
ShipHero Integration
OVERVIEW
ShipHero is a third-party logistics and software provider that provides merchants with services and software to help manage logistical tasks. This article explains how ShipHero works with Loop, how to set up the ShipHero integration, and how to edit and troubleshoot the integration post-setup.
How it works
The integration between ShipHero and Loop is two-way and acts in two primary ways:
Creates returns and notifications within ShipHero when a return is started through Loop.
Sets an outcome for the return in Loop (process, flag, or ignore) based on return status updates in ShipHero's software.
The list below describes how the Loop-ShipHero integration functions within the returns workflow:
The customer submits a return to Loop.
The creation of a return triggers Loop's Webhook feature.
The webhook data creates a return merchandise authorization (RMA) in ShipHero.

The warehouse receives the return package.
The warehouse updates the return status in ShipHero.
The ShipHero webhook triggers a process or flag event within Loop based on warehouse status.
Based on warehouse status, Loop will either:
Process the return and action on any exchange order, gift card, or refund. Processing happens if the ShipHero status is Complete and the number of returned items matches the number of expected items.
Flag the return for manual review if the ShipHero status is Incomplete or the number of returned items does not match the number of expected items.
After this, the return is complete!
Qualifications
The value “partner_order_id” must be assigned to the “Order ID” field in Shopify (or, if necessary, the “Order Name” field). Shopify will then import this value to ShipHero without any more work needed on the merchant's end.
If the merchant does not have developer support or needs help assigning this value, please contact support@loopreturns.com.
Setup
Because Loop built and maintains this integration, no developer work is needed on the merchant’s end. To complete the setup, play the video below or review the written instructions beneath it.
To activate the ShipHero integration in Loop:
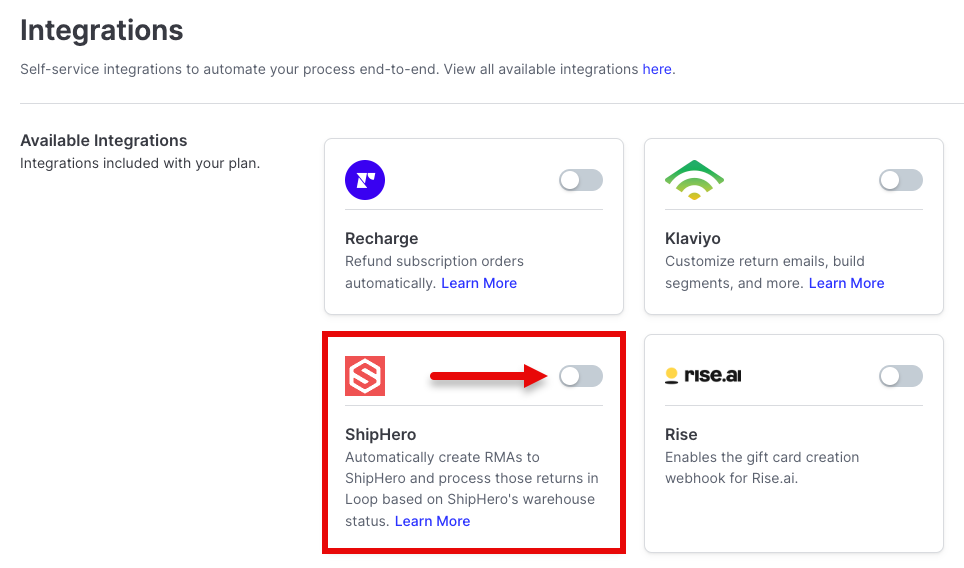
Go to the Loop admin > Tools & integrations > Integrations.
Toggle on the ShipHero tile. If this tile does not appear under Available Integrations, please contact the merchant's MSM or support@loopreturns.com.
Review the pop-up window that shows the information needed.
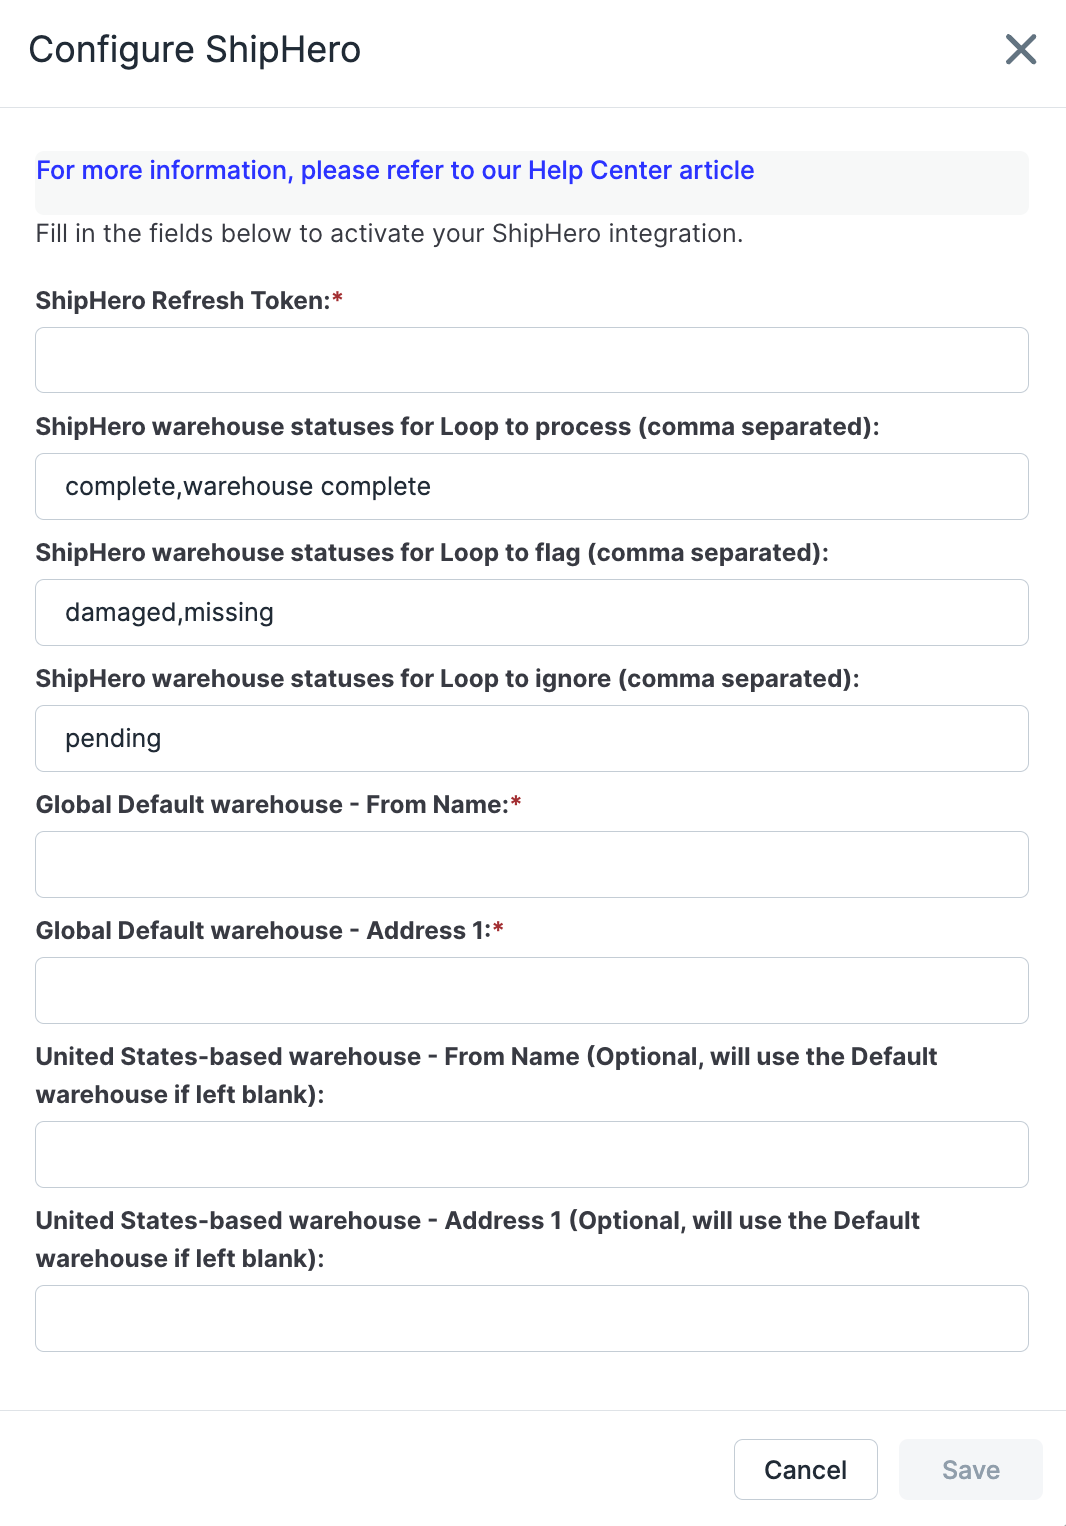
Fill out the information in the pop-up. Required fields are marked with asterisks.
ShipHero refresh token:
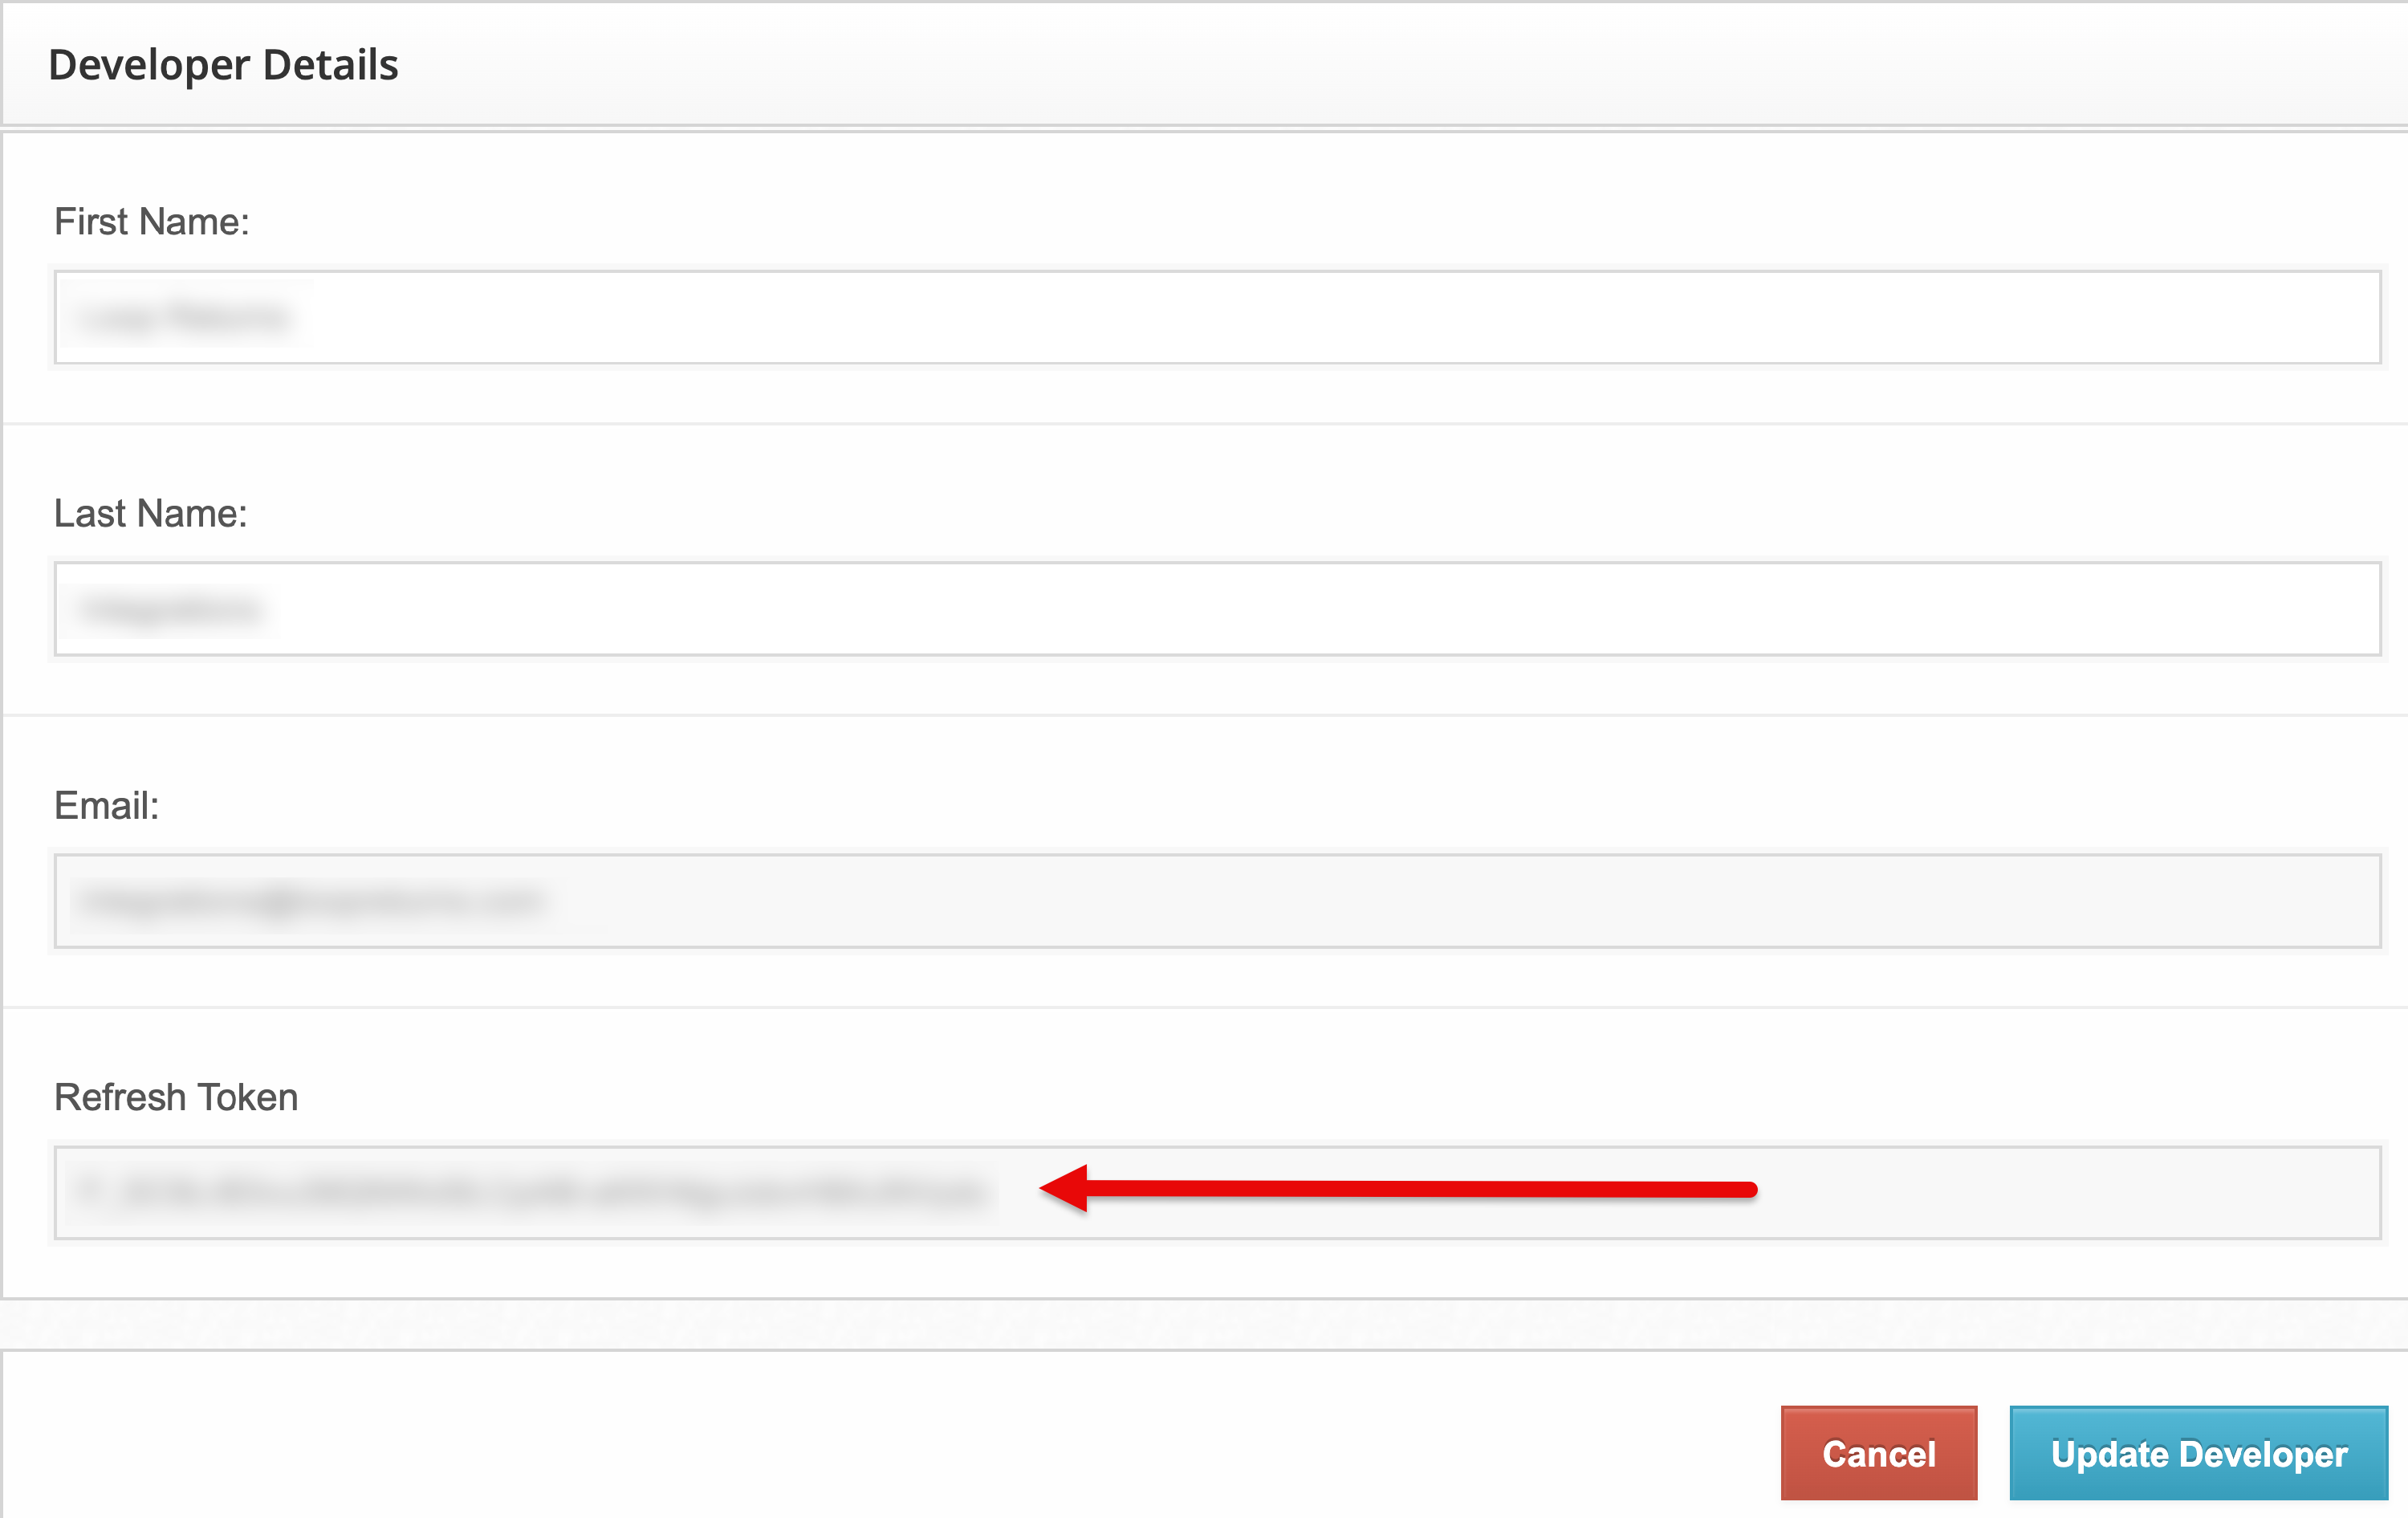
In the ShipHero admin, go to My Account > Developer Users.
Ensure that the email address used for the refresh token is either "integrations@loopreturns.com" OR "integrations+MERCHANT_IDENTIFIER@loopreturns.com" (replacing "MERCHANT_IDENTIFIER" with the relevant identifier).
Click the Edit button for the chosen user to see the refresh token.
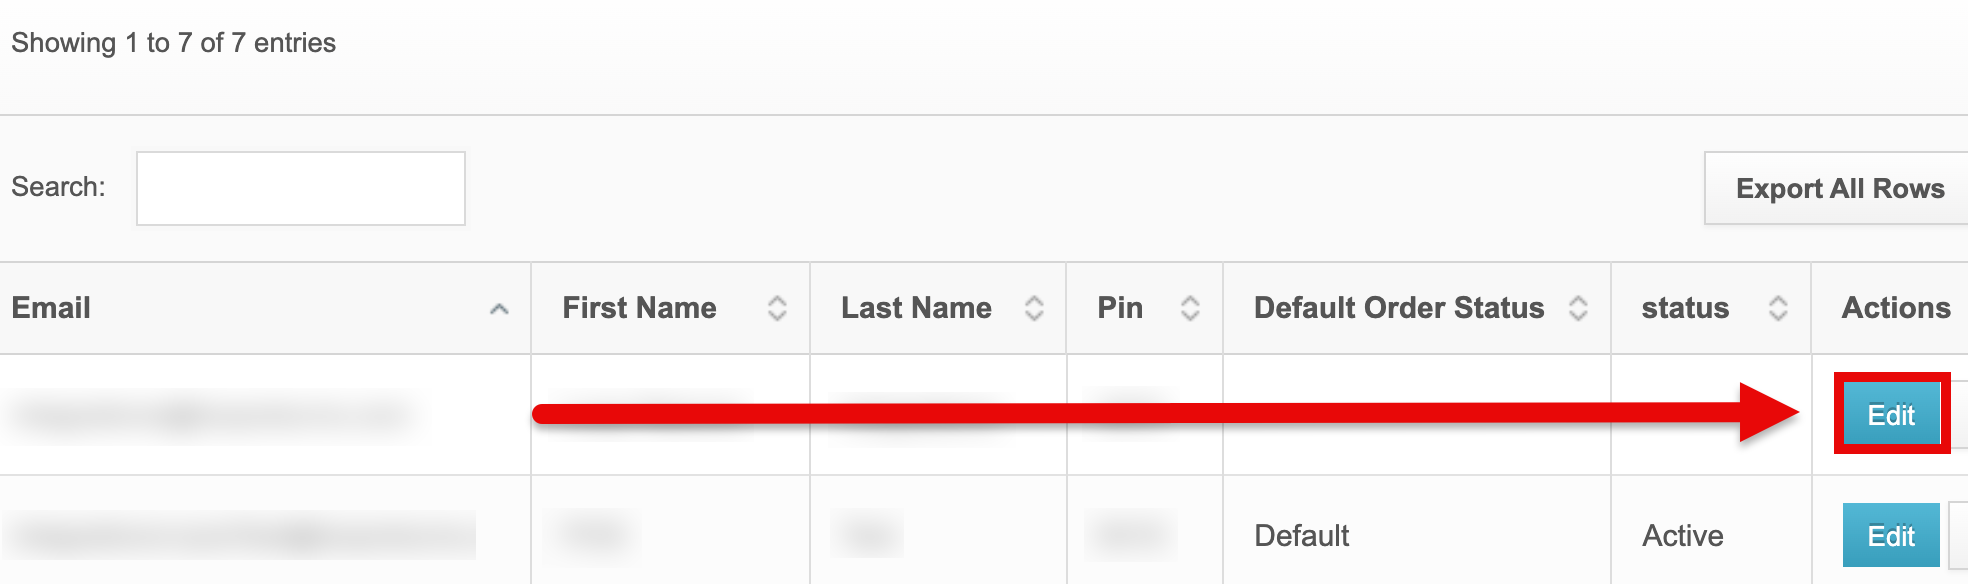
Copy and paste the refresh token into the ShipHero Refresh Token field in the Loop admin.
Warehouse statuses:
In the ShipHero admin, go to Returns > Statuses.
Choose which statuses Loop should process, flag, or ignore.
Type the warehouse statuses into the process, flag, or ignore fields in the Loop admin.
Important: Keep all statuses lowercase when entering them into Loop admin, even if they were capitalized in the ShipHero admin. If entering more than one status into a field, include a comma between each entry.
Choose the default warehouse and enter its name and address (refer to warehouse address troubleshooting below to ensure correct address information).
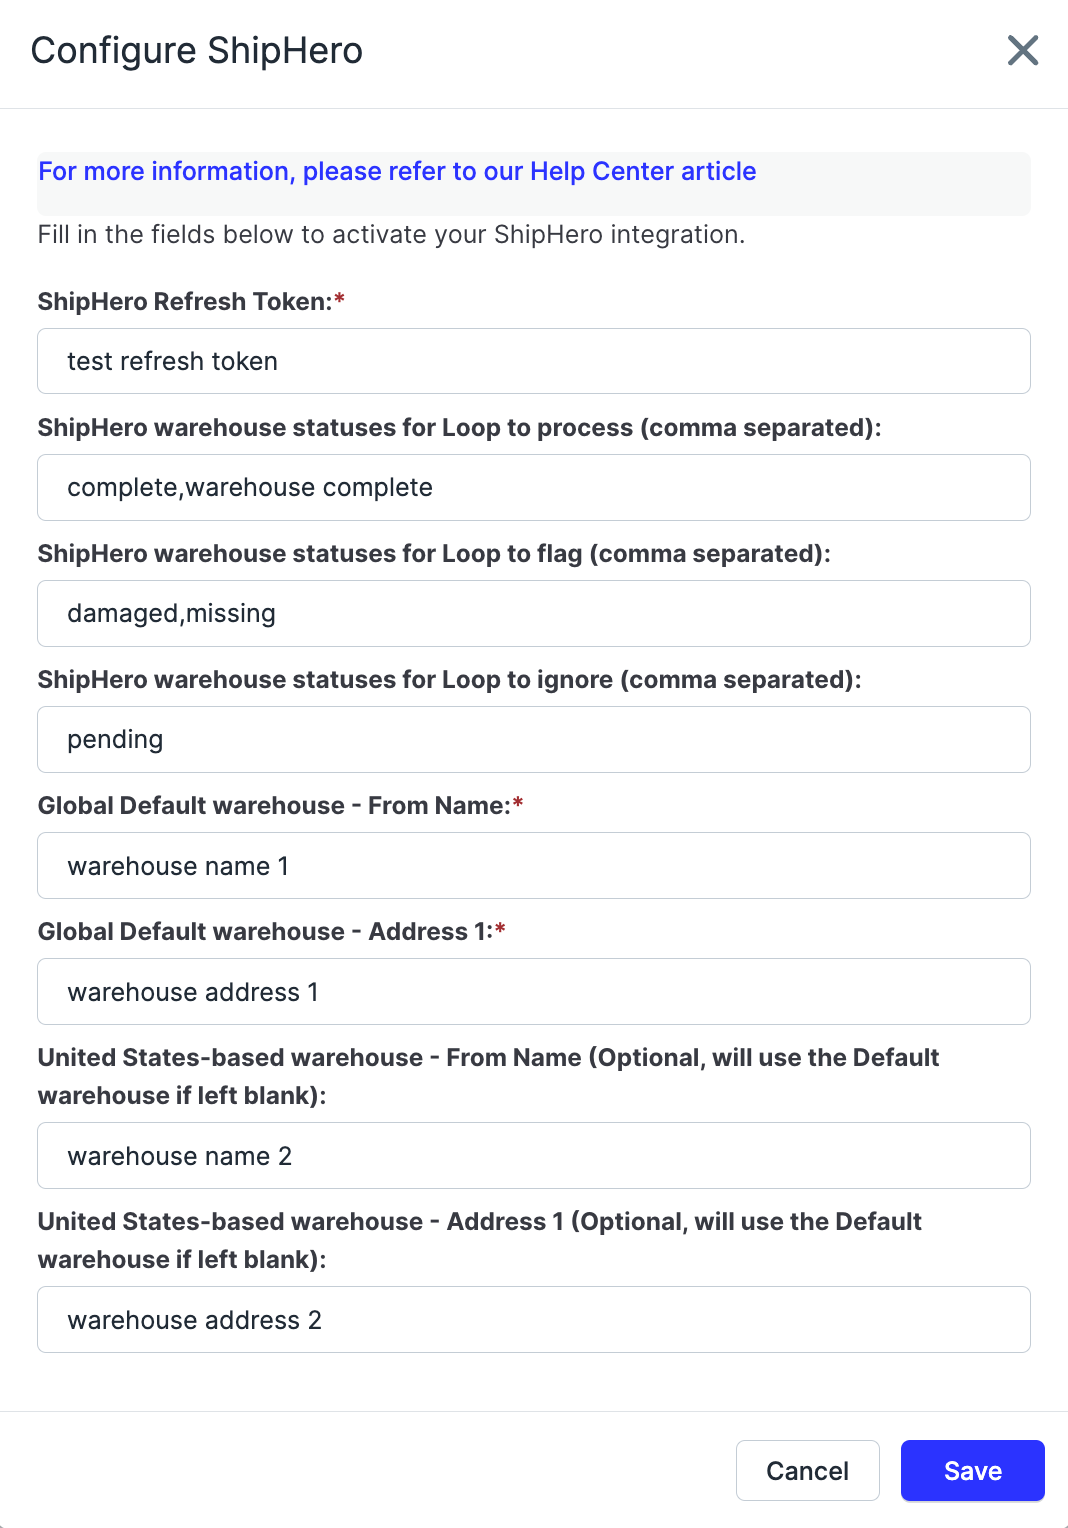
Note: If the store's main warehouse is in the United States of America (USA), merchants should still place its name and address in the Global Default fields to establish it as the main one. Secondary USA-based warehouses can go in the USA-based fields after.
In the pop-up window, click Save (the button will not light up until all required fields are complete).

Edit an active ShipHero integration tile
If needing to update an already-active ShipHero integration tile:
Go to Loop Admin > Tools & integrations.
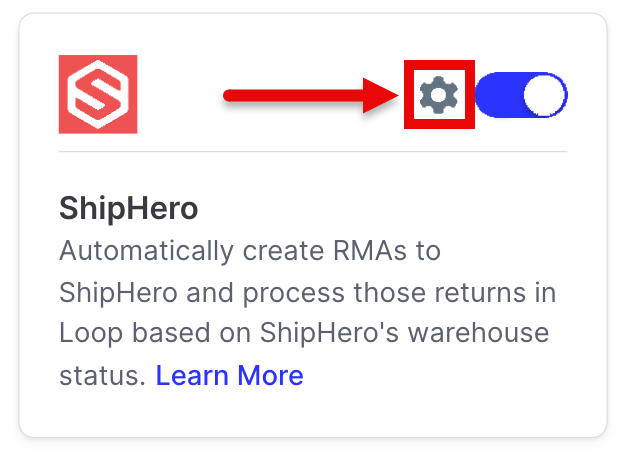
To edit, click the gear icon on the ShipHero tile.

Edit information in the tile pop-up as needed.
Click Save.

Troubleshooting
If the integration tile has trouble finding the warehouse, double-check that the address entered matches that warehouse's Address 1 field in ShipHero and that the Global Default Warehouse - From Name matches. It must match exactly.
To double-check the warehouse address entry:
Go to My Account > Warehouses in ShipHero.
Copy the From Name and Address 1 information for the correct warehouse.

Open the Loop admin, then go to Tools & integrations.
Toggle on the ShipHero integration tile. If updating an already active integration, click the gear icon on the tile to edit it.
An inactive ShipHero integration tile: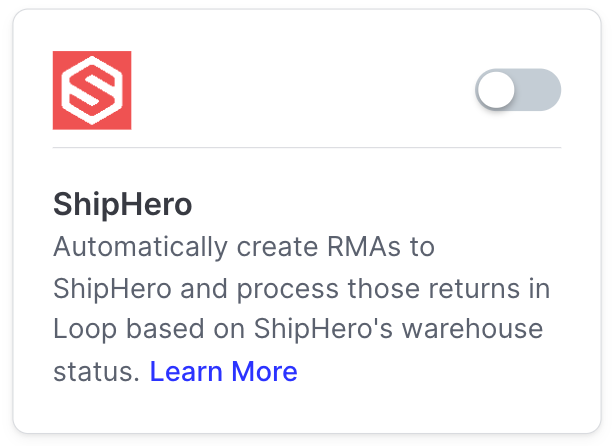
An active ShipHero integration tile:
Paste the address into the warehouse address field(s) in Loop (capital letters and casing don’t matter as long as information such as “street”, “avenue”, “boulevard”, etc. match what is in ShipHero).

In the example image above, the "Address 1" input matches the "Address 1" field in ShipHero exactly (refer to the screenshot under Step 2 above).
After filling out all required fields, click Save.
FAQ
Which Loop plan do I need to use this feature? To check to see if this feature is included in your Loop plan, please review the Pricing page on the Loop Returns website. If you want to add this feature to your account, please contact your Merchant Success Manager or support@loopreturns.com to make an amendment to your account.
Will I need a developer to complete this integration? Not at all! Because Loop built and maintains this integration, no merchant developer work is needed.
How do I get started? Follow the Setup steps above to activate the integration tile!
I receive an error when adding a developer user. What should I do? If you tried to add "Integrations@loopreturns.com" as a developer user, the email may already be in use with another Loop instance. Loop suggests one of these workarounds:
Create a slightly different alias; for example, "integrations+_____@loopreturns.com" (put your store or account holder name after "integrations").
Use a different email to which you have access, rather than a Loop Returns email.
What if Loop's integration tile isn't accepting my warehouse address? Refer to the Troubleshooting section to ensure that your address information matches exactly what's in your ShipHero account!
Why are there multiple similar webhooks in my Loop admin? Please reach out to support@loopreturns.com for questions about multiple webhooks.
What if I don't have a refresh token? Go to My Account > Developer Users, then click "+ Add Third-Party Developer" in the upper right corner. ShipHero will prompt you to fill out the user's name and email. After inputting these fields, click Add Developer.
Please contact the merchant's Merchant Success Manager or support@loopreturns.com with any additional questions