
Navigating the Developers Page
OVERVIEW
This article explains how to manage API keys and webhooks in the Loop Admin's Developer Tools page. It covers creating webhooks with specific events and responses, testing webhooks before activation, automatic deactivation after ten consecutive failures, generating API keys with different scopes, and editing existing API keys to modify their scopes for authorized actions on returns data.
Use the menu on the left to quickly navigate this article.
The Developers page in Loop allows you and your developers to manage your existing API keys and webhooks, as well as add new ones.
Plan information
To check to see if your Loop plan allows access to the Developers page, please review the Pricing page on the Loop Returns website.
If you do not have access and would like to use the API or webhook tools available through Loop, please contact your Merchant Success Manager to make an amendment to your account, or email us at support@loopreturns.com for more information on upgrading.
Webhooks
Webhooks are HTTP callbacks processed and sent by Loop to a pre-defined URL. They allow your application to get information from Loop without reaching out through an API call. Each webhook has a) a Response, which defines the information in the data, and b) an Event, which determines what will trigger the request in Loop.
Creating a webhook
To create or add a webhook, follow the instructions below:
Go to Loop admin > Settings > Developers.
Select the "Create webhook" button. A pop-up will appear requesting three fields.

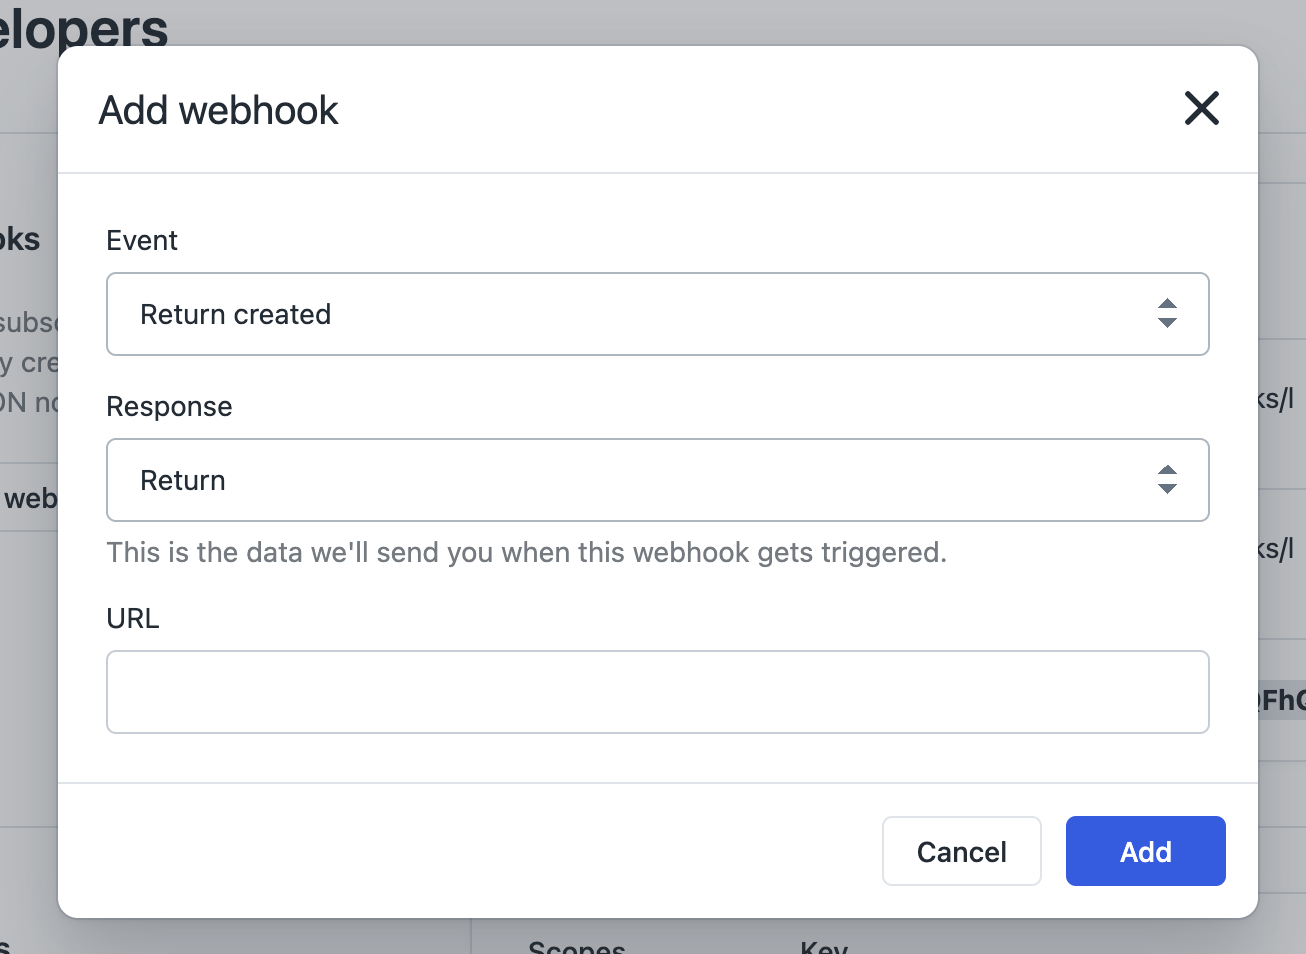
Choose an Event, the point during the return process that triggers your callback. Your event options are:
Return updated - fires a webhook when a return is updated.
Return created - fires a webhook when a return is created.
Return closed - fires a webhook when a return is closed.
Label created - fires a webhook when a shipping label is created.
Label updated - fires a webhook when a shipping label is updated.
Restock requested - fires a webhook when an item is restocked in Shopify using a webhook.
Gift card requested - fires a webhook when a gift card is requested during a return.
Choose a Response, the information that you want sent as a notification to the chosen URL when the event is triggered. Your response options are:
Return
Label
Restock
Gift card
Important: There are certain combinations that will not yield results. For example, if you set up a webhook with an event of "Return create" and a response of "Label," no payload will be available because a return is created before the label is created.
Paste in the URL where the notifications will be sent.
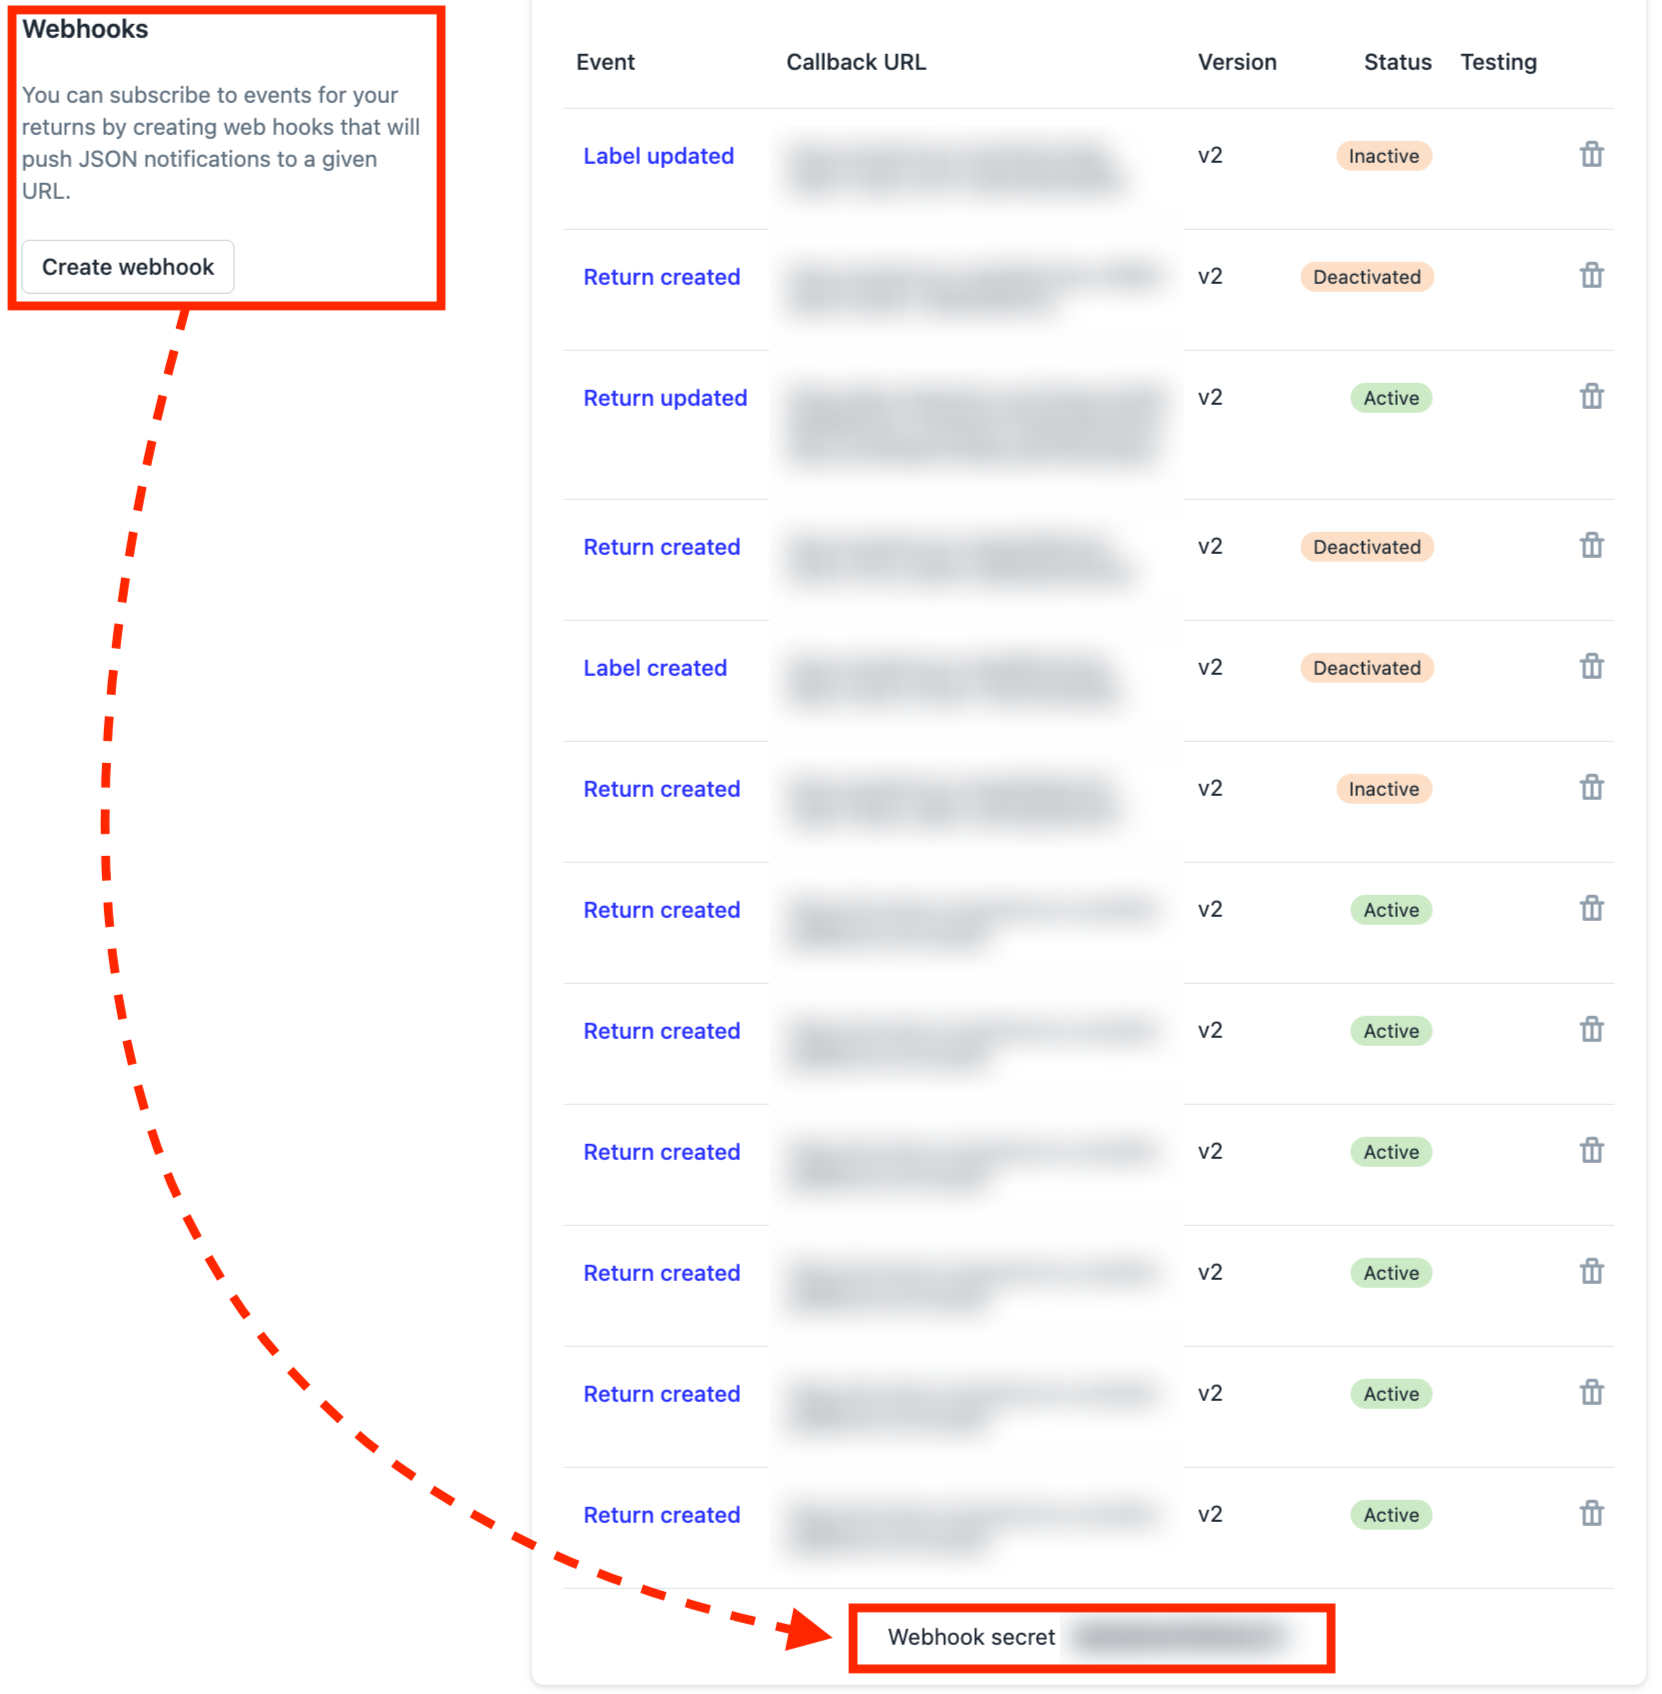
Click the Add button. On the Developers page, you will see your newly-added webhook in the Webhooks section, as well as your chosen settings.
Note: At the bottom of the window is the "webhook secret." This code serves as Loop's digital signature so that the webhook receiver can verify that the webhook came from Loop. Using the webhook secret is optional because the webhooks still work without checking the signature, but Loop highly recommends using them anyway.
Testing webhooks
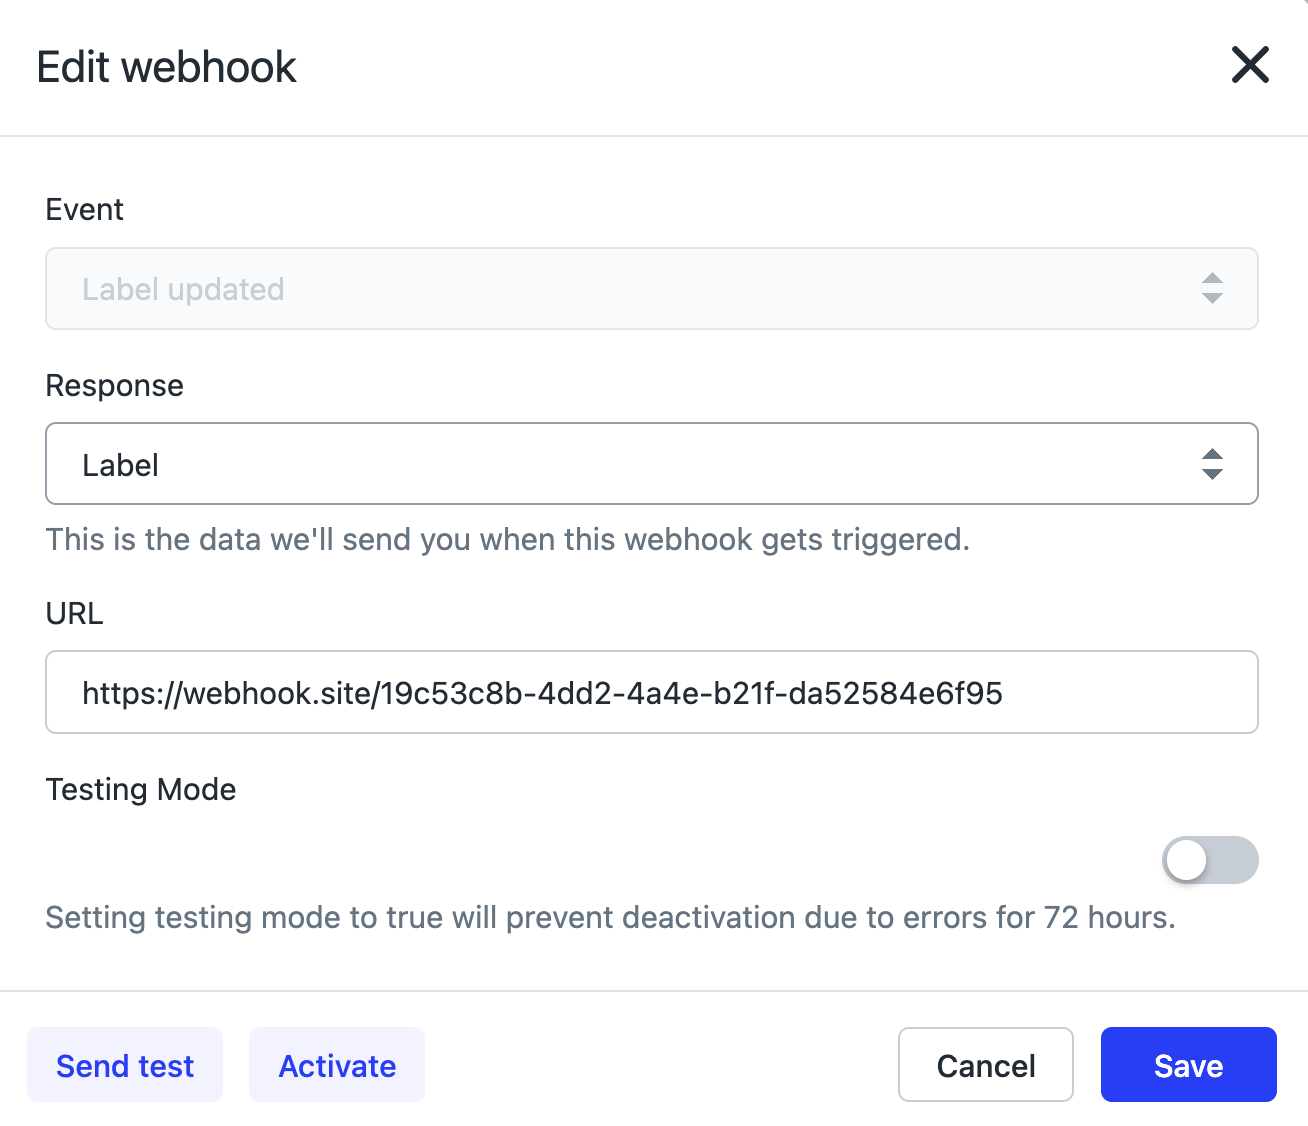
Once you add your new webhook and see it on the Developers page, click on the event in the Event column to open a pop-up window specific to that webhook.

The pop-up window allows you to edit or test your webhook settings before activating the webhook.
To test and check if the webhook actions happen as you intended:
Click the "Send test" button in the bottom left corner of the window, which fires one test webhook.
Click the "Testing Mode" button to toggle it on, which fires test webhooks continuously and prevents deactivation due to errors for 72 hours.
Once you confirm the webhook works properly, click the 'Activate' button to turn on the webhook.

Note: You will always have the option to turn off your webhook. To do so temporarily, click the webhook and then click the Deactivate button inside the pop-up window. To delete the webhook permanently, click the trashcan icon from the main view in the Developers page.
Important: Loop automatically deactivates webhooks if they fail ten times in a row. Webhooks could fail for a number of reasons:
if the receiving API is down.
if the endpoint is set up incorrectly.
if the wrong response is sent.
if the webhook times out or doesn't respond at all.
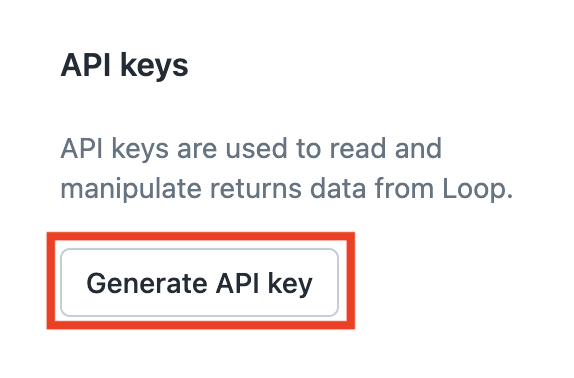
API keys
API keys are used to read and manipulate returns data from your Loop instance. API keys are shop-specific, are scoped tightly to determine what actions a key is authorized to perform, and can have as many scopes (endpoints) as you wish. You can manage API keys here in the Developers page.
Finding API keys
Similar to the webhooks, the Developers page displays all of your API keys so that you can keep track of, manage, and delete them as needed. You will also see a “last used” field where you can see the last time that API key was used.
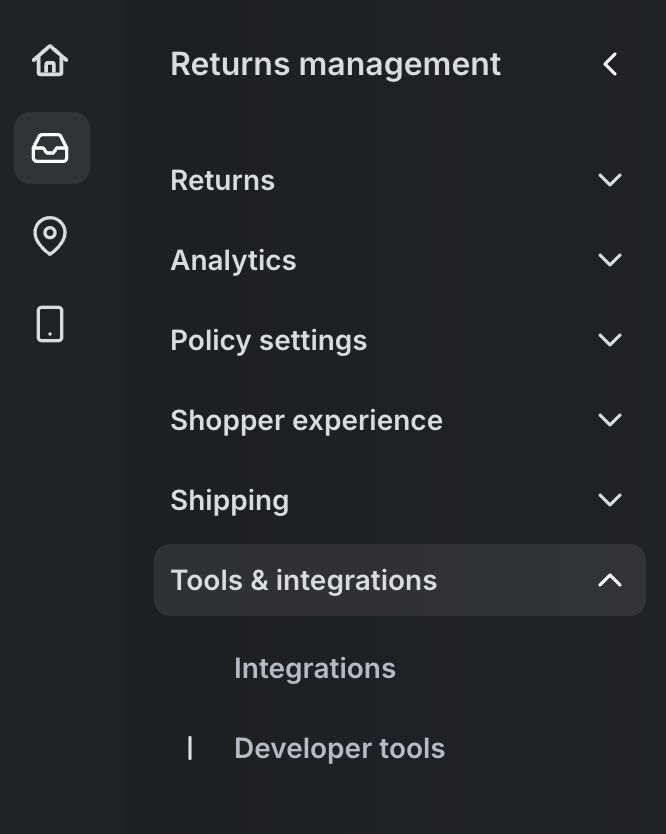
To find your API key(s), go to Returns management > Tools & integrations > Developer tools.
After scrolling past "Webhooks," you will find the "API Keys" section. Here you can review the following:
the API keys.
which scopes are tied to which keys.
if the keys have labels.
when each key was last used.
where to generate new keys.
where to delete keys if necessary.
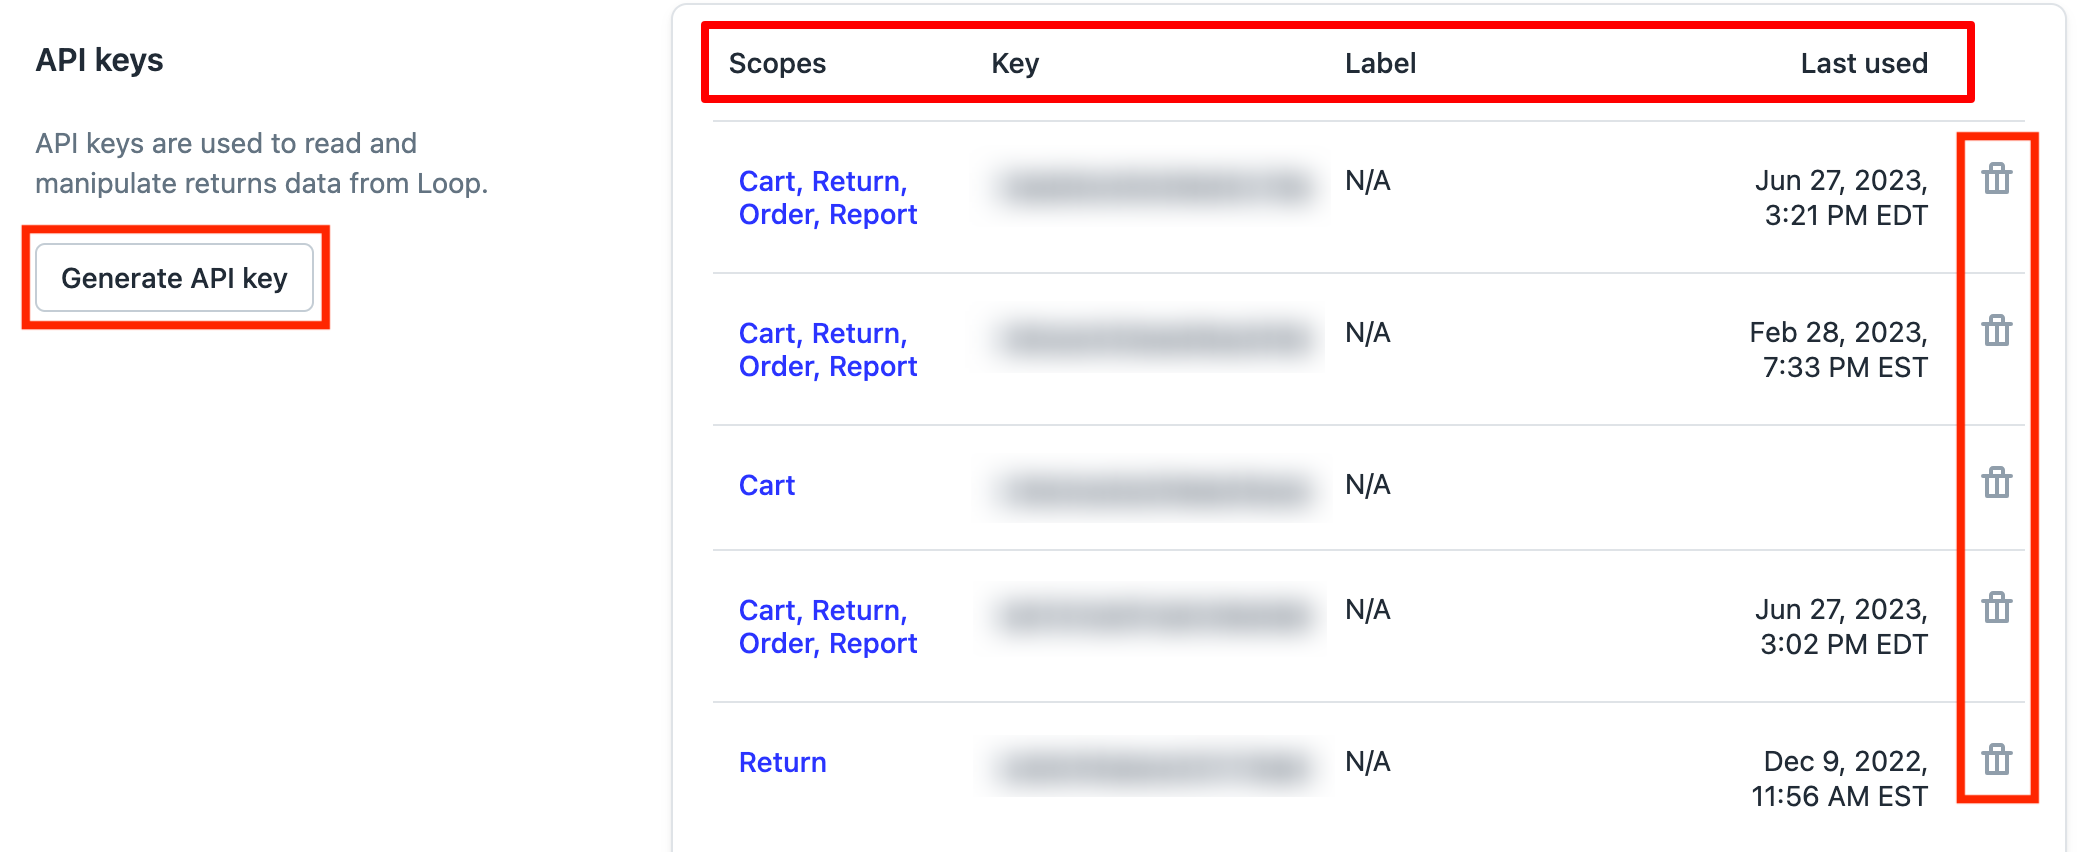
Generating API keys
When generating new API keys, first click on the Generate API Key button.
Next, select the scopes you want to enable for the API key. You can choose any combination of the different scopes for the same API key.
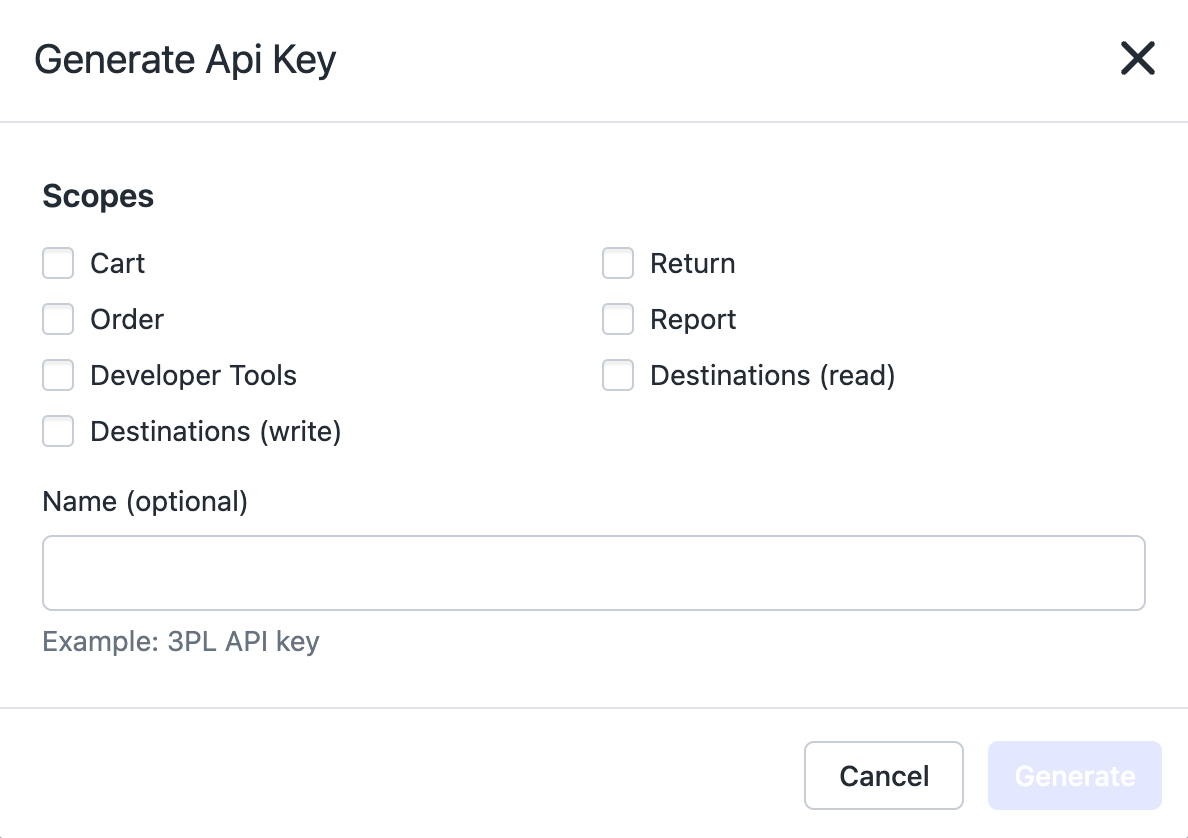
The scopes are used for the following:
Cart - allows a key to be used with the Cart API (relates to Loop's On Store features).
Return - allows a key to be used when making calls to the Returns API endpoints.
Order - allows a key to be used when making calls that relate to Loops block and allow lists using the Listings API endpoints.
Report - allows a key be used when making calls related to the Loop warehouse ASN report.
Developer Tools - allows a key to be used for the Programmatic Webhooks API.
Destinations (read) - allows a key to be used to read your existing Destinations.
Destinations (write) - allows a key to be used to create and edit Destinations.
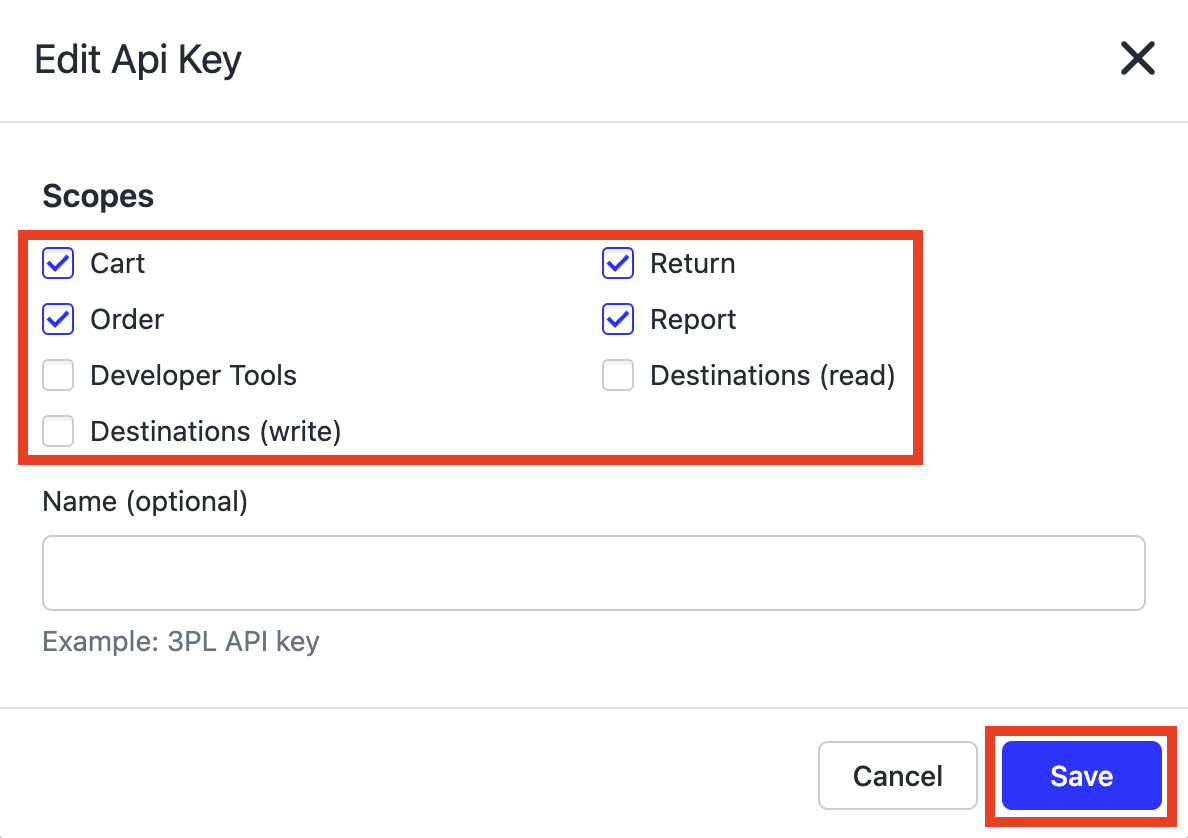
Editing API keys
To change the scope of an existing API key, simply click on the scope(s) listed to the left of the key.

Once the "Edit API key" pop-up appears, you can select new scopes or deselect checked scopes as needed. Don't forget to click Save!
Click here for more technical documentation on Loop’s API, and please reach out to support@loopreturns.com with any additional questions.