
Point of Sale: Using the app
OVERVIEW
This article reviews how to use the Point of Sale (POS) app.
Use the menu on the left to quickly navigate this article.
Please review these other POS articles as well:
Video walkthrough
Using the Loop POS app
Signing in
First, download the Loop POS iOS app.
Open the Loop POS app from an iPad home screen.
Enter the correct Loop username and password. These are the same details used to log in to Loop admin.
Note: Once logged in, the merchant will remain logged in on this device for 2 weeks unless they choose to log out.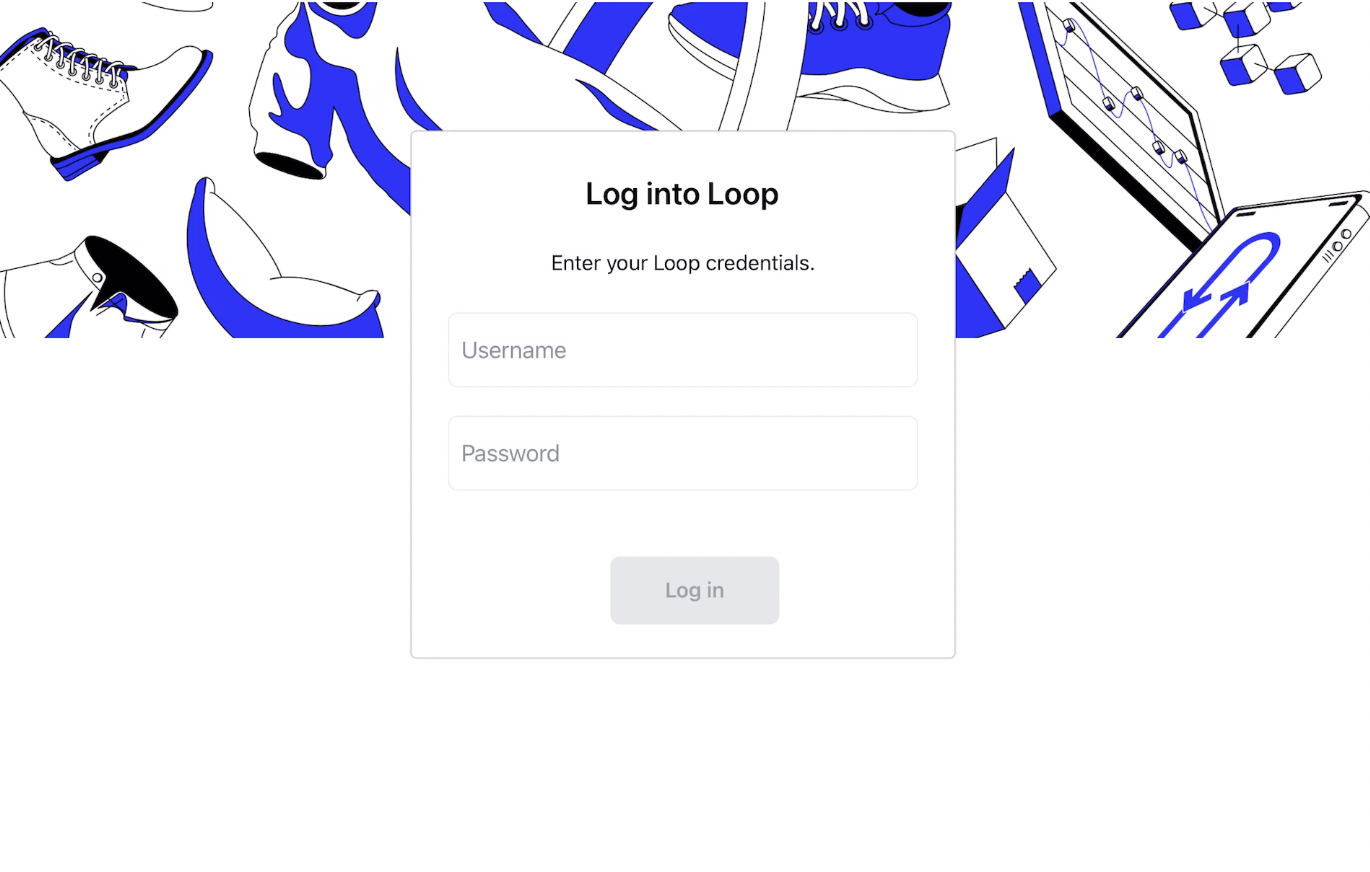
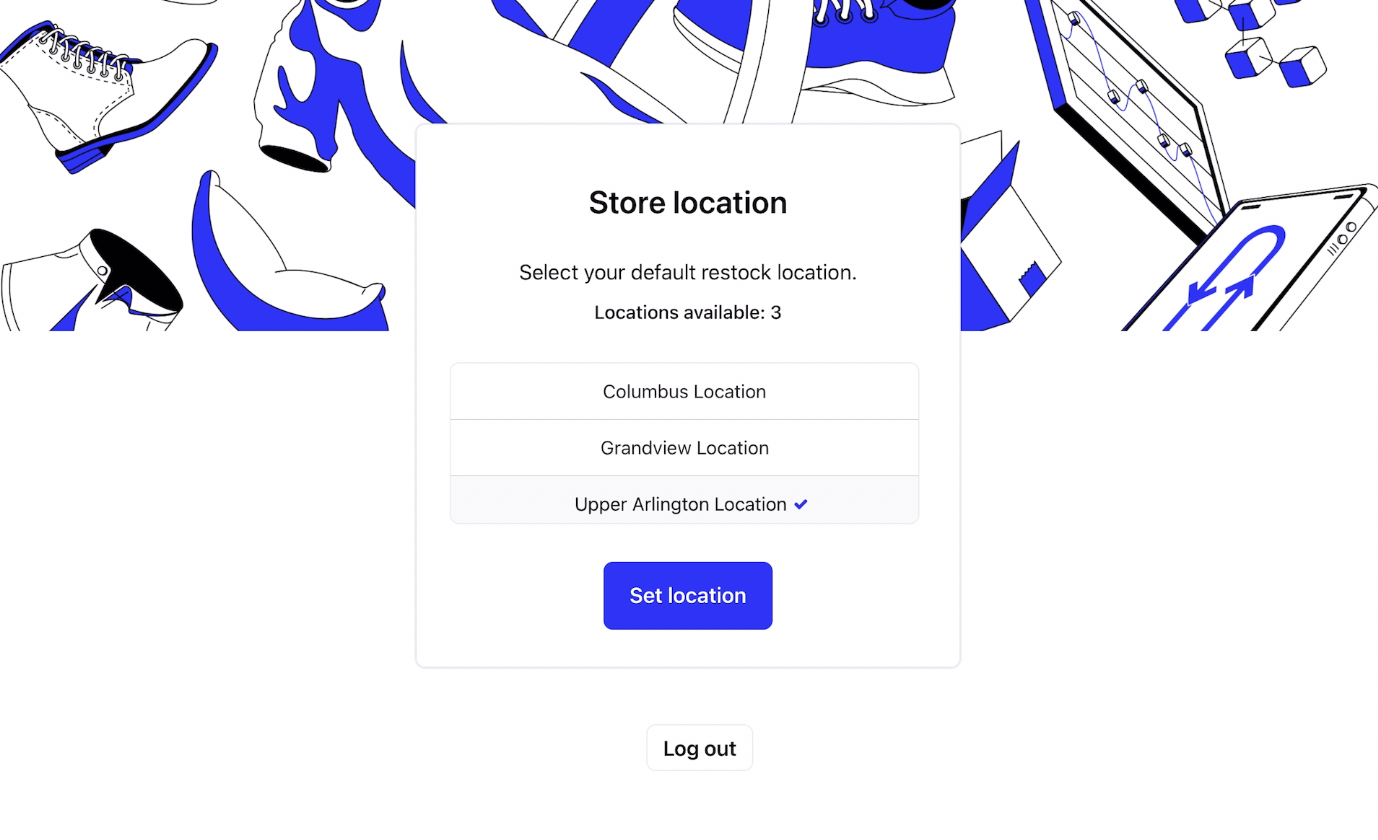
Select the default restock location for this device. Typically, this is the store location in which the device is situated.
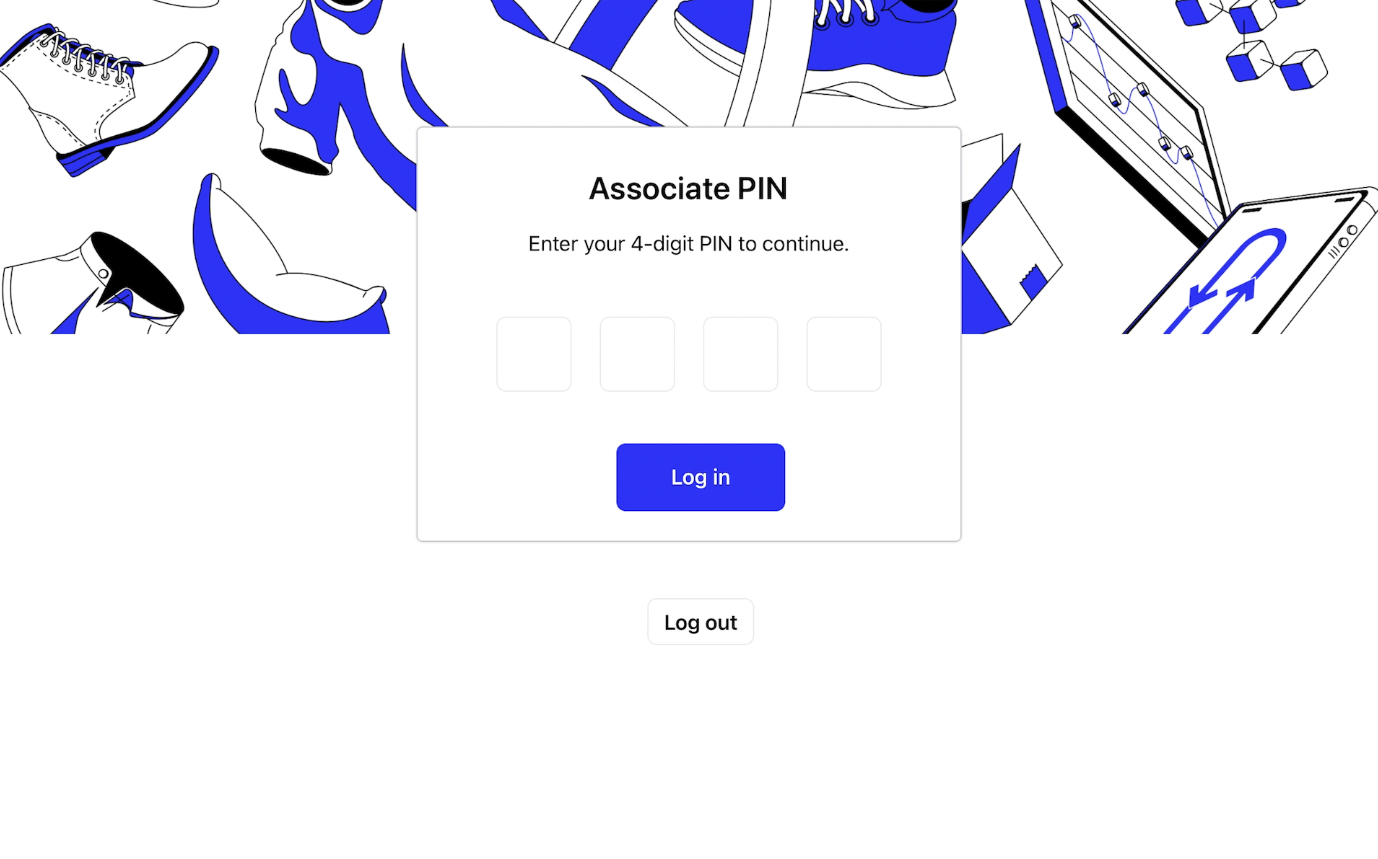
Now it’s time to hand over the process to the store associate. The store associate must enter the 4-digit PIN which was set up for their profile in Loop Admin.
Initiating a return
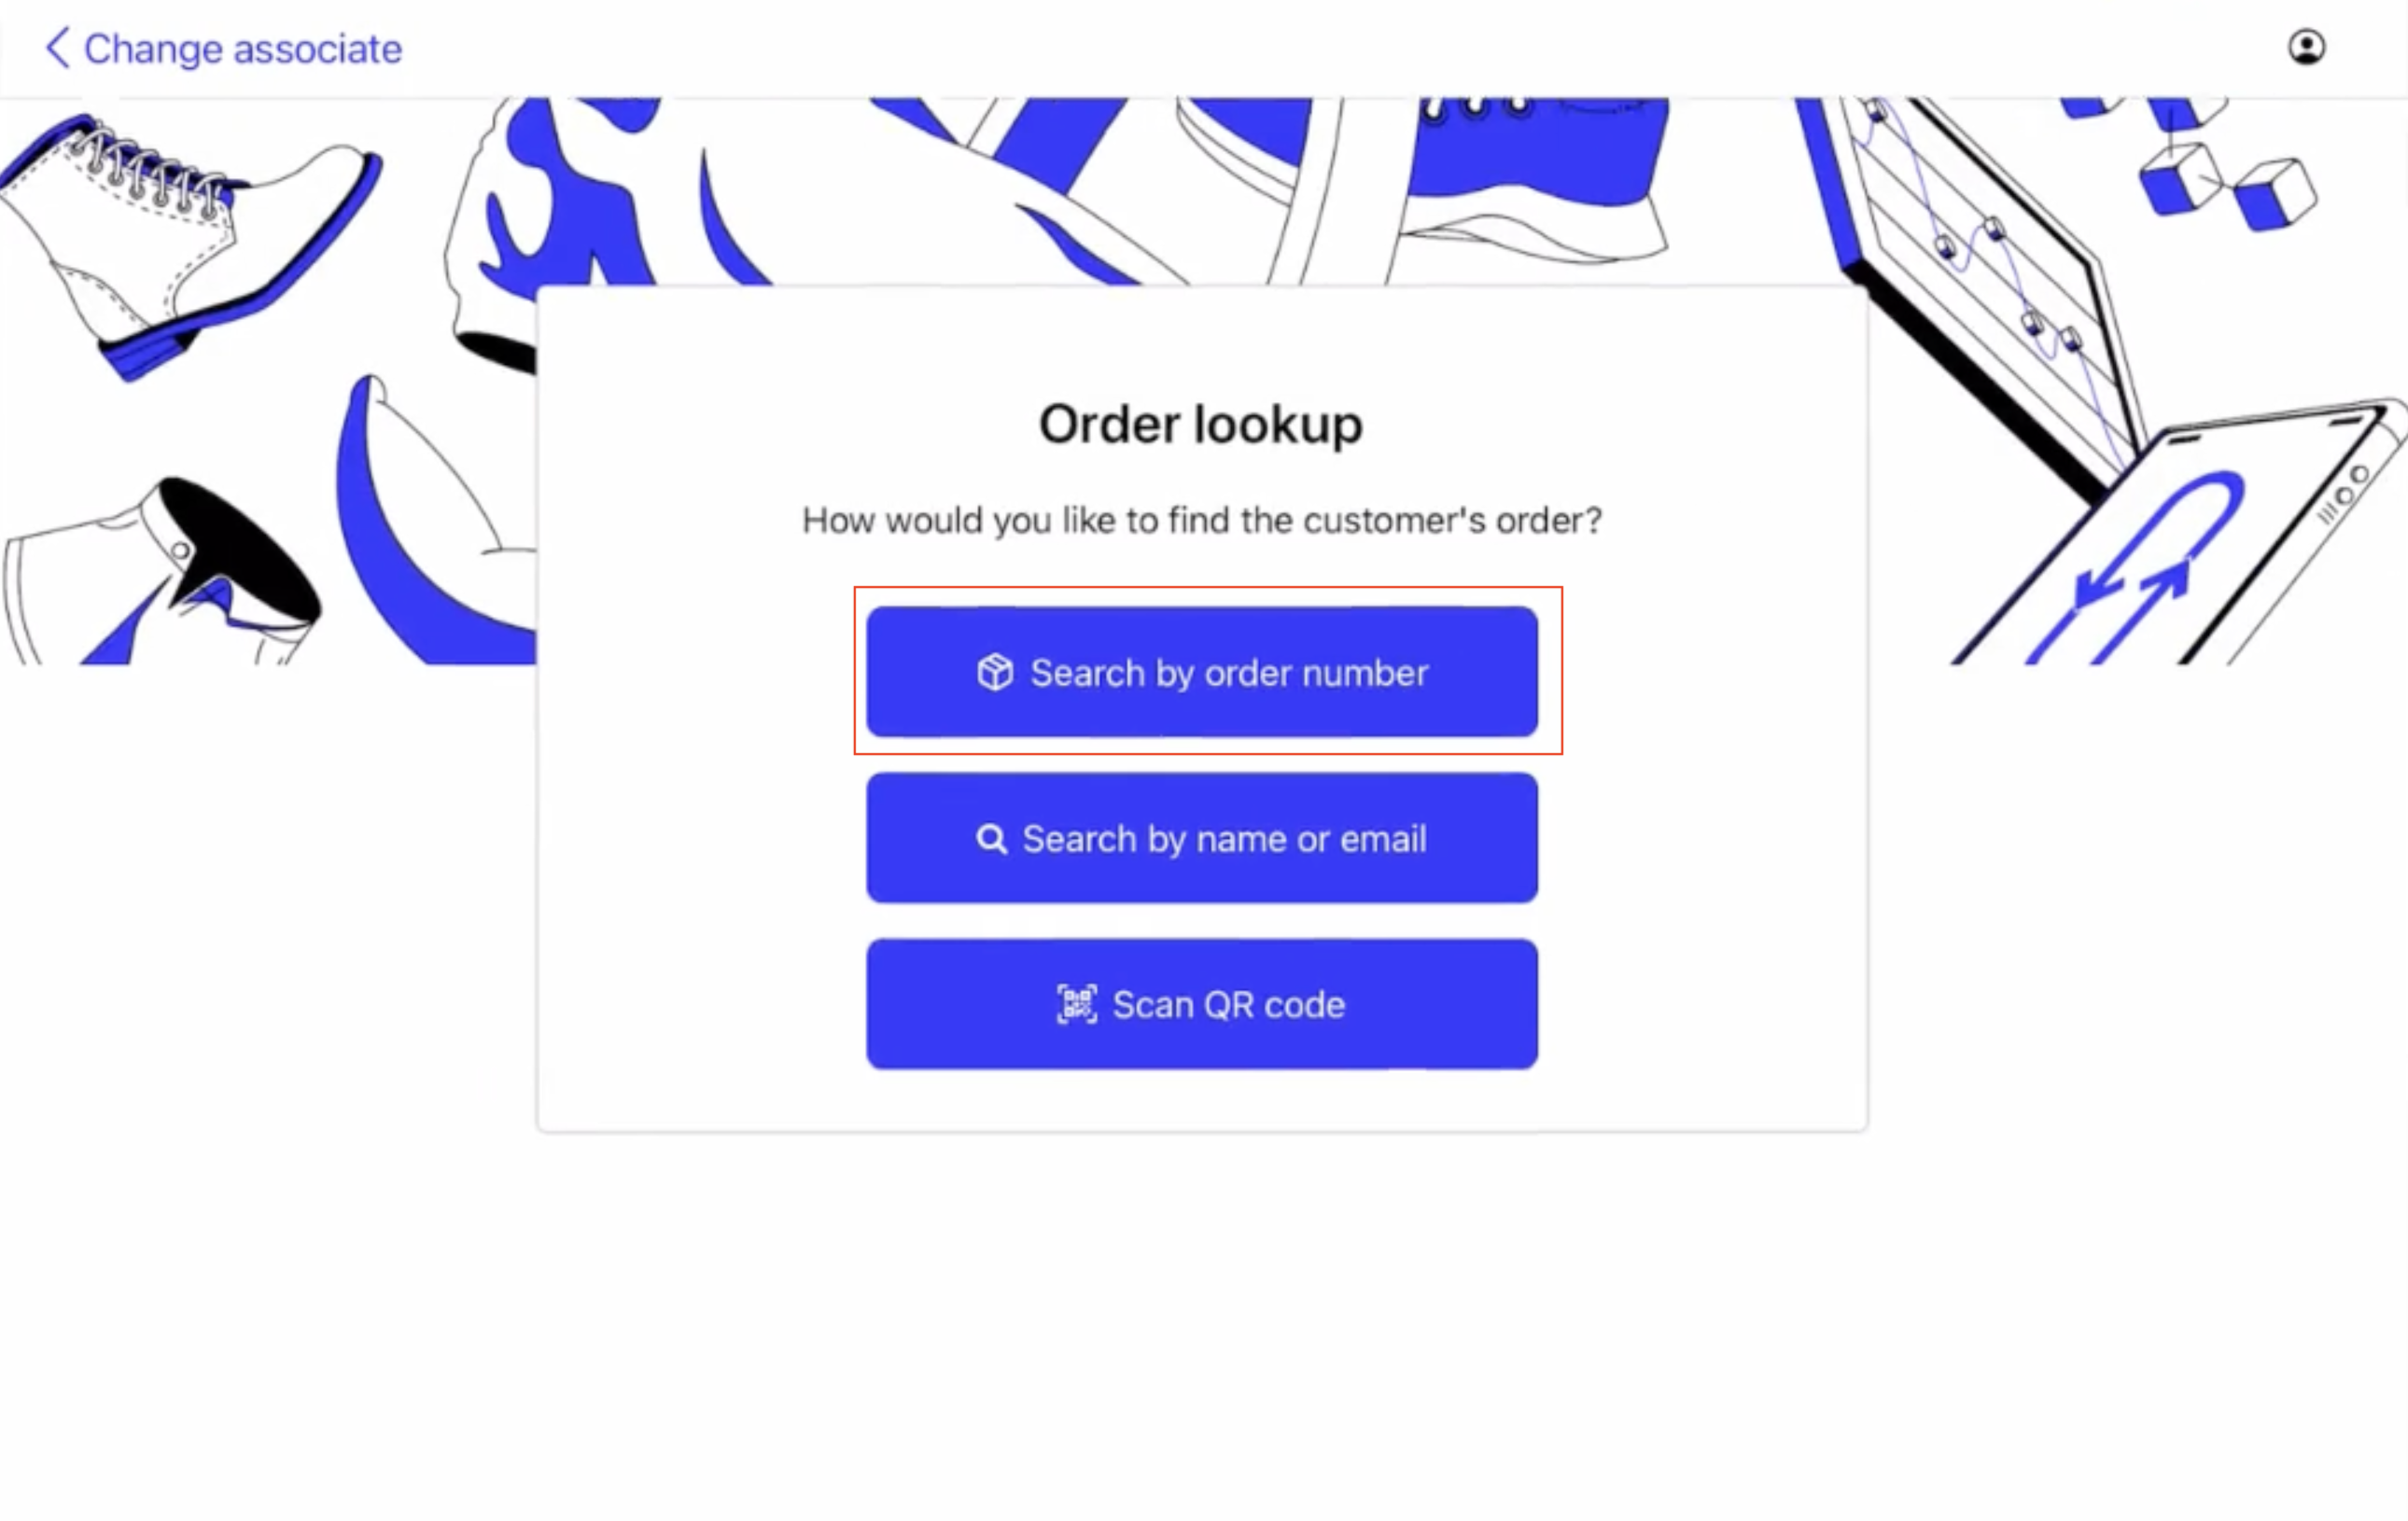
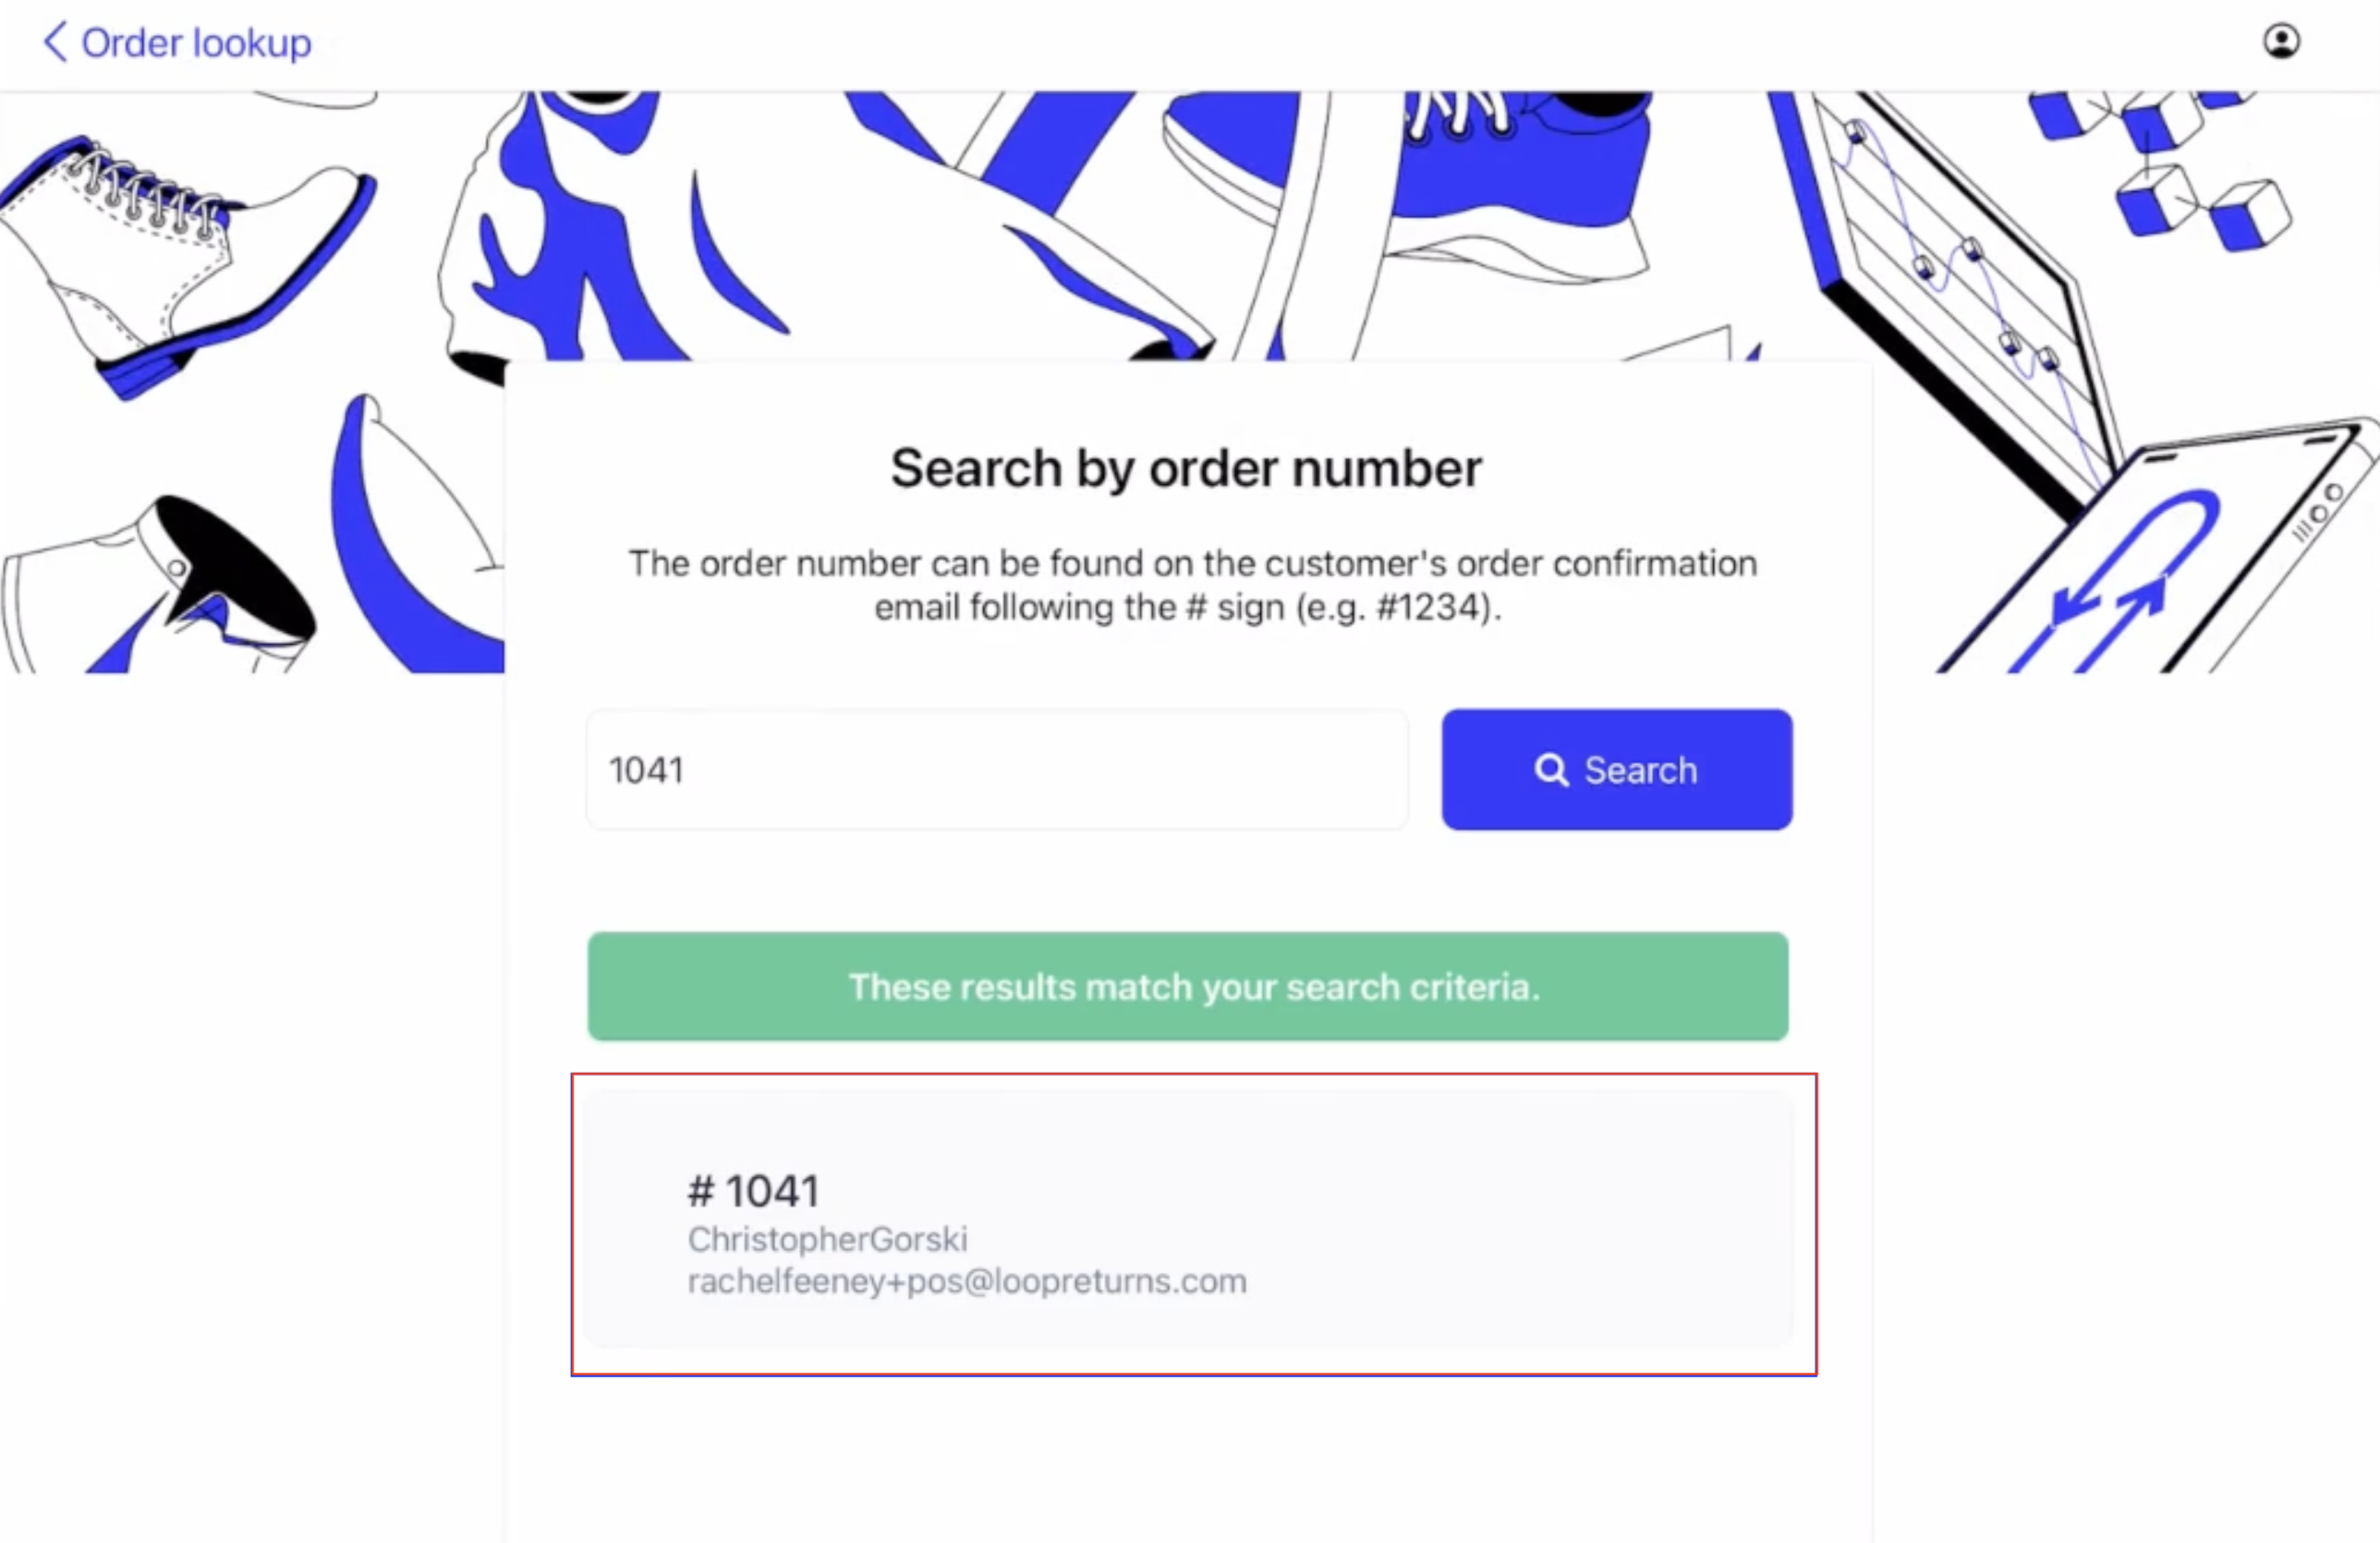
Search for the customer’s order by order number, name, or email (merchants can find these on the shopper's receipt or order confirmation email). Or, if the shopper has a QR code from starting the return online, select ‘Scan QR code,’ which will open the iPad camera to scan.
Select the corresponding order that populates below the green bar.
If the items in the order are ineligible for return, and the merchant wishes to override the return policy, click Items ineligible for return.
If the items are still eligible for return, skip this step.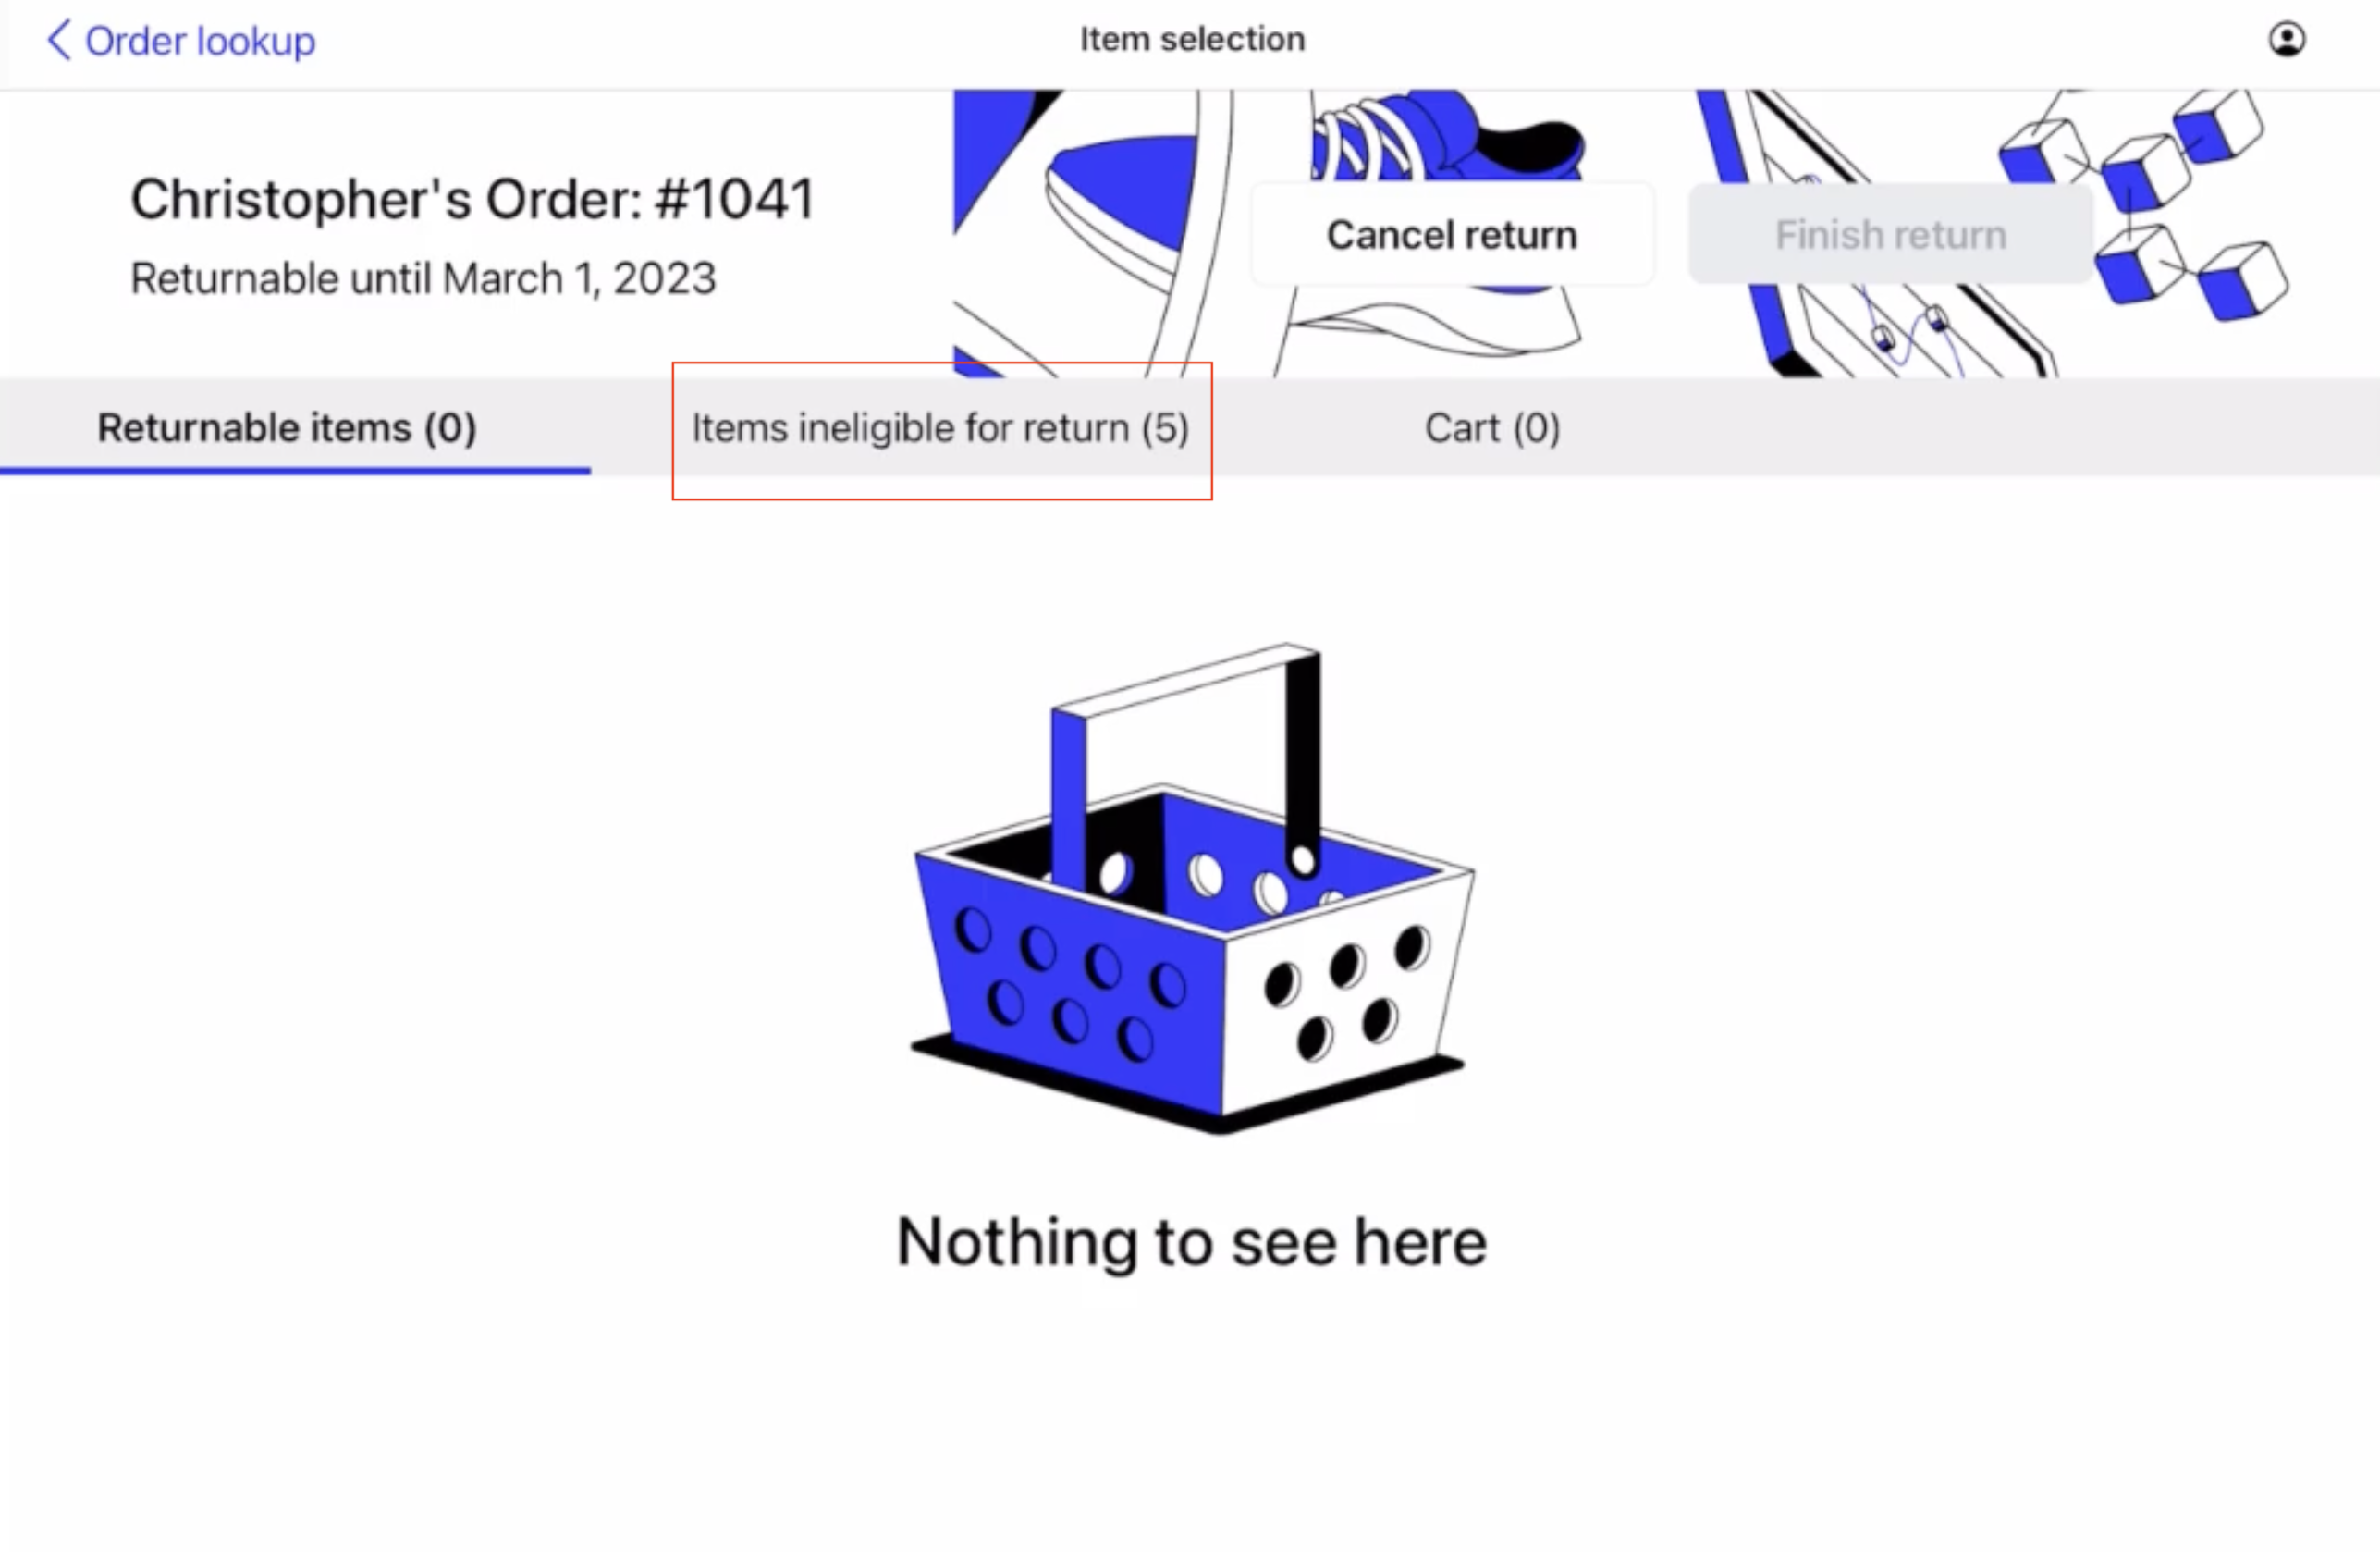
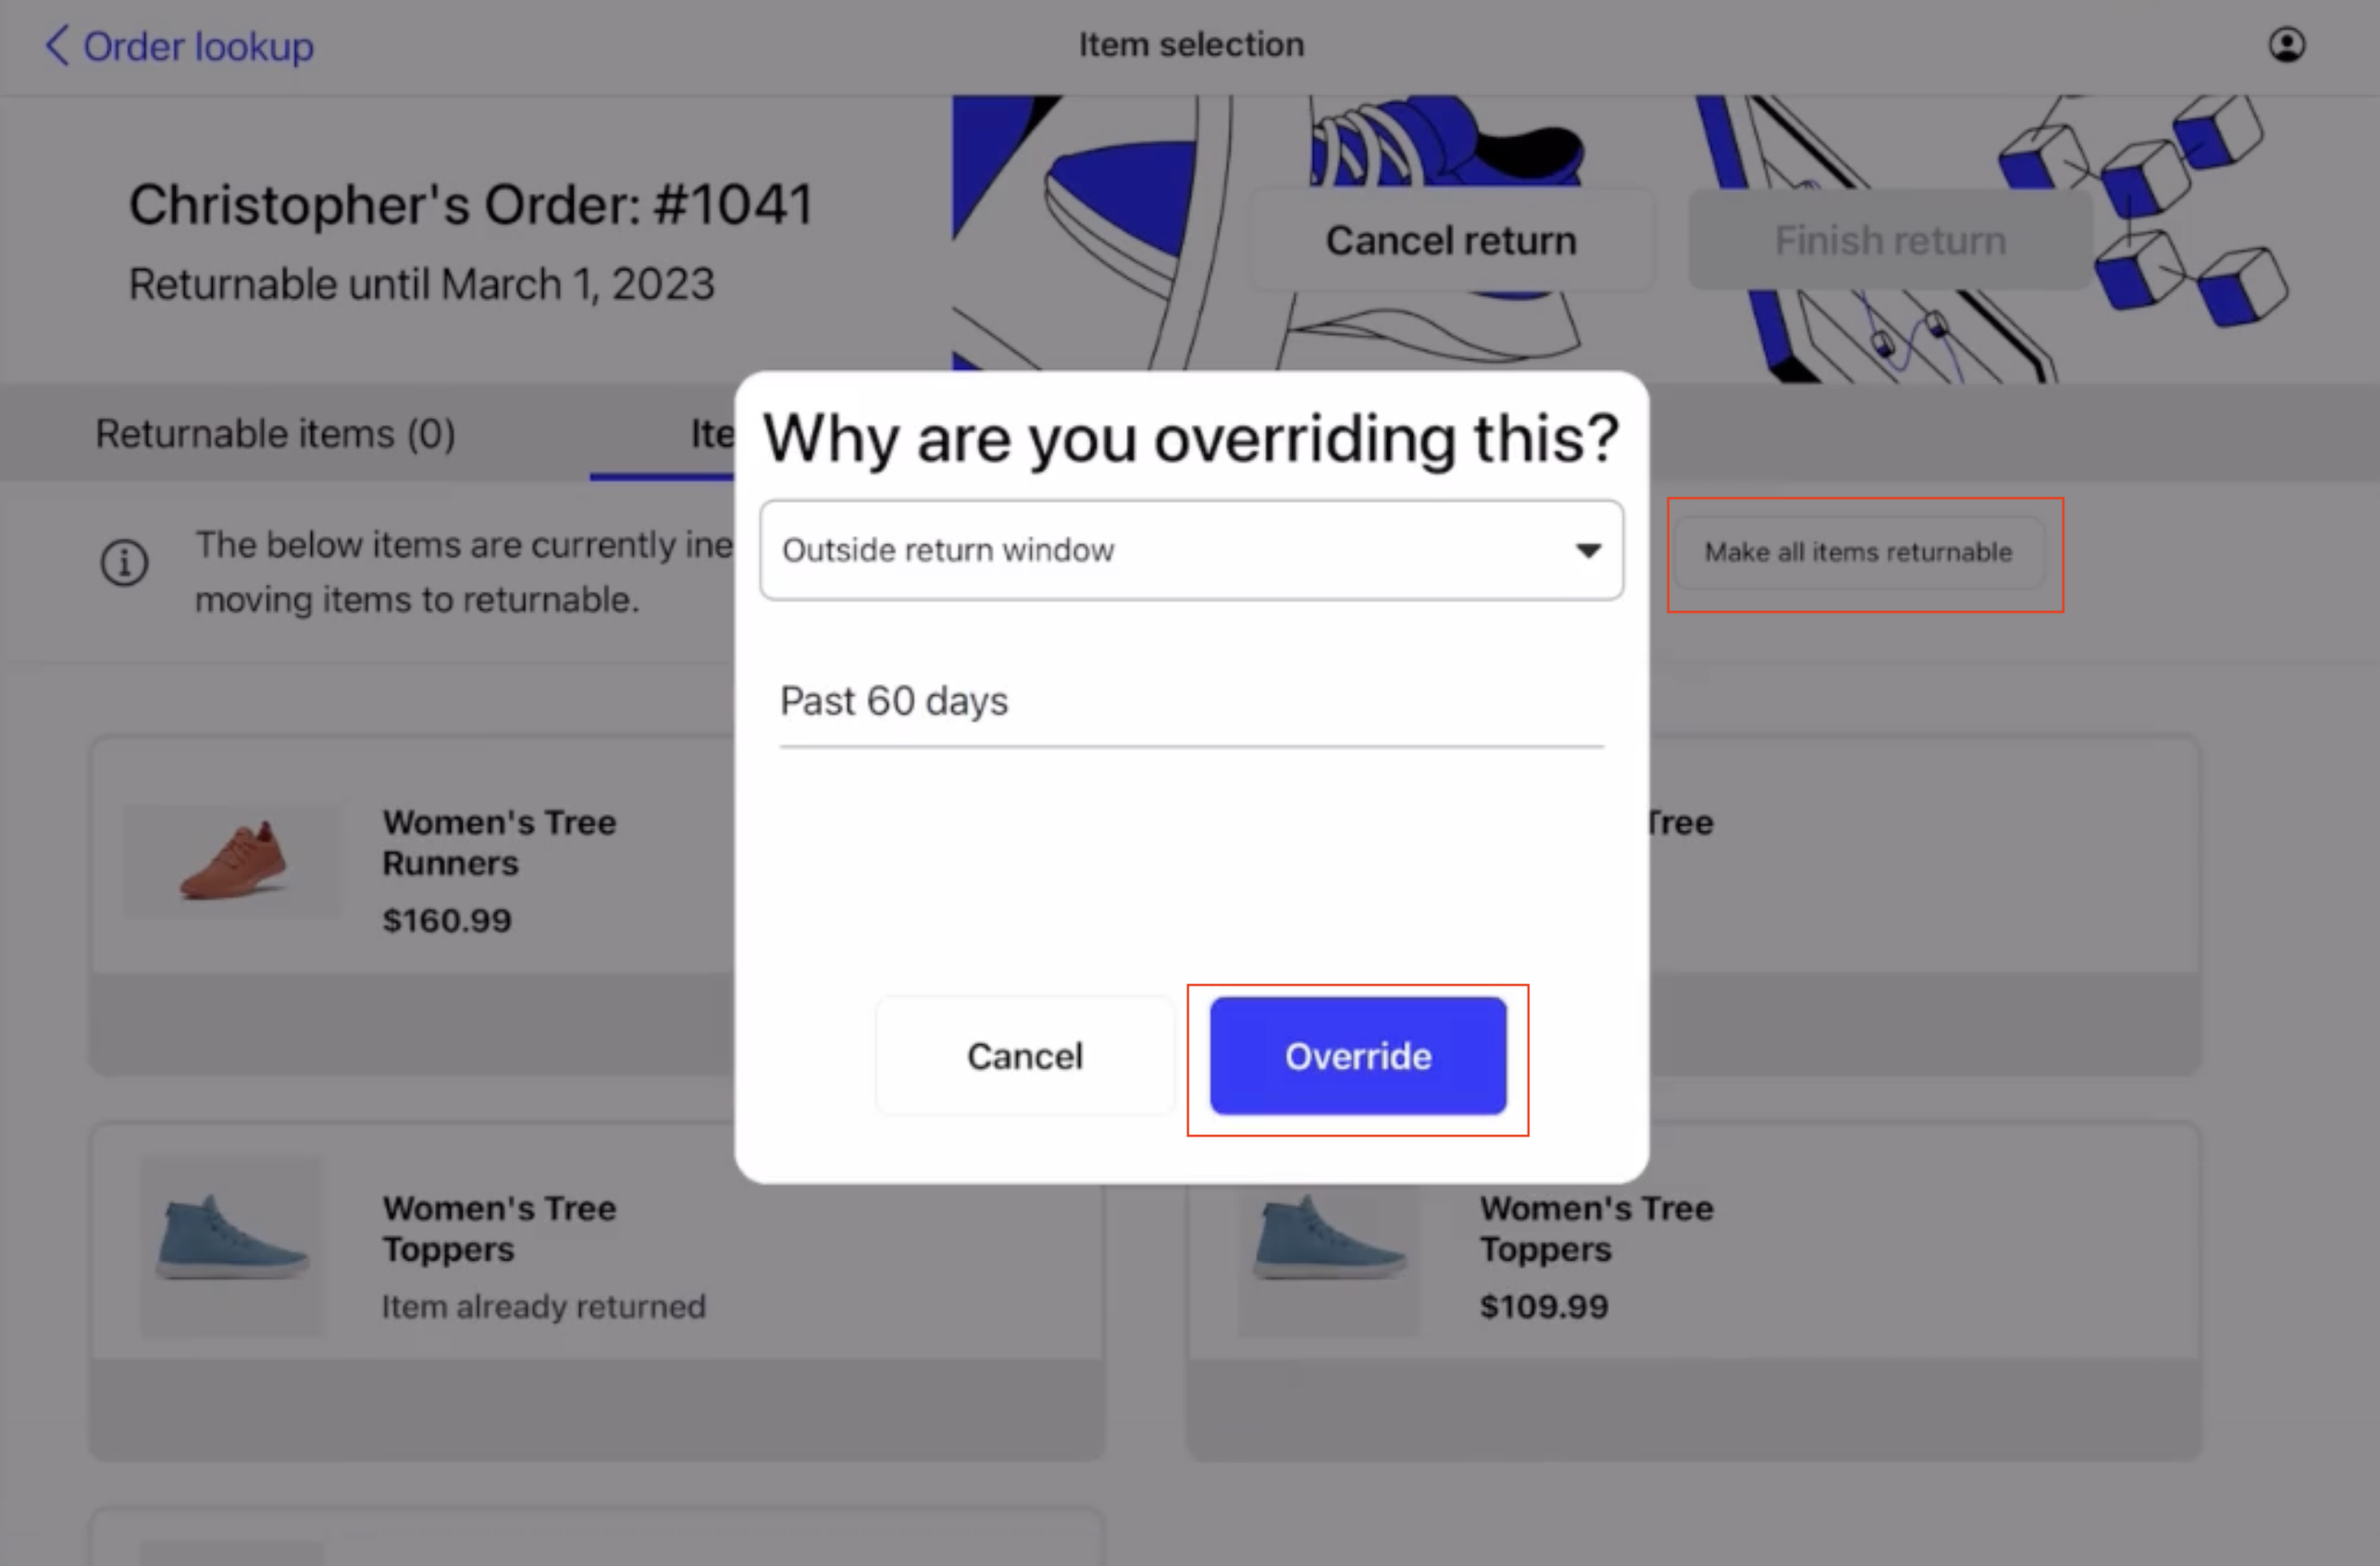
Click Mark all items returnable. A window will open with a drop down menu of override reasons.
Select the appropriate reason, add more details (optional), then click Override.
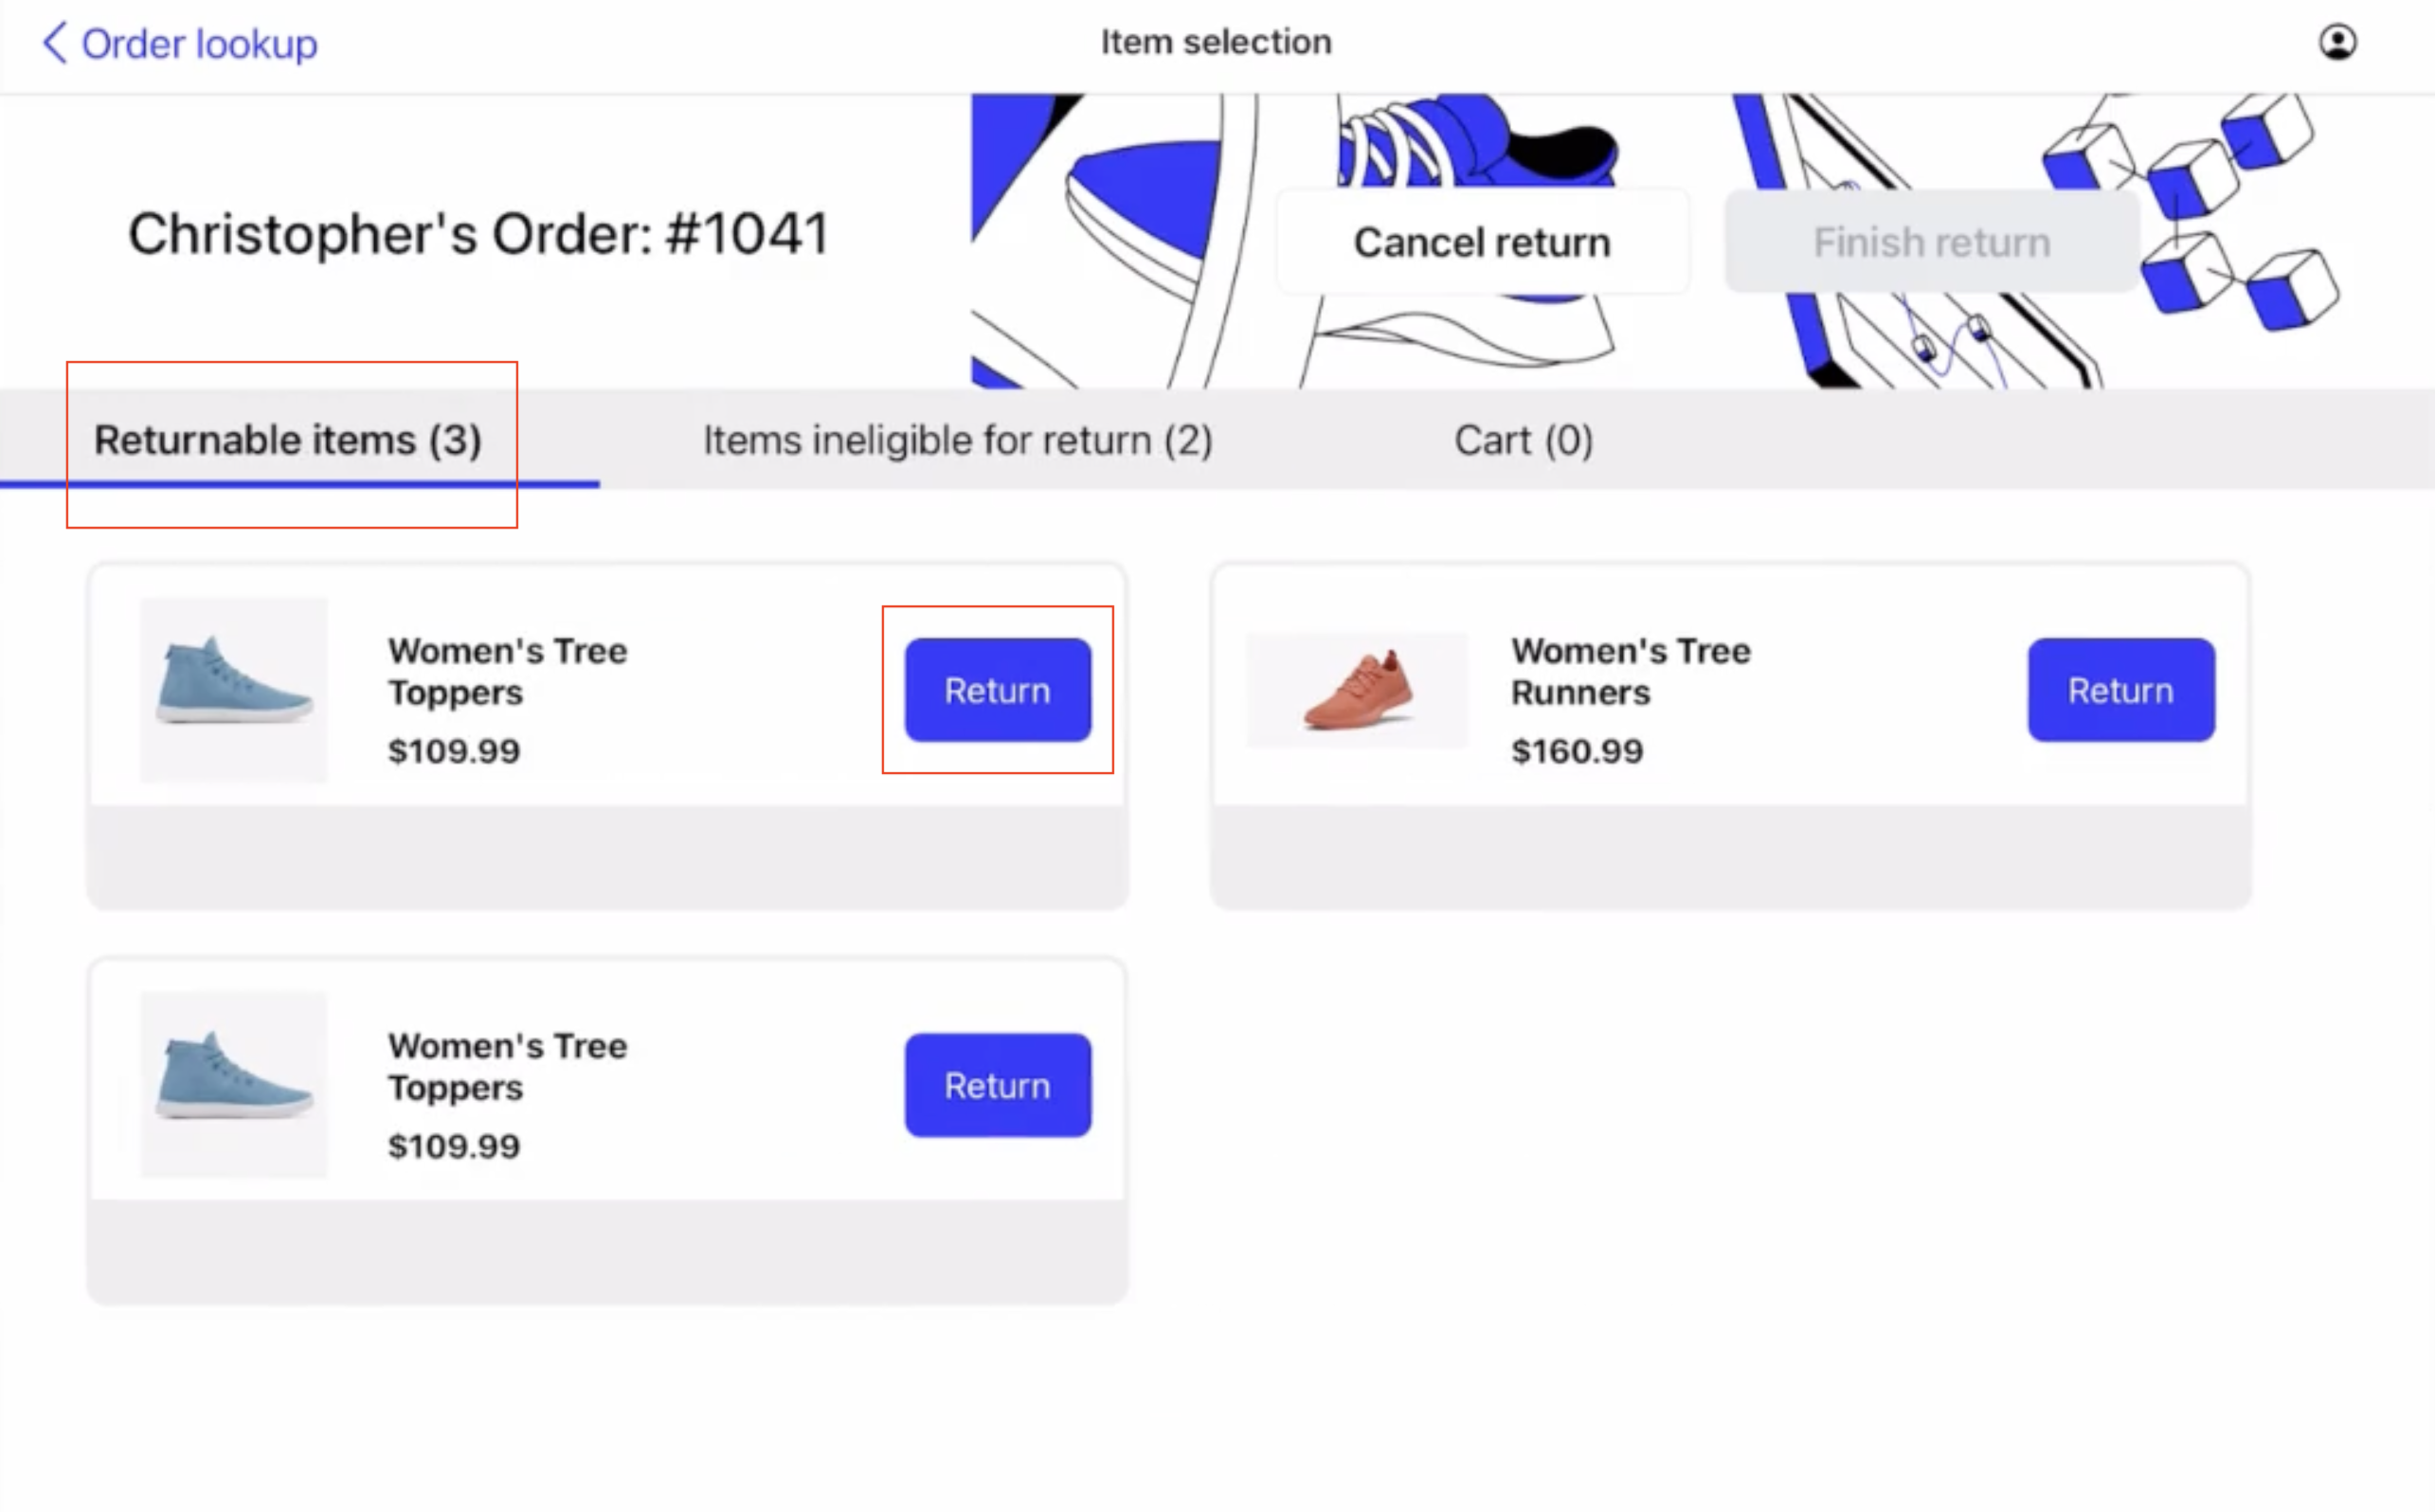
Go back to Returnable items and select the item(s) the shopper wishes to return.
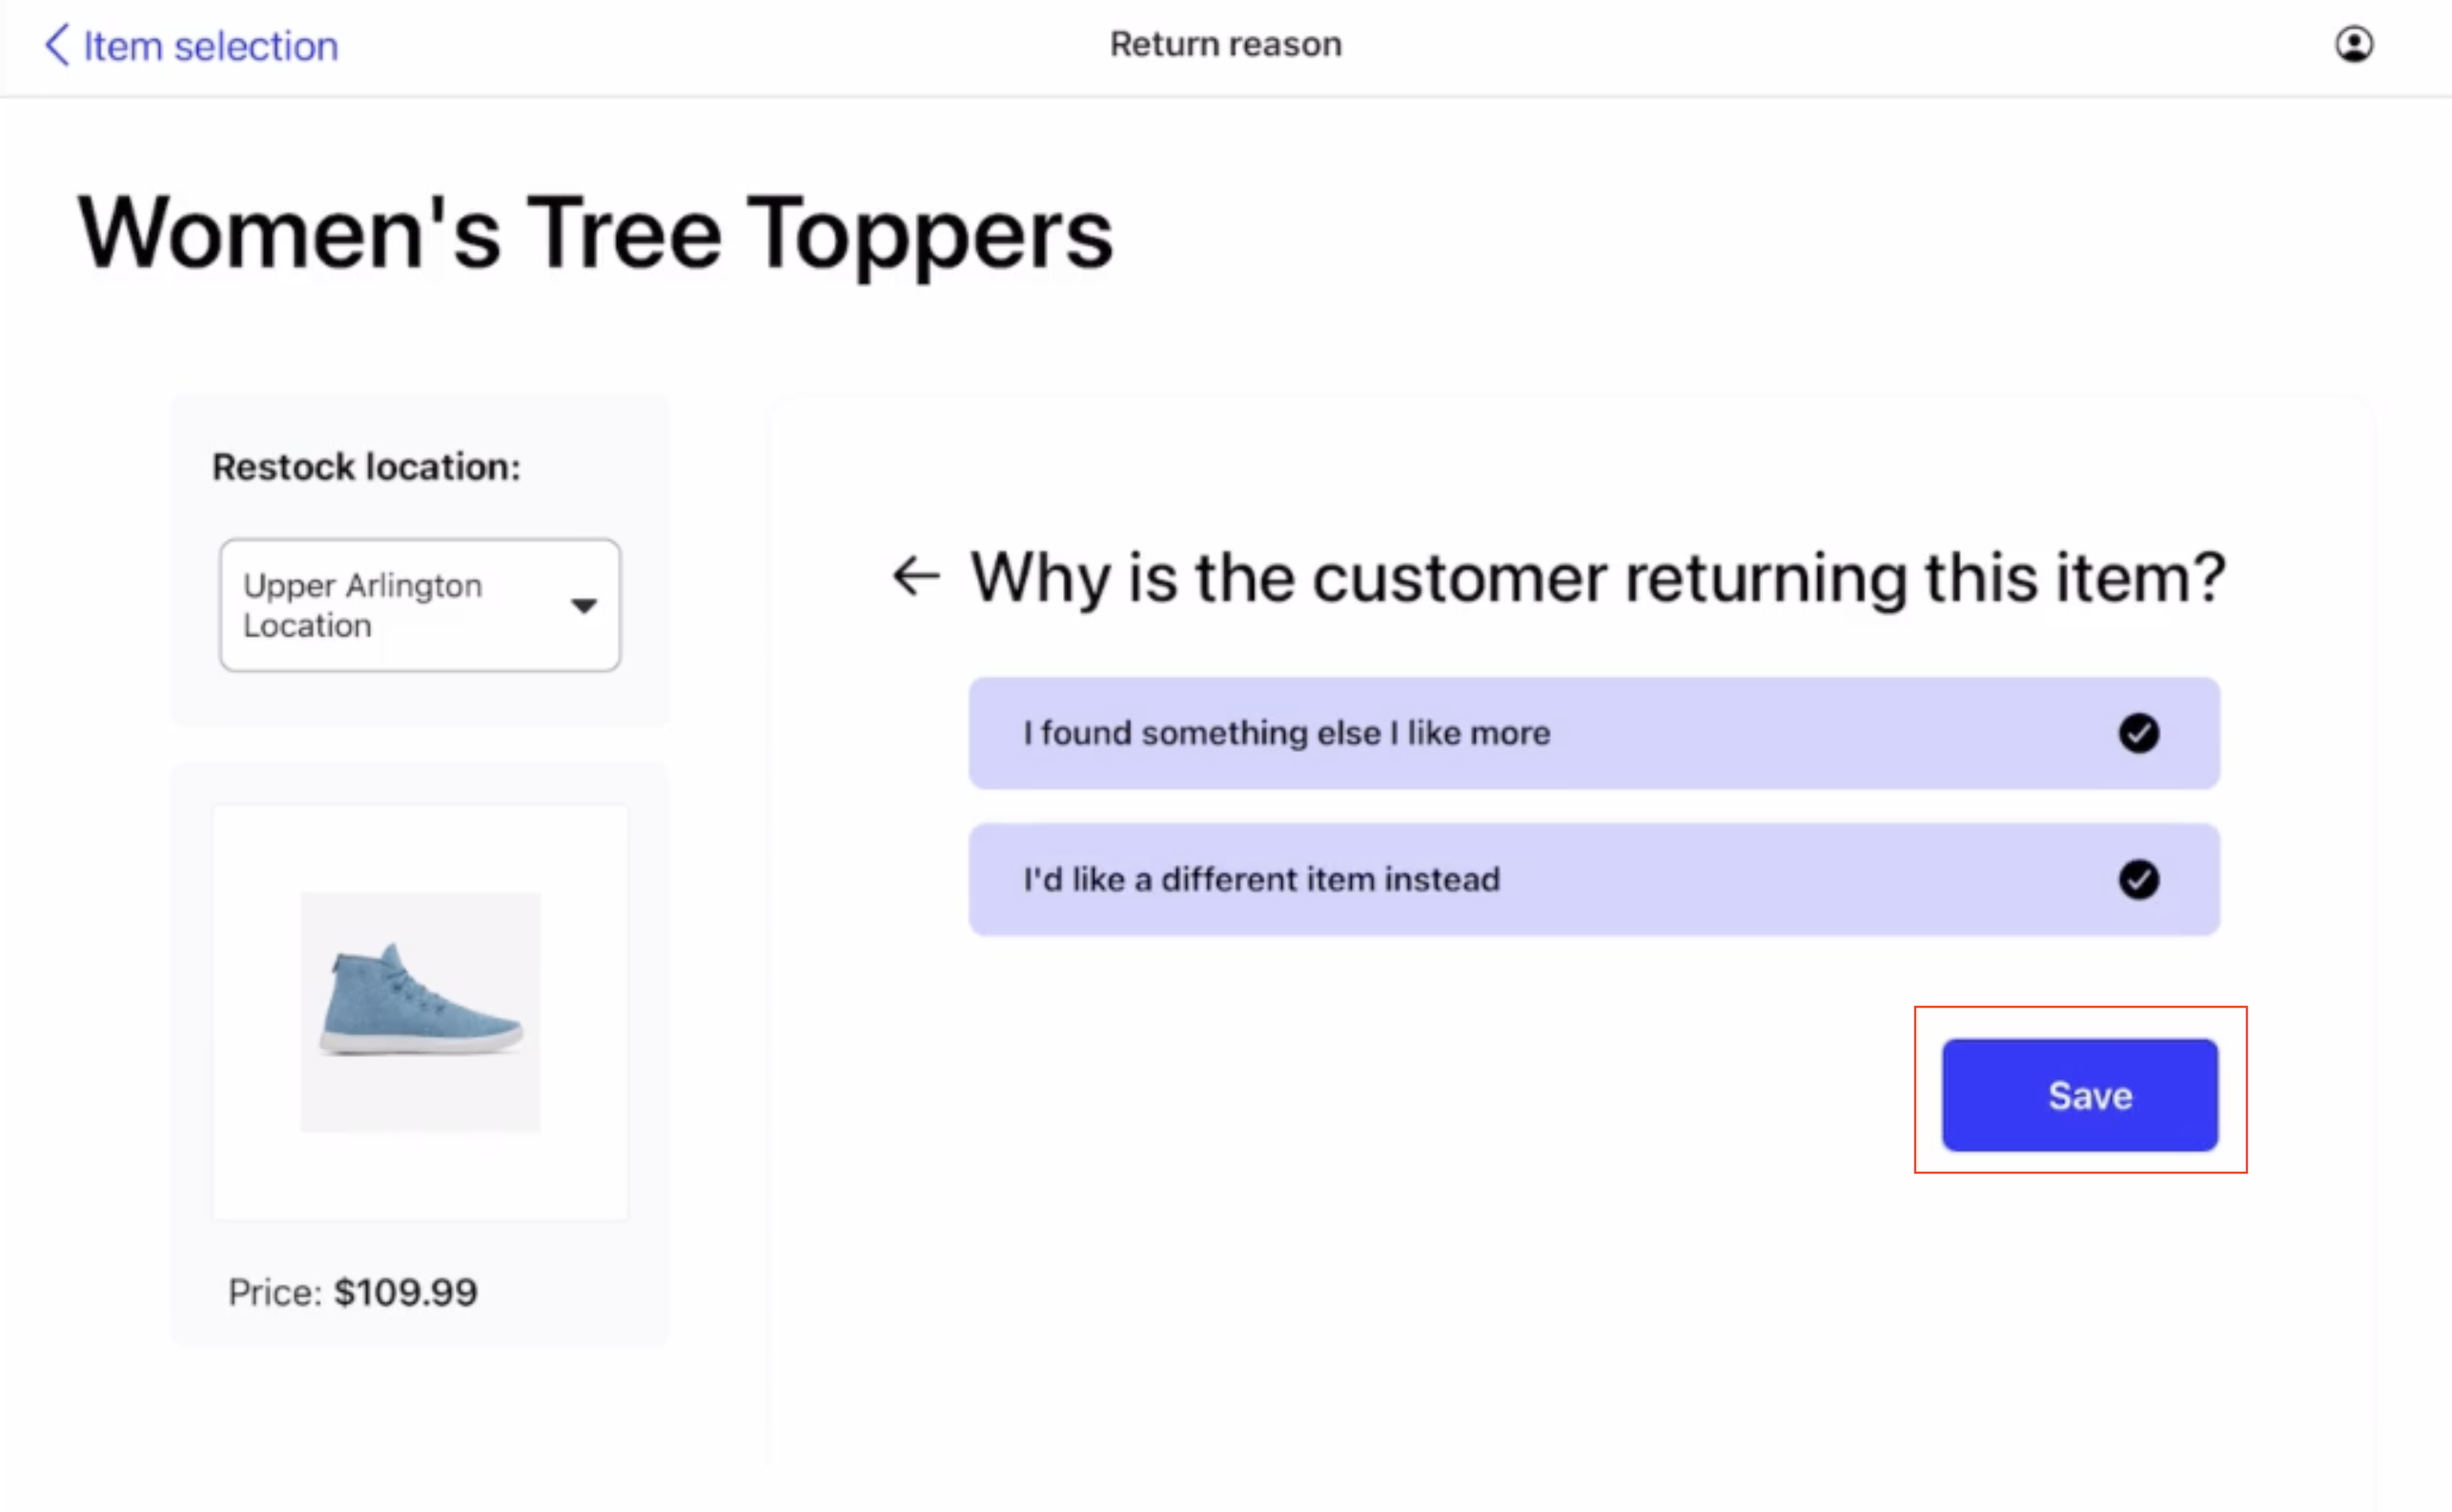
Select the restock location. Or, click Do not restock if this will be different than the location where the return is currently being processed.
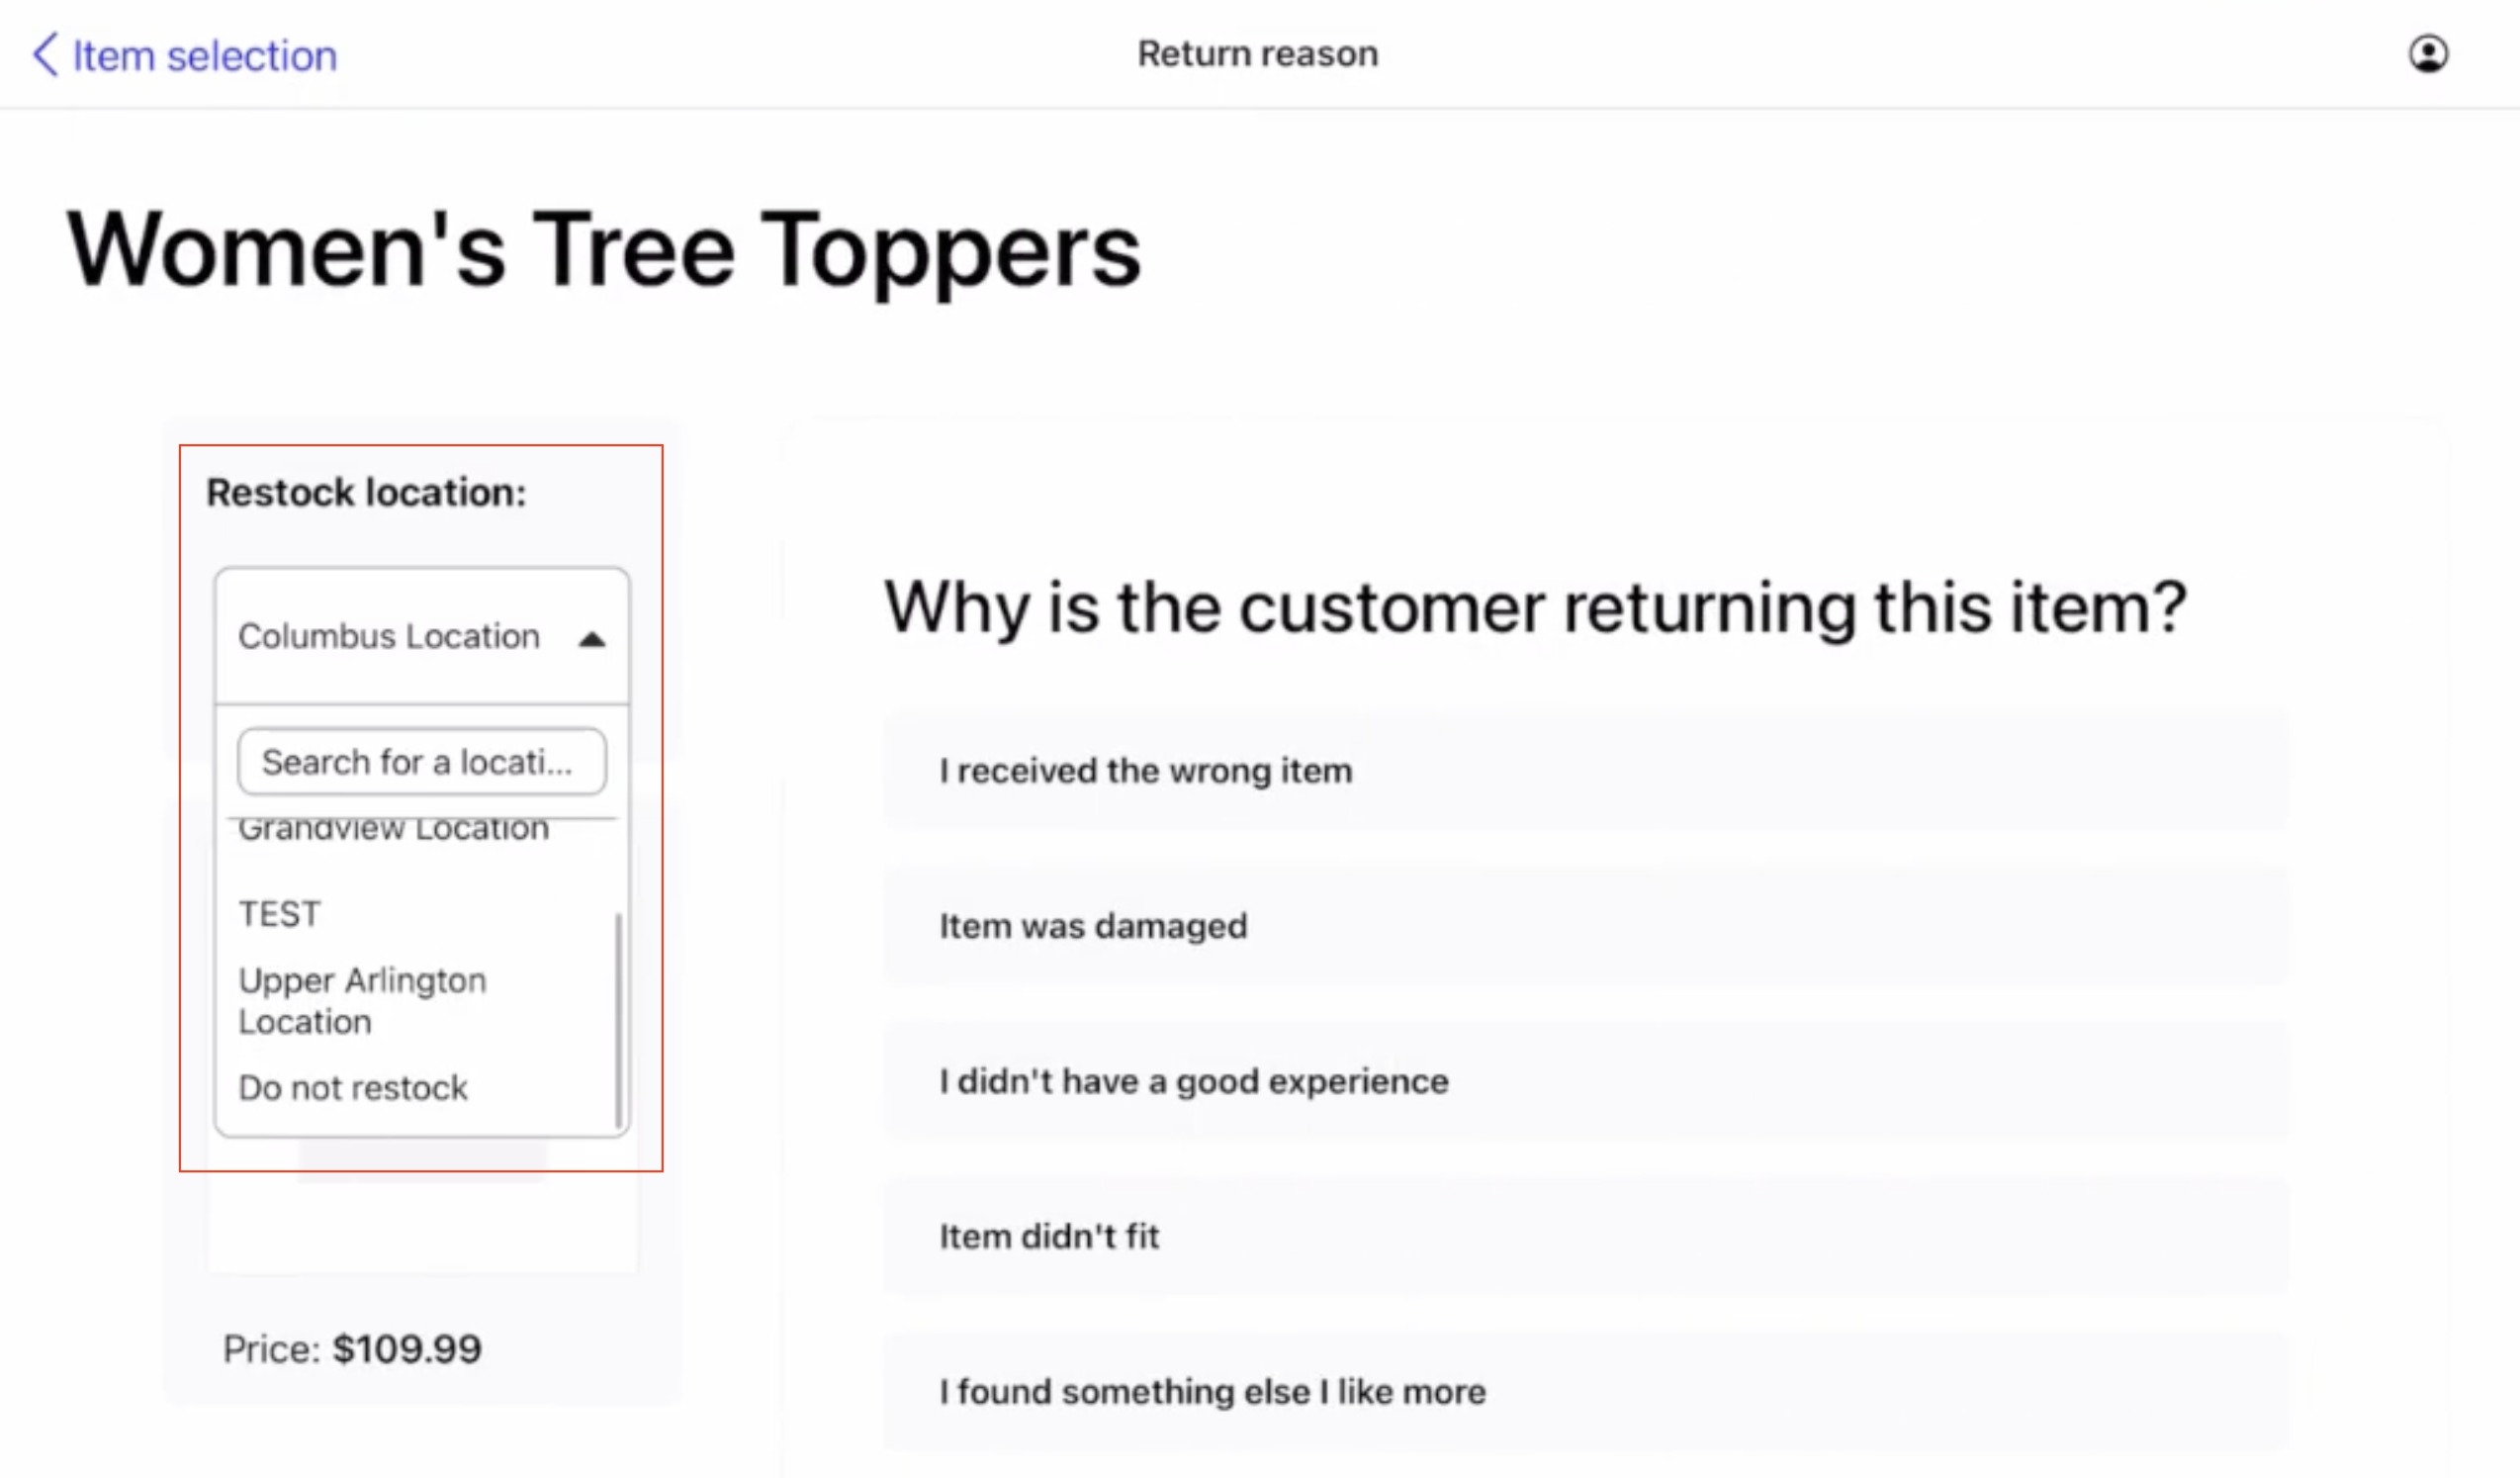
Provide a return reason, then click Save.
If the merchant is not completing an exchange, click Finish return.

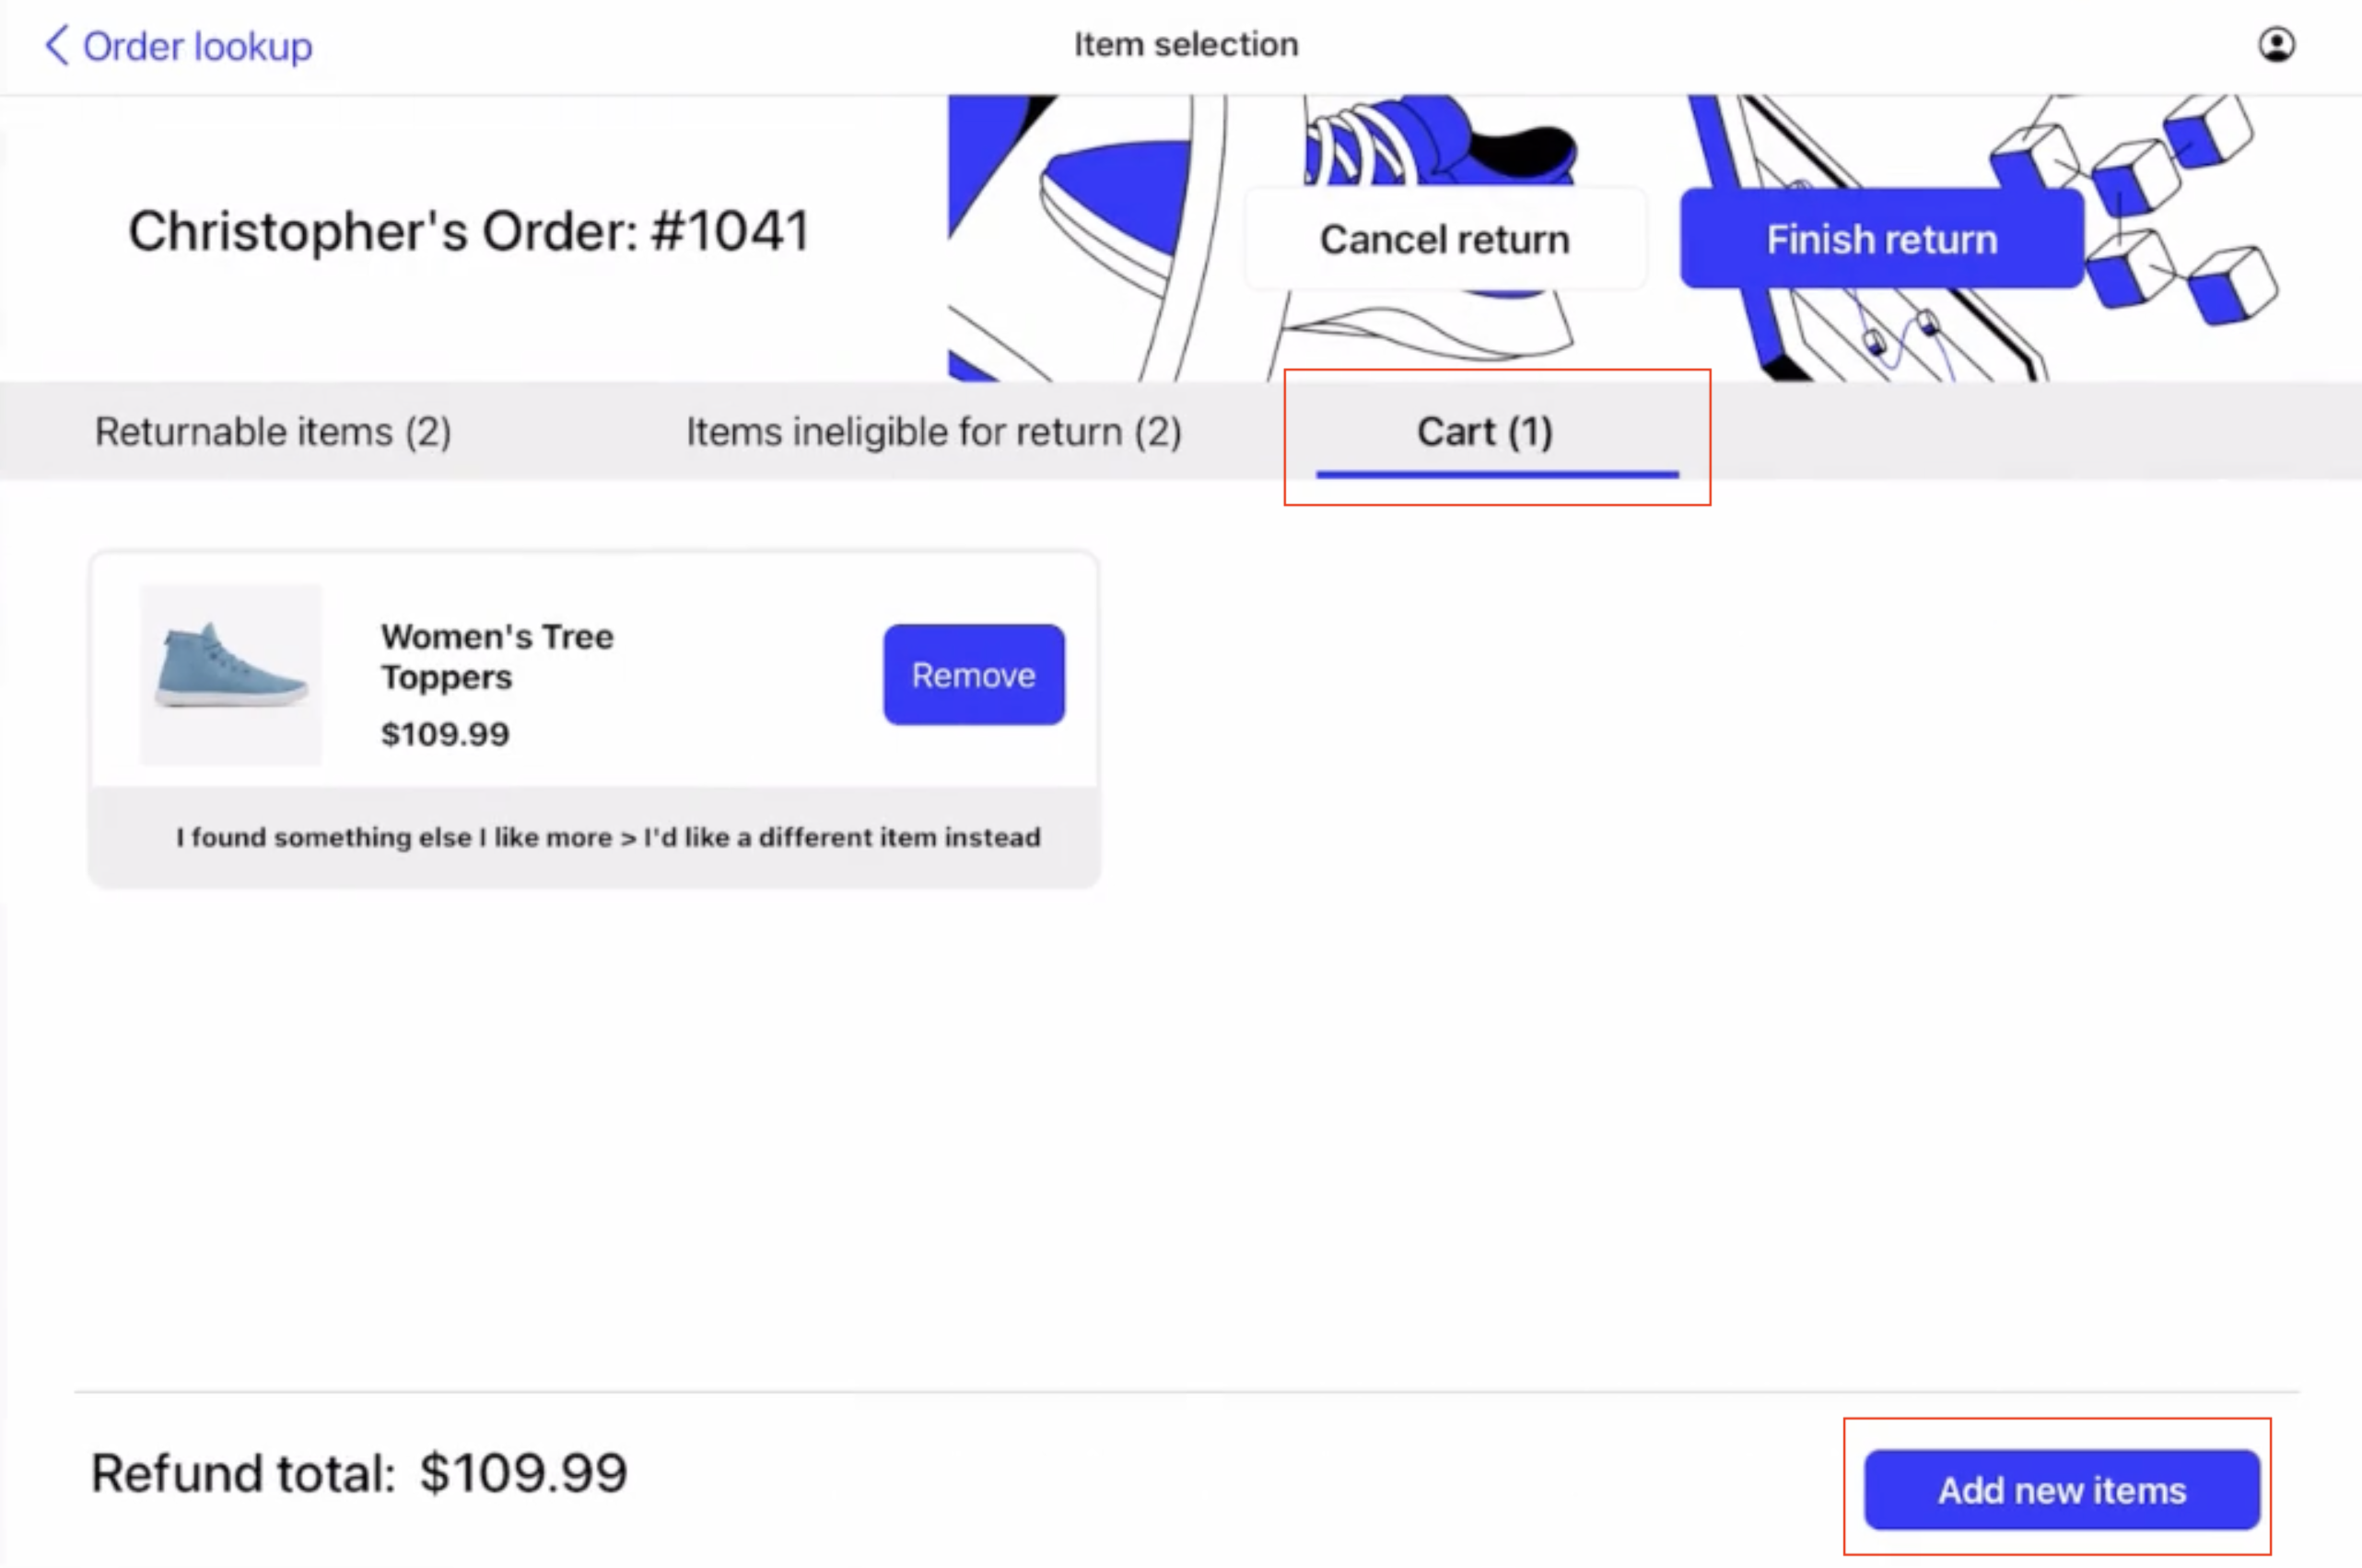
Initiating an exchange after starting a return
To complete an exchange:
Go to Loop POS > Cart > Add new items.
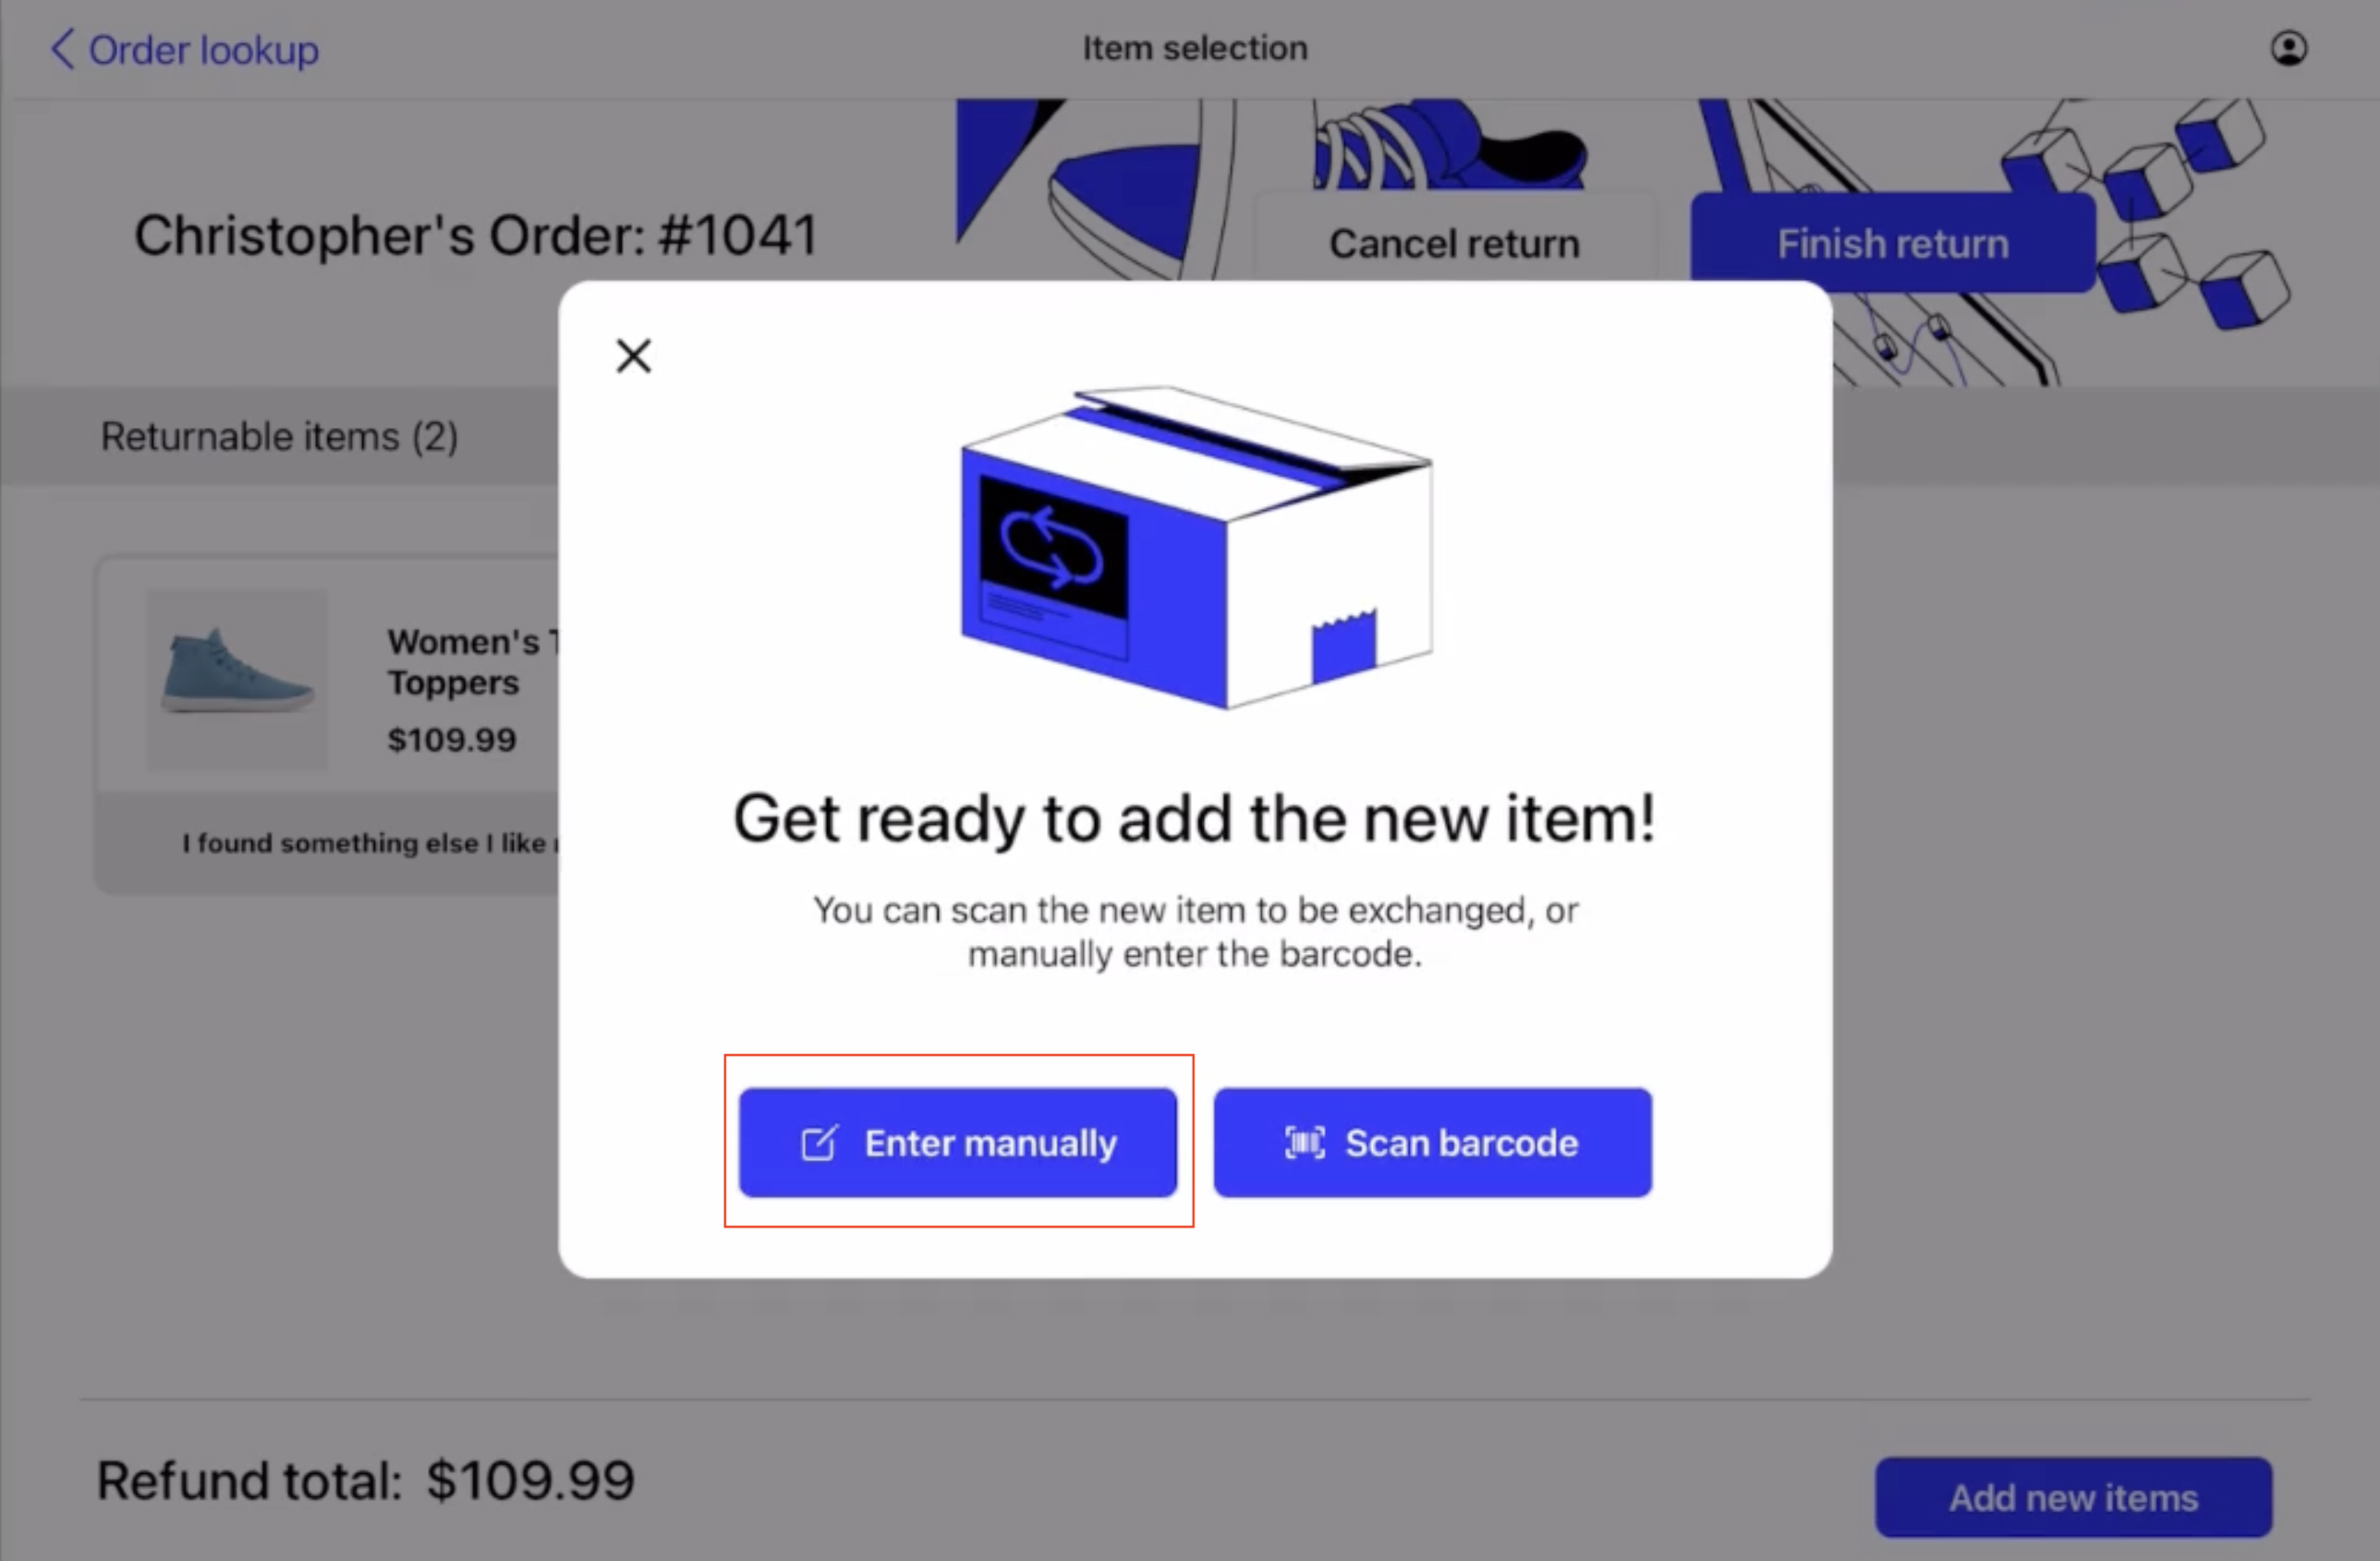
Next, look up the item either by scanning the barcode or manually entering it.
Select the corresponding item below the green bar.
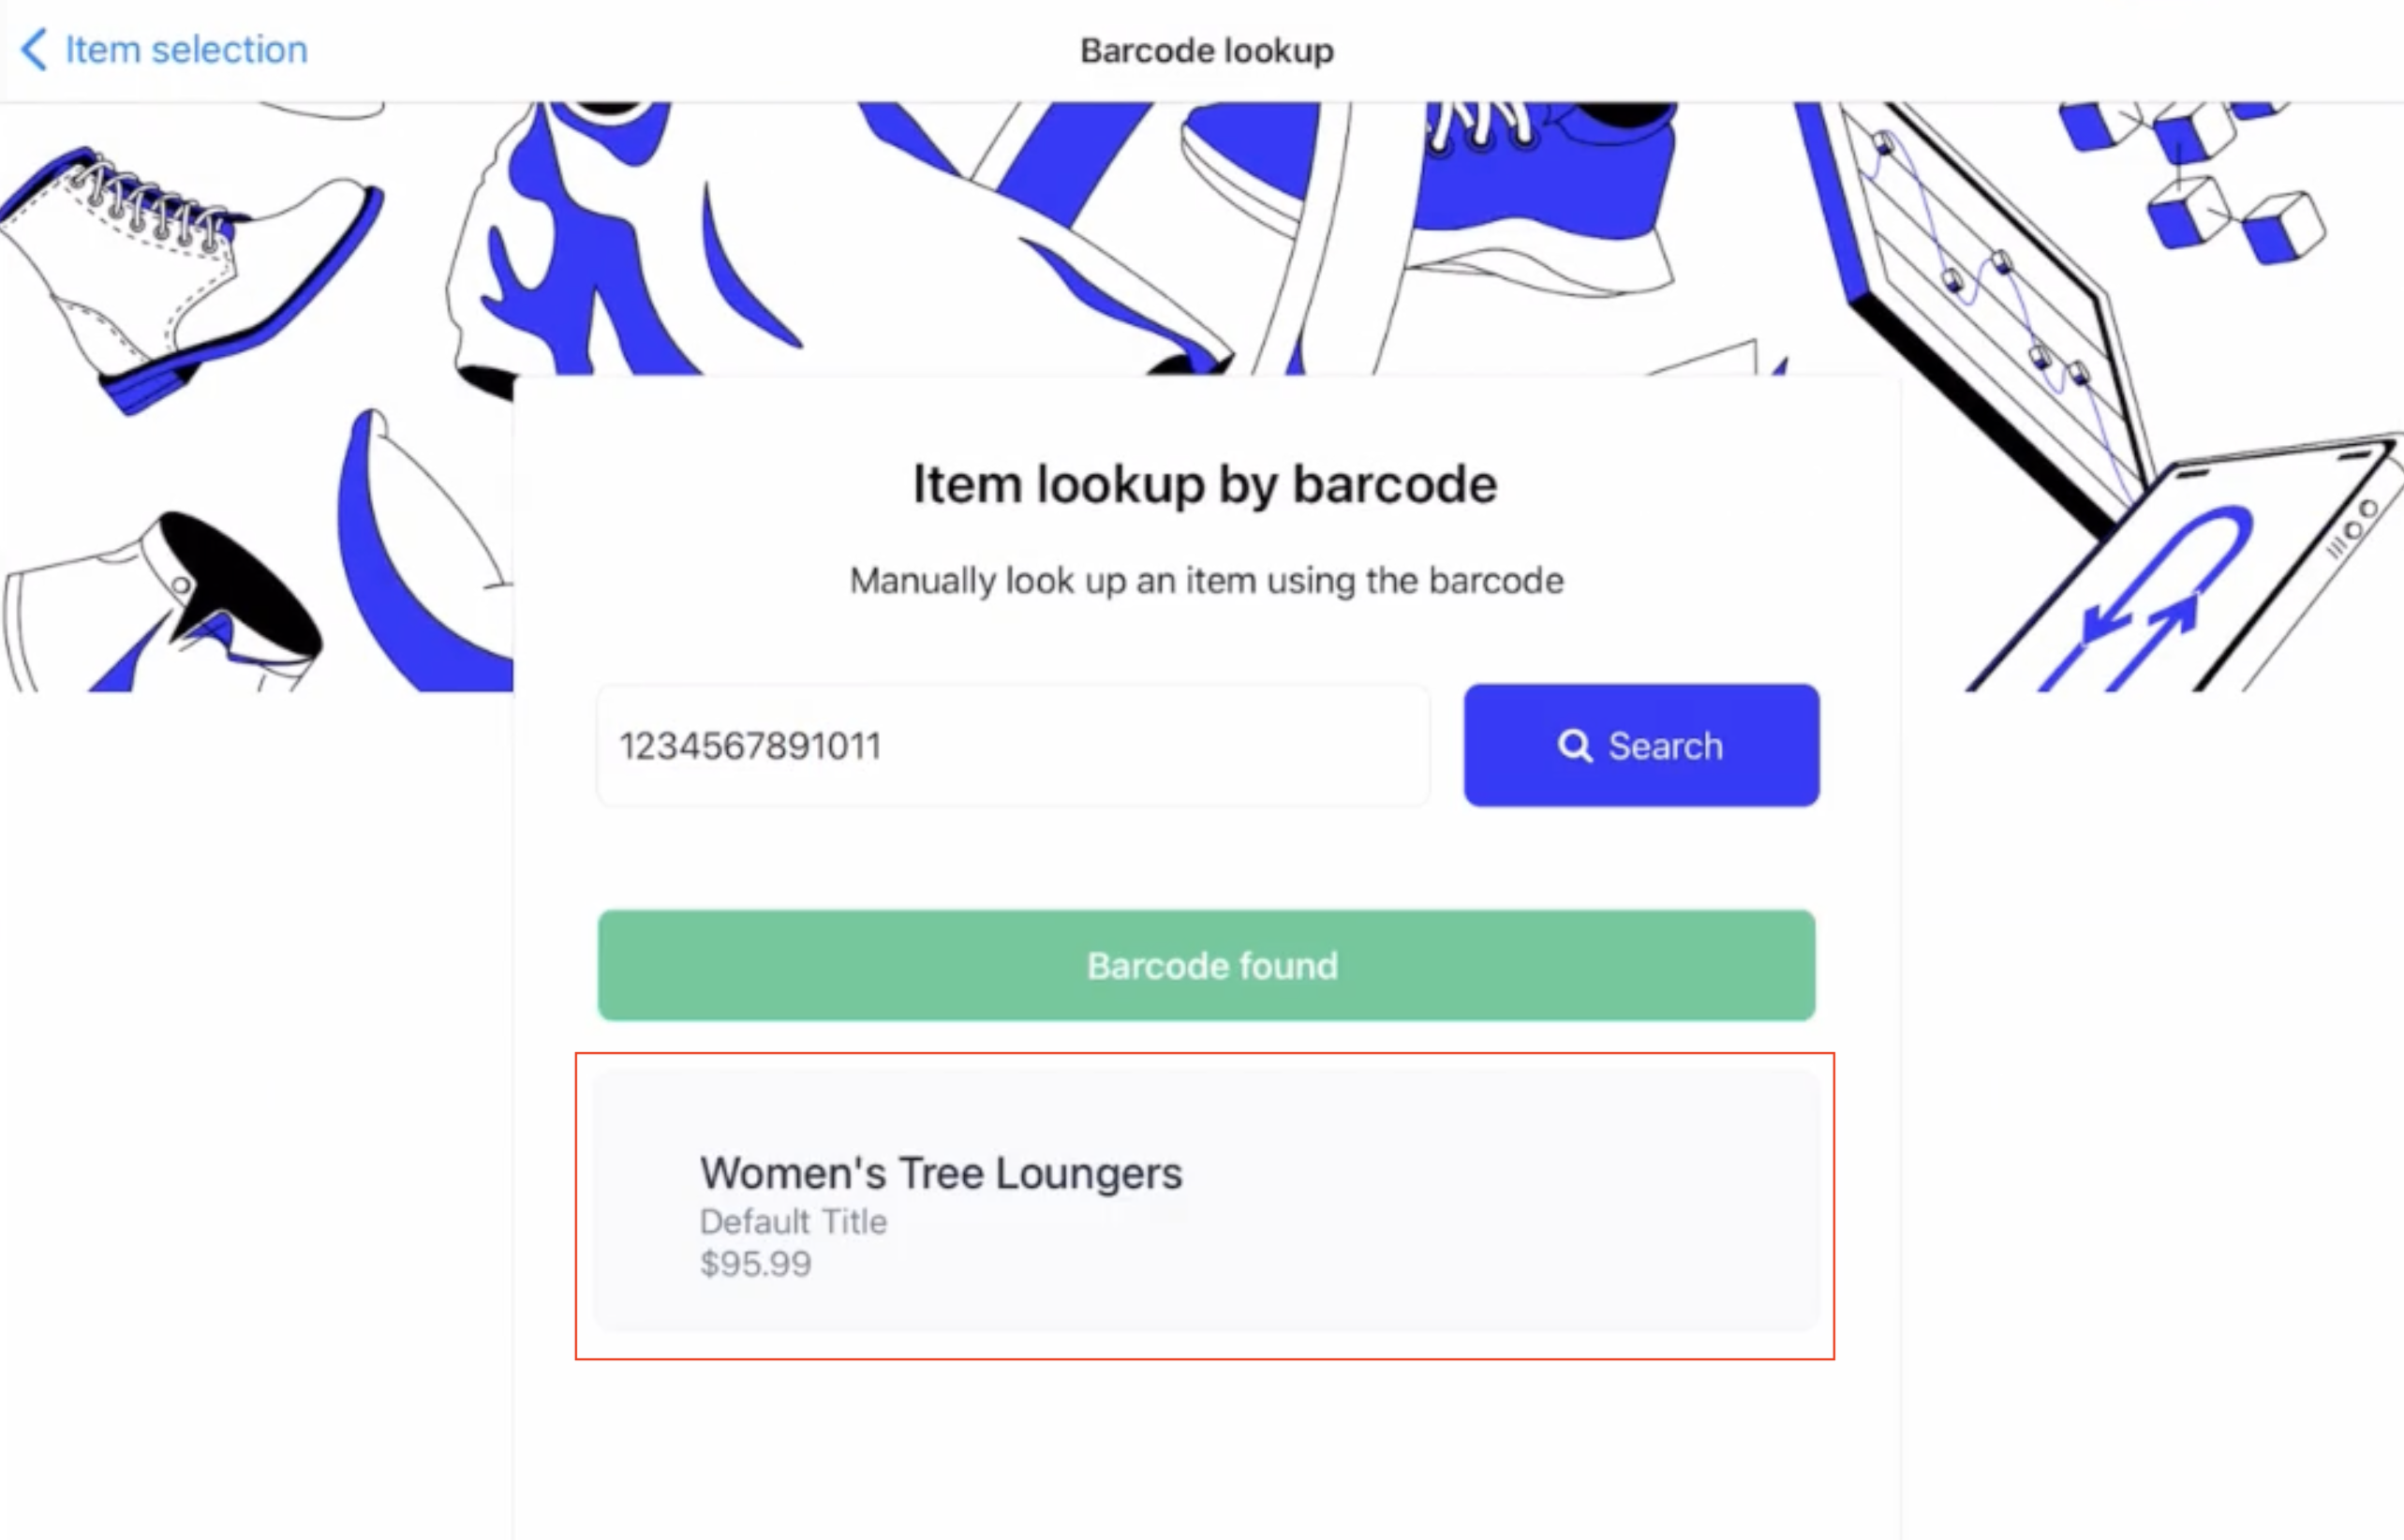
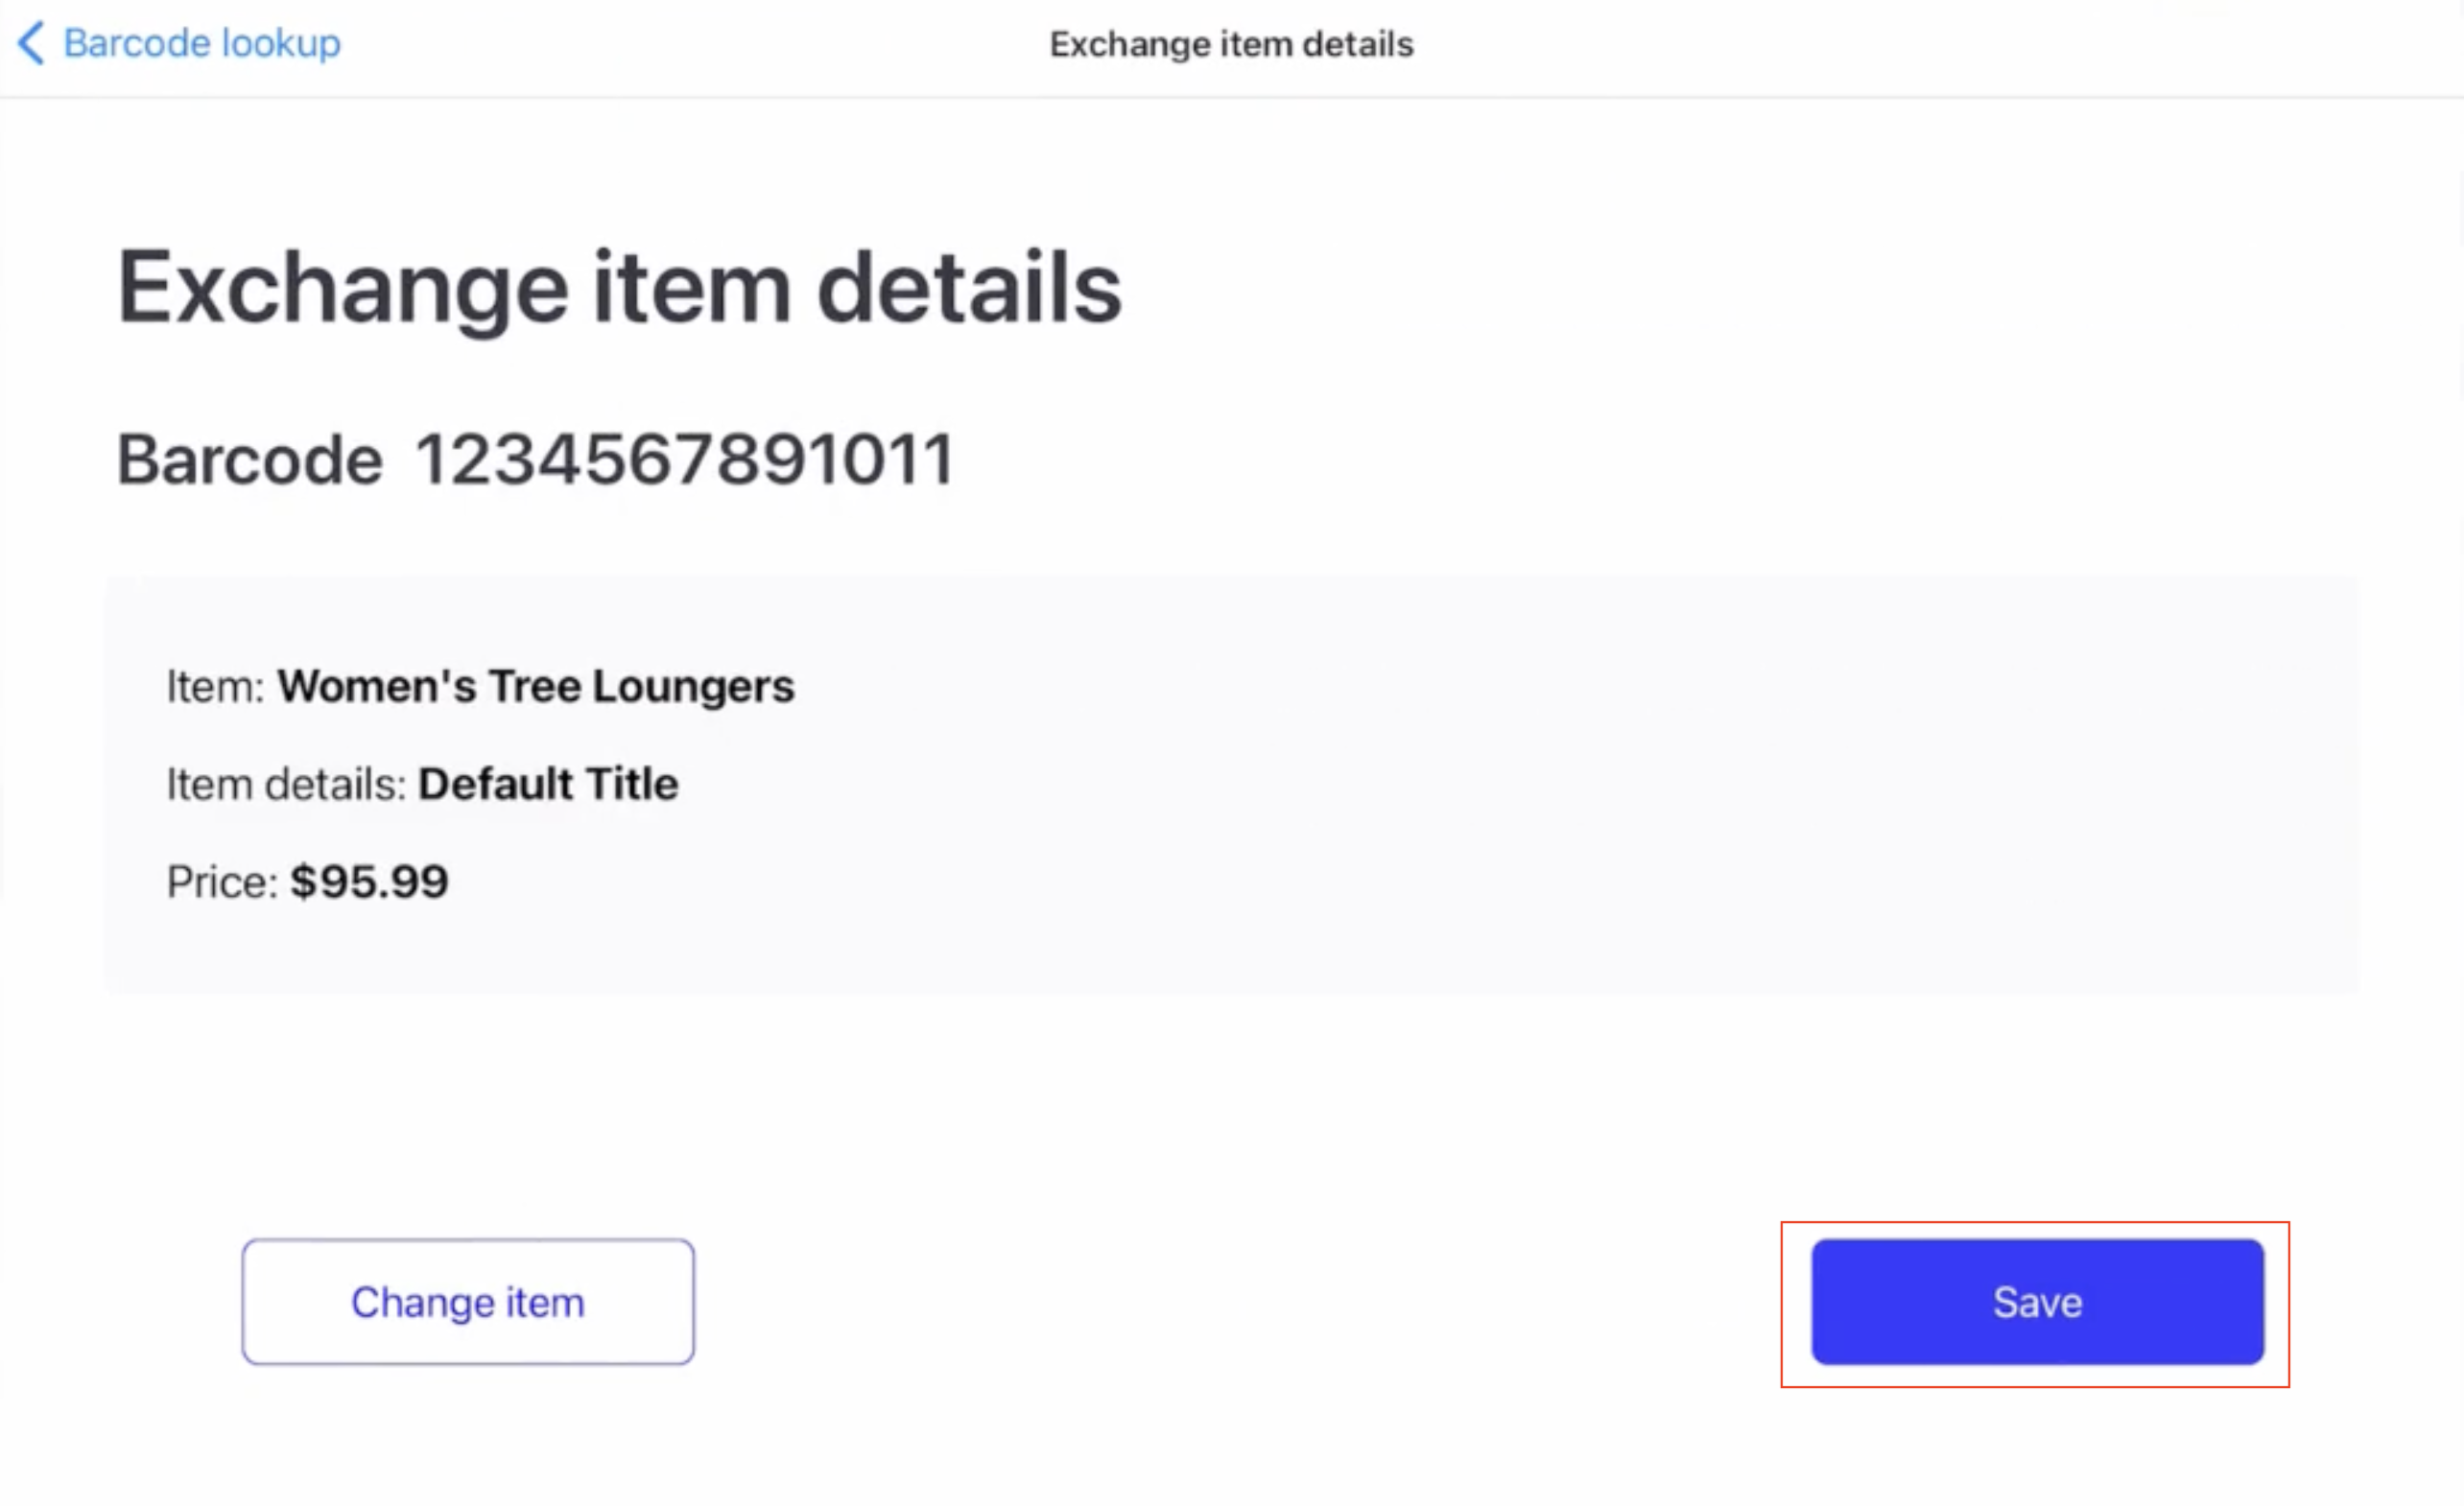
Review the item selected and click Save.
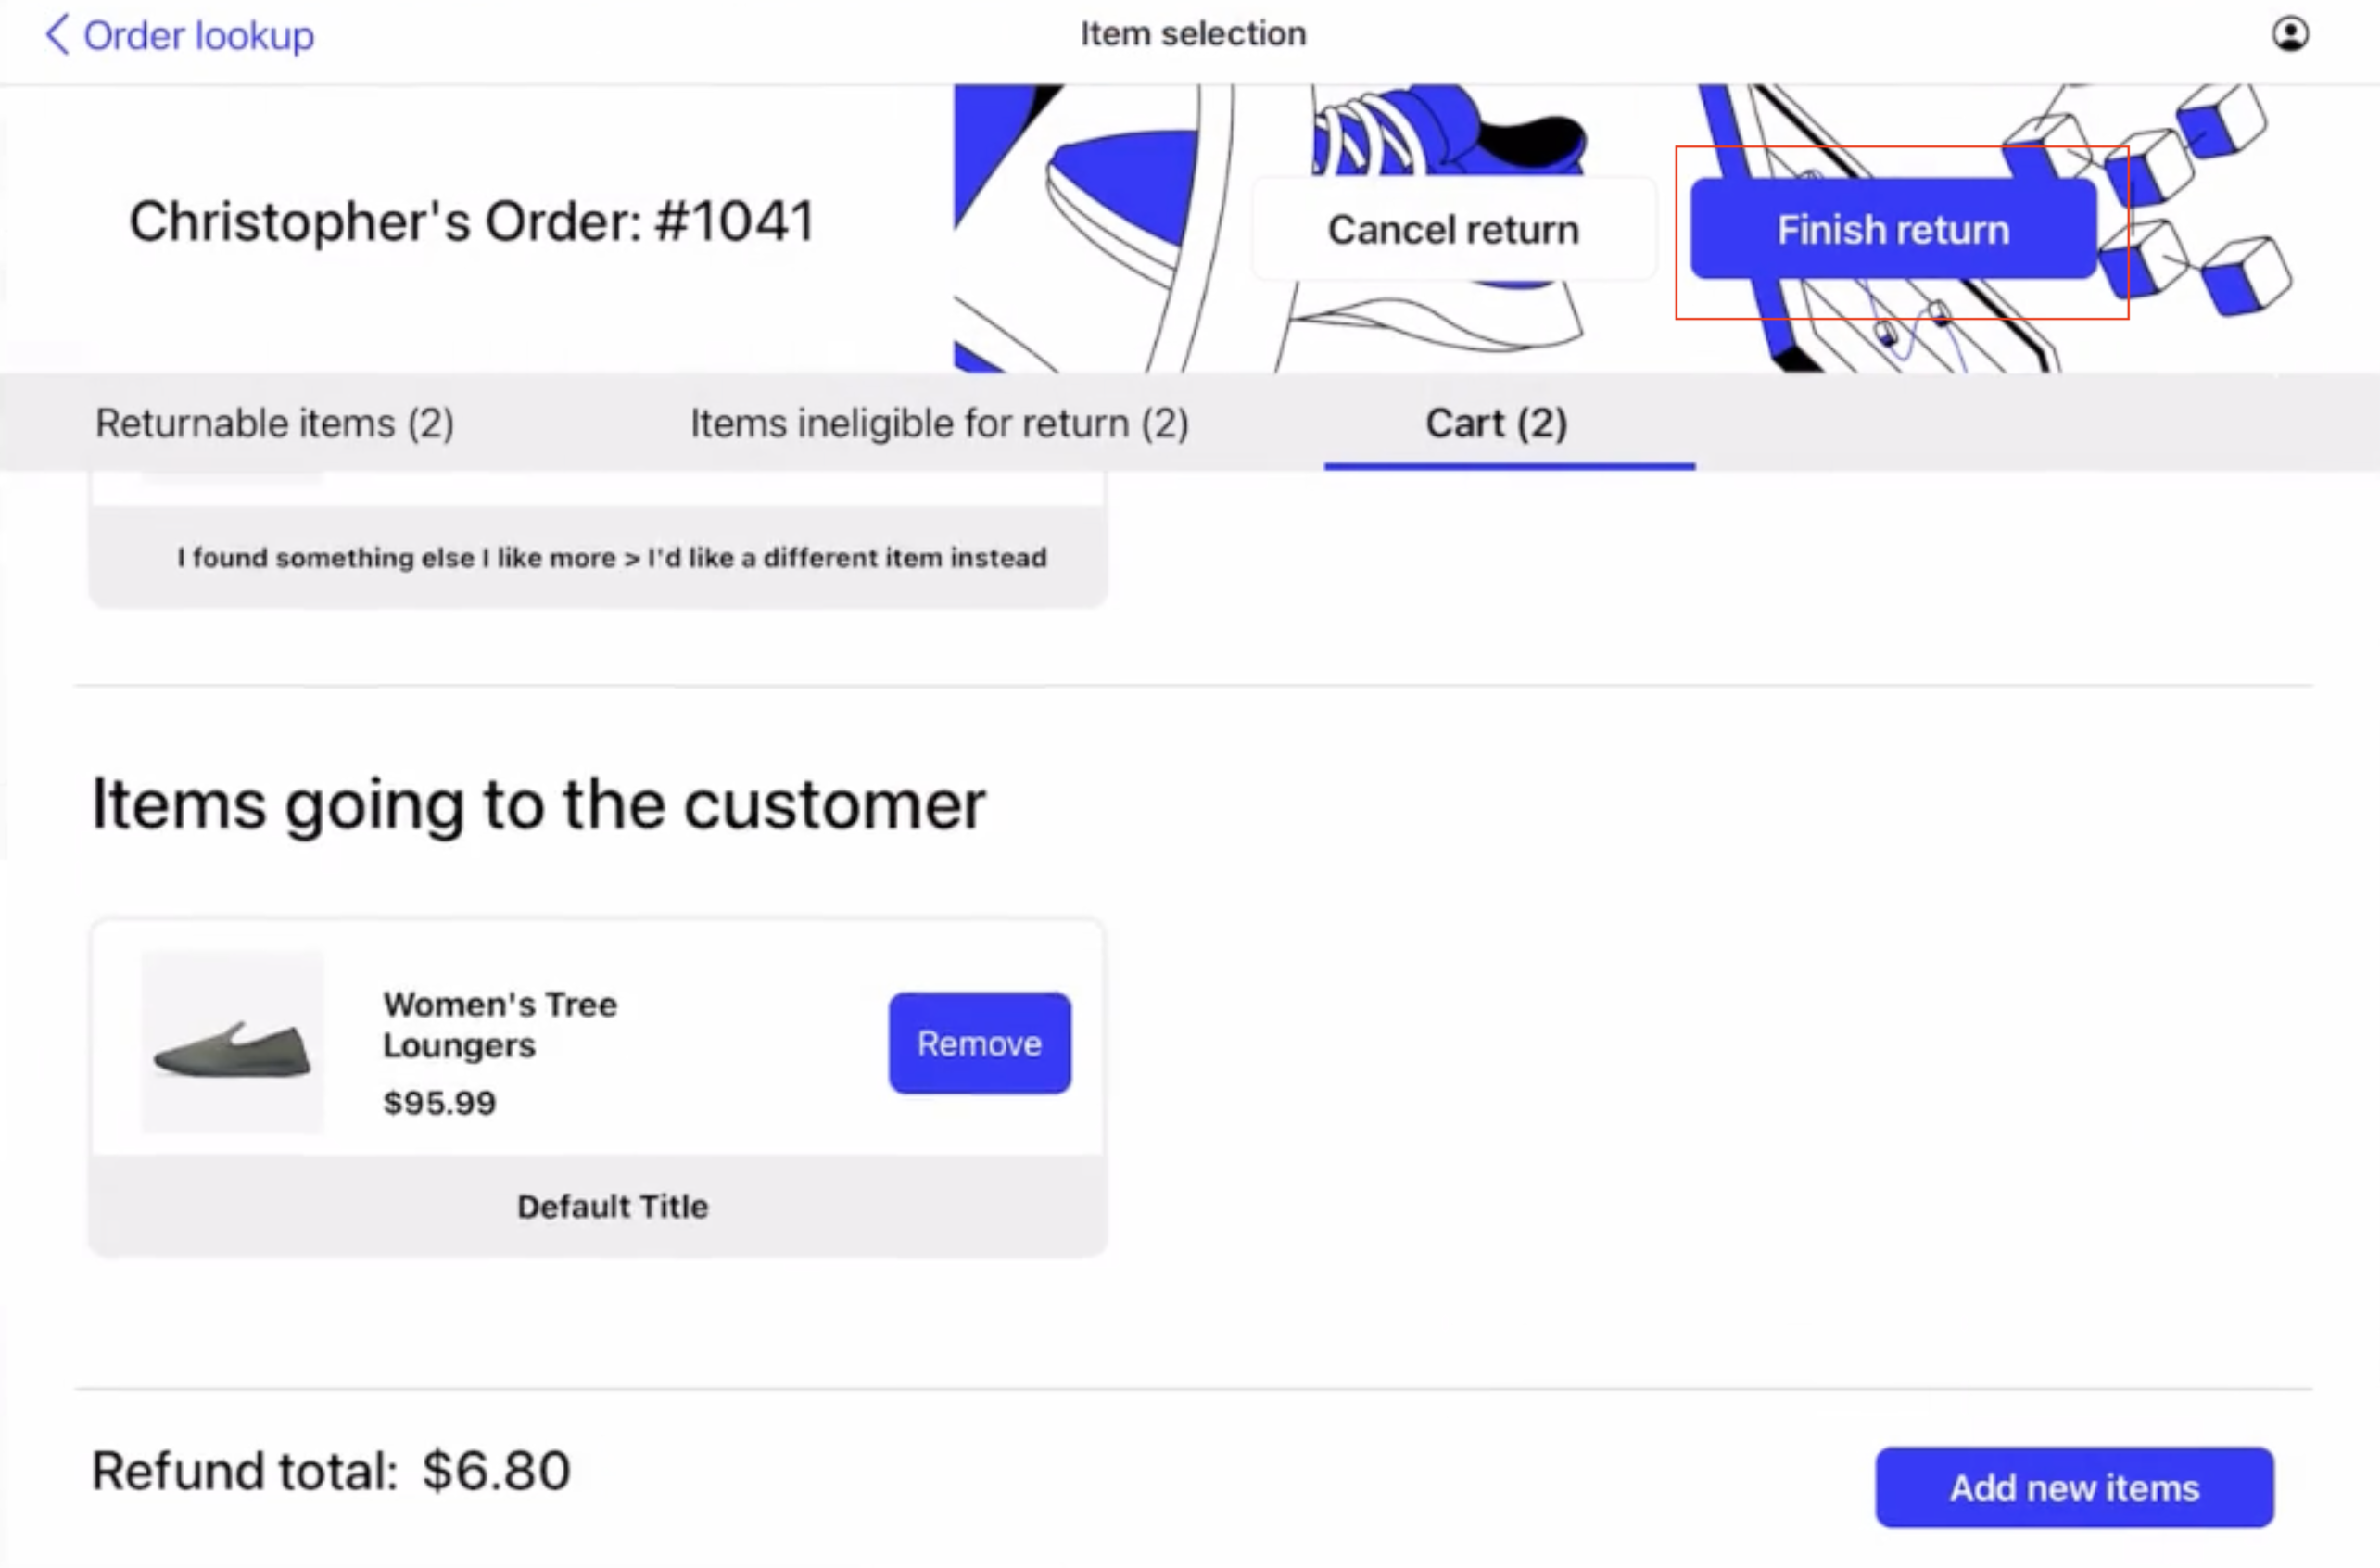
Review the exchange. When ready, click Finish return.
Processing a return
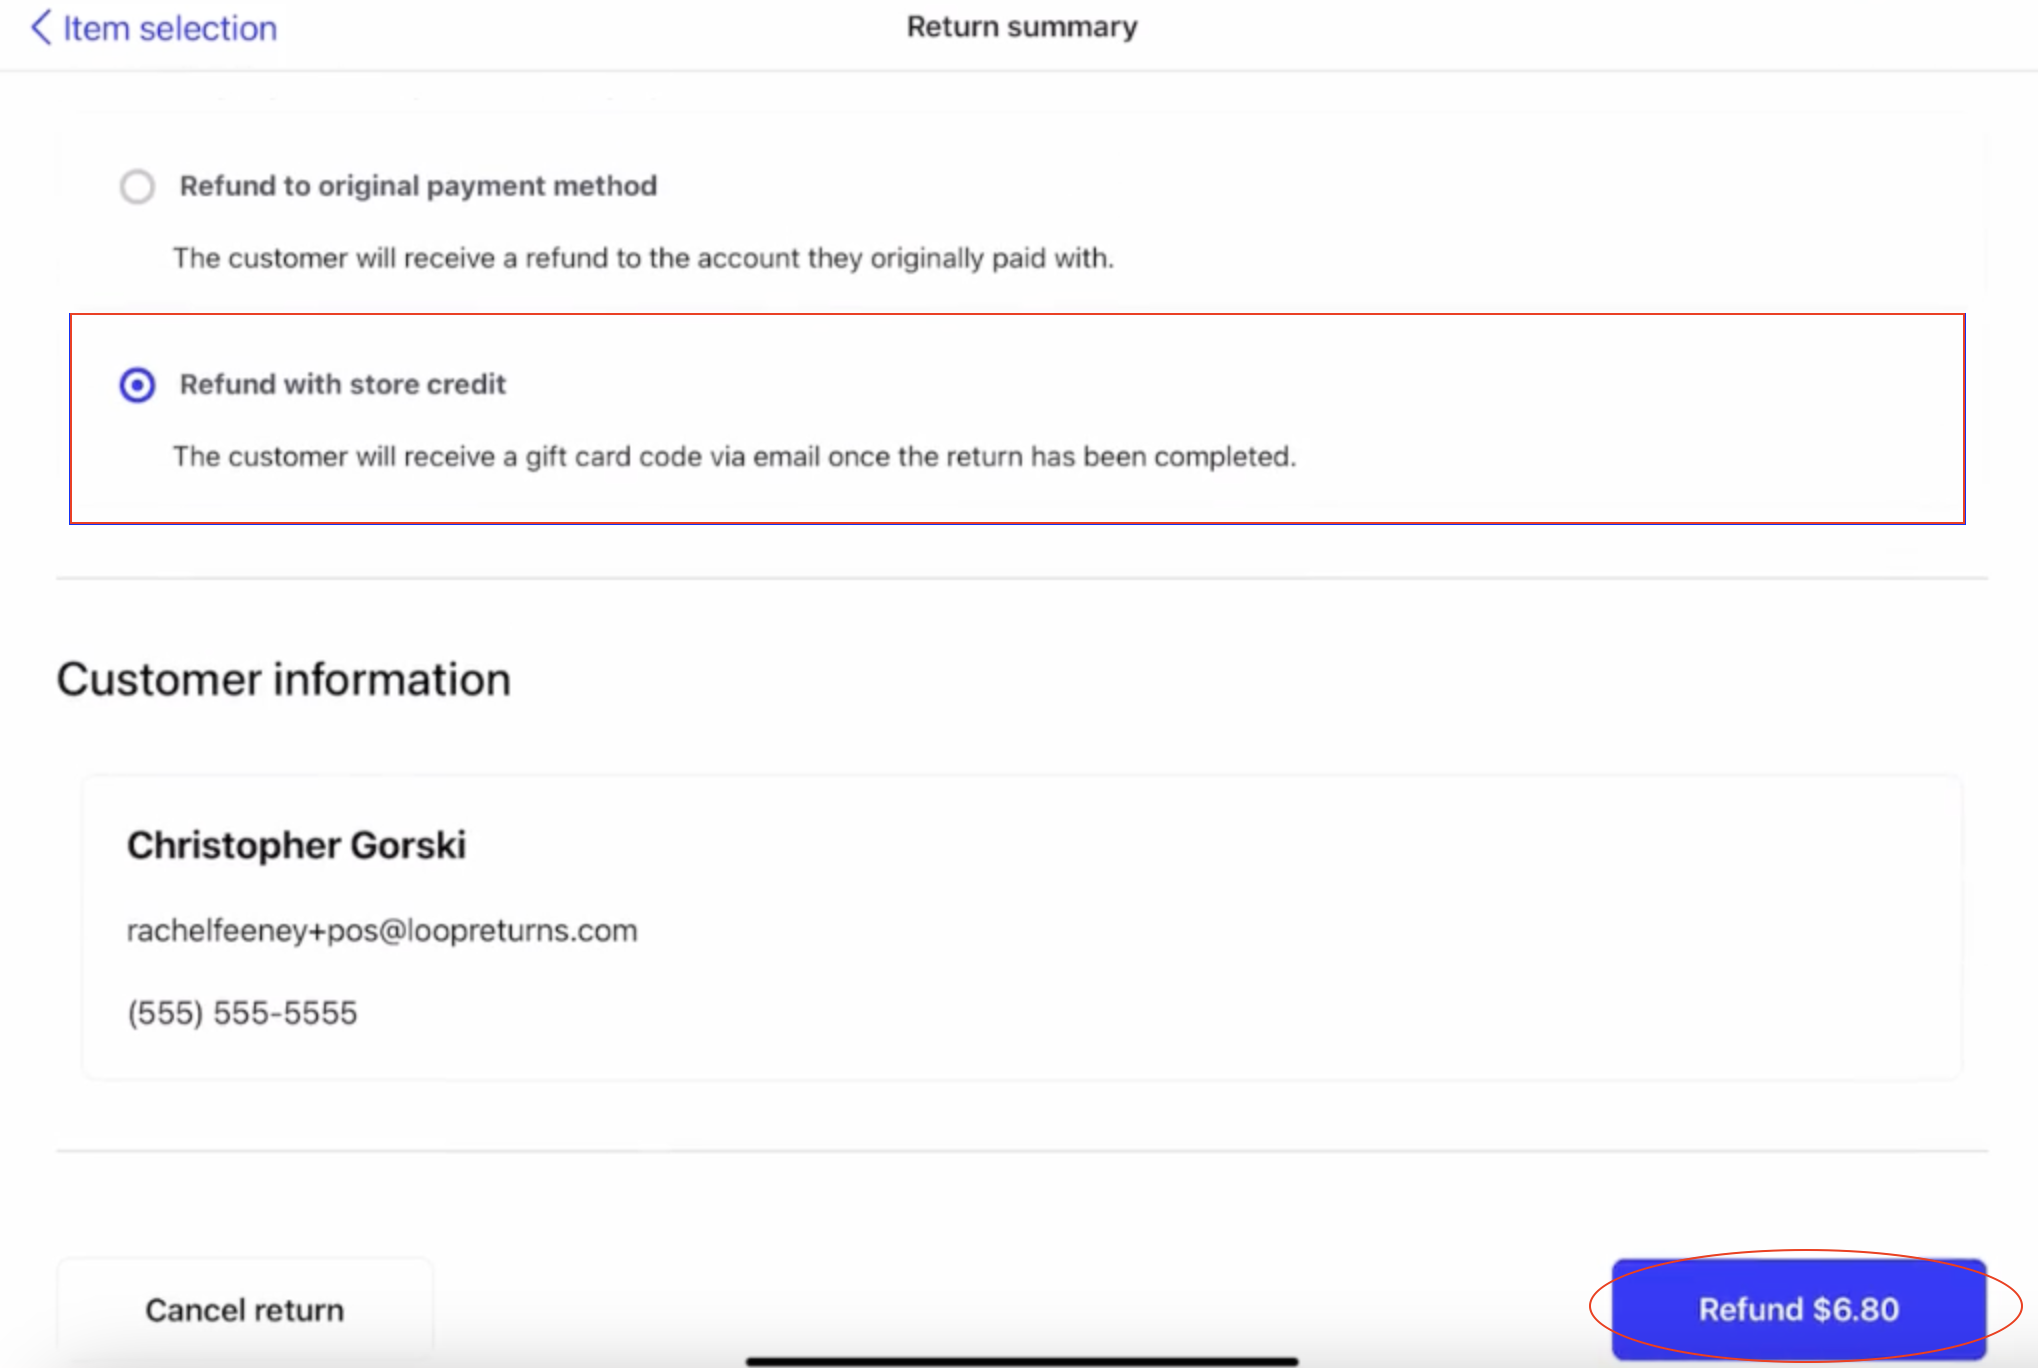
Review the return summary for accuracy.
Choose either a) refund to original payment method or b) refund with store credit (if the store offers this option).
If the return summary looks accurate, click Refund and the return will process.
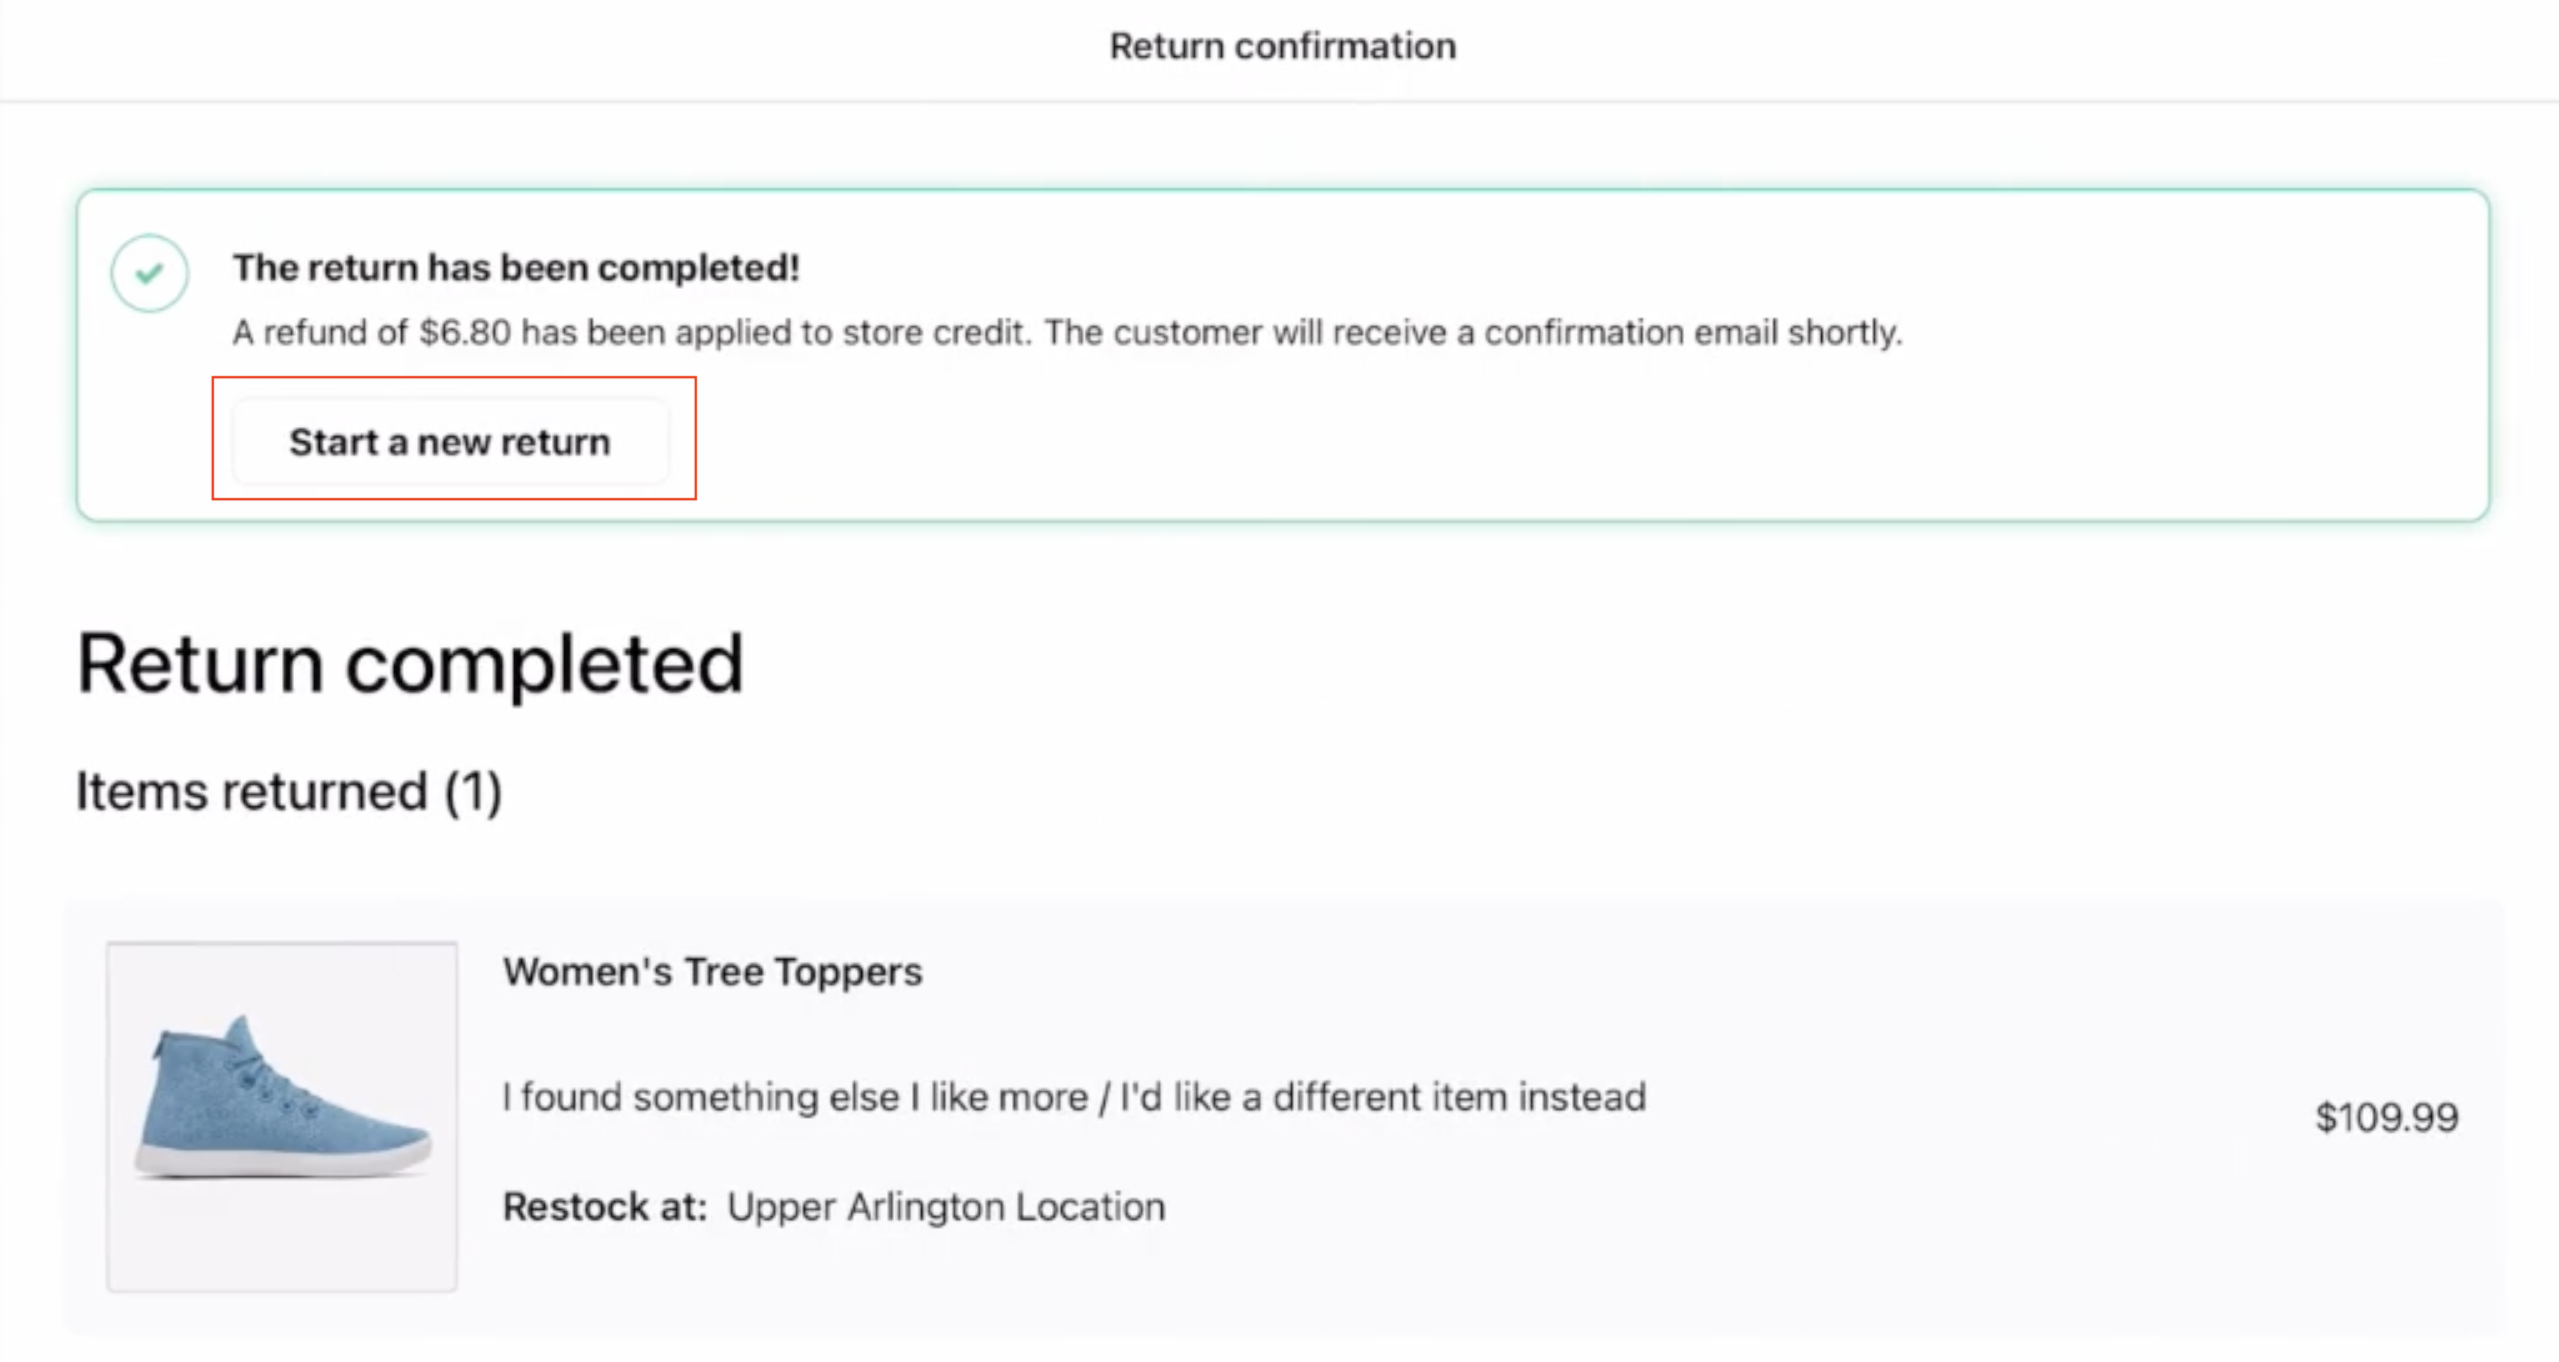
Observe the completed return. If wanting to continue, click Start a new return.
Please reach out to support@loopreturns.com with any additional questions.