
Checkout+: Test & Go Live
OVERVIEW
This article provides step-by-step instructions for testing and launching Checkout+, Loop's prepaid returns program. It covers enabling the Checkout+ product in Shopify, testing the cart and checkout functionality to ensure opt-in and opt-out options work properly, testing the return flow to confirm free return messaging appears correctly, and adding appropriate Checkout+ language to the return policy before going live.
Use the menu on the left to quickly navigate this article.
Enable the product
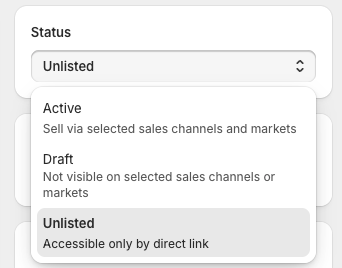
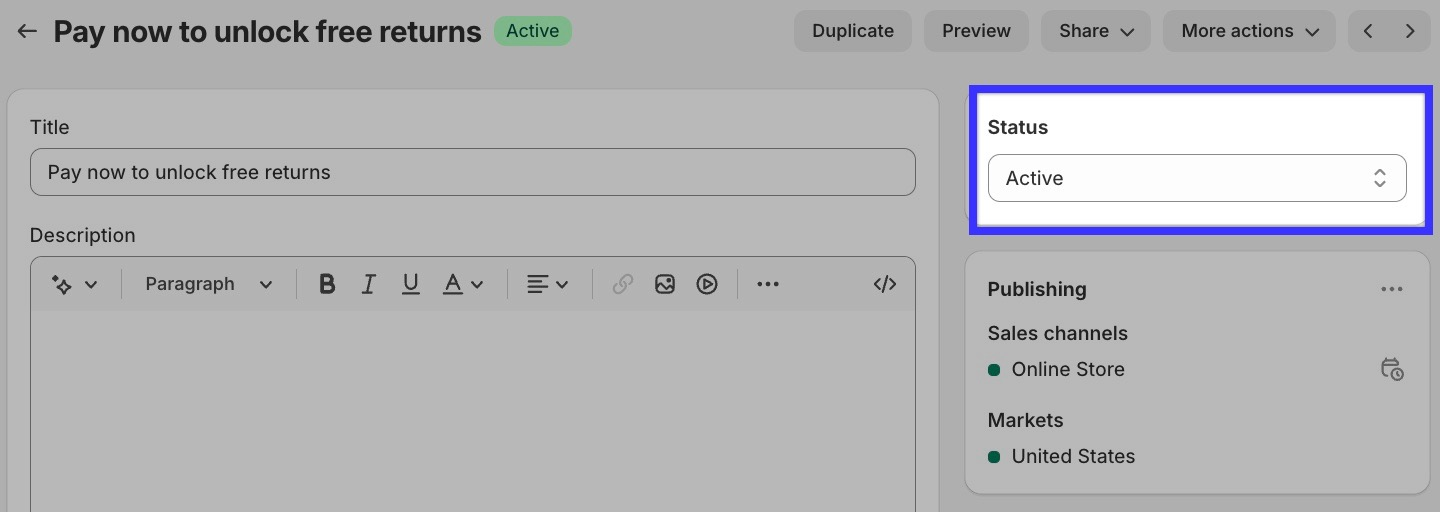
In the Shopify admin, navigate to Products and find the Checkout+ product (it will probably be named "Pay now to unlock free returns").

If the status of the Checkout+ product is set to Draft, click on the product and change the product status from Draft to Unlisted.
Important: Be sure to change the product status back to Draft after testing is complete. Set the product status to Unlisted when it's ready to be used in the merchant's shop.
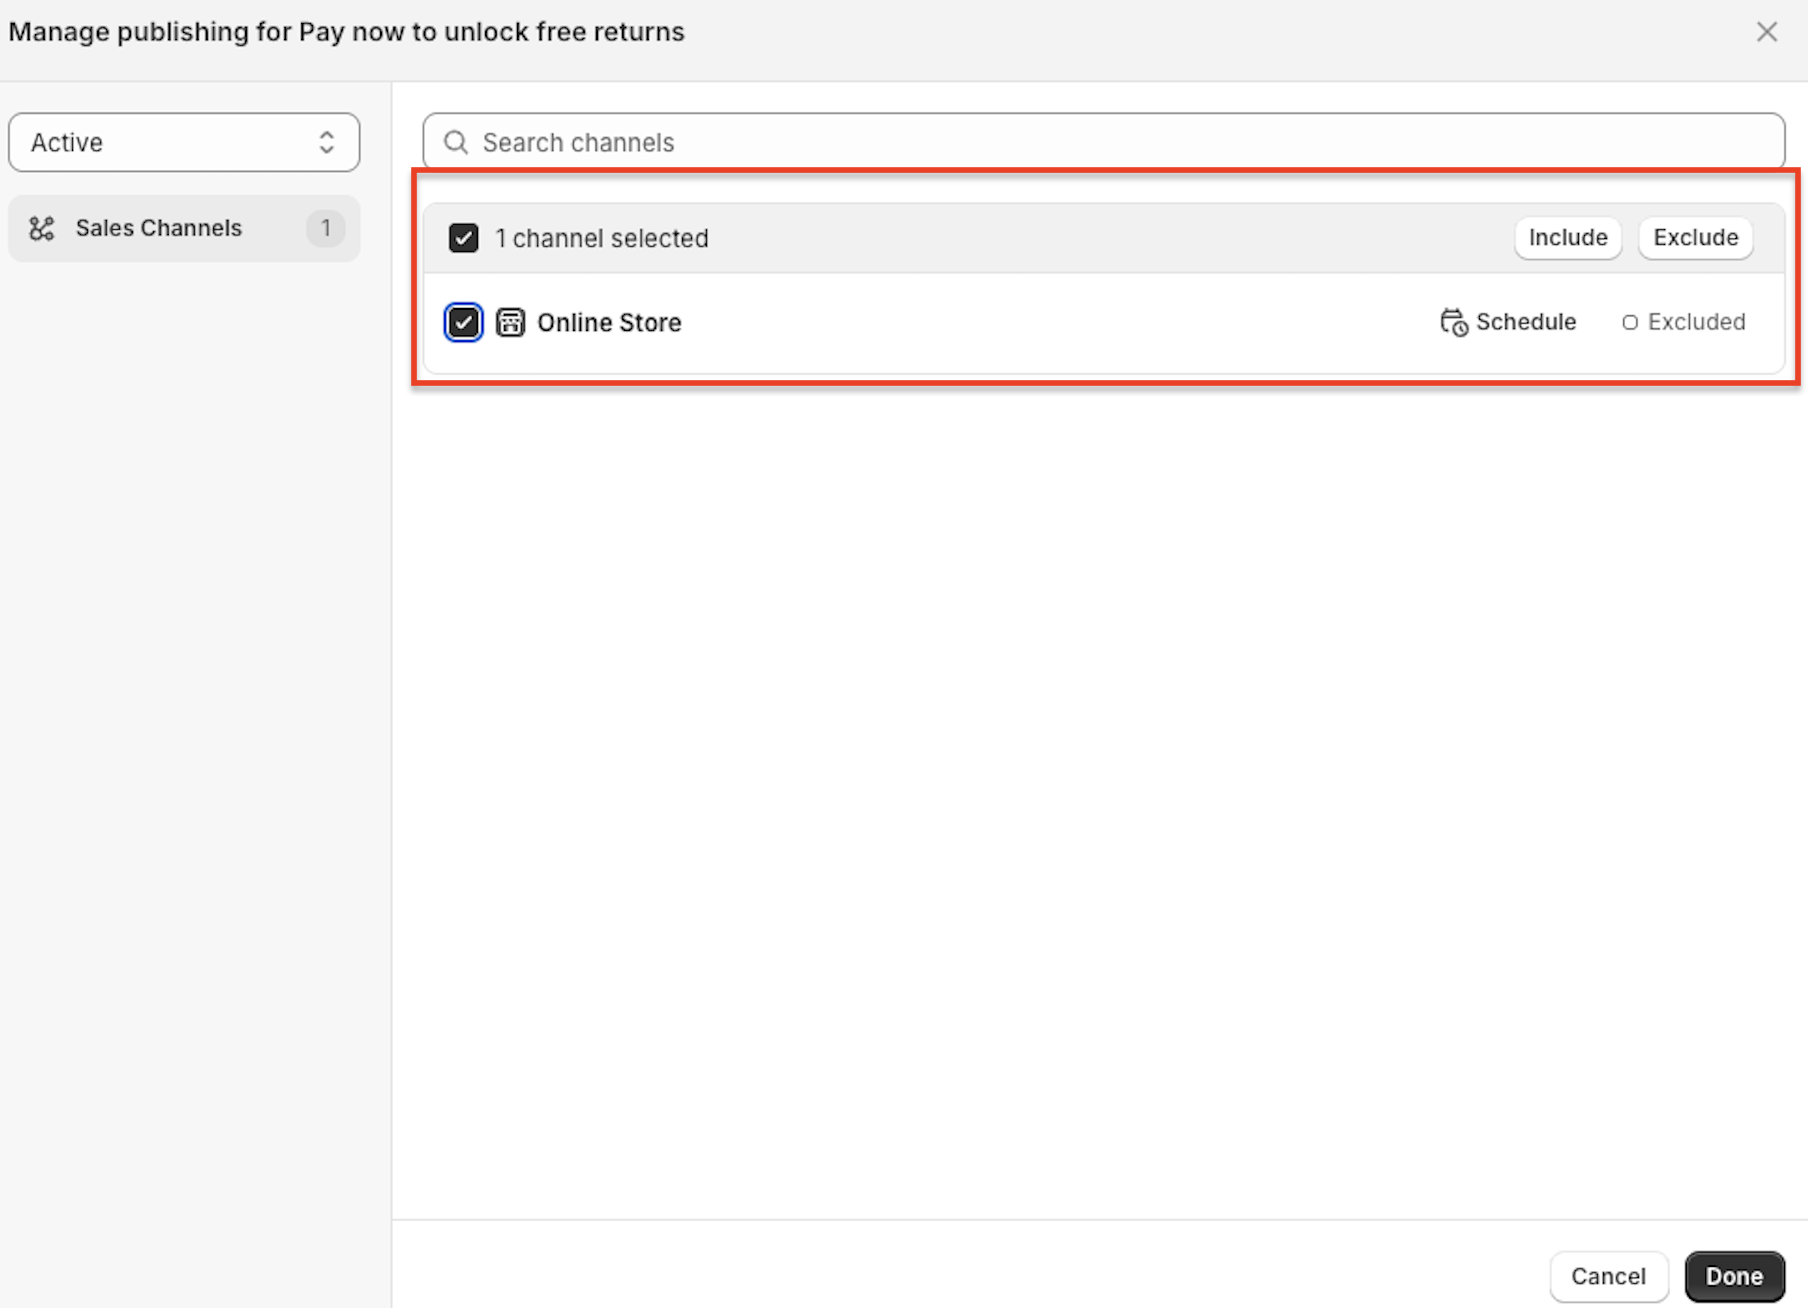
Under Publishing, click Manage.
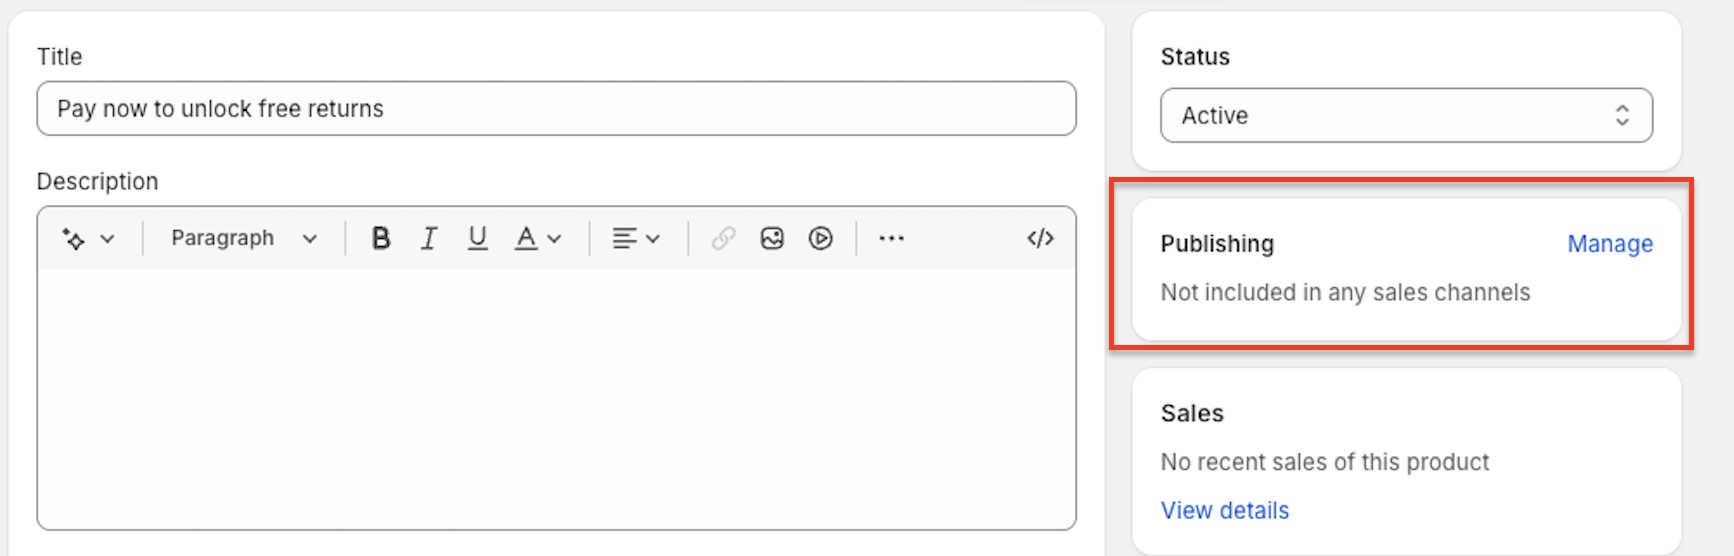
Select Online Store as a sales channel, then click Done.
Test the cart
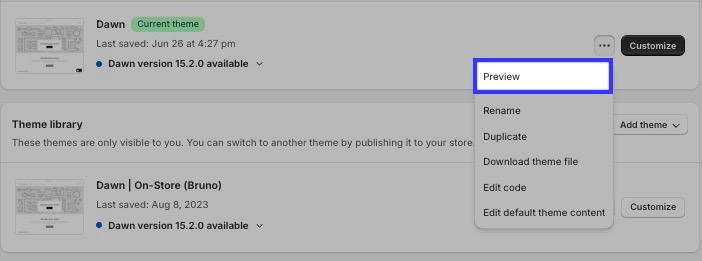
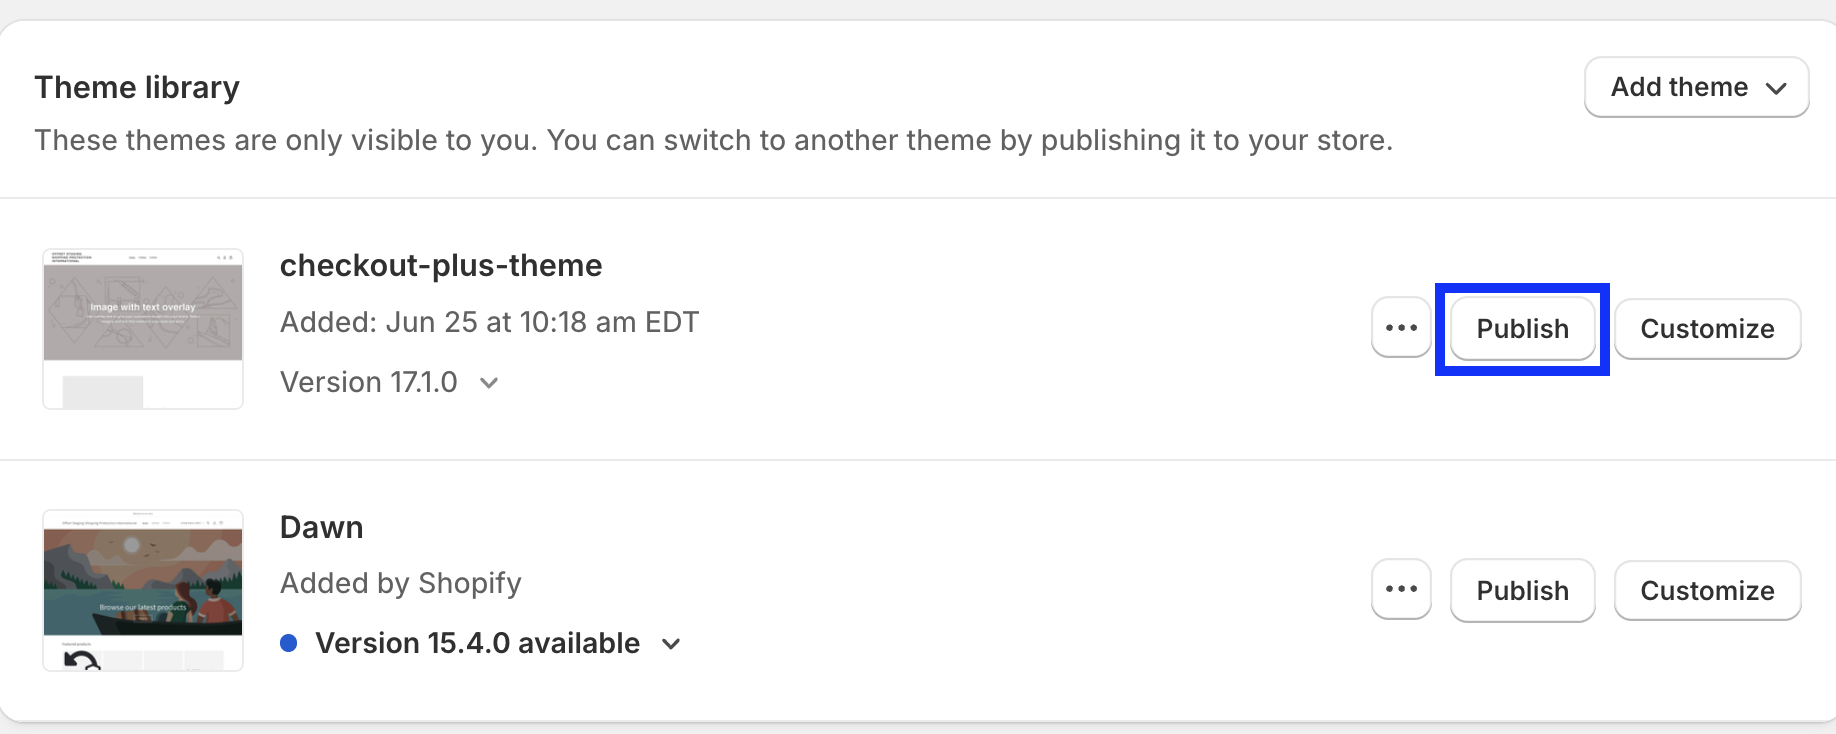
Navigate to Sales channels > Online Store > Themes.
Preview the theme by clicking on the ellipse next to your theme where the Checkout+ product was added.
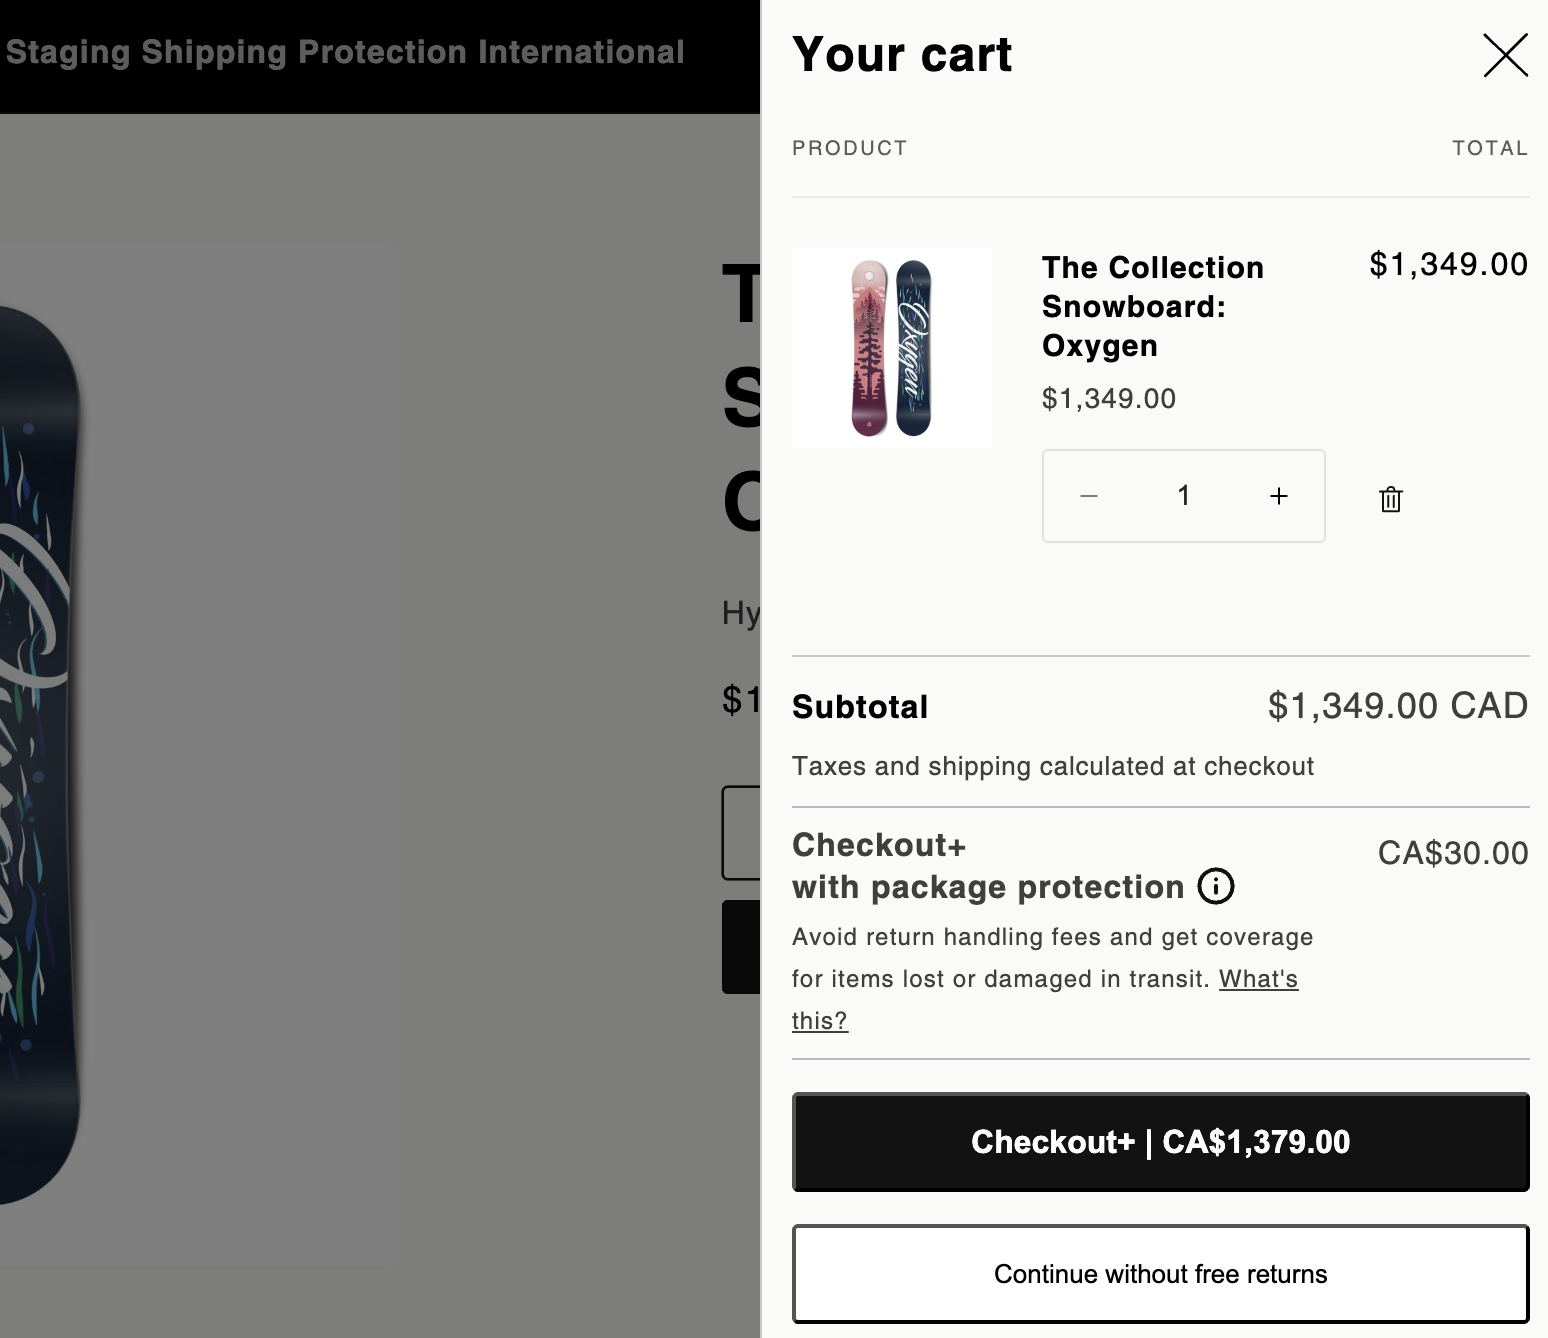
While in preview mode, add a product to the cart, then open the cart.
Confirm that both the Checkout+ (with its information section) and Continue without free returns options are visible.
The below steps (5-6) are for Shopify Plus merchants only.
Click Checkout+, then confirm on the checkout page that Pay now to unlock free returns is displayed.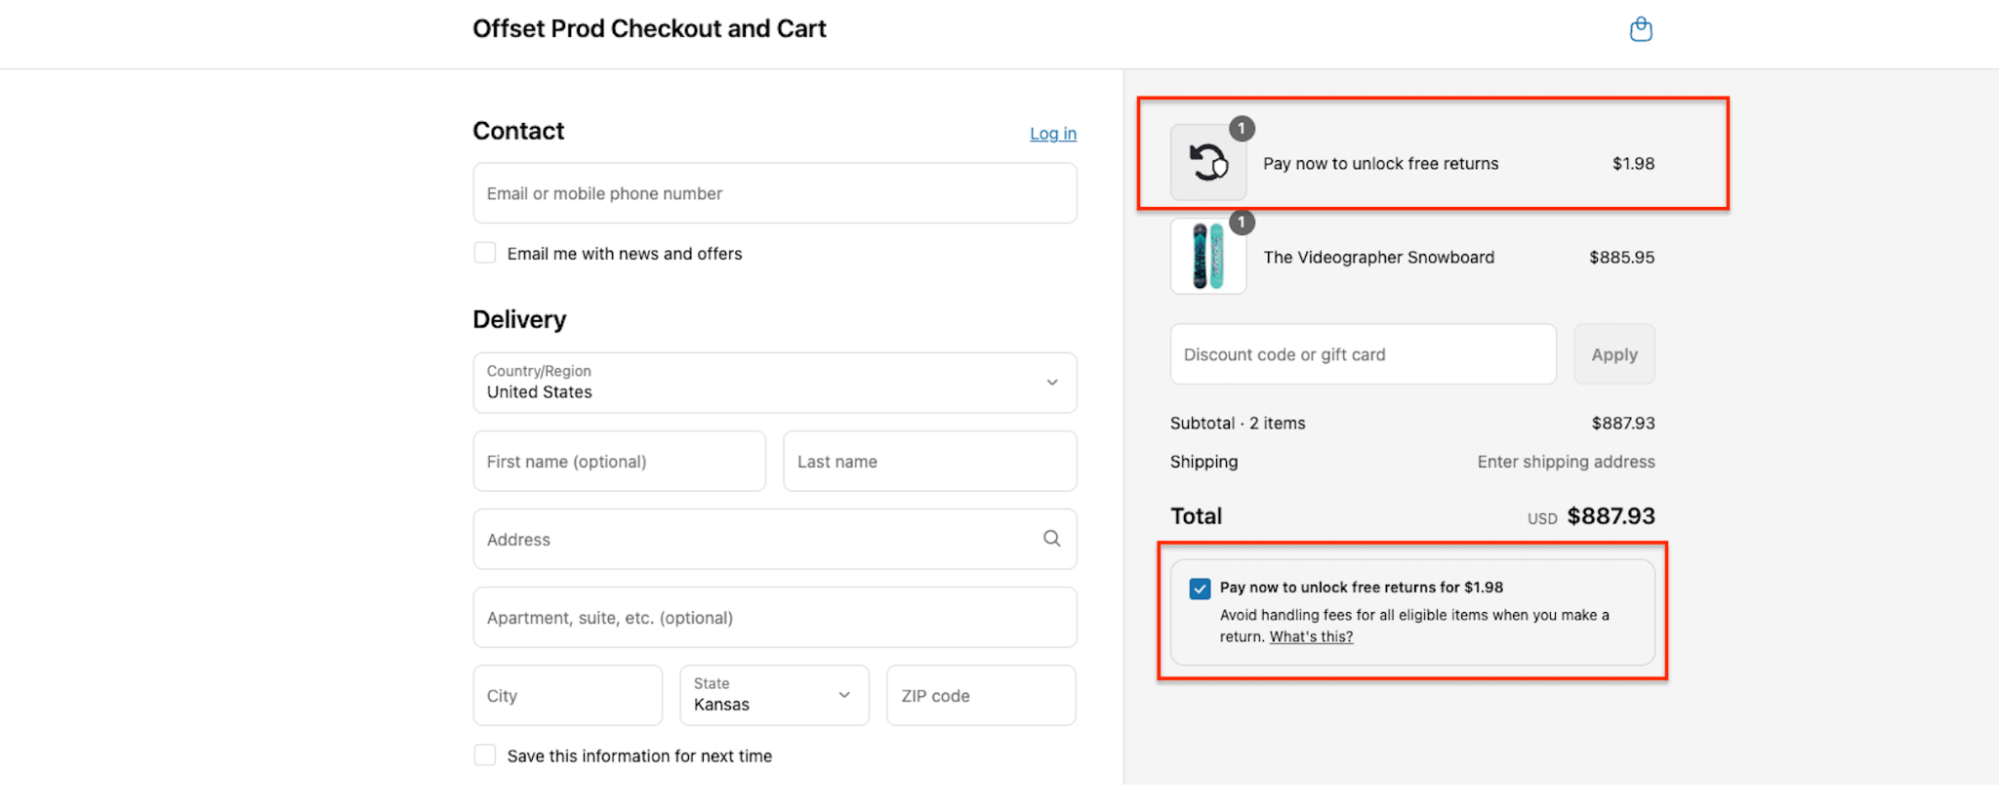
Test the opt-out/opt-in functionality by unchecking the box next to Pay now to unlock free returns to remove it from the order. Check the box again to add it back to the order.
Test the return flow
Before enabling Checkout+, test the return flow to ensure that everything is working properly.
Create a test order by following the instructions in Building a Test Order in Shopify.
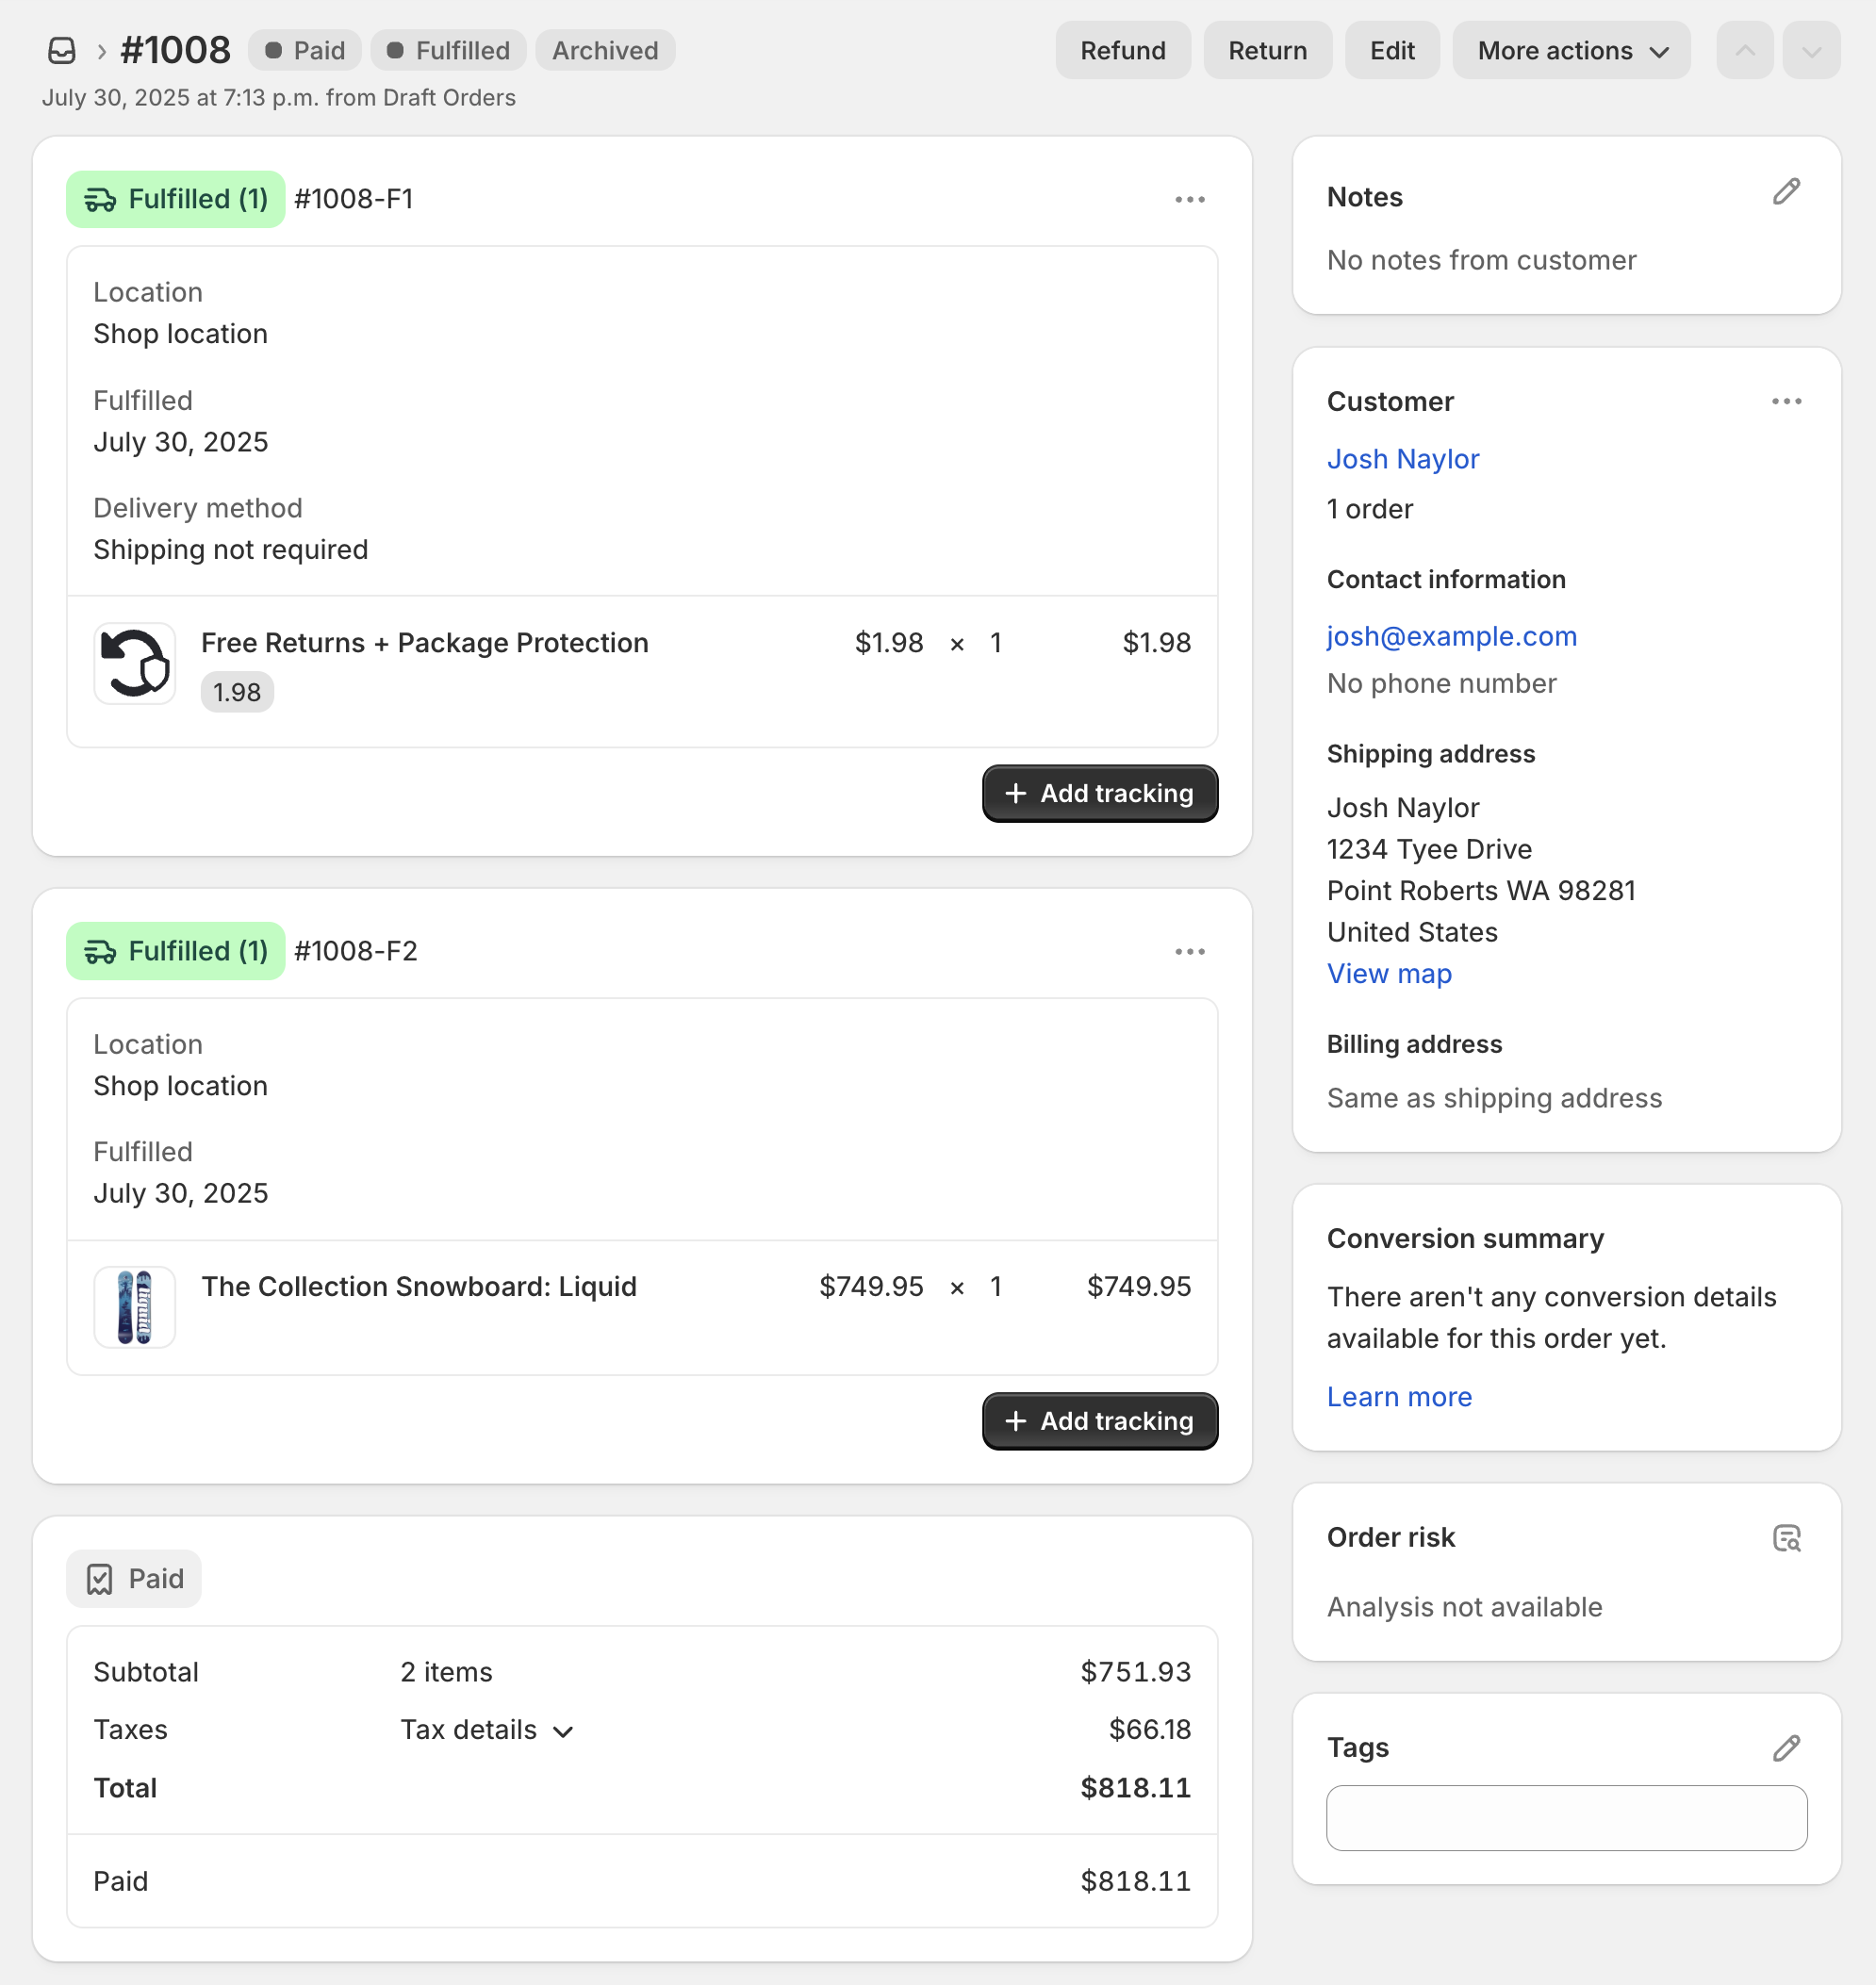
Add the Checkout+ (or "Pay now to unlock free returns") item to the order, then add a second product to the order.

Set customer information, change the order status to Paid, mark the Order as Fulfilled, and note the order number.
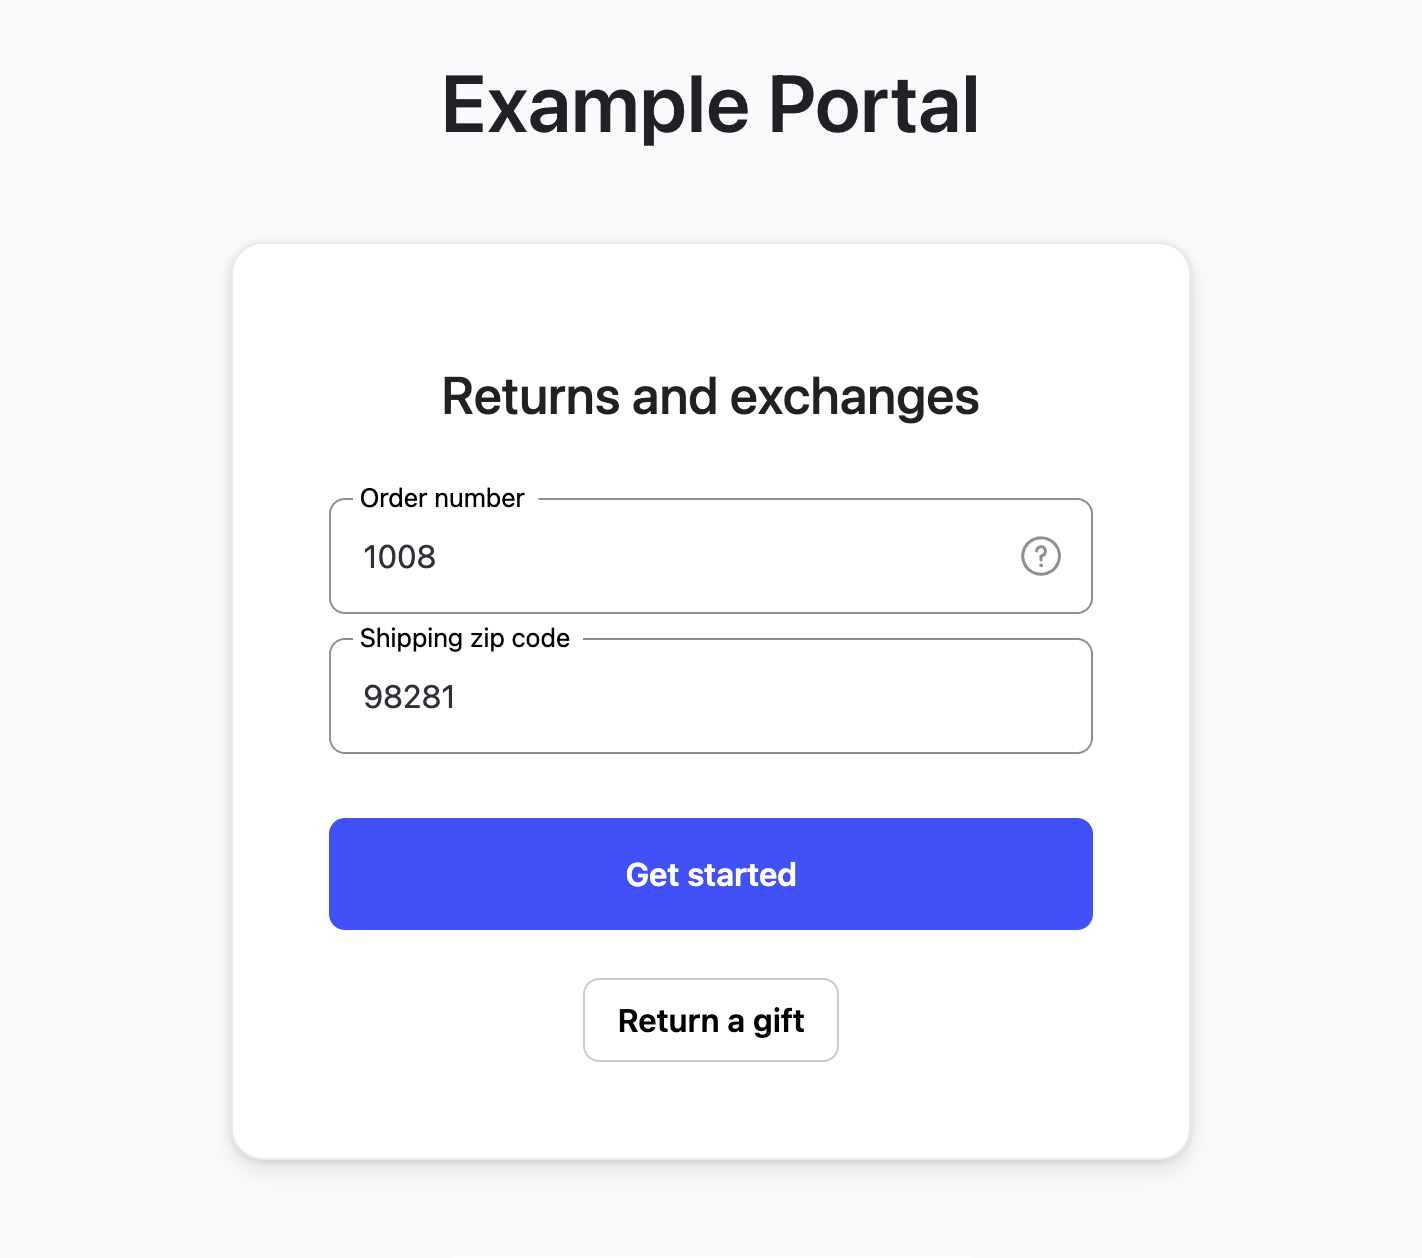
Navigate to the merchant's shopper return portal, and initiate a return.
Enter the order number and the associated customer's zip code or email address, then click Get Started.
Choose a return reason for the item and proceed through the return process.
Confirm that a message indicating coverage for a free return is displayed, confirming Checkout+ functionality in the return flow.
Add Checkout+ language to your Return Policy
As part of the Checkout+ program, your return policy and website should accurately reflect how your customers can perform returns while “Checkout+” is enabled. Below is a template example of how you can communicate Checkout+ within your return policy.
However, you have the ultimate responsibility for ensuring that your website and related websites, are truthful and accurate and advise customers if there are any additional fees that apply to perform a return (such as restocking fees):
Products are eligible for exchange, store credit, or refund for up to [insert your return policy window] following the purchase date.
We offer you the option to unlock free return shipping later for the eligible items in your order by paying a small returns fee at the time of purchase. If you choose to pay this fee during purchase, there is no additional charge for shipping your item(s) back to us. If you choose not to pay this fee during your purchase, you may be subject to a higher shipping/handling fee later at the rates that we require on the date you ship your item(s) back to us for a return.
Please note that this service does not exempt your order from final sale or other store policies.
Note: The Checkout+ & handling fees may change from time to time based on factors including return rate, label rate, and Checkout+ purchase item adoption. As a result, you may wish to not include these exact prices in your return policy.
Go live
Before going live, make sure the Checkout+ product is set to unlisted.
If everything works as expected during testing and the product is Unlisted, then you're free to go live with Checkout+!
To go live, publish the theme where the Checkout+ product has been added.
Please reach out to support@loopreturns.com with any additional questions.