
Analytics 2.0: Exports, Alerts and Filters
OVERVIEW
This article covers how to export analytics and report data, set up custom alerts, and create filtered views for dashboards or reports.
Use the menu on the left to quickly navigate this article.
Export data
Hover over the top right of the data table object within the report until the three dot icon appears. Click Export from the menu list and select an export format. Data can be exported as a slide deck (PDF or PPTX) or as plain data (formatted XLSX, formatted CSV, or raw CSV).
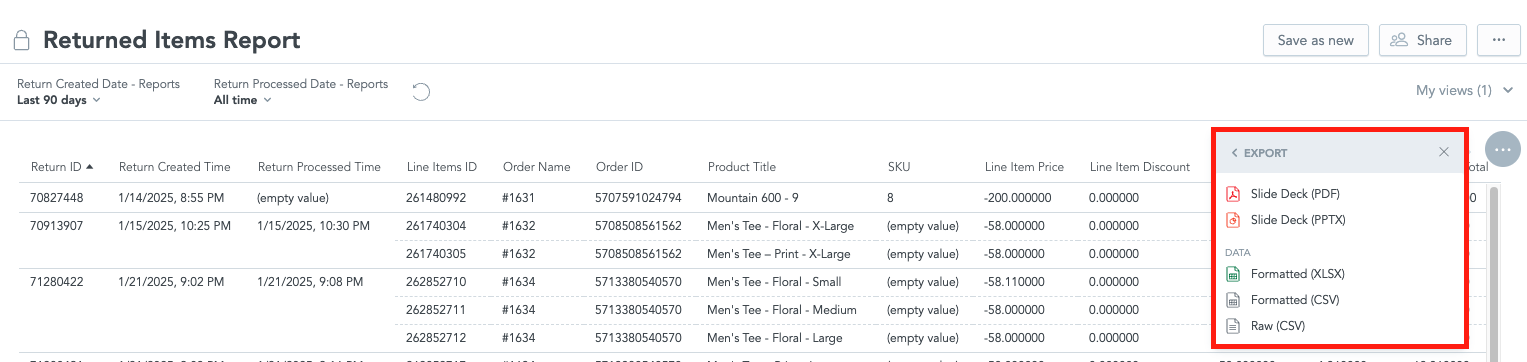
When the Formatted (XLSX) option is selected, a pop-up will appear prompting you to choose whether or not to keep attribute cells merged. If this option is not selected, attribute cells will not be merged, and the output will display repeated line item values (for example, the same return ID appearing on multiple rows for different items). This option only applies to Formatted (XLSX).
Note: All rows will within the output will be automatically exported.

A blue Export in progress message will appear on screen. When the export is complete, this message will change to green and read Export successful. The report will then automatically will be downloaded and can be accessed from the Downloads menu in the merchant's web browser.
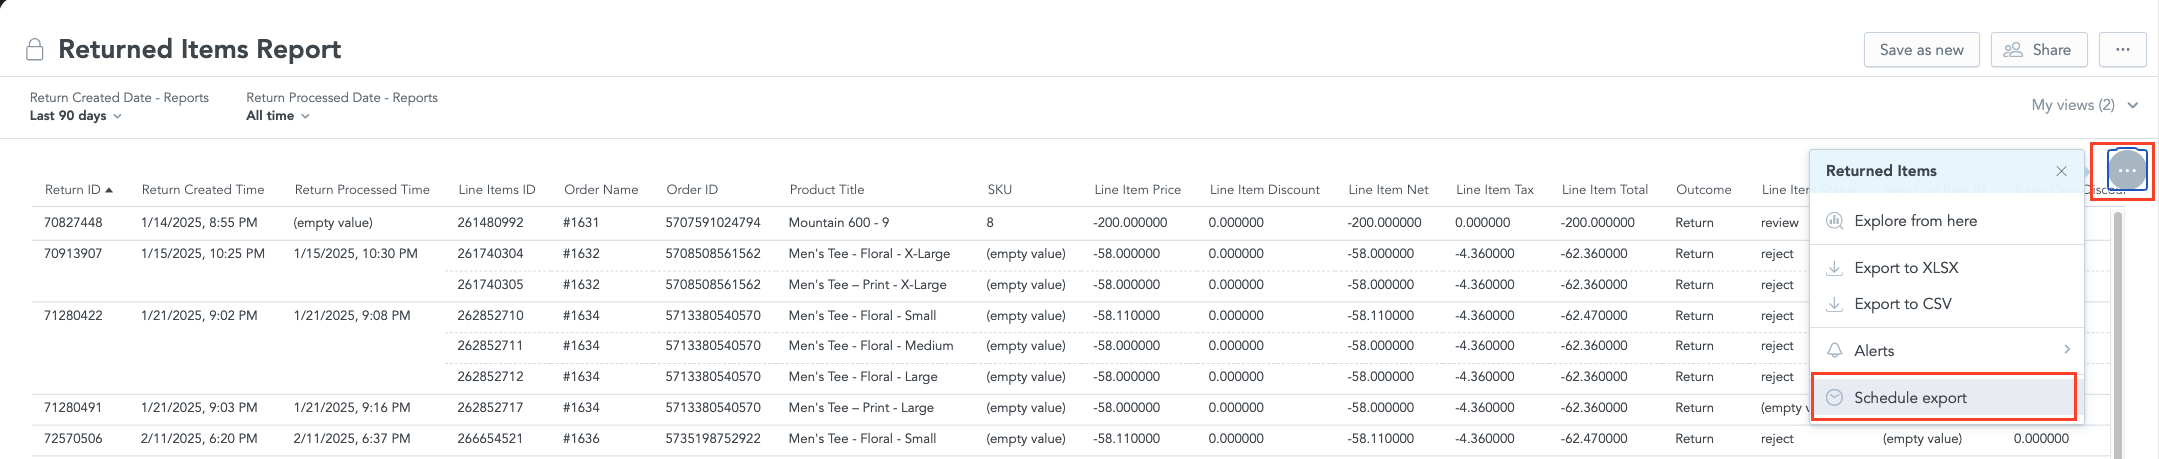
Schedule Exports
Automate manual report pulls to gain back time and schedule report delivery to receive important content automatically.
Hover over the top right of the data table object within the report until the three dot icon appears. Click Export from the menu list and select an export format. Data can be exported as a slide deck (PDF or PPTX) or as plain data (formatted XLSX, formatted CSV, or raw CSV).
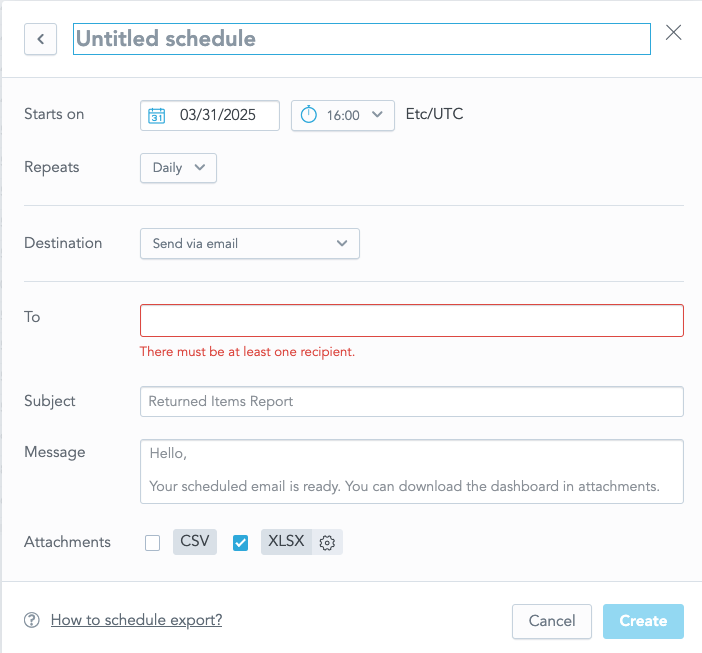
Set the title, start date, frequency, email recipients, email content and attachment(s) type.
Start Date: when a certain day of the week is selected, this will dynamically set the weekly and monthly options to be on the same day and time of month (for example, monthly on the first Monday of the month).
Frequency: pre-set to daily. Loop recommend using this as the most granular time setting, as data can take sometimes 6-8 hours to refresh.
Destination: currently, only email is supported.
Email Recipients: the recipient list will pre-populate with other users in the merchant's workspace. In order for a user to show as an available user in the workspace, your team member must have access the analytics page. External or unknown recipients are not currently supported.
To edit or delete an existing schedule, navigate to the report associated with the scheduled export, hover over the three dots icon on the data table (or top right dashboard menu icon), and select Show schedules. From there, click into any schedule to edit it or hover over the schedule name to delete it using the trash icon.
Set up Custom Alerts
Custom alerts allow merchants to automate the process of monitoring business-critical metrics. When hovering over a visualization, a three-dot icon appears in the upper right corner with an Alerts option. This feature allows merchants to set up notifications that will alert select users when a given metric reaches a certain threshold.
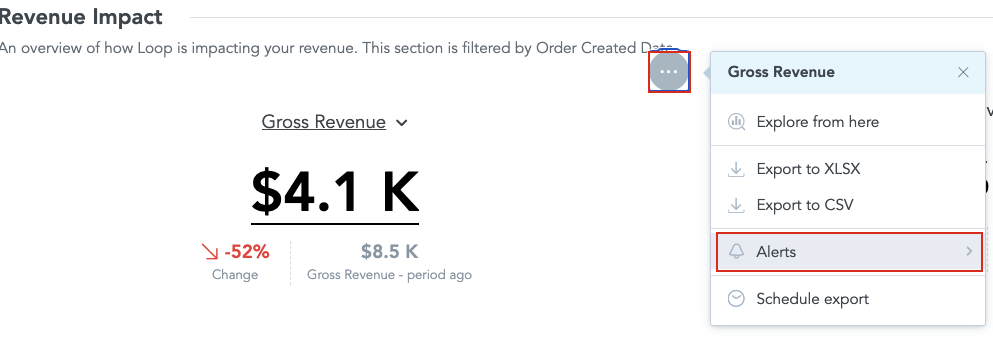
Once selected, a Create Alert dialog appears with the respective metric pre-populated. In some visualizations with multiple metrics, merchants can select which metric they want to receive alerts about.
When creating an alert, first select the conditions can also be set as to when the alert should be triggered and the email recipients of the alert. The alert should also be given a descriptive name.
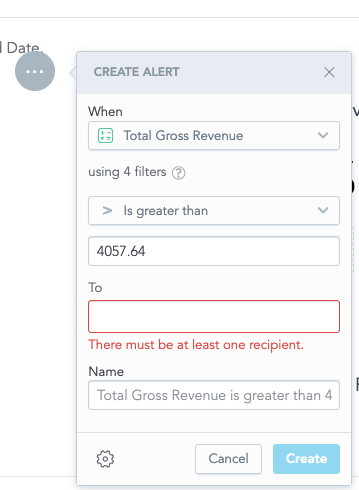
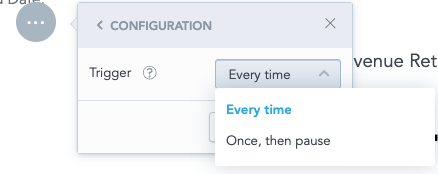
Click the gear icon on the lower left to further configure how often notifications are sent out.
Alerts can be edited, paused or deleted at any time by either navigating to the upper right of the dashboard to the More actions box and clicking Show alerts or navigating to the visualization associated with the alert.
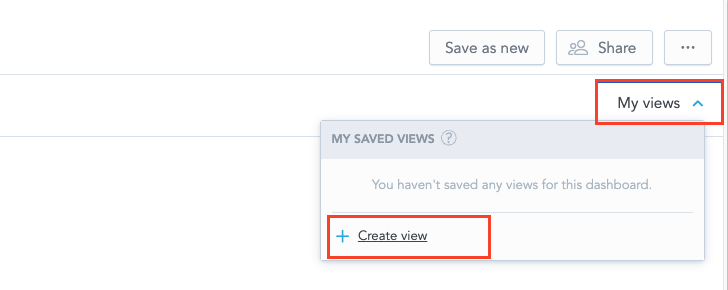
Create Filtered Views
Have a specific view of a dashboard or report that needs frequent revisiting? Save time by setting up a filtered view that’s quickly accessible whenever it's needed.
To set up a saved view:
First, set the filter preferences at the top of the report under the title.
Click the My Views dropdown underneath the buttons in the upper right corner of the report. Select Create View to open the creation dialog.
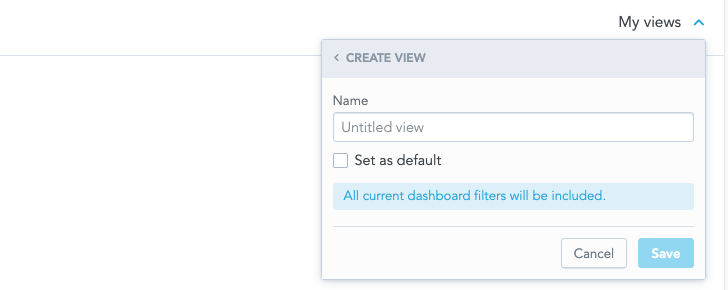
Create a name for the view. To set the report to open up to this filtered view by default, check the Set as default option. Click Save when complete.
Access all saved views or create a new view by navigating to My Views. To remove the default option applied on a view, hover over the view that is marked with (default) and click Unset as default. The view can also be deleted entirely by clicking the trash icon.
Please reach out to support@loopreturns.com with any additional questions.