
Destinations
OVERVIEW
If available on your Loop plan, multiple destinations gives merchants the ability to add and manage multiple warehouse locations or donation center. When a customer initiates a return, Loop can:
Rate shop between all available locations to send the return to the cheapest destination
Send specific products back to specific destinations - especially useful for drop-shipping businesses or, when utilizing a donation center for certain products or eligible returns
In addition to providing more flexibility with where returns go, this functionality allows merchants to add global warehouse locations that can be tied to location-based return policies. This allows merchants to accept returns in any country where they have a warehouse.
Updating the default destination
By default, when Loop is first installed, the Shopify store's business address will populate as the default destination in the Loop admin. Loop suggests that merchants do the following:
Go to the Loop admin > Returns management > Shipping > Destinations to confirm that this address is the one where physical returns should be routed.
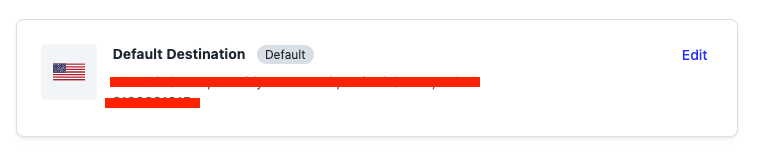
Update the name of the destination from 'Default Destination' to the brand name or the warehouse name; this information pulls through to the return shipping label and will be visible to customers.
Using Destinations: Rate shopping
Most carriers leverage "zones" to price shipping labels. Using the sender's ZIP code as a start point, carriers look at zones of postal codes to figure out how much a shipping label should be. Here's an example of what USPS shipping zones look like for a package coming from Southern California.
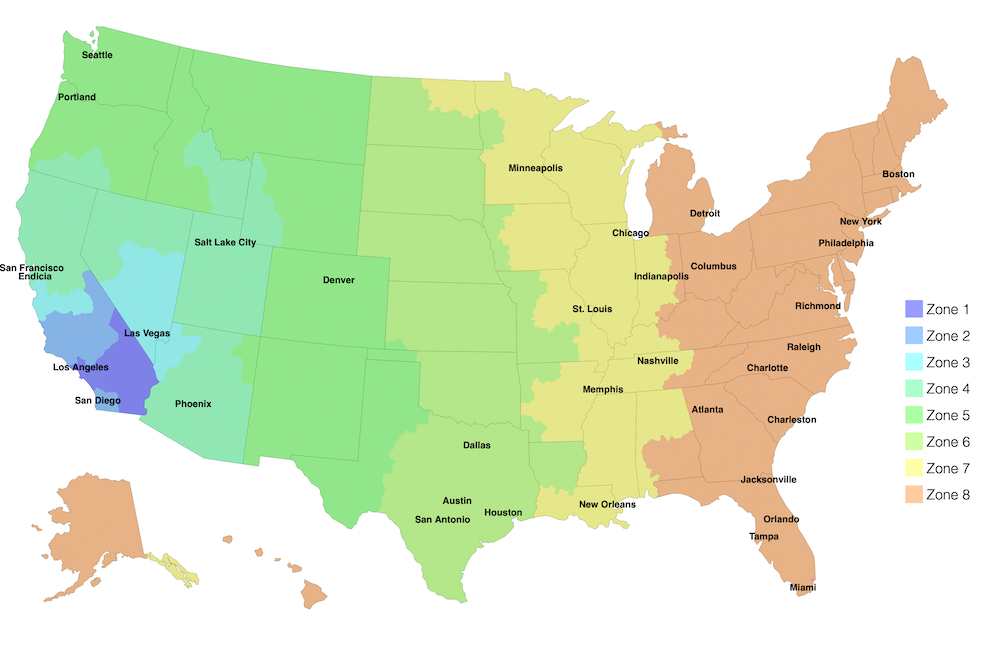
By having multiple locations across the country, more of your return shipments will come from cheaper zones, saving you money on return shipping labels.
If multiple destinations are available on your plan, Loop allows merchants to add any destinations where they can accept returns. Loop's default functionality is to rate shop between all available return destinations any time a customer submits a return. Loop will provide the customer with a return label to the cheapest destination based on their location. Using destinations to rate shop between multiple locations requires no additional configuration. Add your destinations and Loop will take care of the rest.
What does this mean for you? This feature means you save on shipping costs, the customer gets their outcome faster, and we're all using less energy to get packages where they need to go.
Using Destinations: Product rules
As merchants scale, they need to be more sophisticated with their fulfillment model and how they handle returns. Drop-shippers or merchants with multiple destinations dedicated to fulfilling specific products need to be able to direct those products back to specific destinations.
Drop-shippers, for example, ship products directly from their partner vendors' warehouses. When a customer wants to return those products, the most efficient approach is to send them back to the vendor where they can be restocked.
When adding new destinations, merchants can now create rules associated with those locations to ensure that returned products are going to the right place. Loop can also handle situations where the customer is returning multiple products that each have separate end destinations.
What does this mean for you? This means no extra shipping to get returned products to the right place, less work for your warehouse teams, and lower costs.
Note: Due to the way Loop receives label rates from Fedex SmartPost - this feature does not work with Fedex SmartPost.
Product rules: The customer experience
When merchants add multiple destinations with product rules, customers returning multiple products that need to go to separate places will see a slightly different return process. A few notable changes:
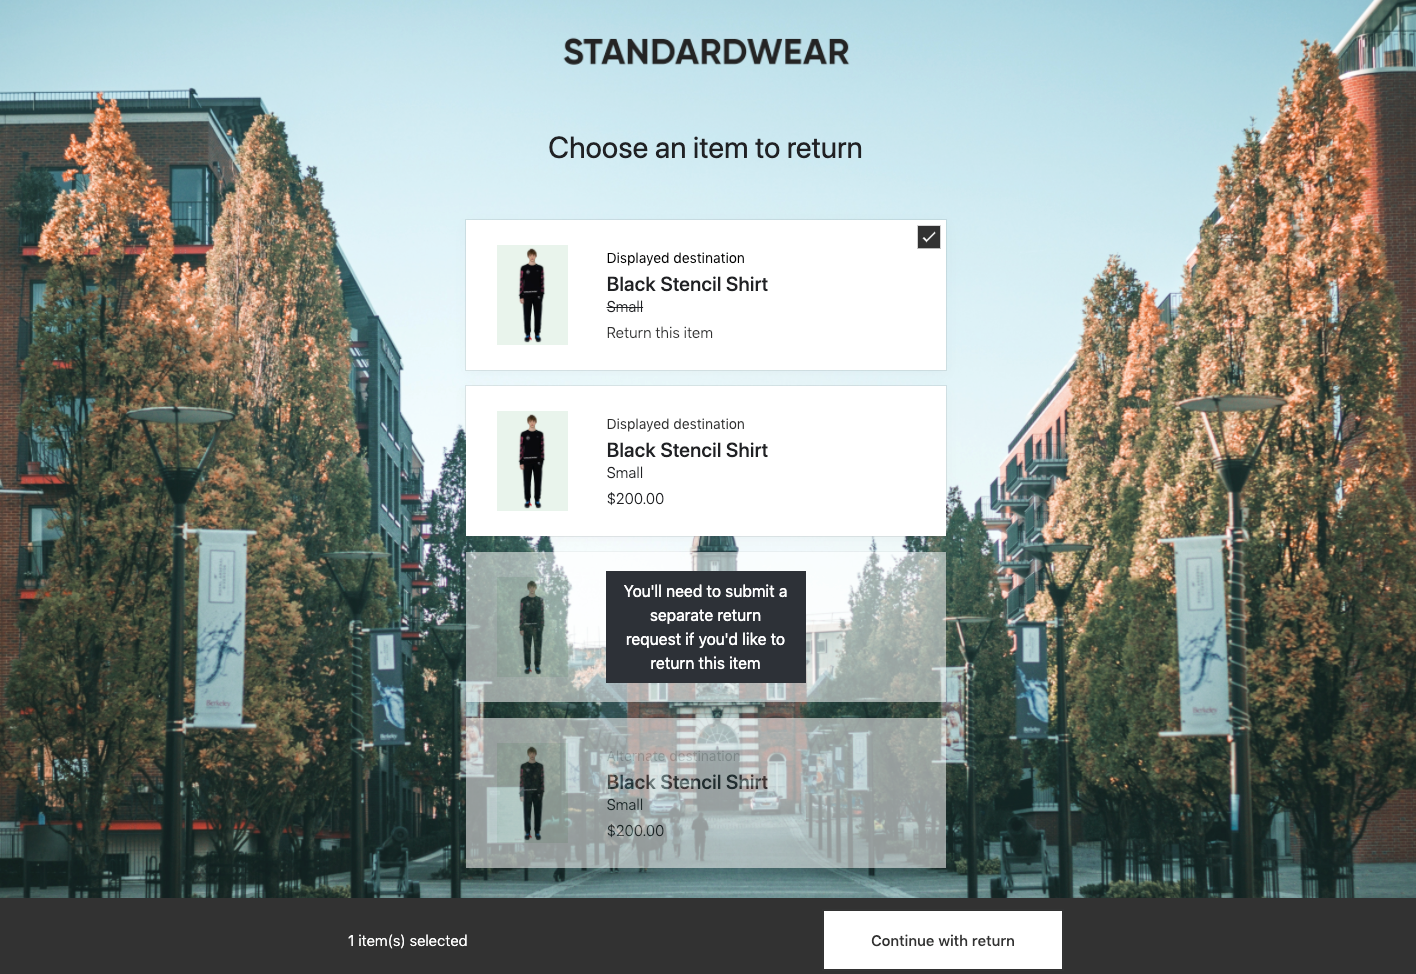
If "Display this name to customer in the return portal" is checked when adding a destination, customers will see the name of the Vendor (as listed in Shopify) on each item in their order when first looking up their order.
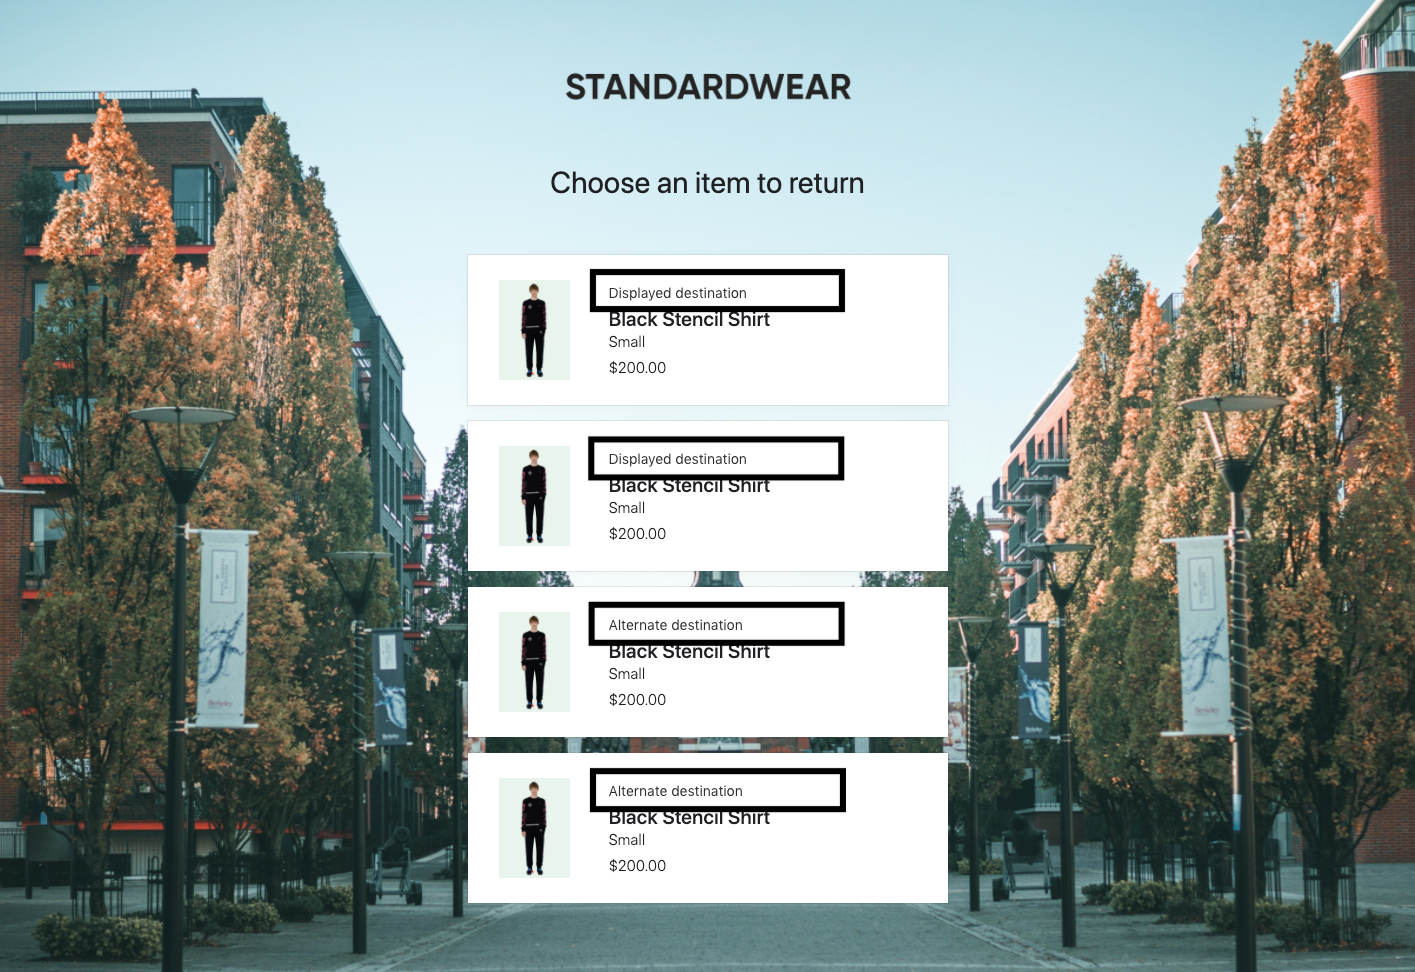
If "Enforce product rules" is turned on, products linked to other destinations will grey out when a customer selects a product to return to a certain destination. This is to prevent the customer from returning multiple products in the same return, which will send those products to the default destination instead.
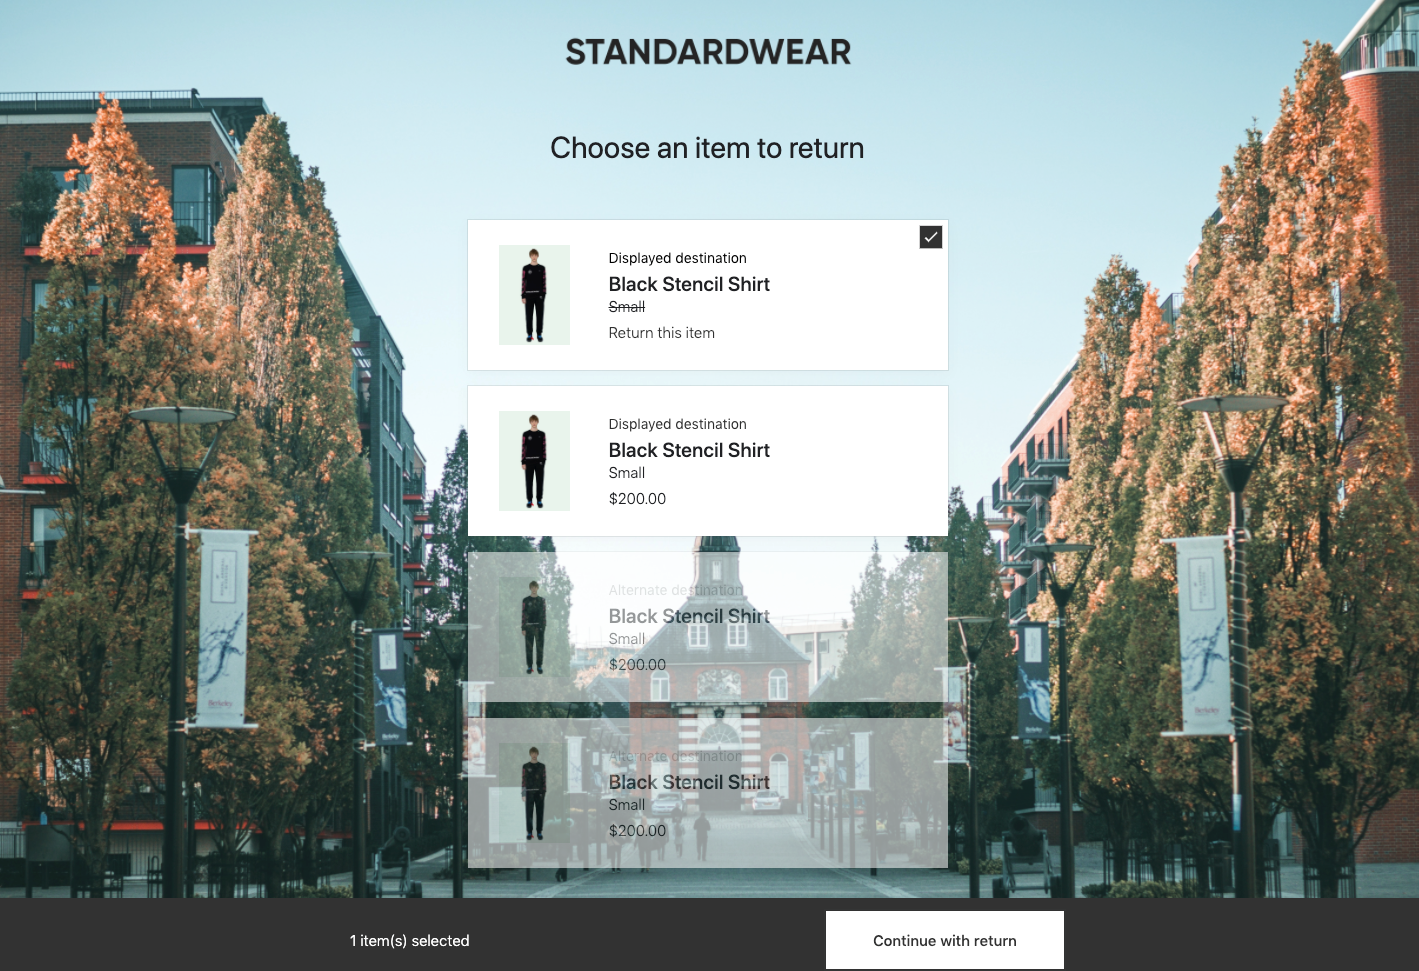
When hovering over the greyed out products on their order, Loop will show a tooltip to explain why they have been greyed out. This copy is editable in the Destinations screen, if "Enforce product rules" is turned on.
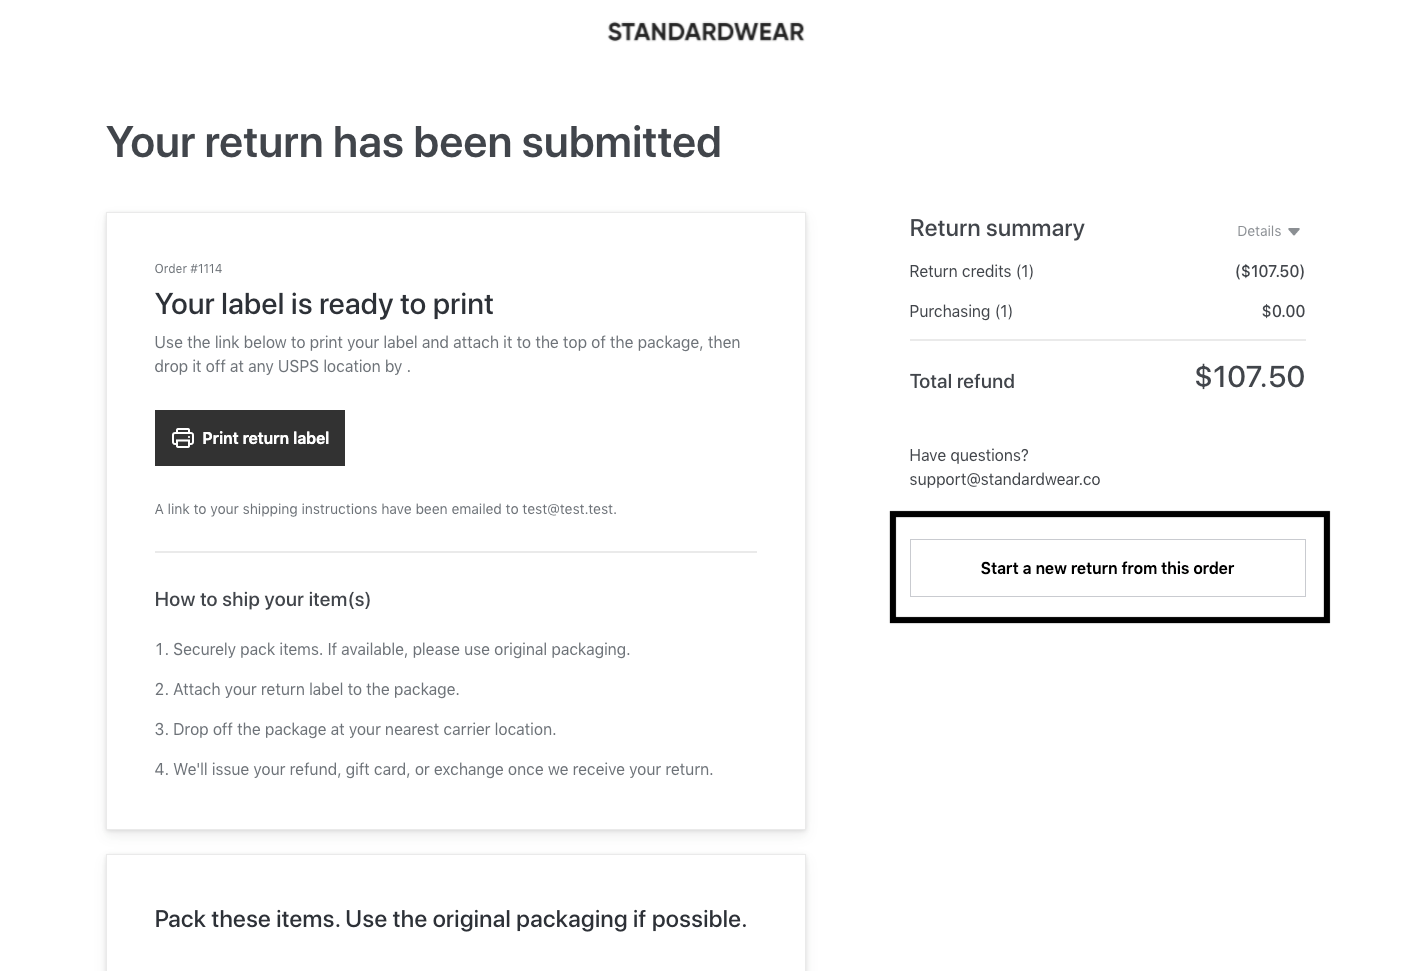
When the return for all items to this destination is complete, customers will have the ability to easily start a new return for any products tied to other destinations. This can be done right from the Return Status Page.
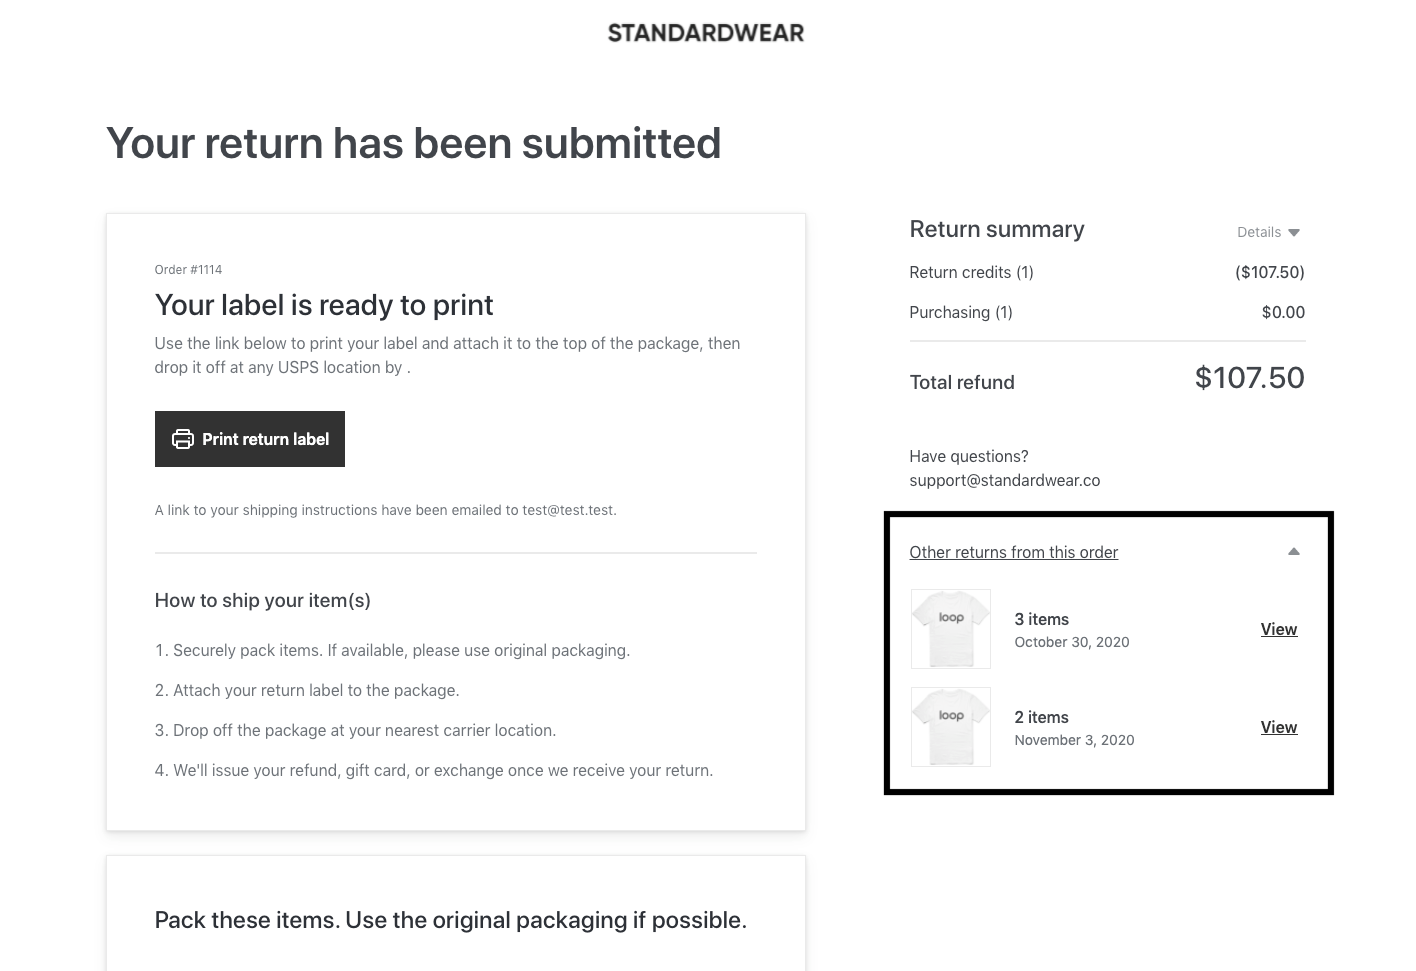
For customers that are submitting multiple returns on the same order - whether due to destination rules or to normal customer behavior - Loop will list all other returns associated with a given order on the Return Status Page. Customers can pull up any other returns they may need information or a label for from this page.
Using Destinations: Workflows
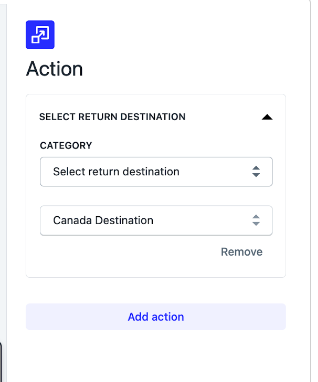
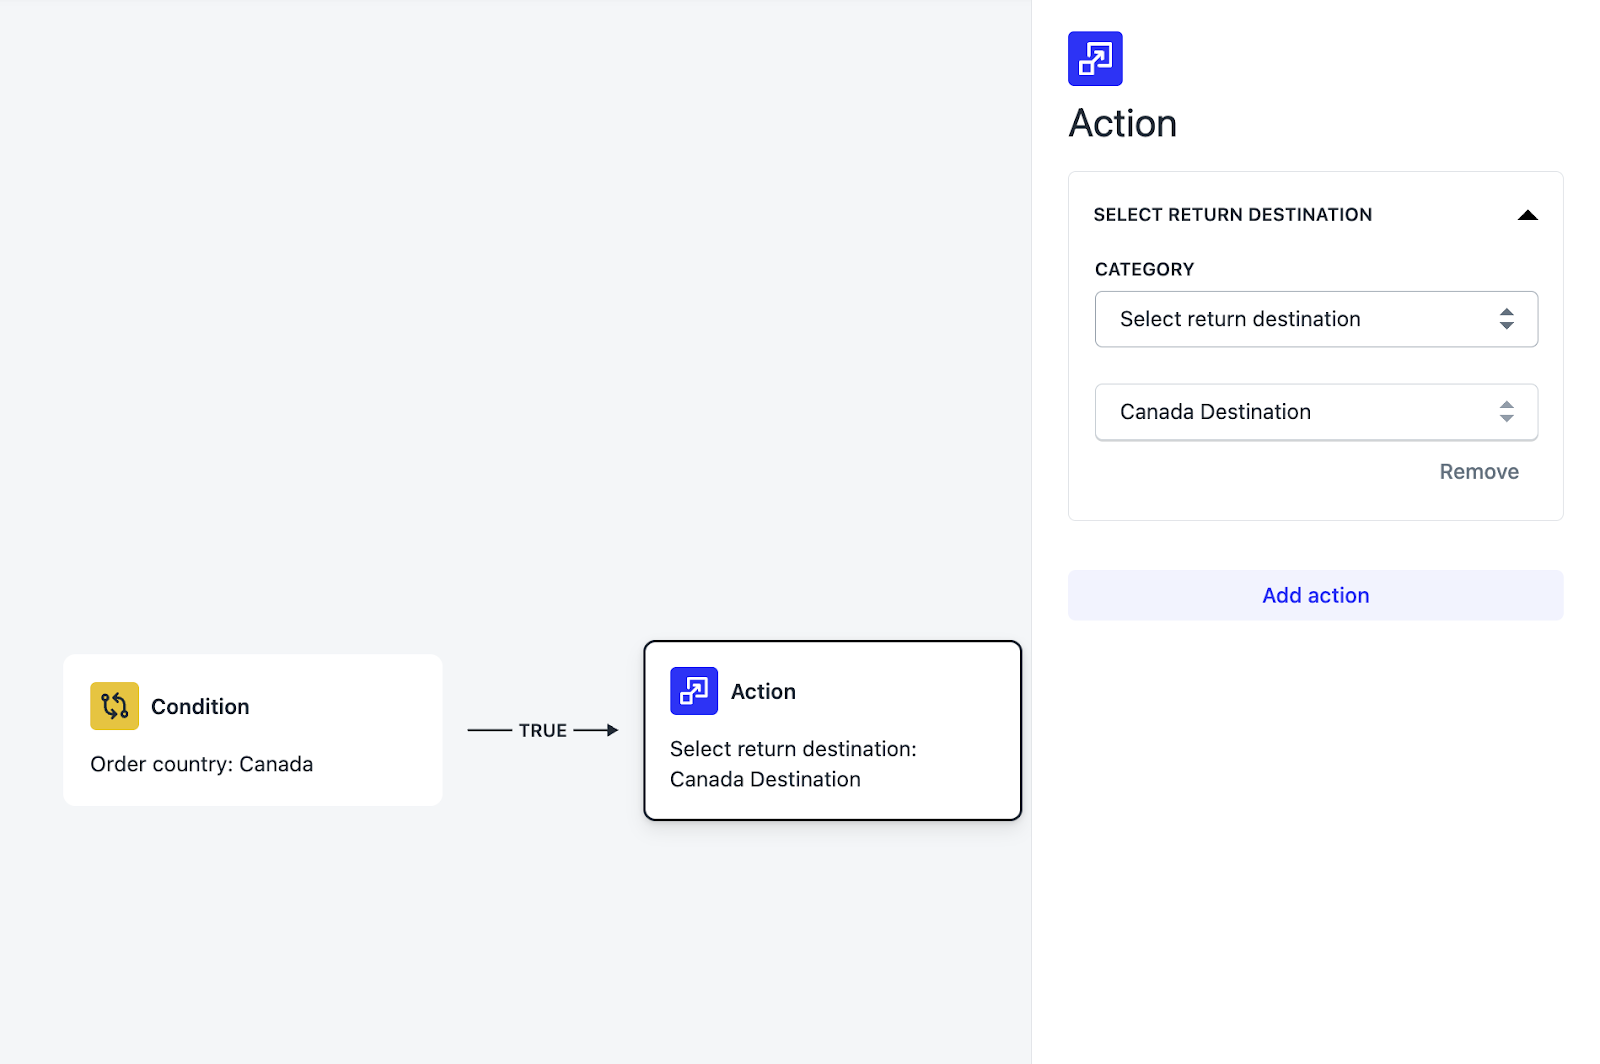
"Select Return Destination" is a new Workflow action that allows merchants to fine-tune the destination of returned items based on any Workflow conditions.
While Product Rules have the power to route items based on Product Type, Vendor, and Product ID, the Select Return Destination Workflow can route returns based on any Workflow condition. This provides a number of new use cases for routing. For example, merchants can specify certain conditions for items to be routed to different destinations of their choice such as store or outlet locations, regional warehouses, resale partners, donation centers, or manufacturers.
The Select Return Destination Workflow does not force shoppers to submit different returns when items in a return have multiple destinations like Product Rules does. It will route the full return to the specified destination if the Workflow condition is met. We recommend using Product Rules if routing solely based on Product Type, Vendor, or Product ID. Select Return Destination is best to use for other routing conditions needed. Merchants can also choose to pair any Workflow conditions with condition “only 1 item in return” to have returns with differing destinations revert to the default destination.
What does this mean for you? This means no extra shipping to get returned products to the right place, less work for your warehouse teams, and lower costs.
Adding new destinations
Adding a new destination is easy. Whether you plan to use them to have Loop rate shop labels between multiple destinations, configure international warehouses, or to create some destination product rules, you'll start by doing the same thing.
Destinations video walkthrough
Setting up rate shopping
In the Loop Admin, go to Returns management > Shipping > Destinations.
Click Add Destination.
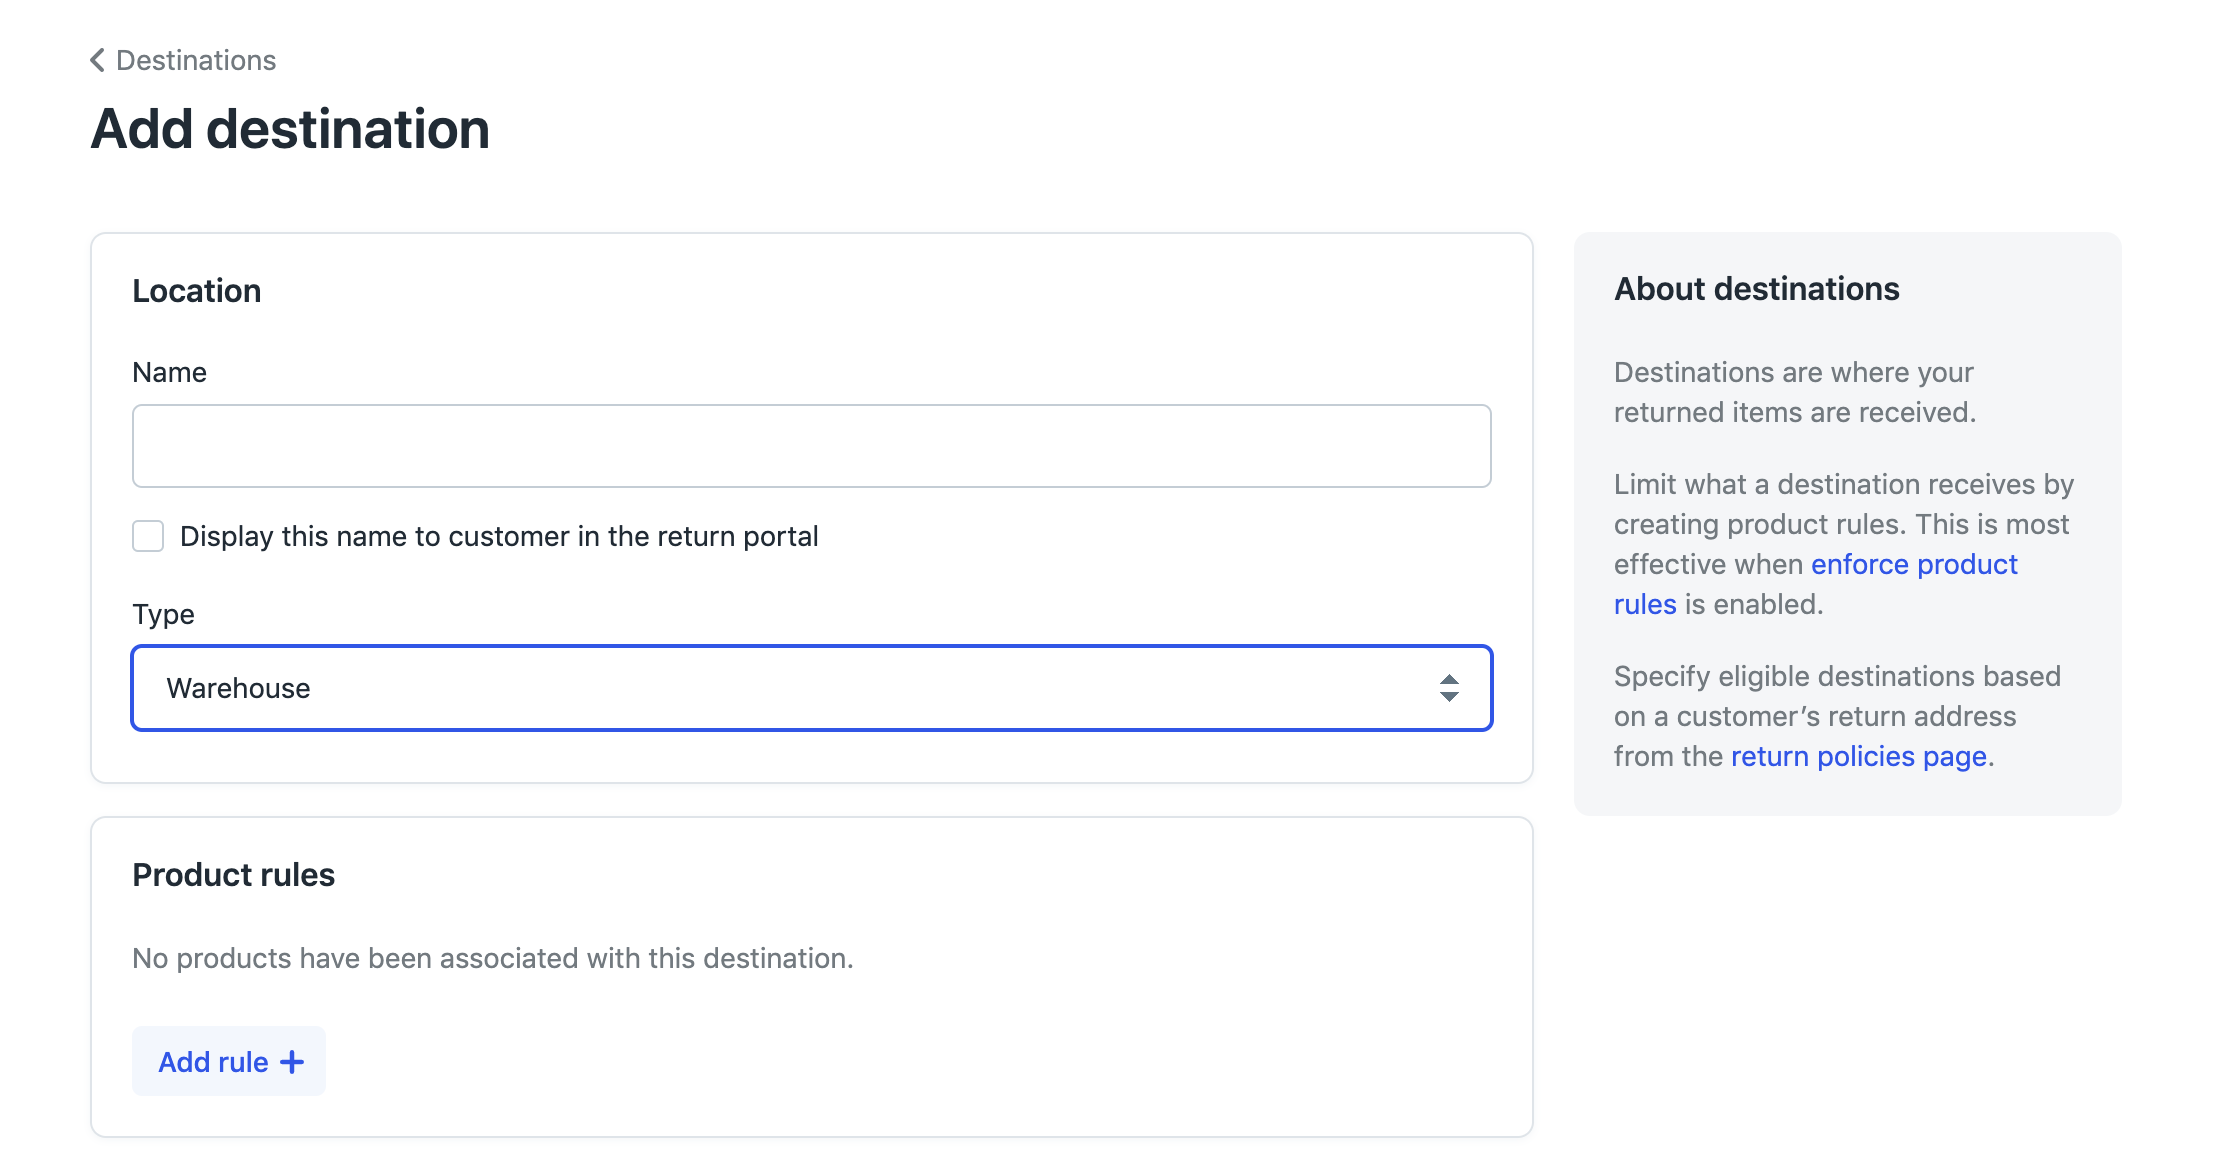
Add a name for the location. This name will appear on the return label. If the box "Display this name to customer in return portal" is checked, customers will see where their products are going as they go through the return processed.
Tip: If you are a drop-shipping merchant with multiple vendors that customers will send returns to, Loop recommends checking this box.Set the Destination Type to either warehouse or donation center (if you work with a partner for donating products in unsellable condition like LiquiDonate).
Note: The Destination Type can be either an additional warehouse or processing center, or a donation center for goods deemed unsellable.Add the address for the destination.
Note: Some 3PLs may require specific information to be included in the Apartment, Suite, etc and Company fields. The phone number is optional for merchants using USPS for return labels but is required for merchants using Fedex or UPS.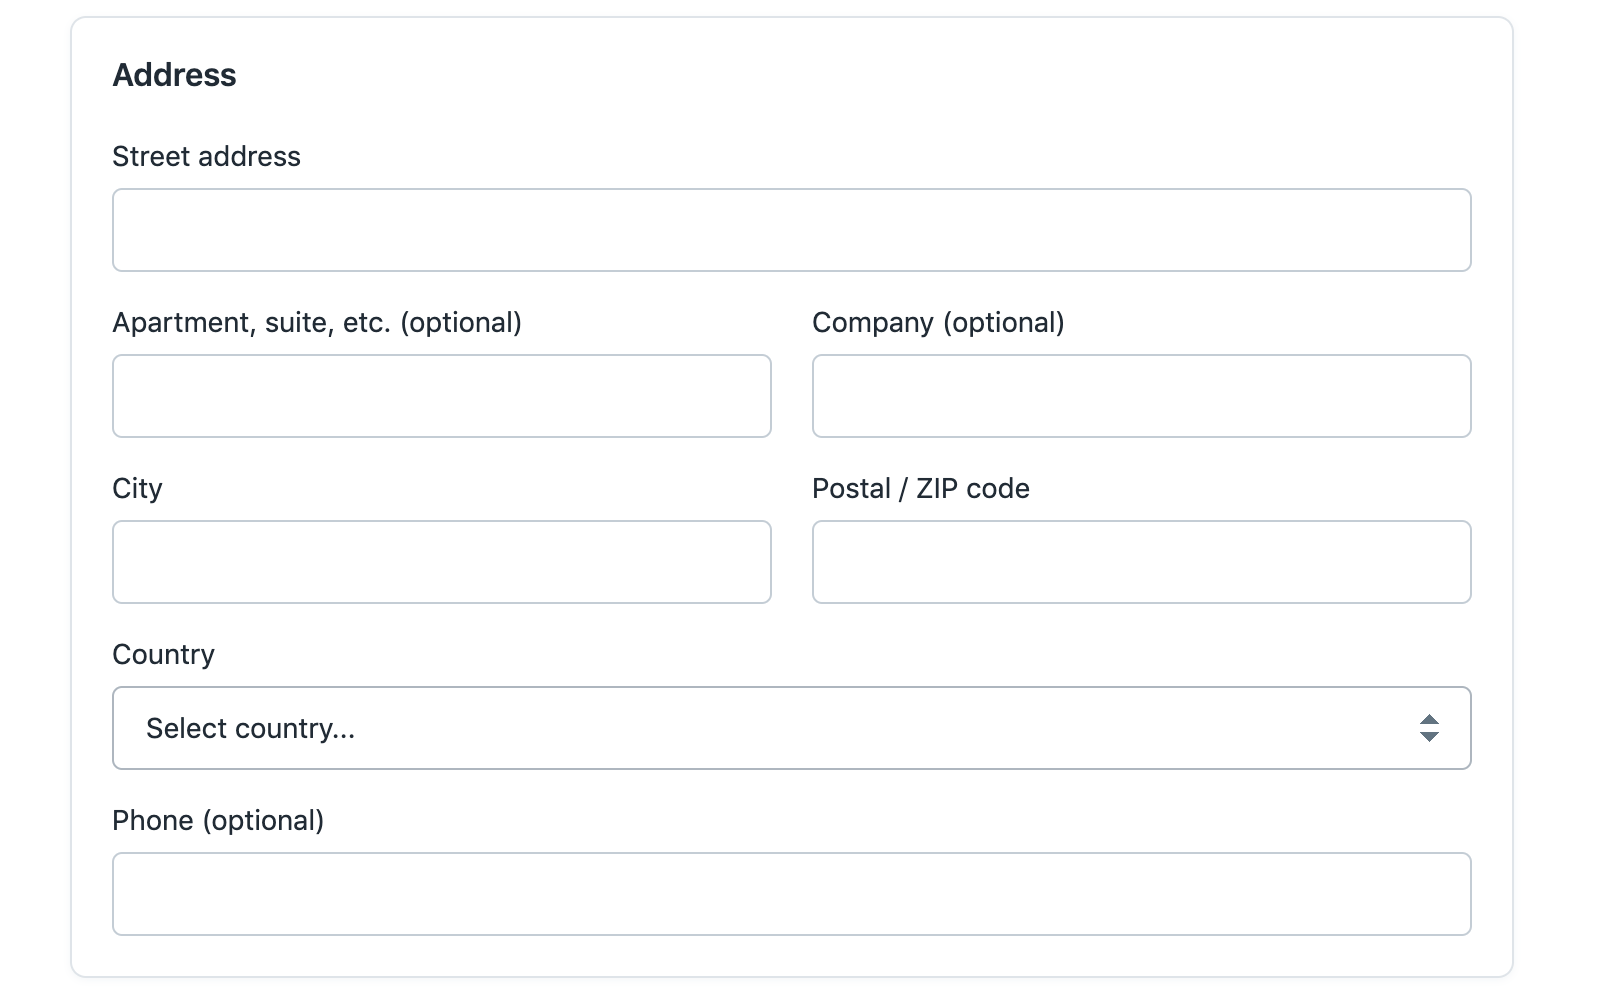
Hit Save.
Adding a destination to a return policy
Merchants must add the destination to the relevant return policy in order for Loop to begin shopping rates for that destination. To do this:
Go to the Loop admin > Policy settings > Return policies and click on the policy to which you'd like to add this destination.
Note: Please make note that destinations added must be of the same country of origin as the countries entered in the Returning From unless you have Loop's Cross-Border shipping functionality setup.
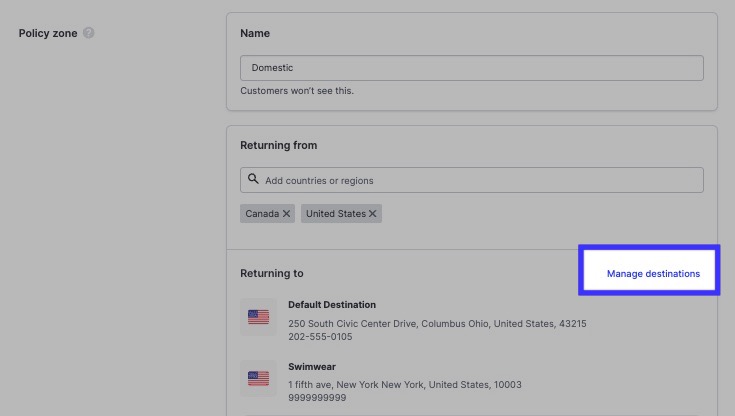
Under the Policy Zone, click Manage destinations under the "Returning to" heading.
Add the new destination(s) from the drop-down, then click Save.
Visit Loop's Return Policy Settings article for more information on location-based return policies.
Note: If you are only setting up one destination, or are setting up multiple for Loop to rate shop between without rules for where specific products need to go, you are all done at this step. Feel free to add any more destinations you need from here.
Setting Up Product Rules
Product rules video walkthrough
Product rules setup
If you need specific products to go back to specific places, follow these steps to create those rules:
We recommend activating Enforce product rules on the main Destinations page if using product rules. This ensures that customers will be able to easily create multiple returns in the case that they are returning products that need to go to separate places.
Note: If this is not turned on, any return containing products that need to go to different places will be sent to the default destination.Either edit an existing destination or create a new destination (as explained above) to pull up the destination configuration screen.
Click Add rule to begin building in product rules.
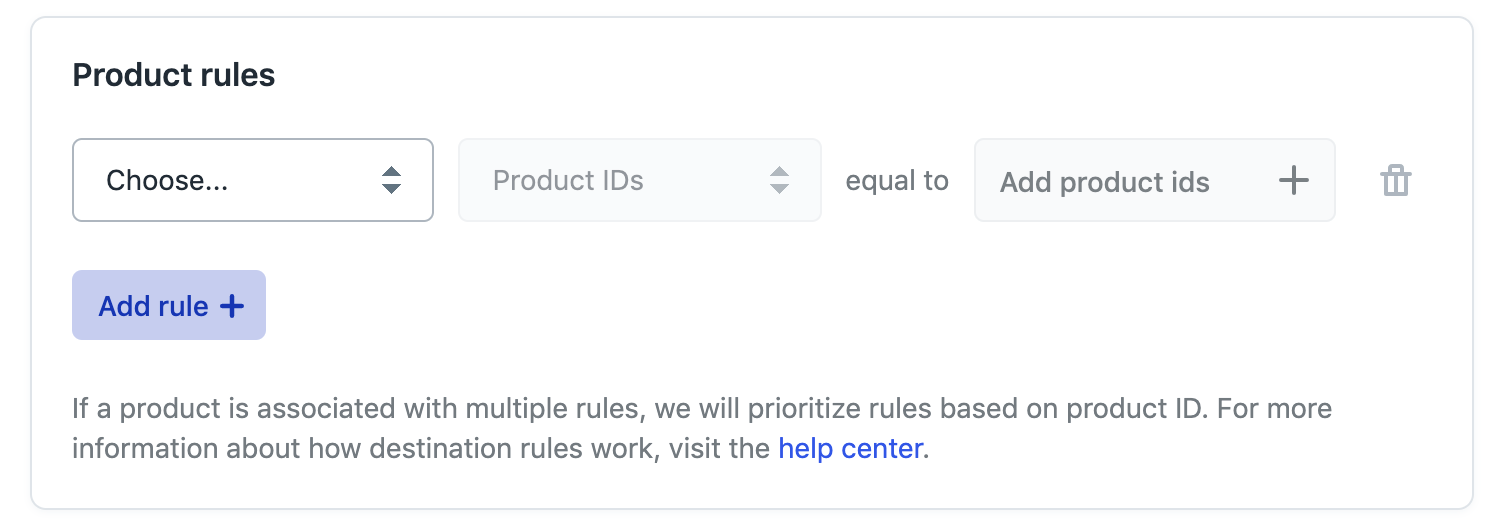
Set your receiving options in the box marked Choose. The options are:
Receive all. The products you designate must go to this destination, but this destination can also receive other products.
Do not receive. The products you designate cannot be sent to this destination.
Only receive. This destination must receive the products you designate, and only the products you designate. These products can not be routed to any other destinations. Only receive can not be combined with other rule types, though multiple Only receive rules (e.g. one for specific products, one for a vendor) can be created.
This will be the most common rule used for dropshipping merchants.Note: Receive all and Only receive are mutually exclusive. If a rule is created using one of these options, the other will be greyed out. Setting up conflicting rules across destinations (e.g. two destinations set to Only receive for the same product type) will cause that return to be routed to the default destination.
Pick your filter of choice. The options are:
Product Type. This is as configured in your Shopify site.
Vendor. Products can have a vendor associated with them in Shopify. This is common for dropshippers.
Product Tag. As configured in your Shopify site. This must match a tag applied to the desired product(s) exactly.
Product ID. Allows you to pick specific products in your catalog to follow this rule.
Important: If a product falls under multiple rules due to vendor or product type association, product tag, and product ID, Loop will prioritize, from highest priority to lowest priority: product ID, product tag, vendor, product type.
Add the products that correspond to the filter you chose in Step 5 above. Loop will pull in a list of items (products, product types, vendors) from Shopify for you to select from.
Click Save to complete setup.
Setting up Select Return Destination in Workflows
Destination rules can also be configured in our Workflows feature, which can support the ability to route returns based on customer, order, product, or return attributes. This gives you a little more flexibility than the legacy product rules functionality within destinations.
To setup the Select Return Destination workflow, follow these steps:
Navigate to the Workflows section of the Loop admin.
Click Create workflow and select the Conditional outcomes template.
For the Condition, choose from Product > Type, Vendor, or ID.
For the Action, choose Select Return Destination.
Select Publish to publish your workflow.
Adding or editing destinations with CSV
Some merchants need to update destinations and destination product rules fairly regularly. To make that process faster and easier, you can now import and export all of your destinations and related product rules via CSV.
To add destinations via CSV, do the following:
If you don't have any yet, add one or two destinations through the Loop admin dashboard, following the instructions above.
Export the file that contains your existing destinations.
Use the format of this document to add any new destinations.
Note: When adding a new destination, leave the "Destination ID" field blank; Loop will populate this automatically.
Import the new file.
Likewise, if you just need to edit an existing destination, export the file, make the necessary change, then import the new file.
Important:
Importing a new CSV will fully overwrite any existing data. Best practice is always to export what you already have, leave any destinations that need to stay the same alone, and just add any changes that need to be made.
When adding a new destination via CSV, leave the Destination ID field blank. Loop will populate this field for you.
Don't use any special characters (Ã,Ę,Ô; etc.) in the destinations. Our system can't read special characters, so you'll likely see this error message:

Using Destinations in location-based return policies
As you are setting up your return policy (or return policies, if you are working with multiple locations), you'll see that you have the ability to add the destinations you set up to the policies you're creating. As you add new destinations in the Destinations tab, they will become available to add to return policies as possible return destinations.
Multiple destinations can be applied to one return policy.
One destination can be added to multiple return policies, and therefore apply to multiple locations. Keep in mind that any destination associated with a policy in another country will not allow for label printing. Loop does not currently support cross-border shipping.
How destinations work with an International Lite return policy:
You can add a destination that is already linked to another policy to an International Lite policy.
Customers affected by an International Lite policy will be sending a package across borders, so they will not receive a label at the end of the process.
Loop is not printing a labels for the customer, so we are not rate shopping a label on your behalf. We recommend adding only one destination to an International Lite return policy.
Using Destinations: Donations Centers
FAQ
How can I change which destination is our default? The Default Destination tag cannot be moved in the admin, so it is best to manually update your addresses accordingly by selecting Edit and updating the fields with the address you need to be your default destination.
Keep in mind that the default destination designation only matters if you have built product rules, but do not have "Enforce product rules" turned on.
How can I configure more specific product/return rules for my Donation Center destination? Donation rules and conditions can be optimized further by leveraging the Workflows functionality. By setting specific return conditions in Workflows, merchants can automatically send qualifying returns to their configured Donation Center.
How many destinations does my plan support? To find out how many destinations are supported with your plan, please review the Pricing page on the Loop Returns website.
Please reach out to support@loopreturns.com with any additional questions.