
Loop Point of Sale
OVERVIEW
This article introduces Loop Point of Sale (POS). It provides a video walkthrough, setup instructions, and how to use the app.
Use the menu on the left to quickly navigate this article.
POS video walkthrough
Leverage Loop Point of Sale (POS) iOS app to streamline order management and facilitate a hassle-free return and exchange experience in-store. Loop POS helps drive foot traffic, streamline order management, save on logistics costs, and retain more revenue. Let online shoppers fall in love with your brand IRL with Loop POS.
Prerequisites
In order to use Loop POS, the following must be in place:
iOS devices in-store
Shopify POS
Stores must be located in US, CA, AU, and/or UK
Stripe must be enabled to complete exchanges
At this time, the app is only offered in English and cannot be translated. If you use ShipBop, ShipHero, or Bluecherry, we advise waiting to roll out Loop POS.
How it works
Loop POS is a standalone app that merchants can use alongside Shopify POS to process returns and exchanges in-store. Shoppers can bring their product(s) in-store to be returned or exchanged, and a store associate will process the return by navigating through the returns flow on the app, which is very similar to the user experience of the customer portal.
Setup
Reach out to support@loopreturns.com to enable Loop POS for your store.
Once enabled, you will be able to see the POS tile in your Loop Admin settings.
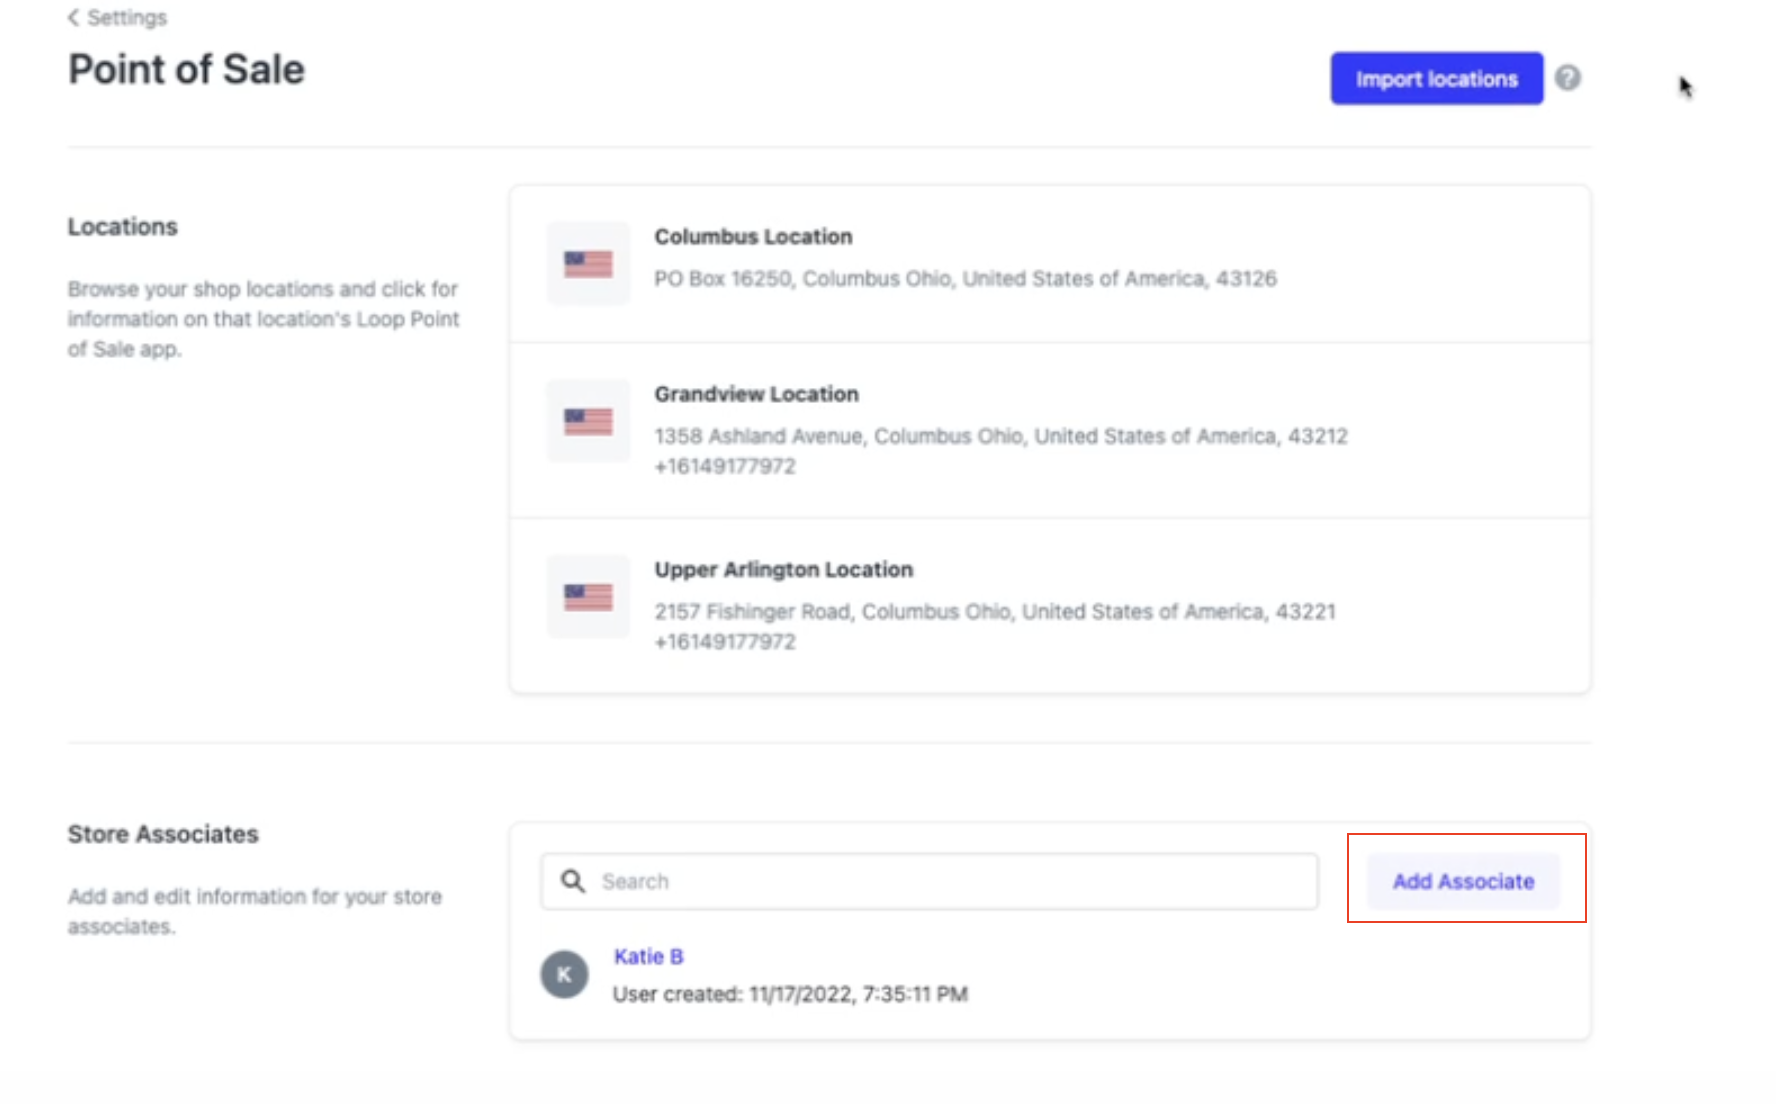
Within the POS tile, click the Import Locations button to import the shop’s locations from Shopify into the POS app. The locations should appear like the below after the button is clicked, and they will correspond with the store locations that the merchant selects in the POS app.
Tip: If your desired store location isn’t on this list, you can add it in your Shopify account via settings, and then import locations again here.Then scroll down to click Add Associate.
It will navigate to the page above. Enter your associate’s first name and last initial. A random PIN will be pre-filled, which the associate will use each time they want to log in to the POS app.
Tip: You can generate another random PIN or type in a PIN of your choice, as long as that PIN is not already assigned to another associate.Make sure to note down the PIN that will be used, as it cannot be viewed after leaving this screen!
Click Save. You can view, edit, or remove associates, as well as change their PIN from the main POS settings page at any time.
Using the Loop POS app
First, download the Loop POS iOS app.
Open the Loop POS app from your iPad’s home screen.
Enter your Loop username and password. These are the same details which you use to login to Loop Admin.
Note: Once you are logged in, you will remain logged in on this device for 2 weeks, unless you choose to log out.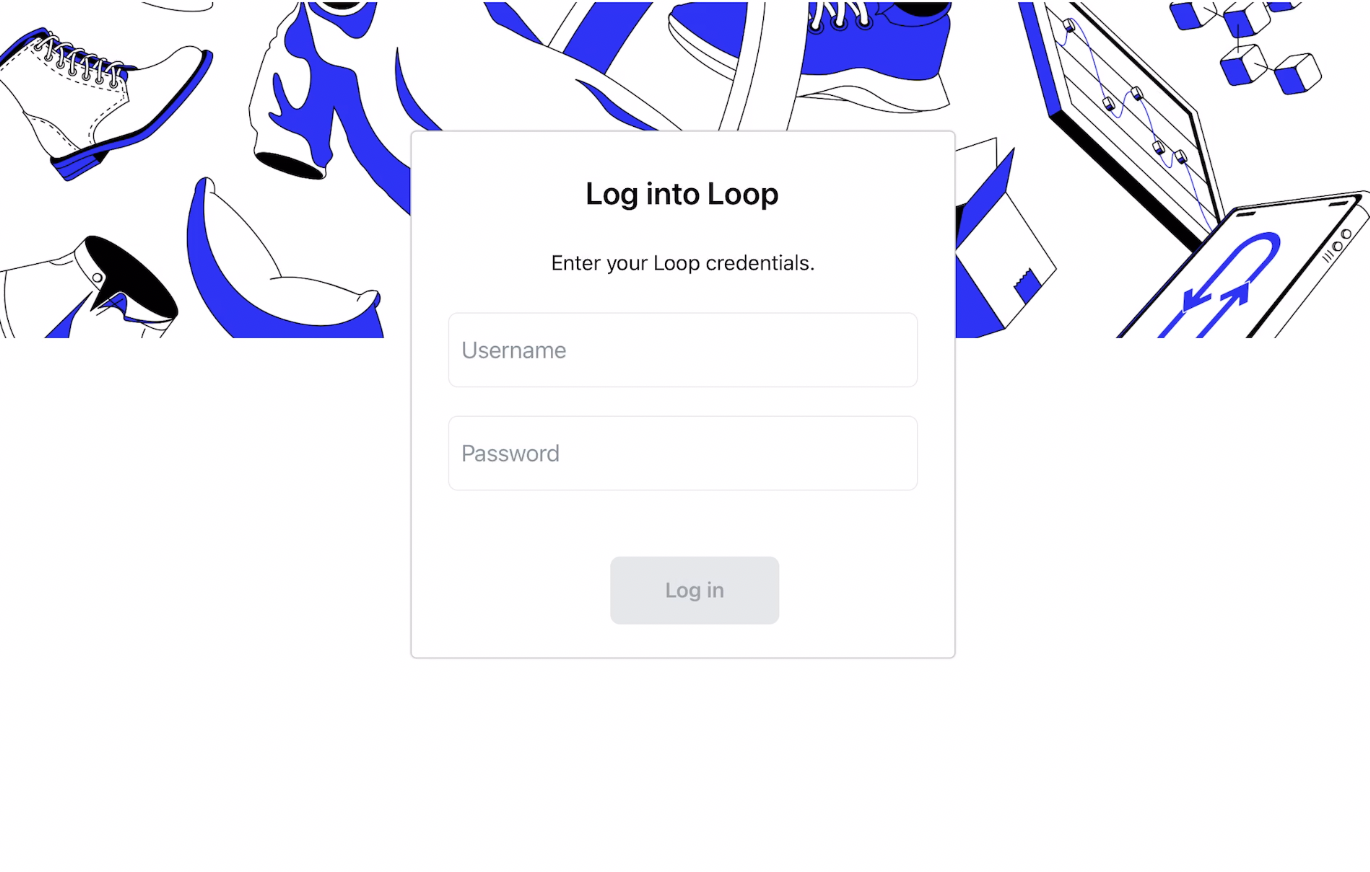
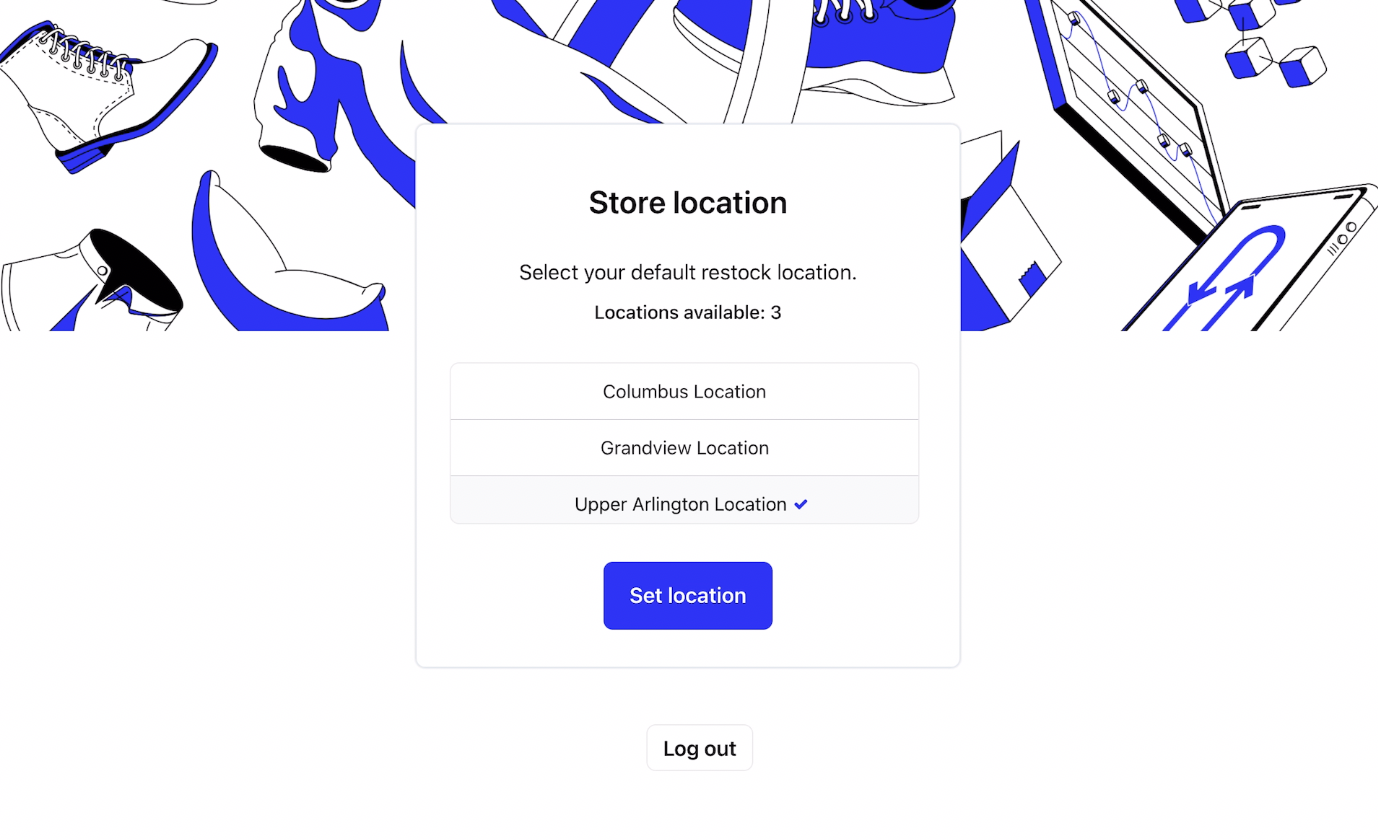
Select the default restock location for this device. Typically, this will be the store location in which the device is situated.
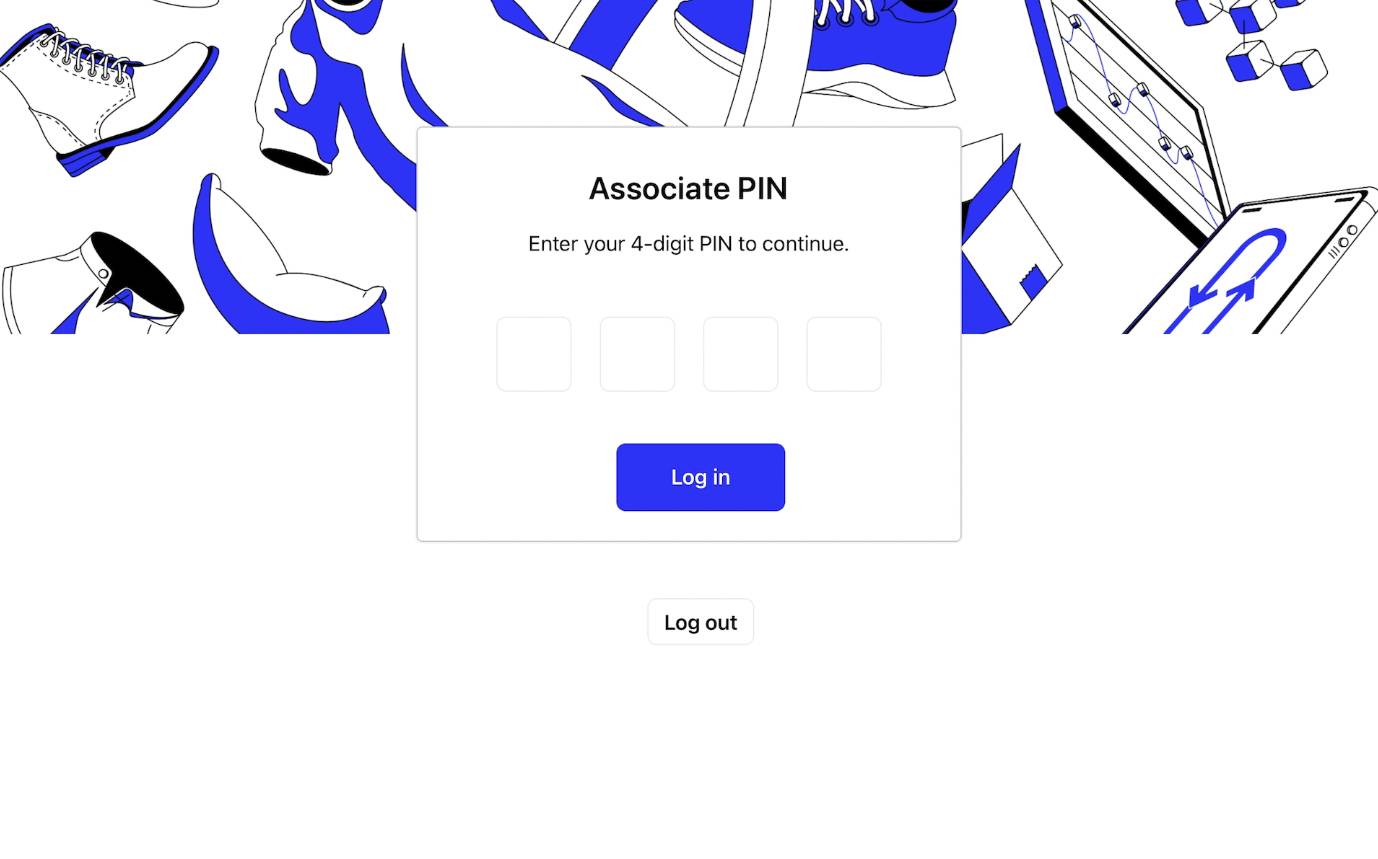
Now it’s time to hand over to your store associate. The store associate enters the 4-digit PIN which was set up for their profile in the Loop admin (Step 5 under "Setup," above).
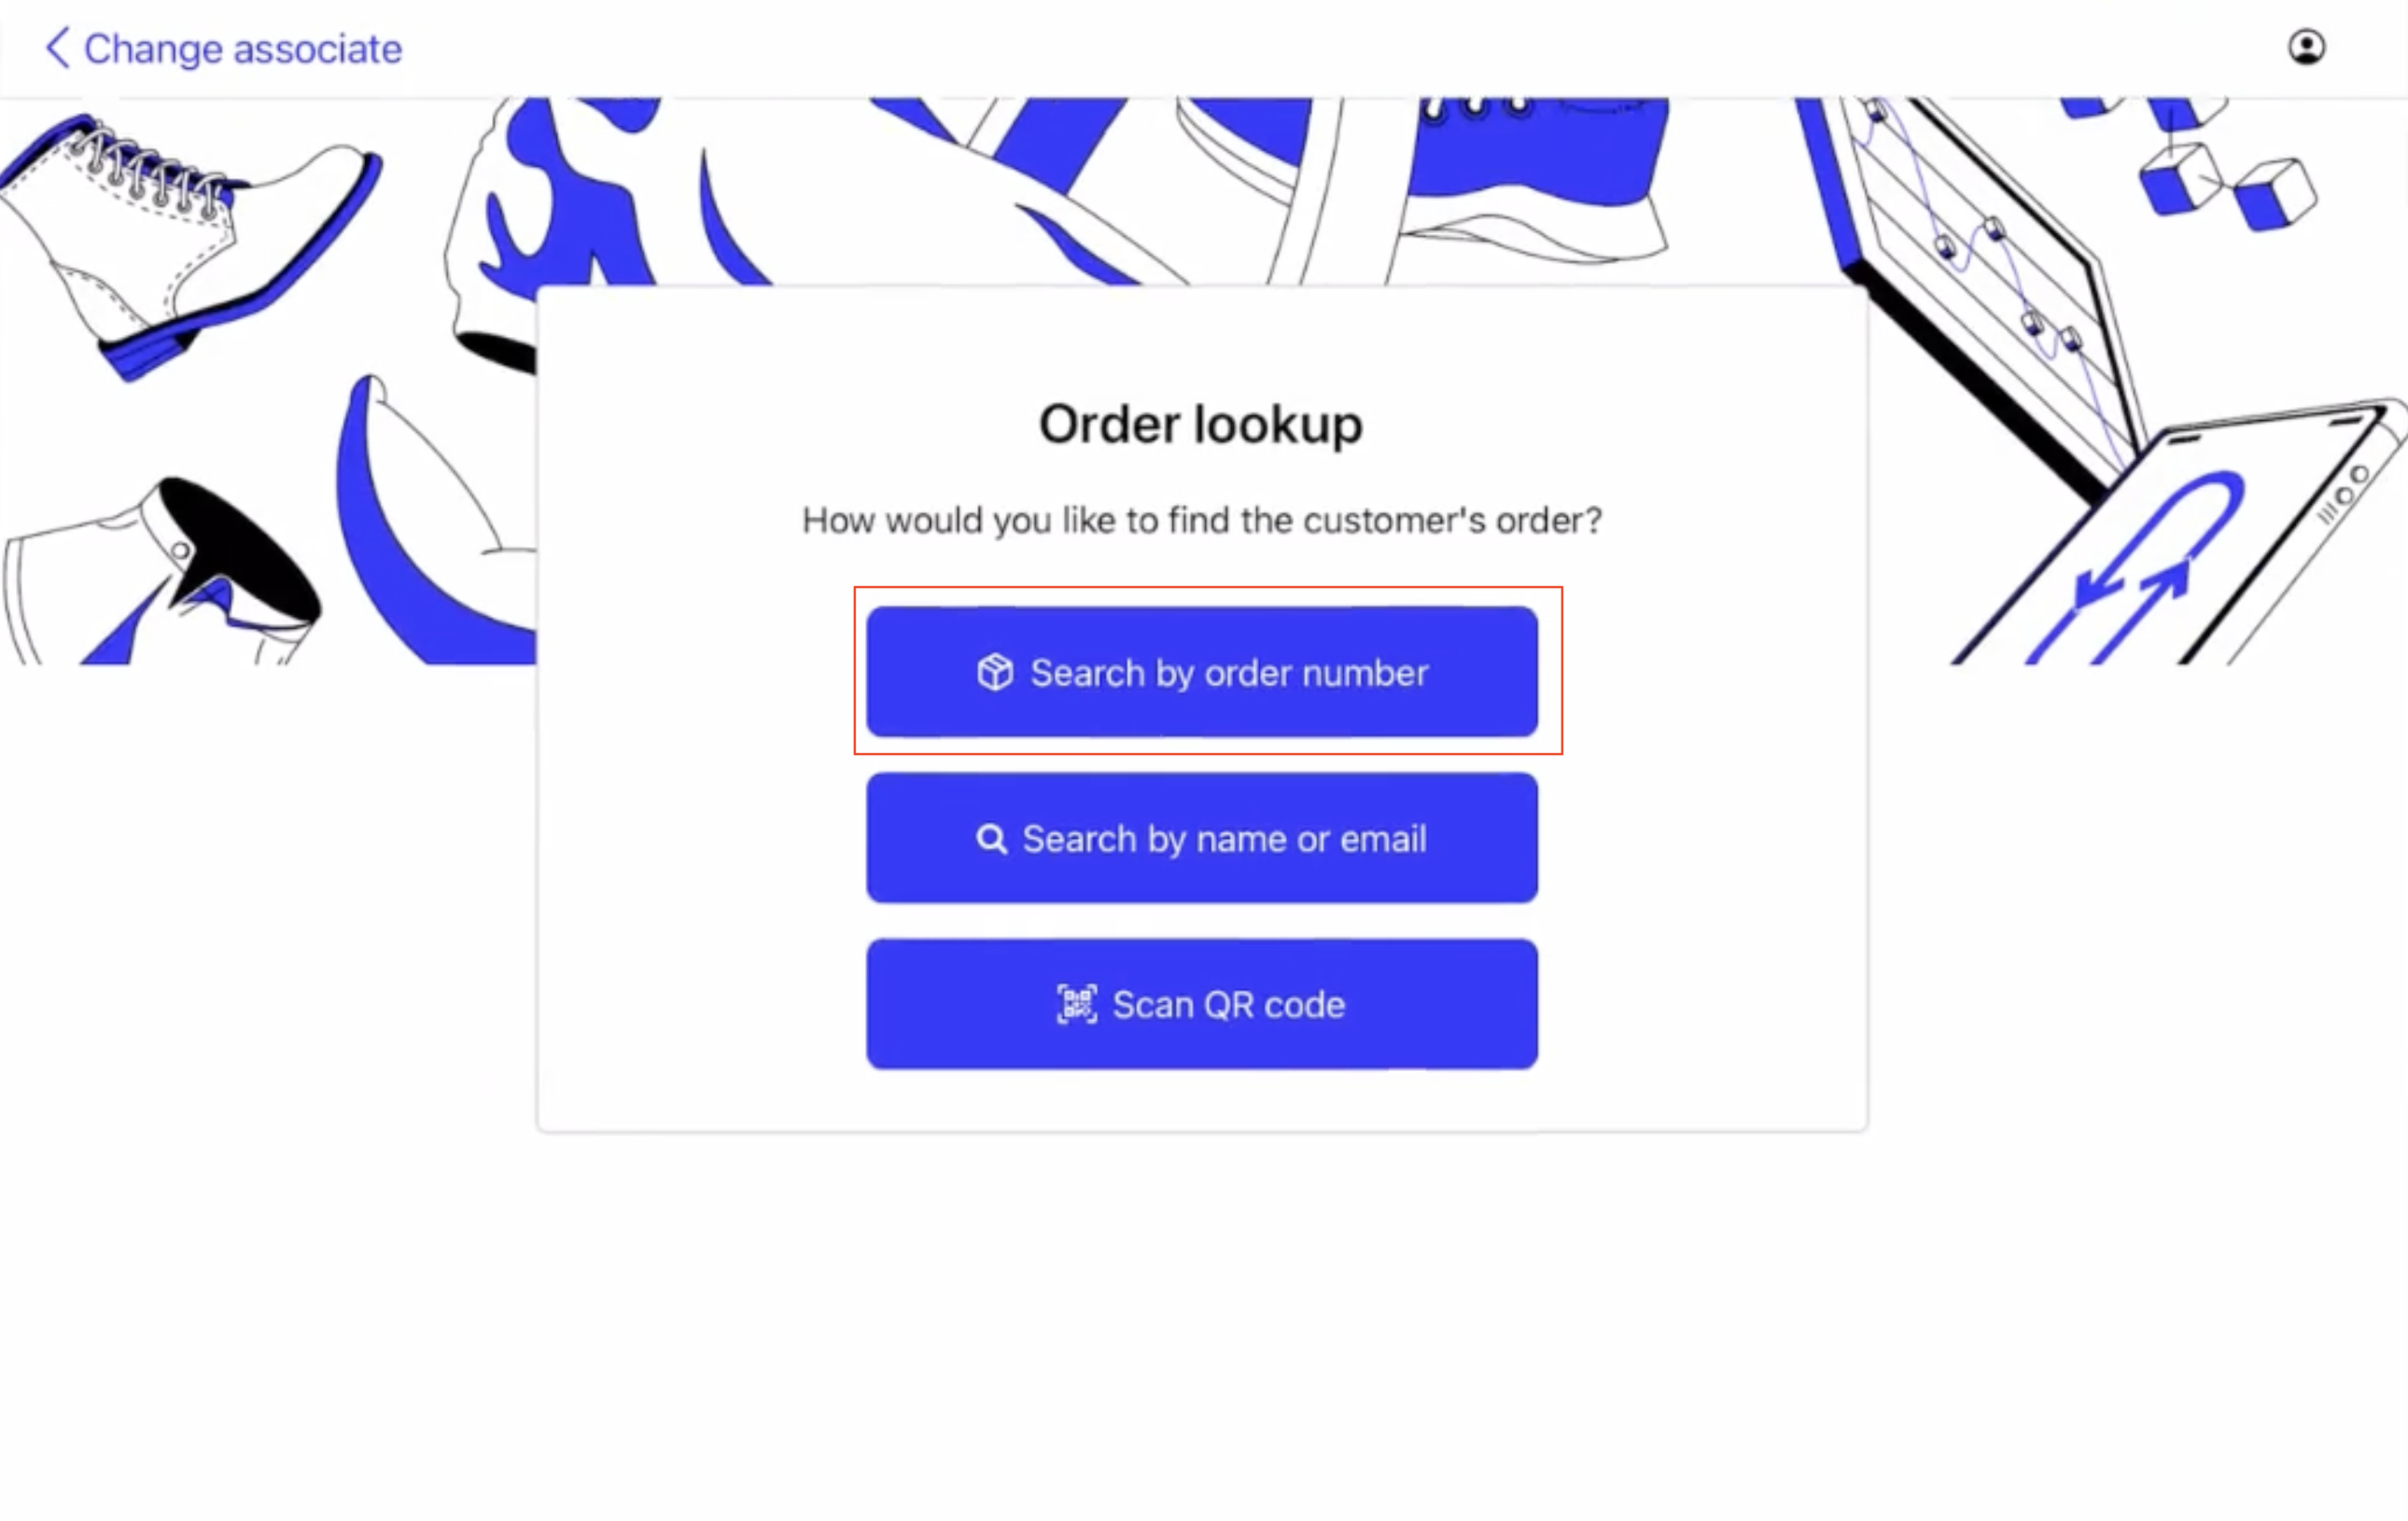
Search for the customer’s order. Associates can do this by:
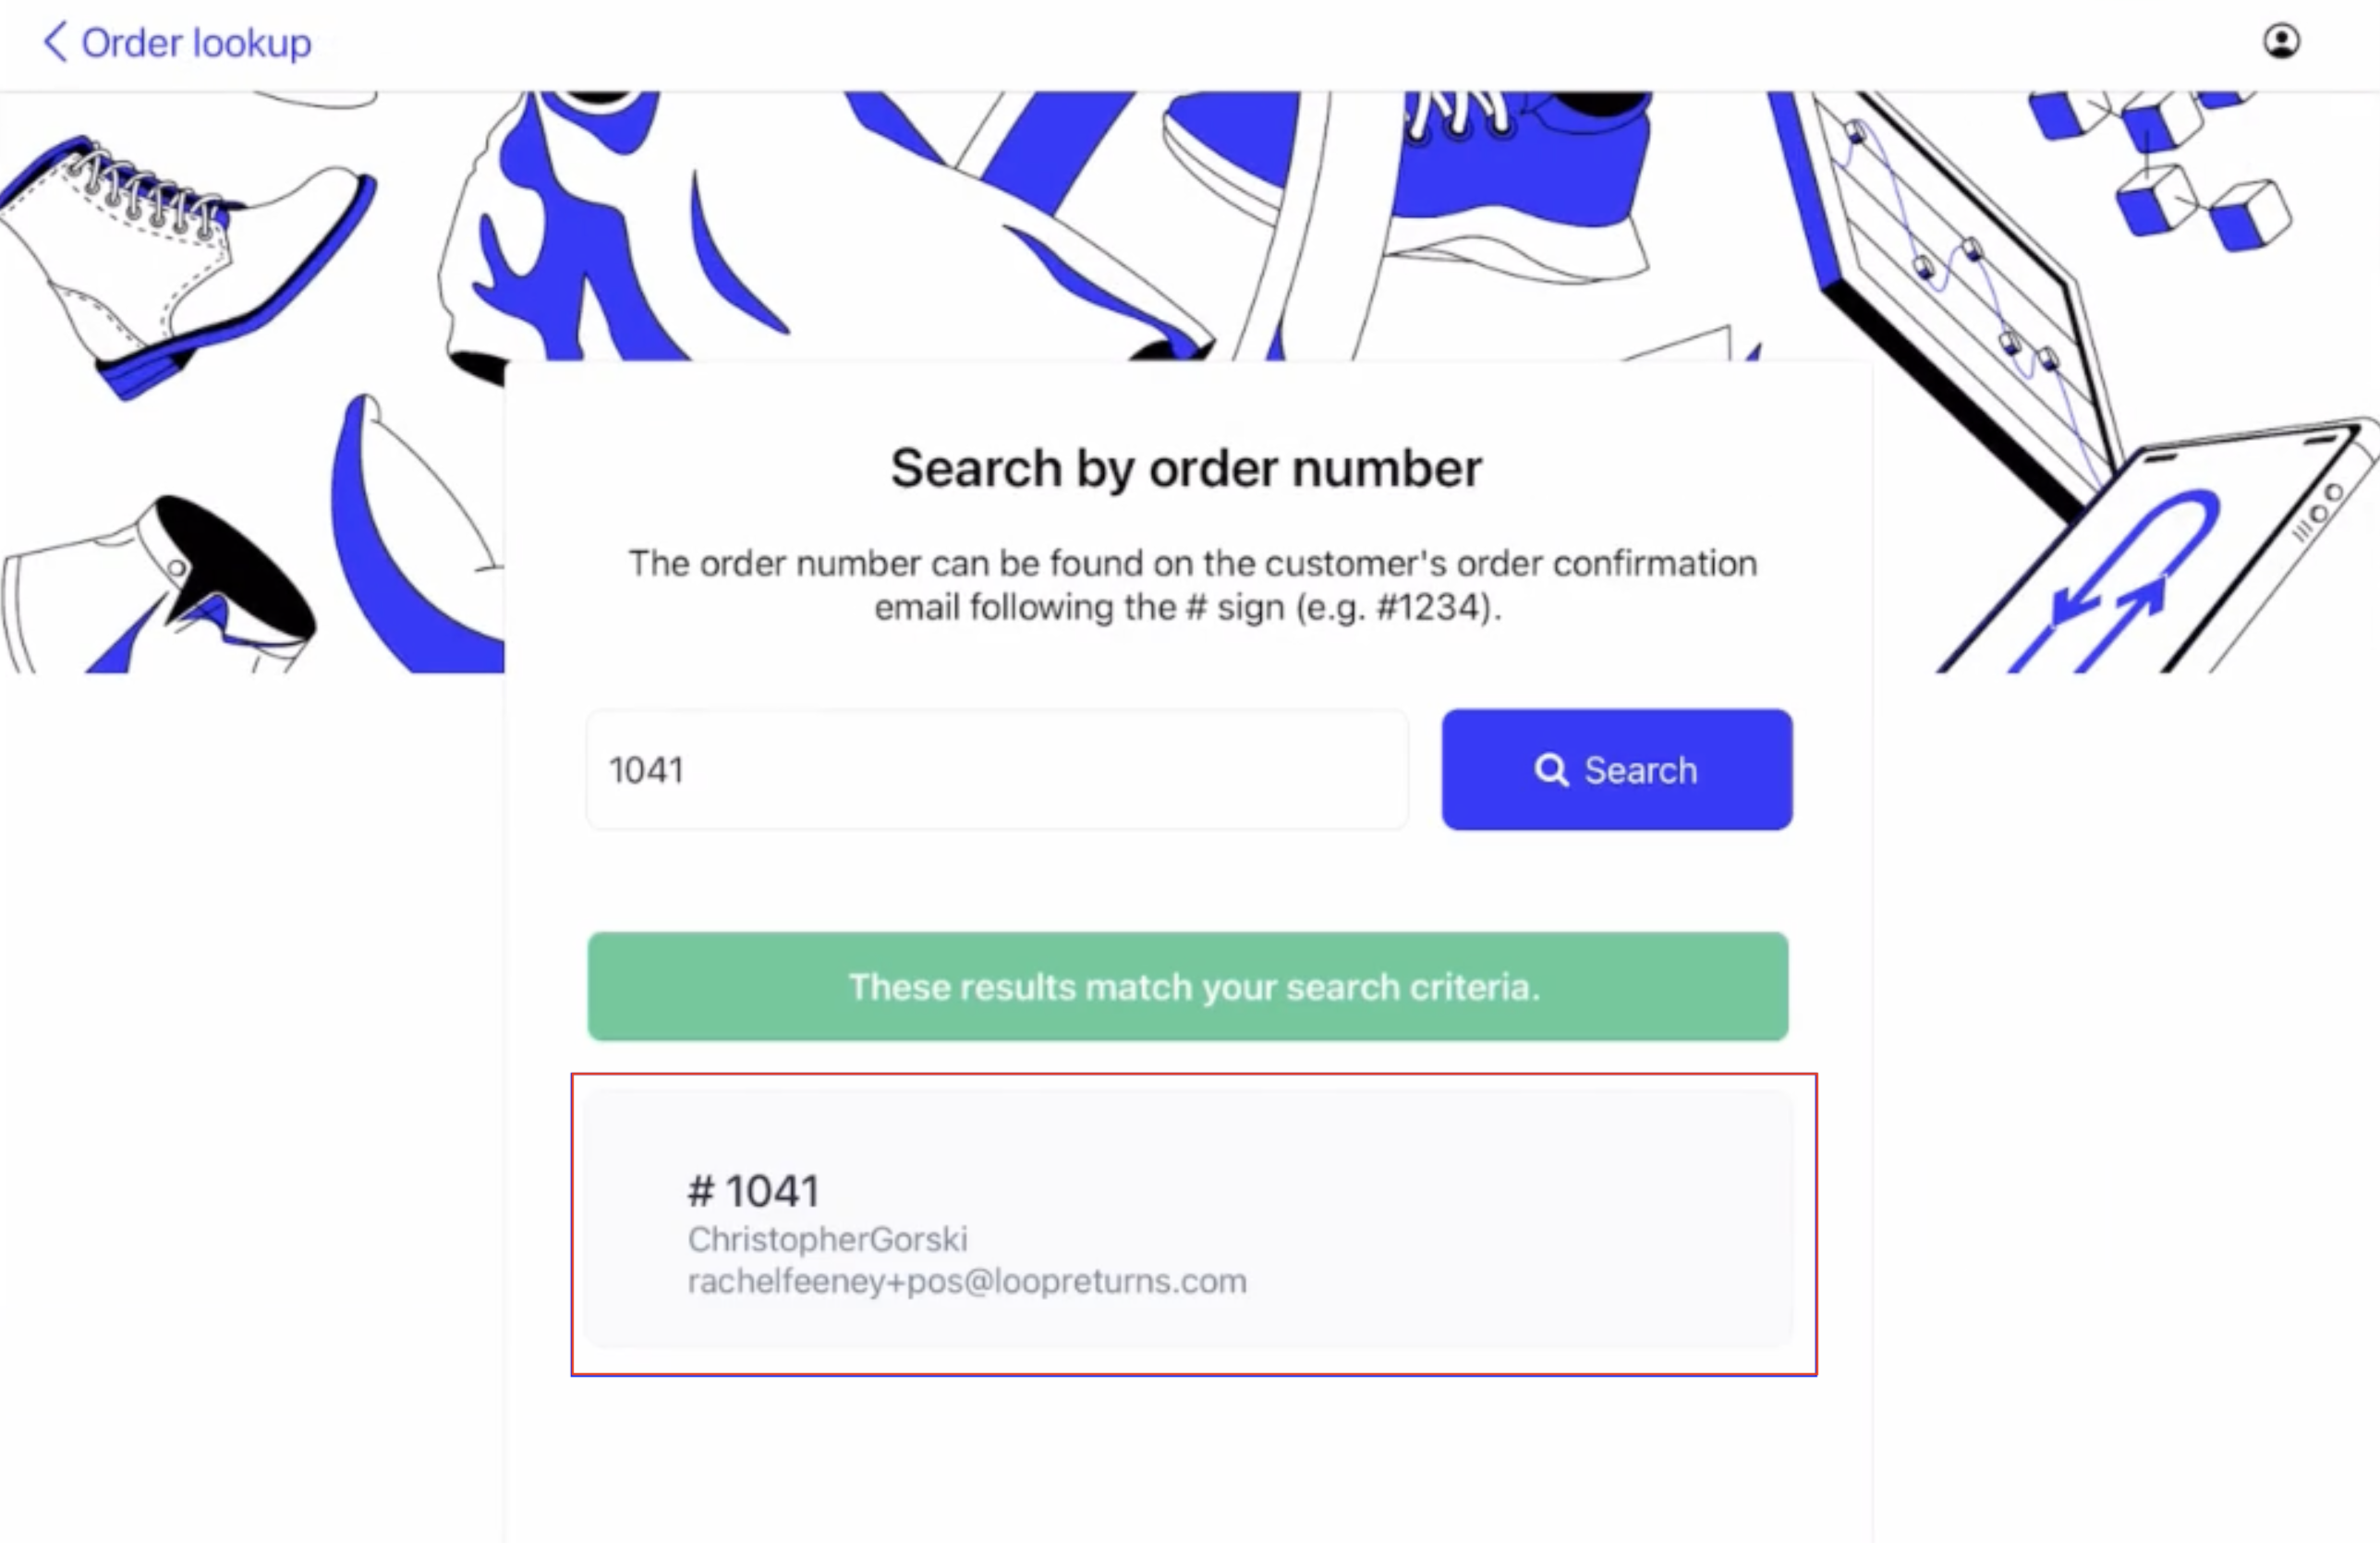
Entering the customer's order number, name, or email. These can be found on their receipt or in their order confirmation email.
Selecting Scan QR code, which will open the iPad camera to a scan. This is only possible if the customer provides a QR code from starting the return online.
Select the corresponding order that populates below the green bar.
If the items are ineligible for return and you wish to override the return policy, select Items ineligible for return.
Skip this step if the items are still eligible for return.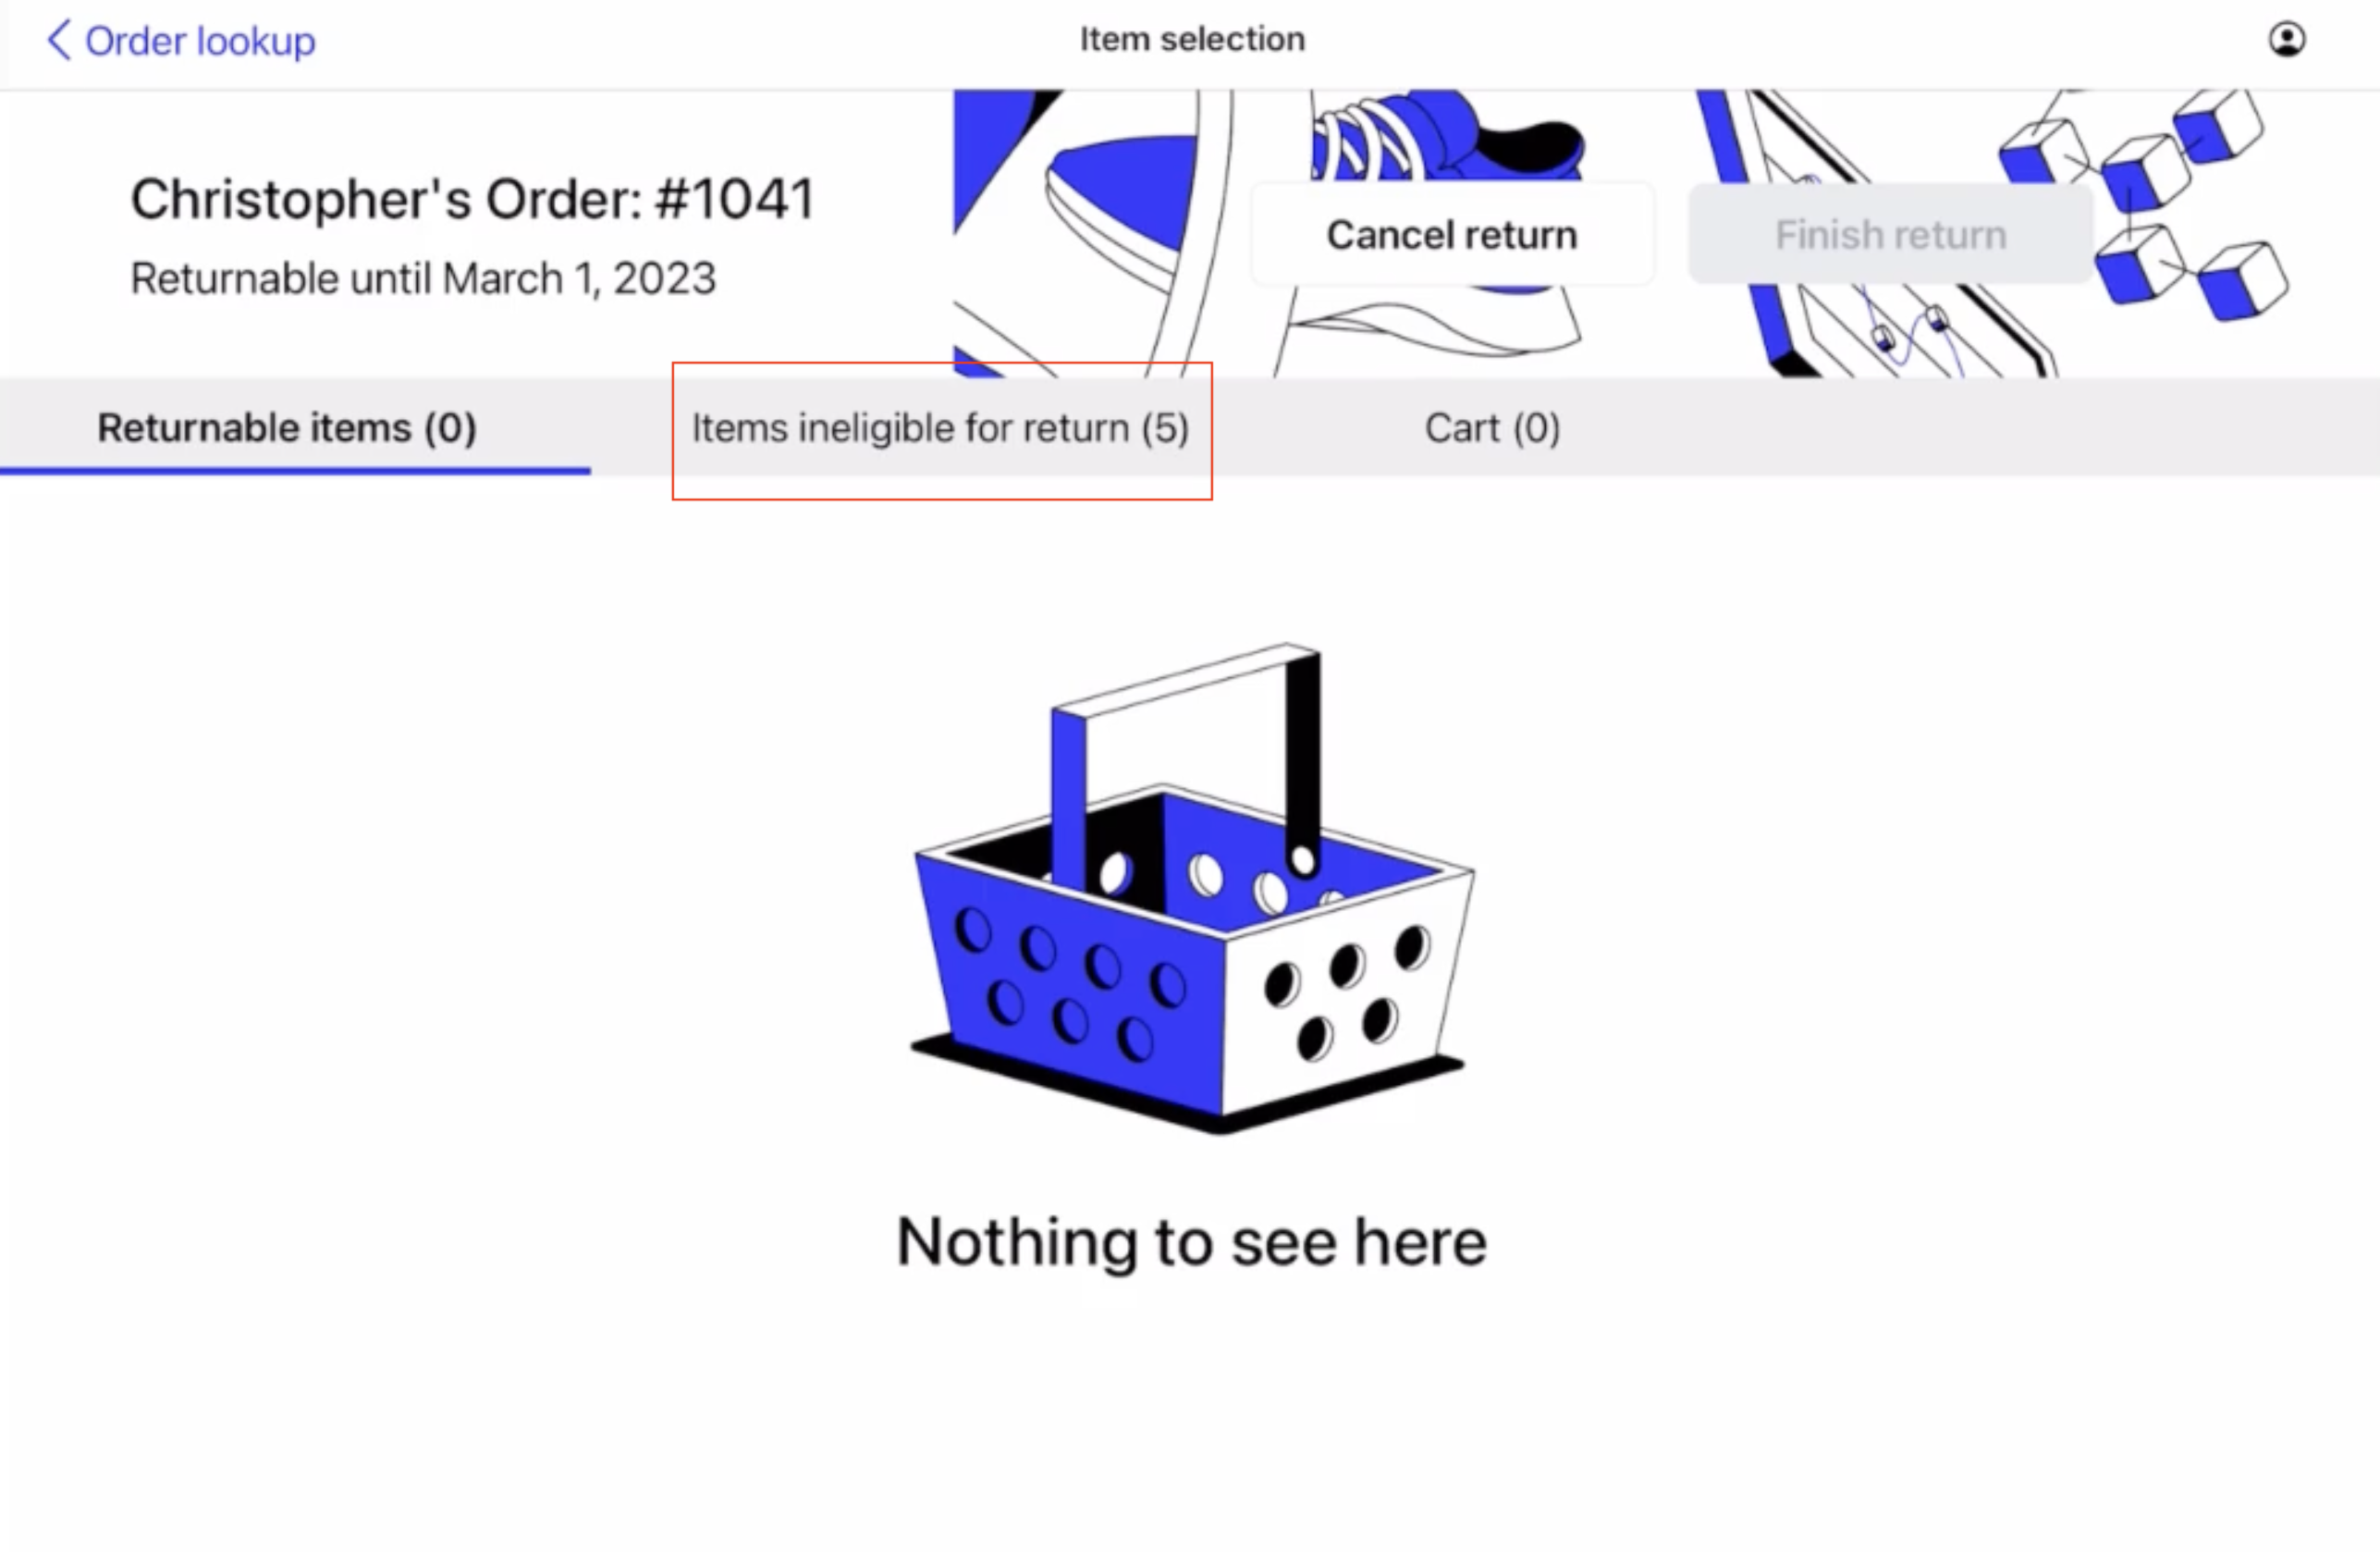
Select Mark all items eligible for return. A window will open with a drop down menu of reasons. Select the appropriate reason and add more details (optional).
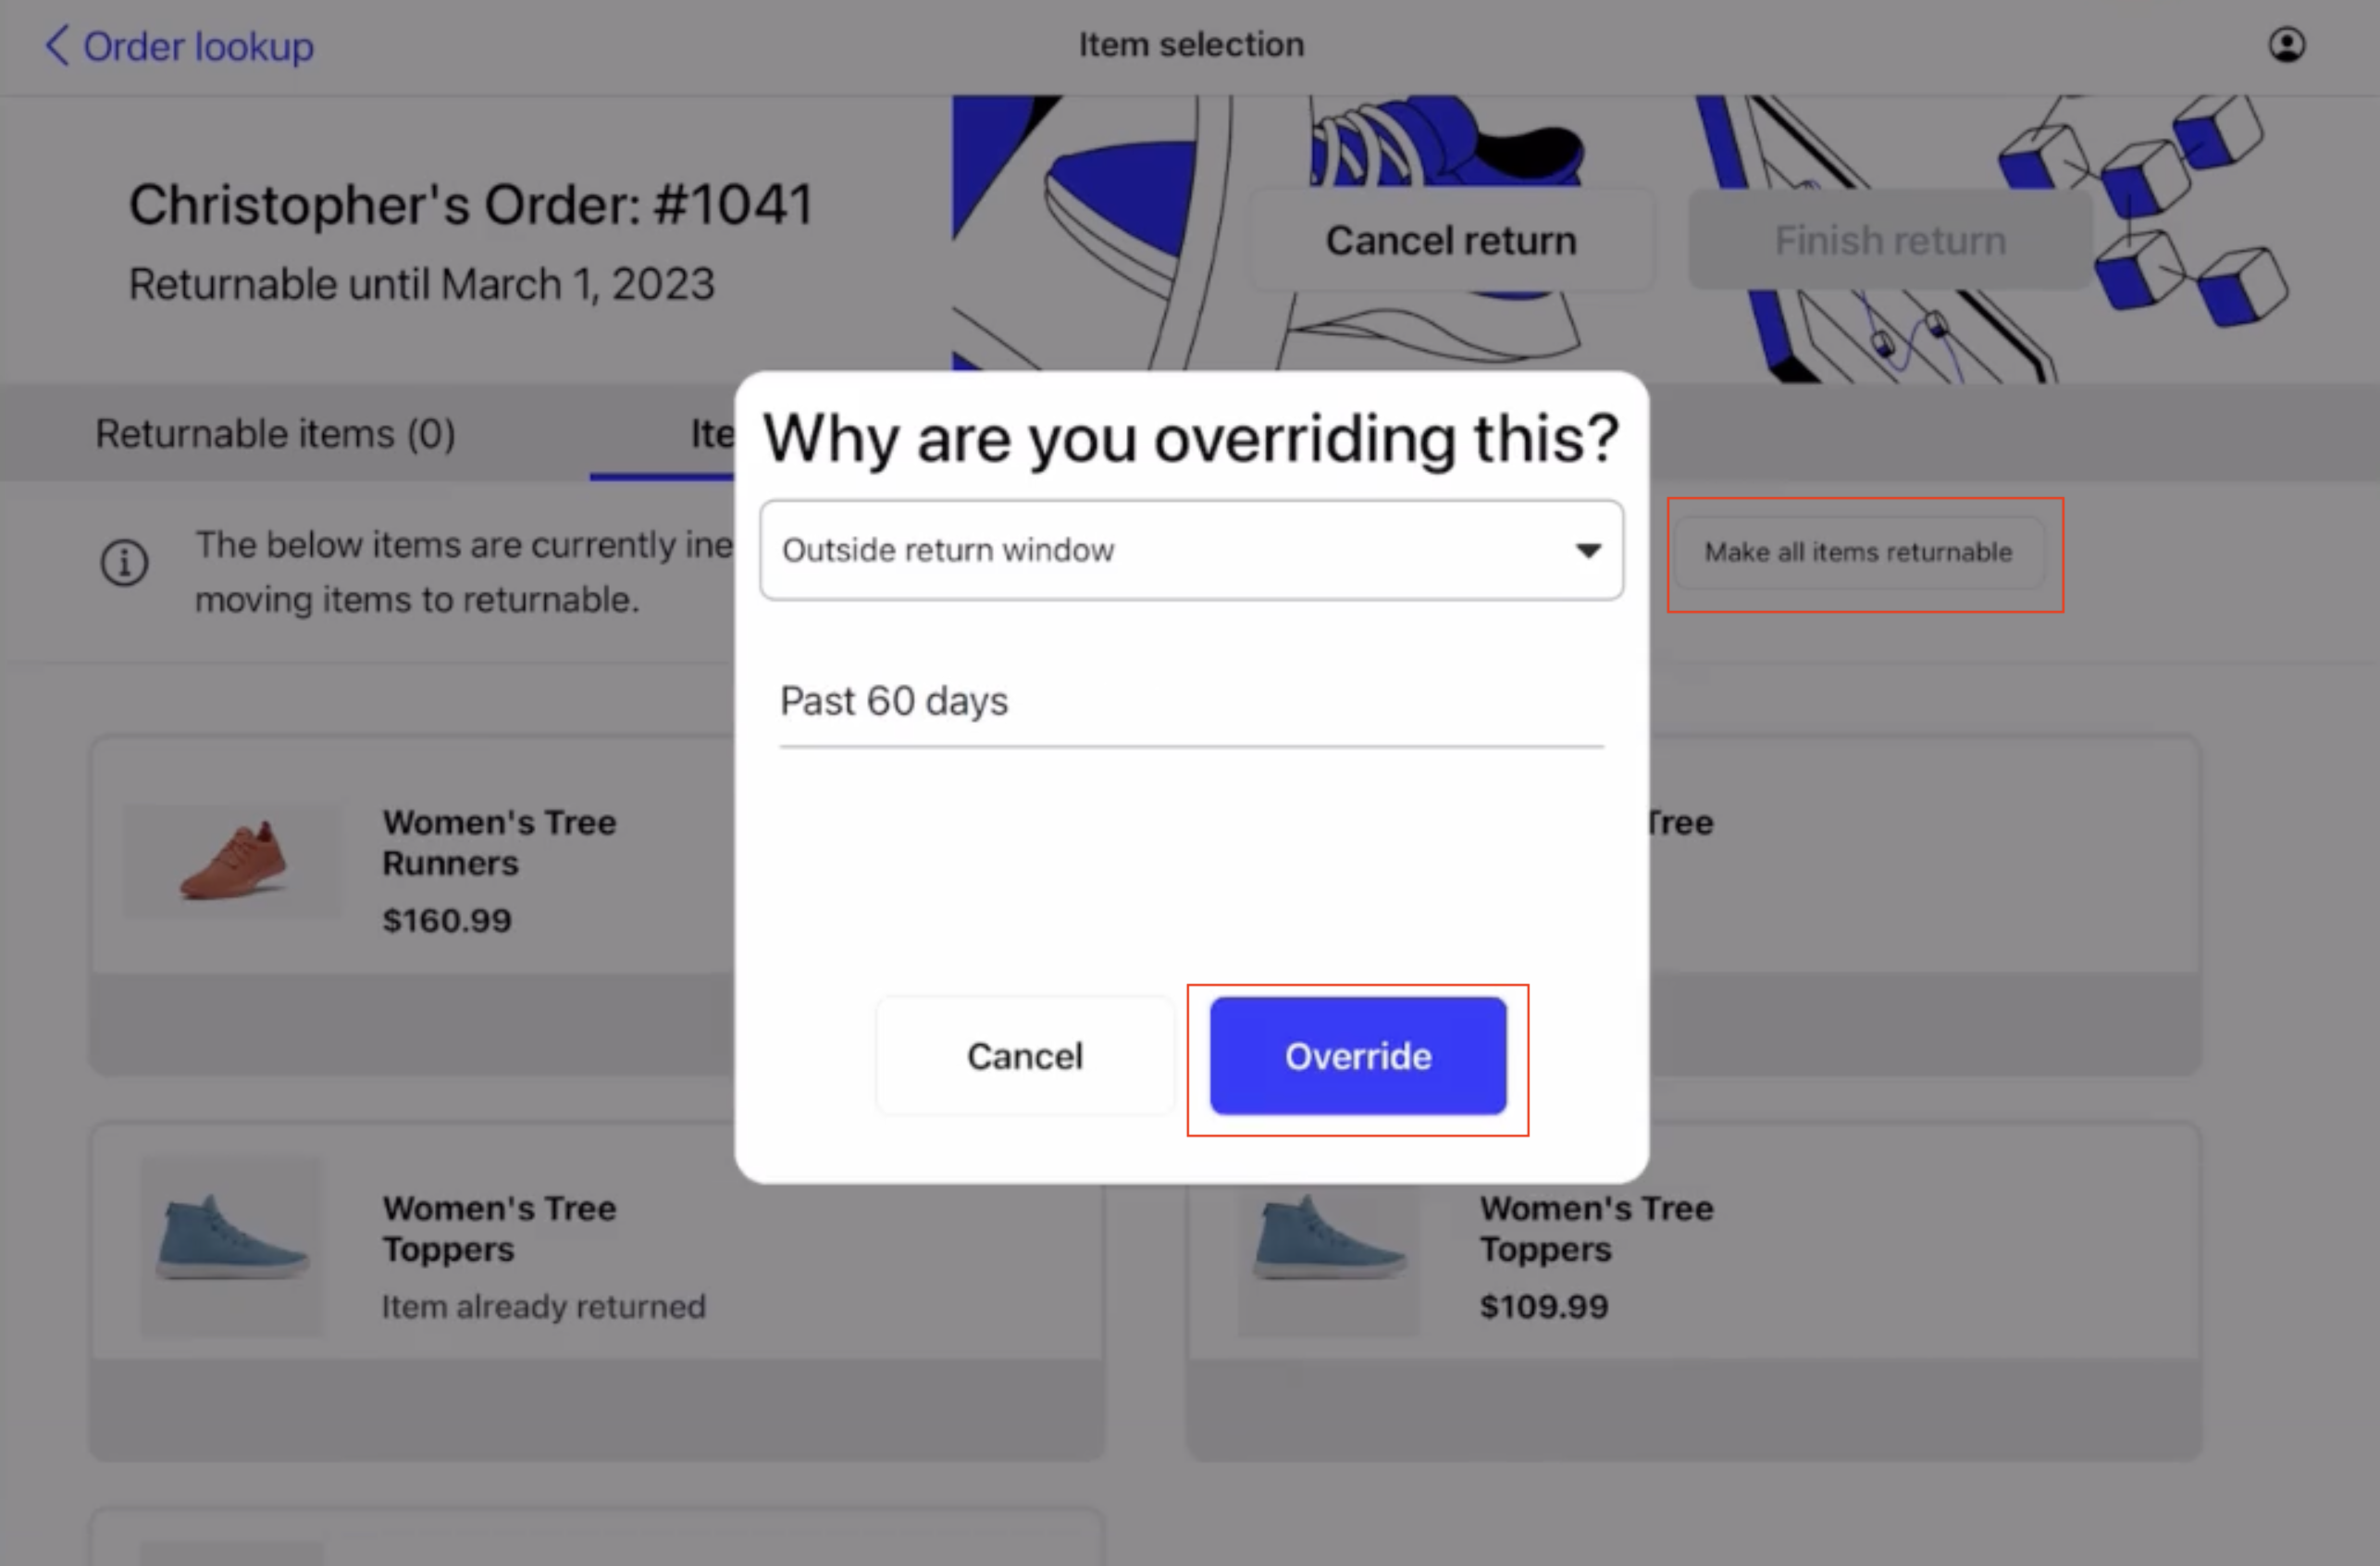
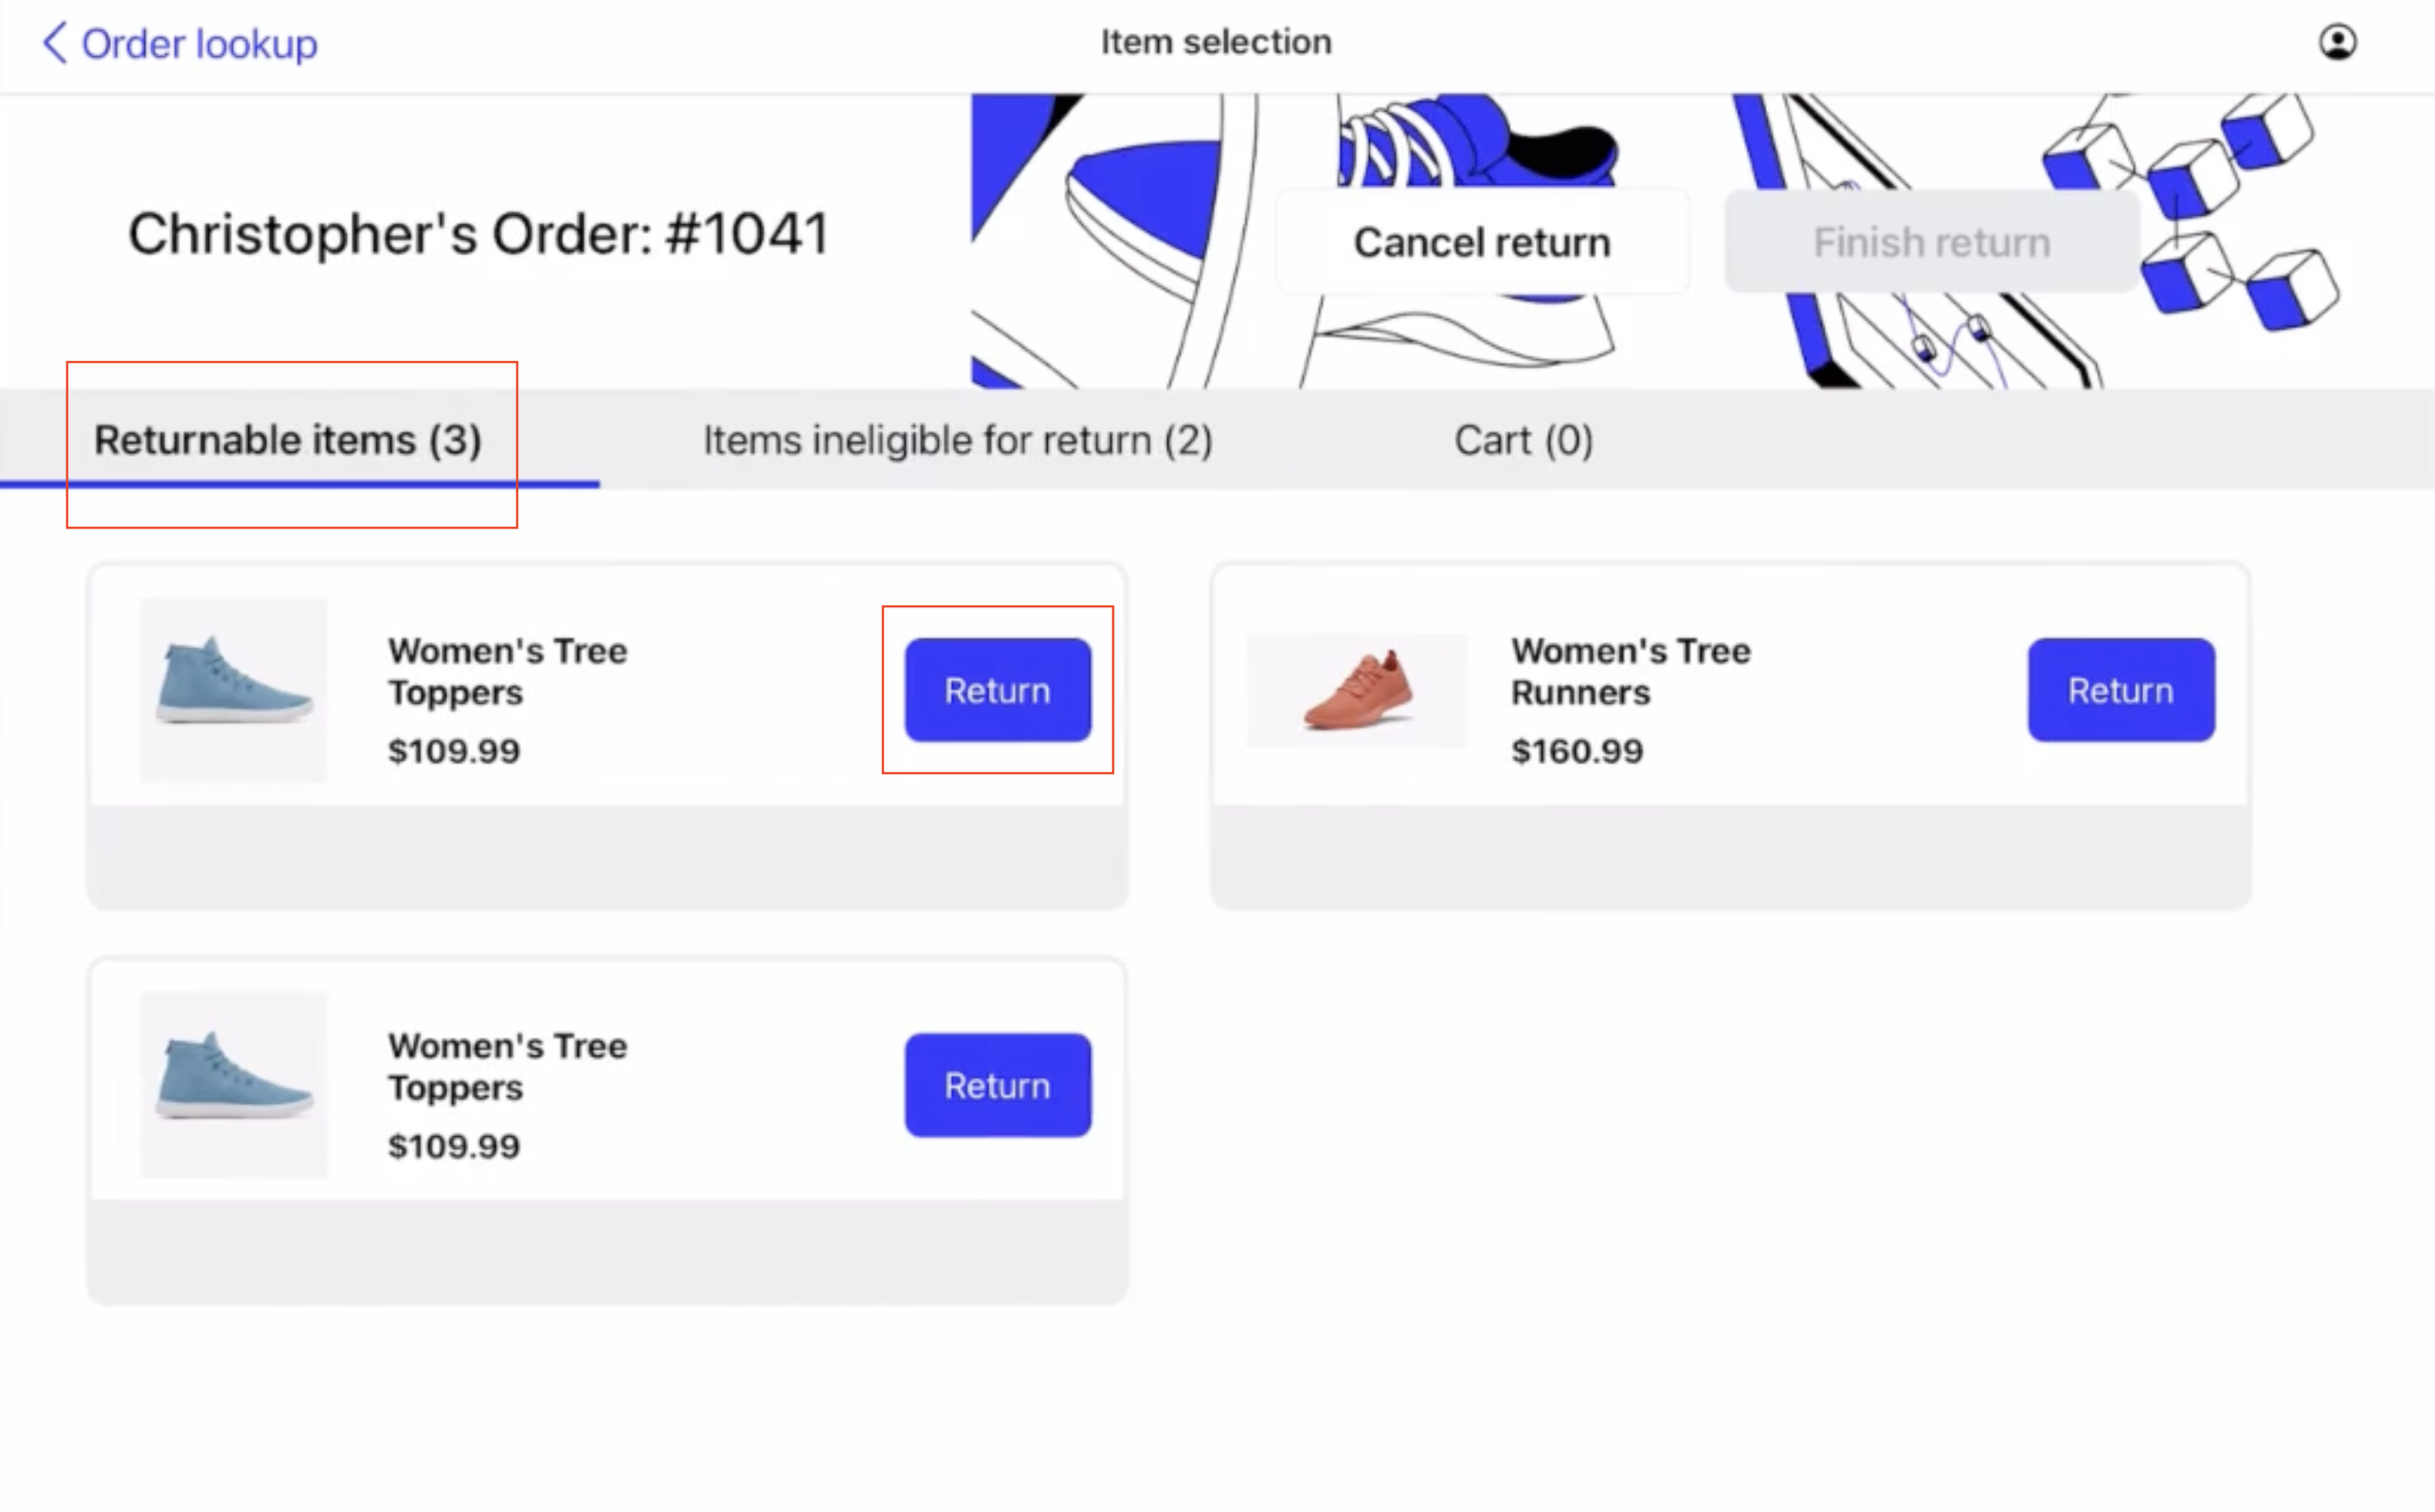
Navigate back to Returnable items and select the item(s) the customer wishes to return.
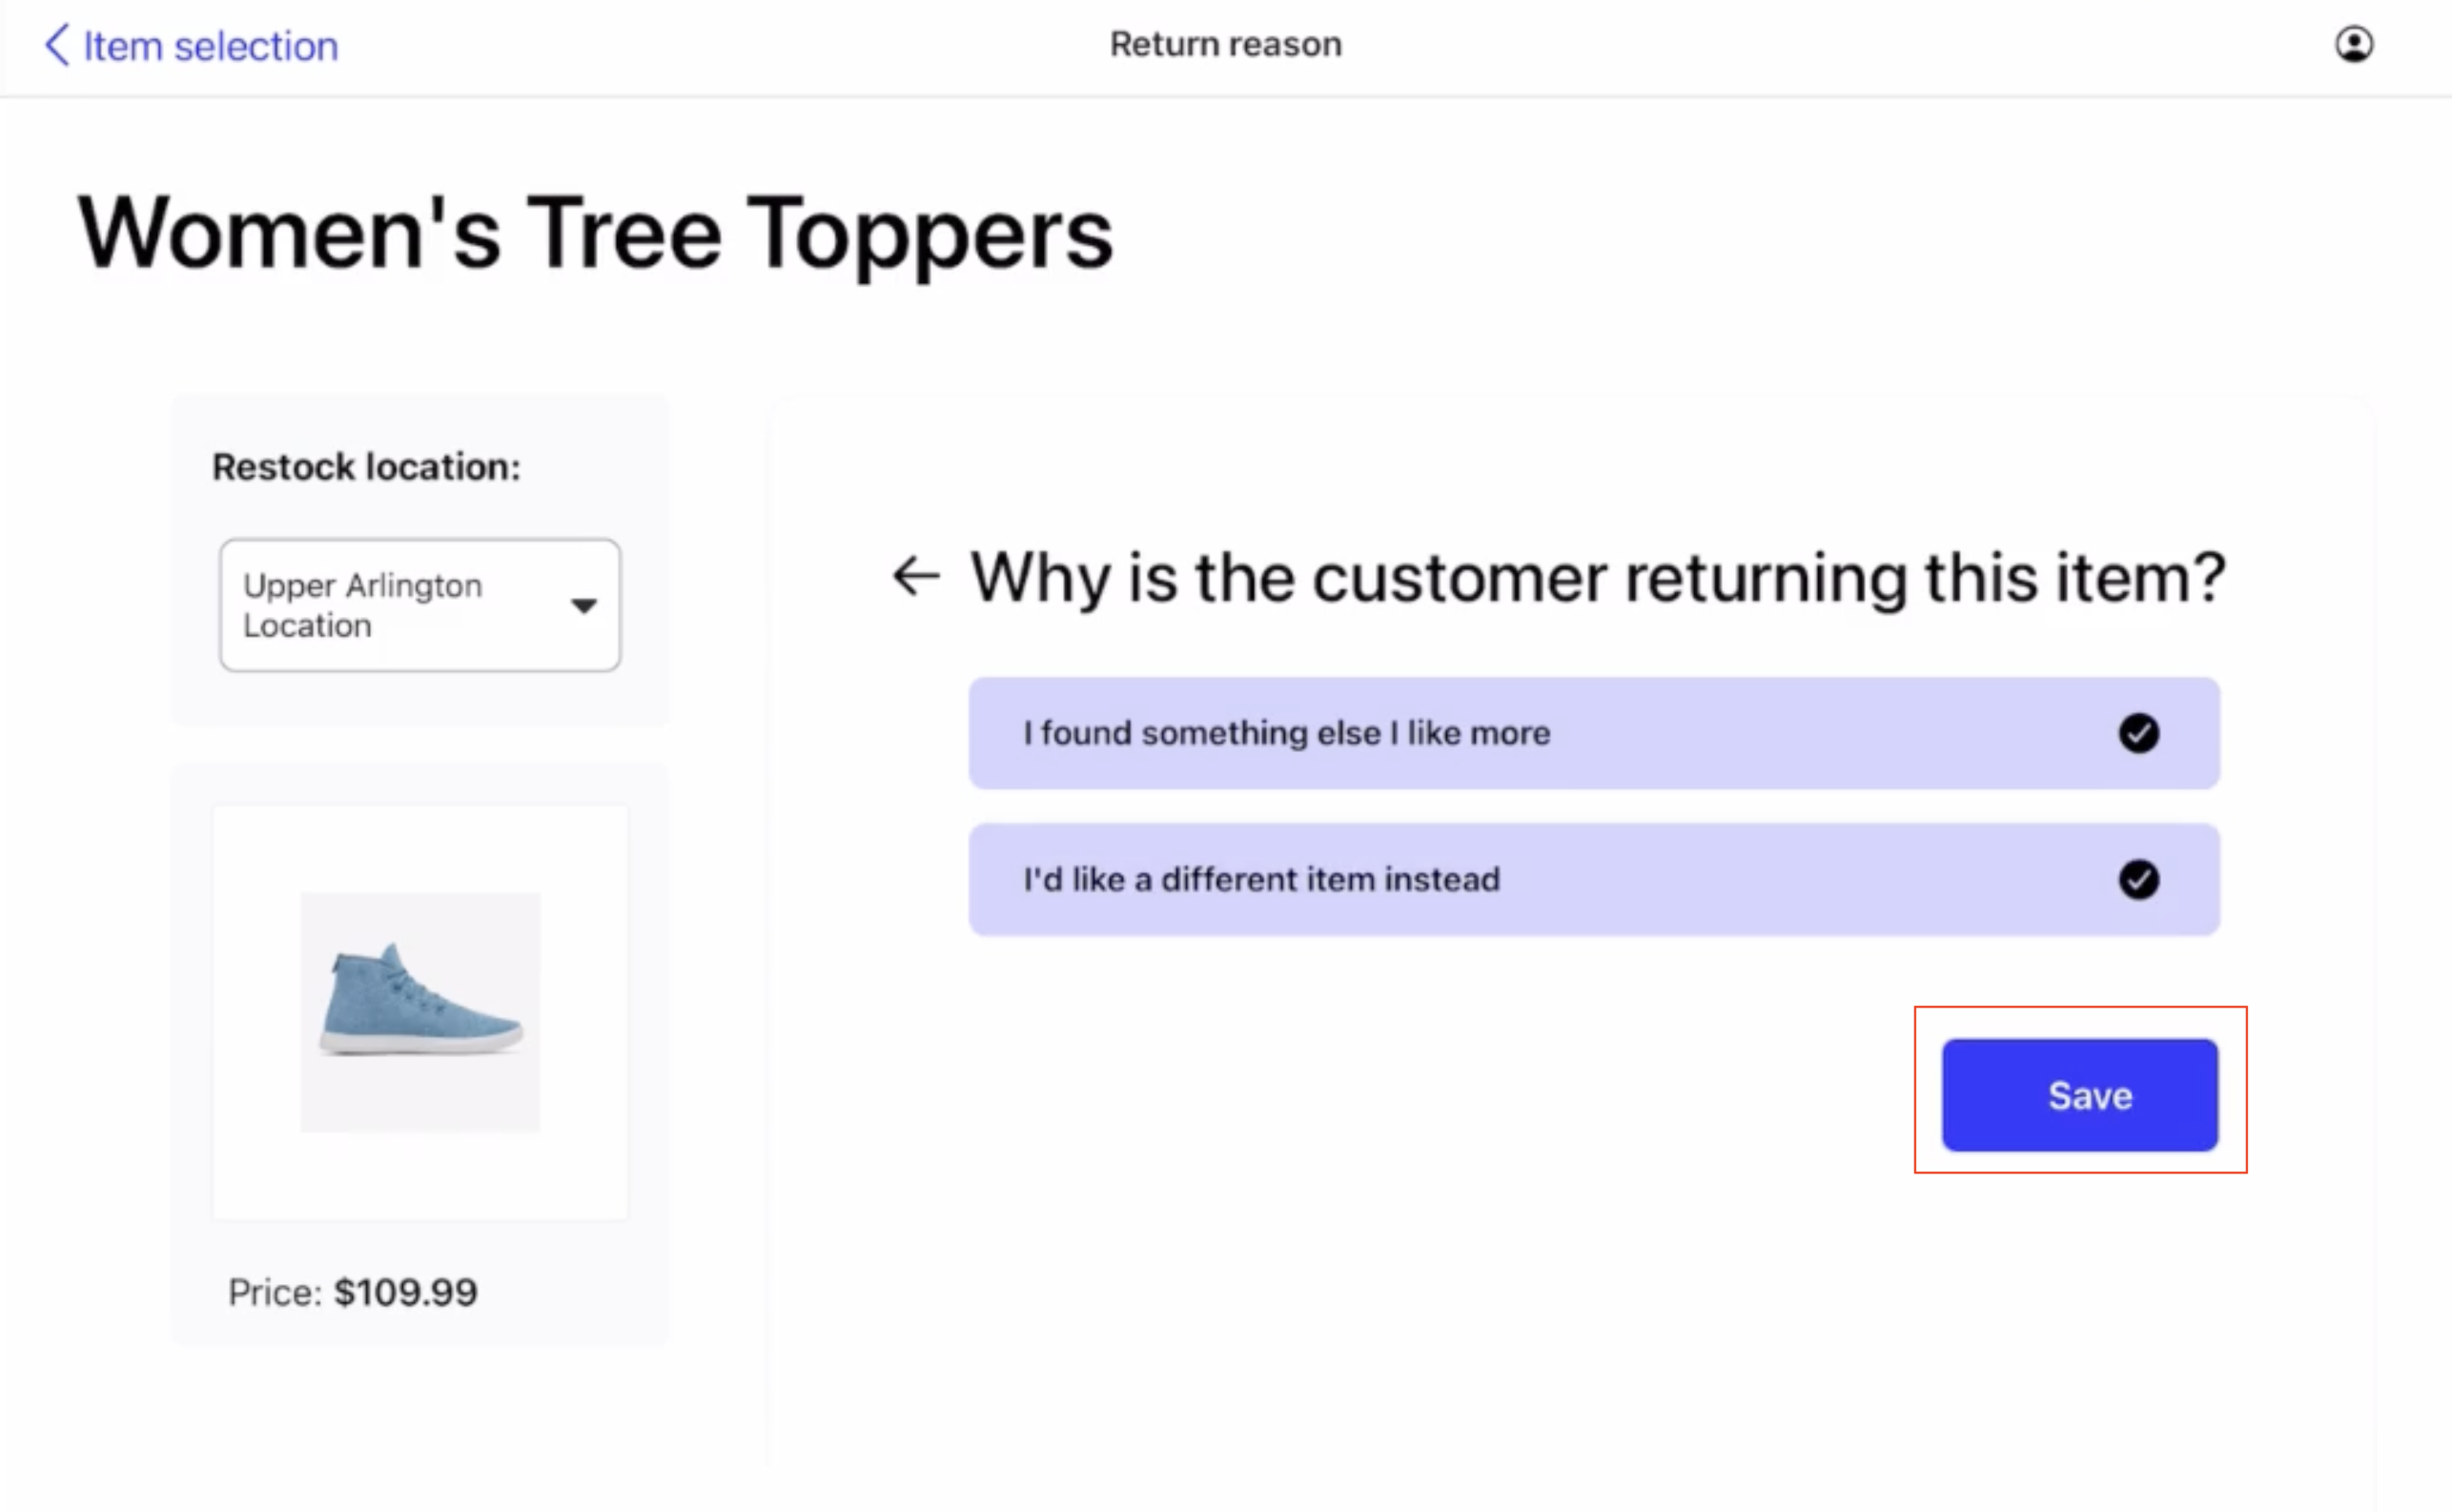
Select the restock location or Do not restock if this will be different than the location you are currently processing the return.
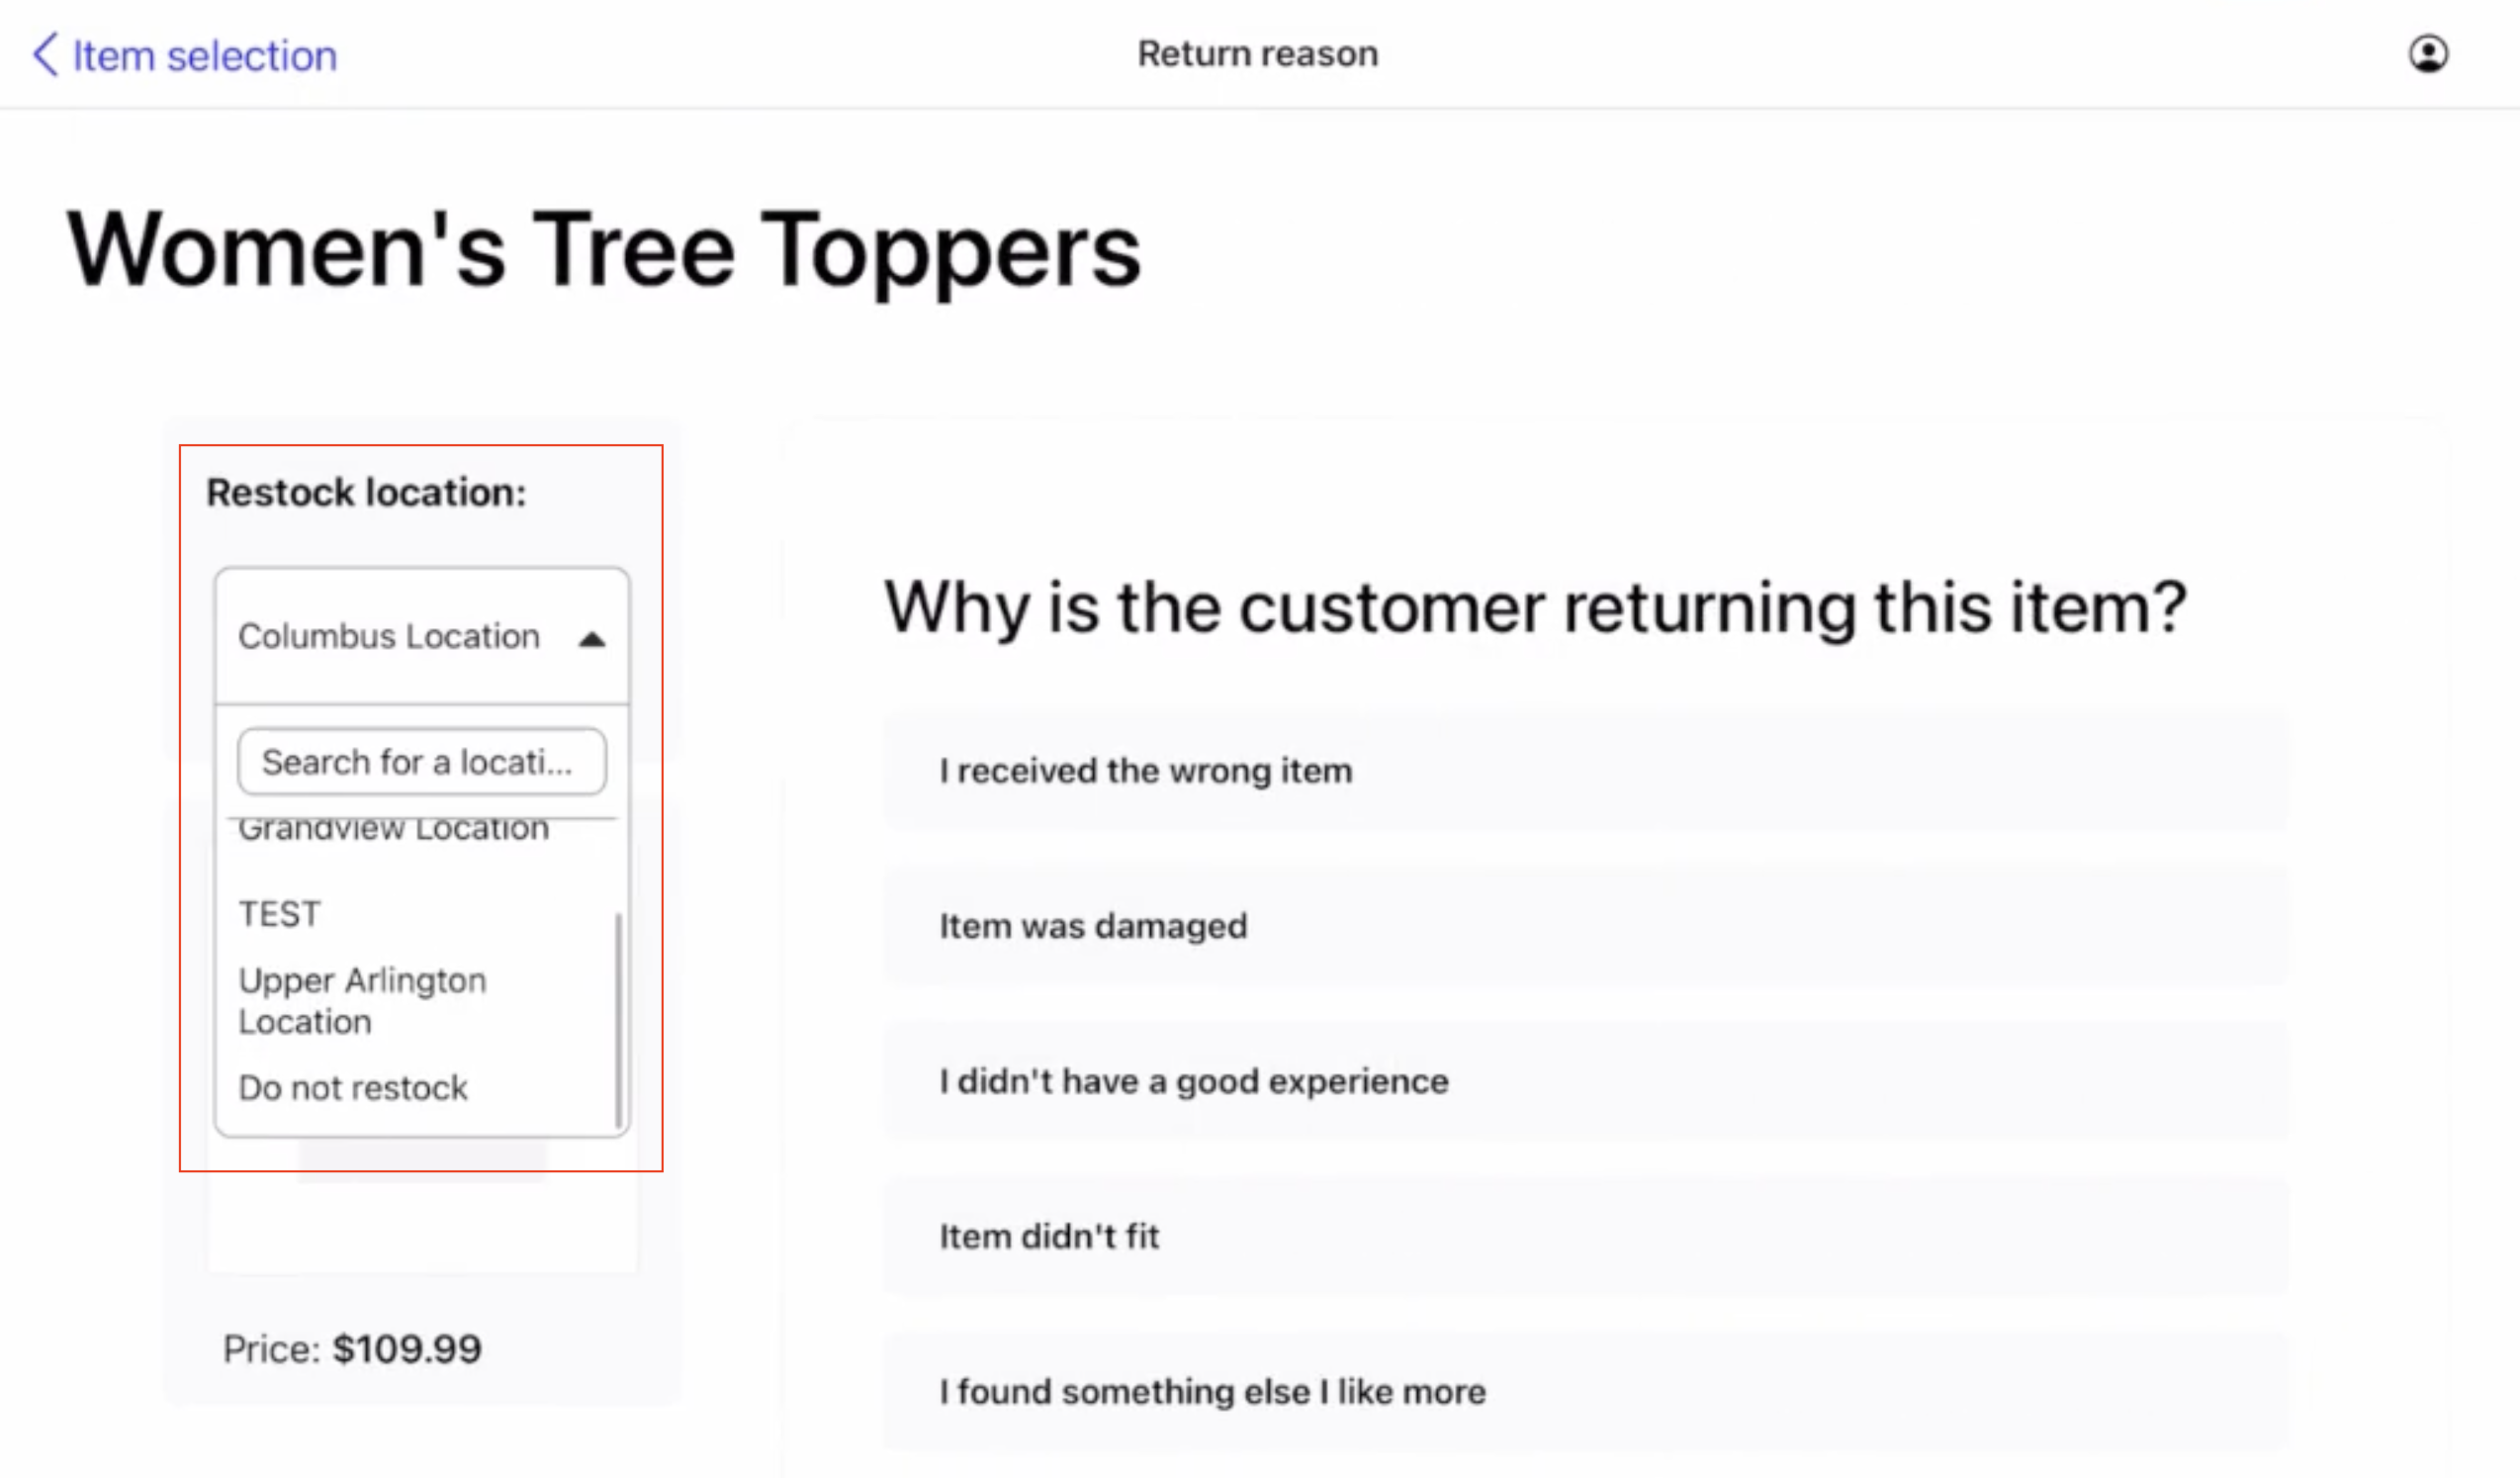
Provide a return reason, then hit Save.
If necessary, select additional items to return.
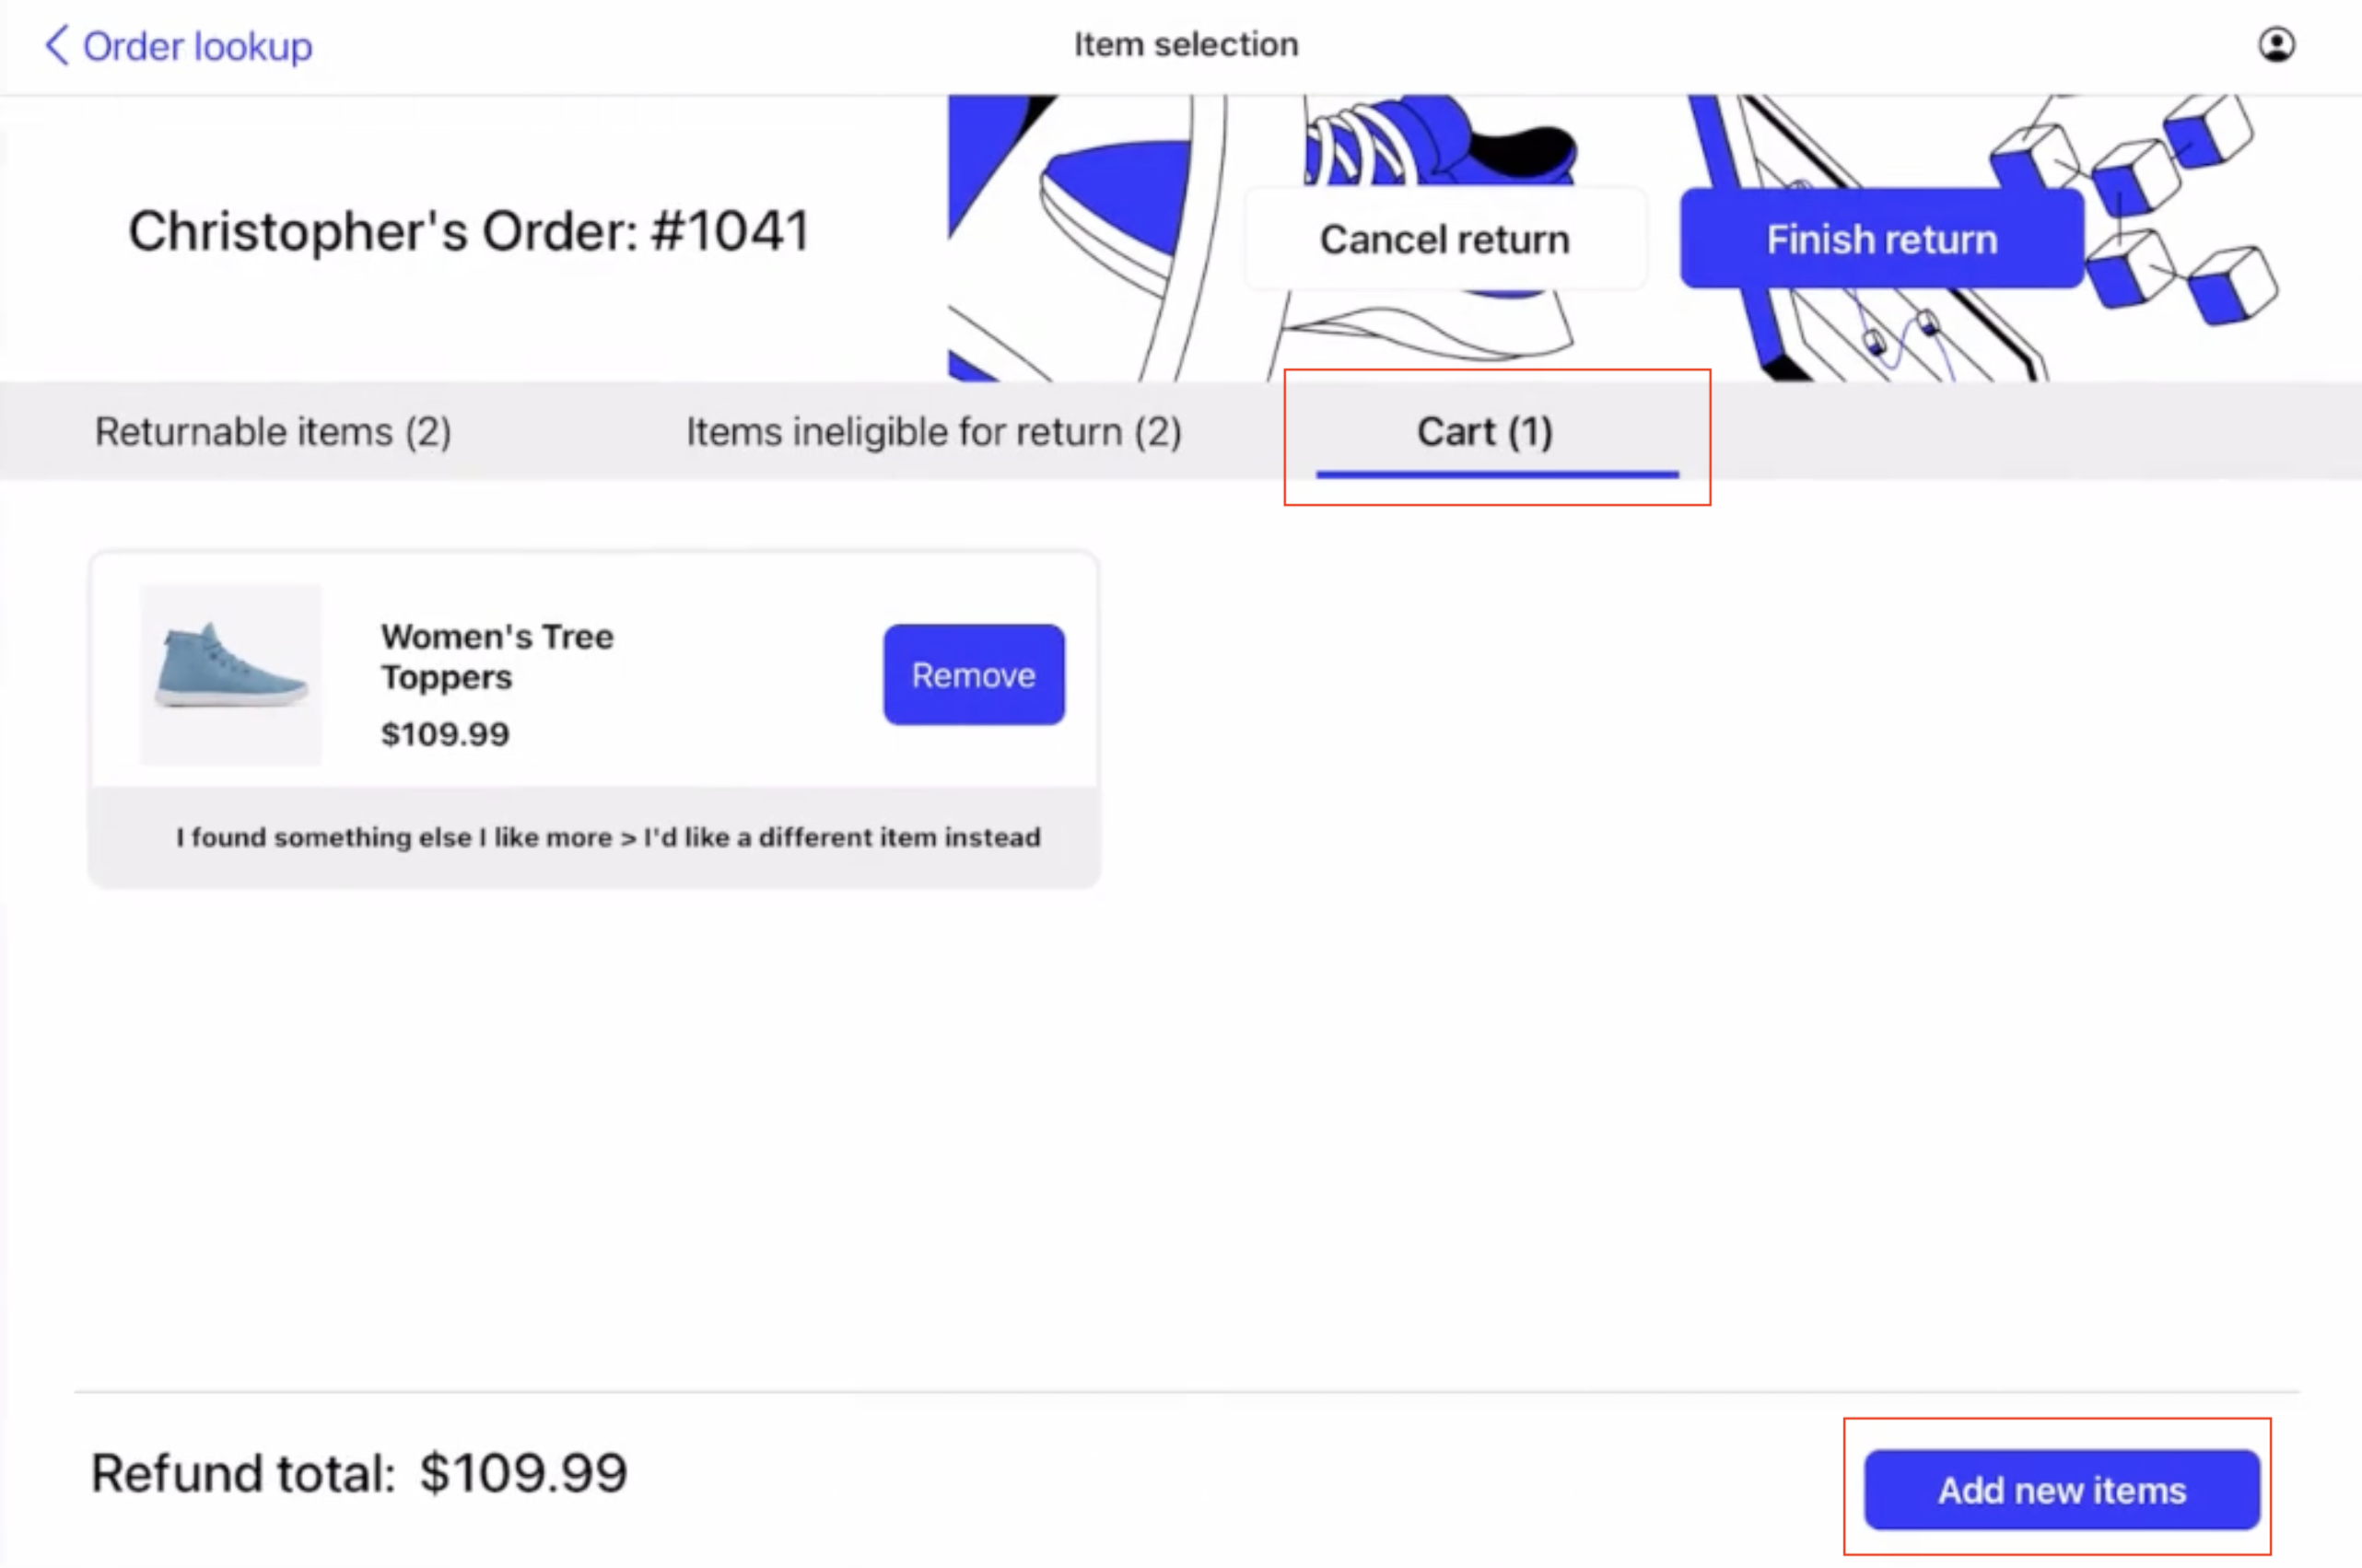
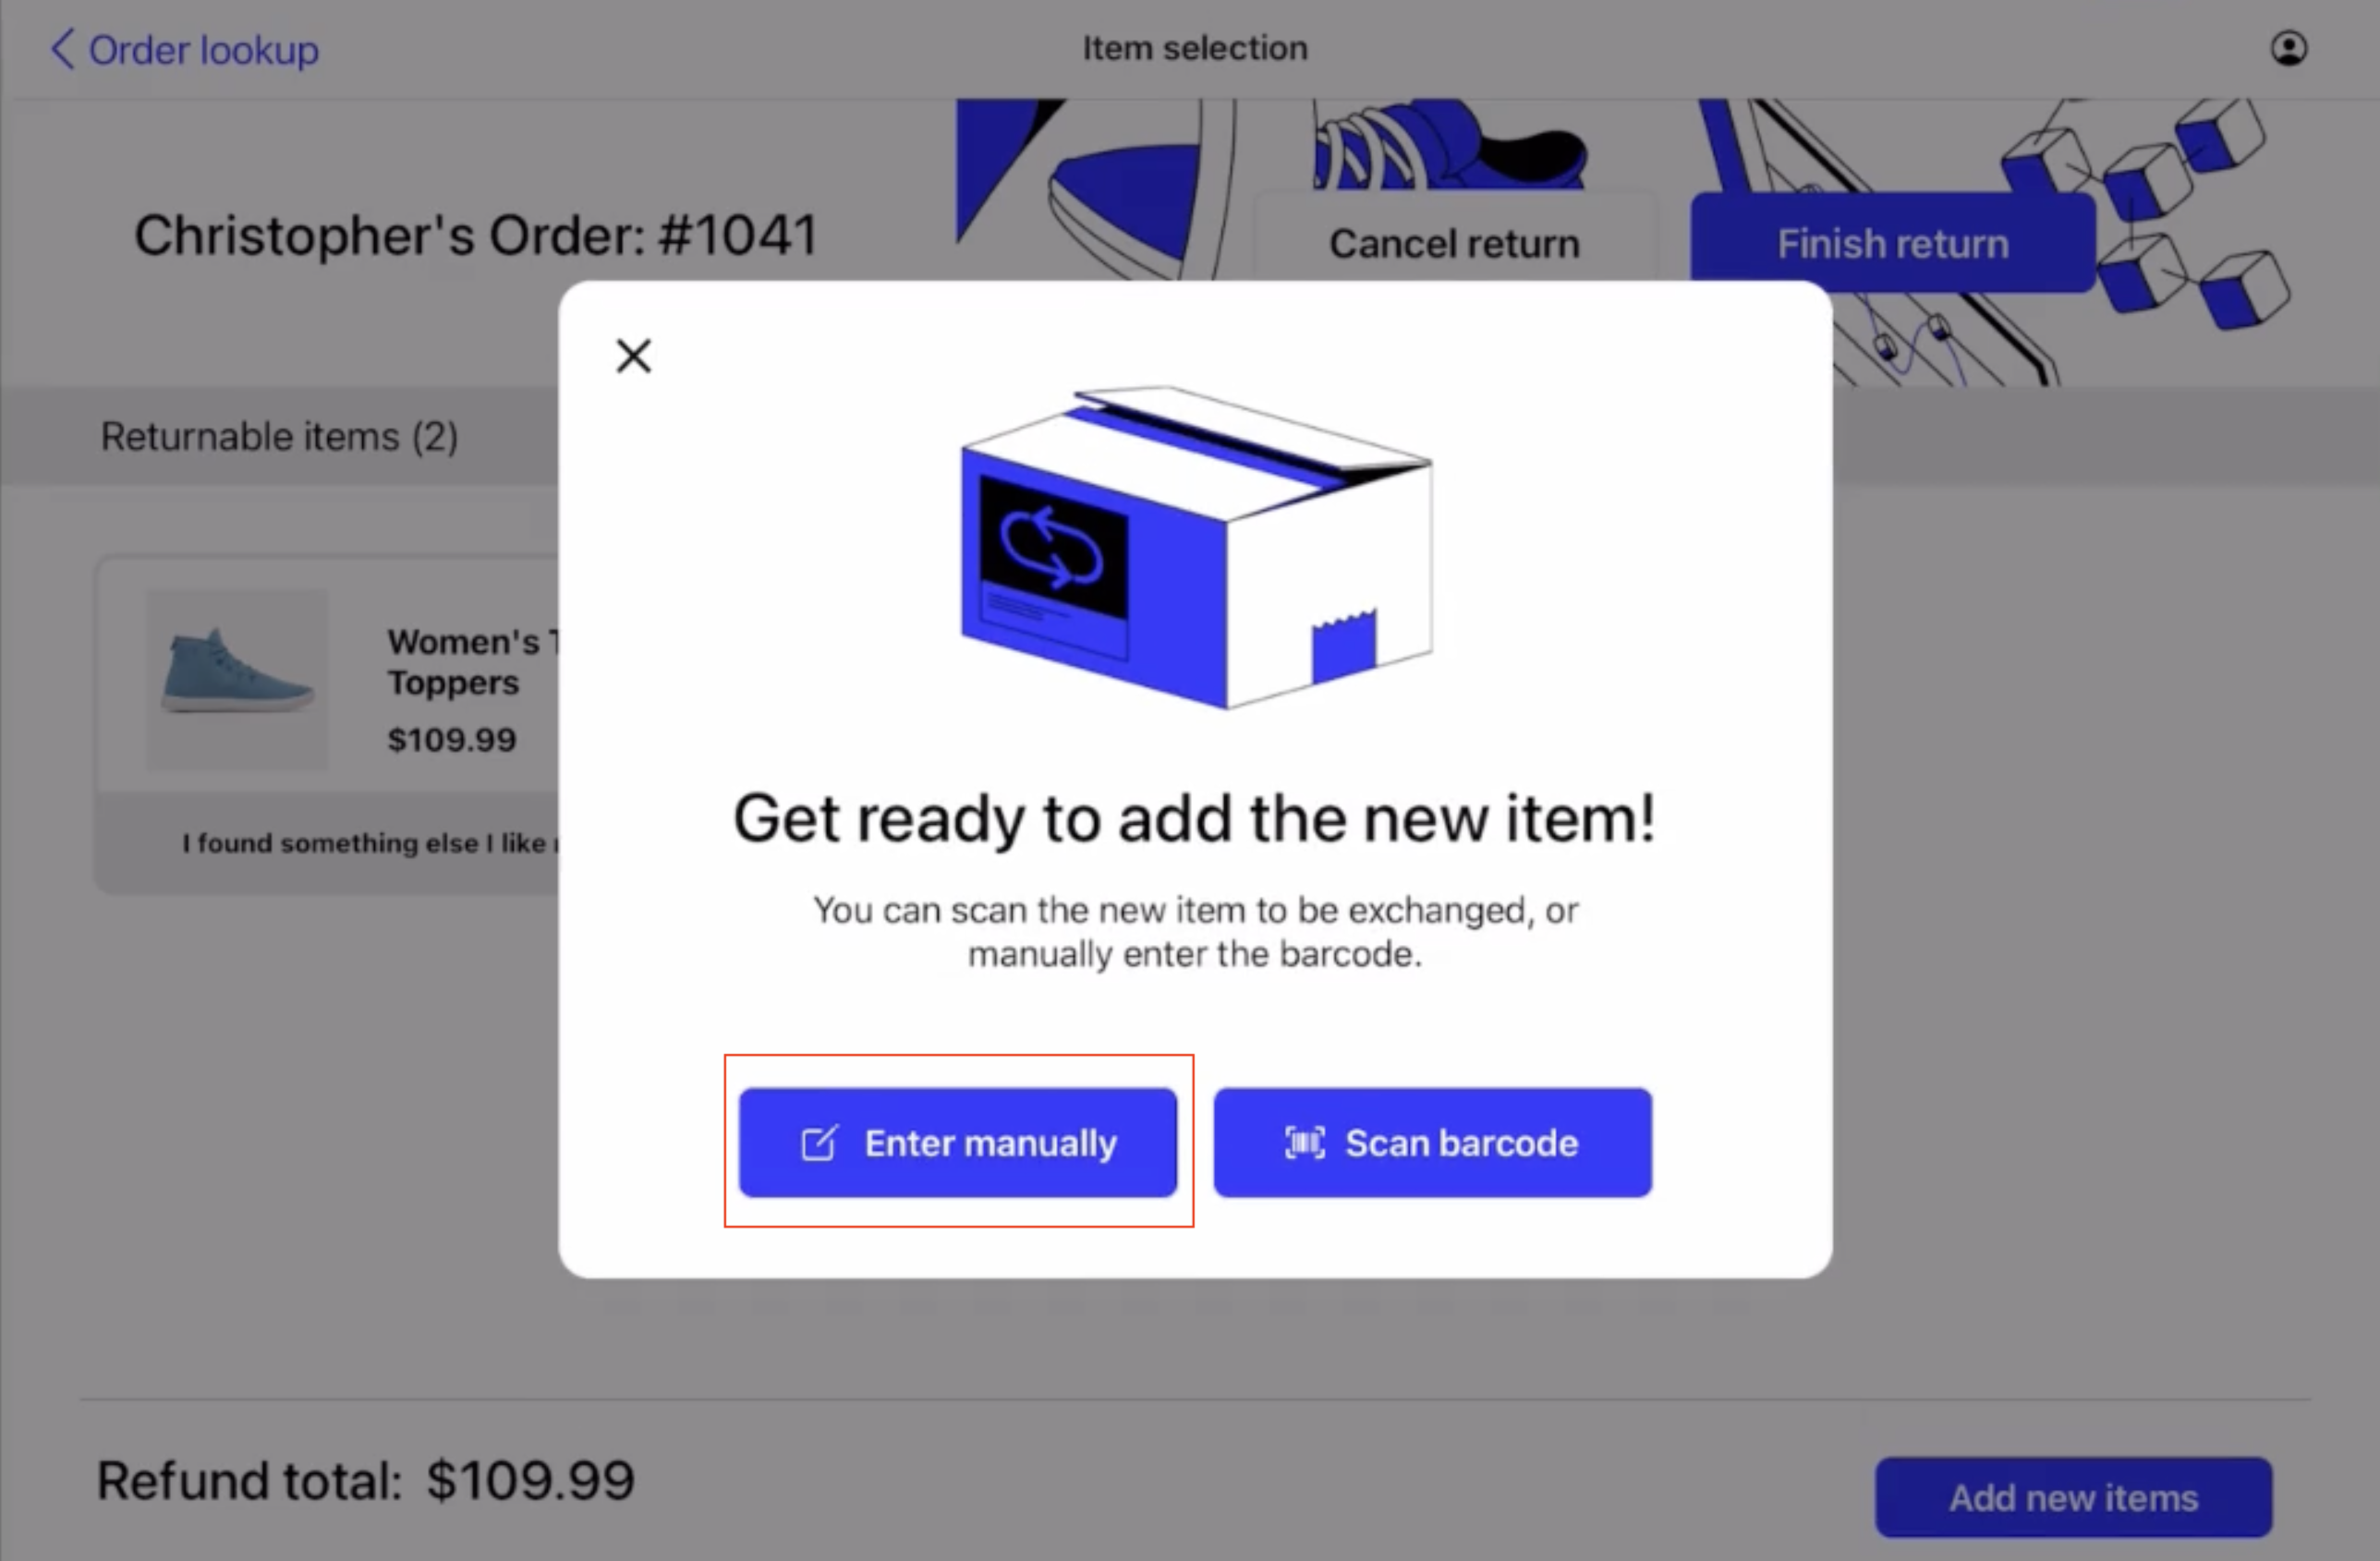
To complete an exchange, navigate to Cart, then Add new items. If you are not completing an exchange, select Finish return and skip this step.
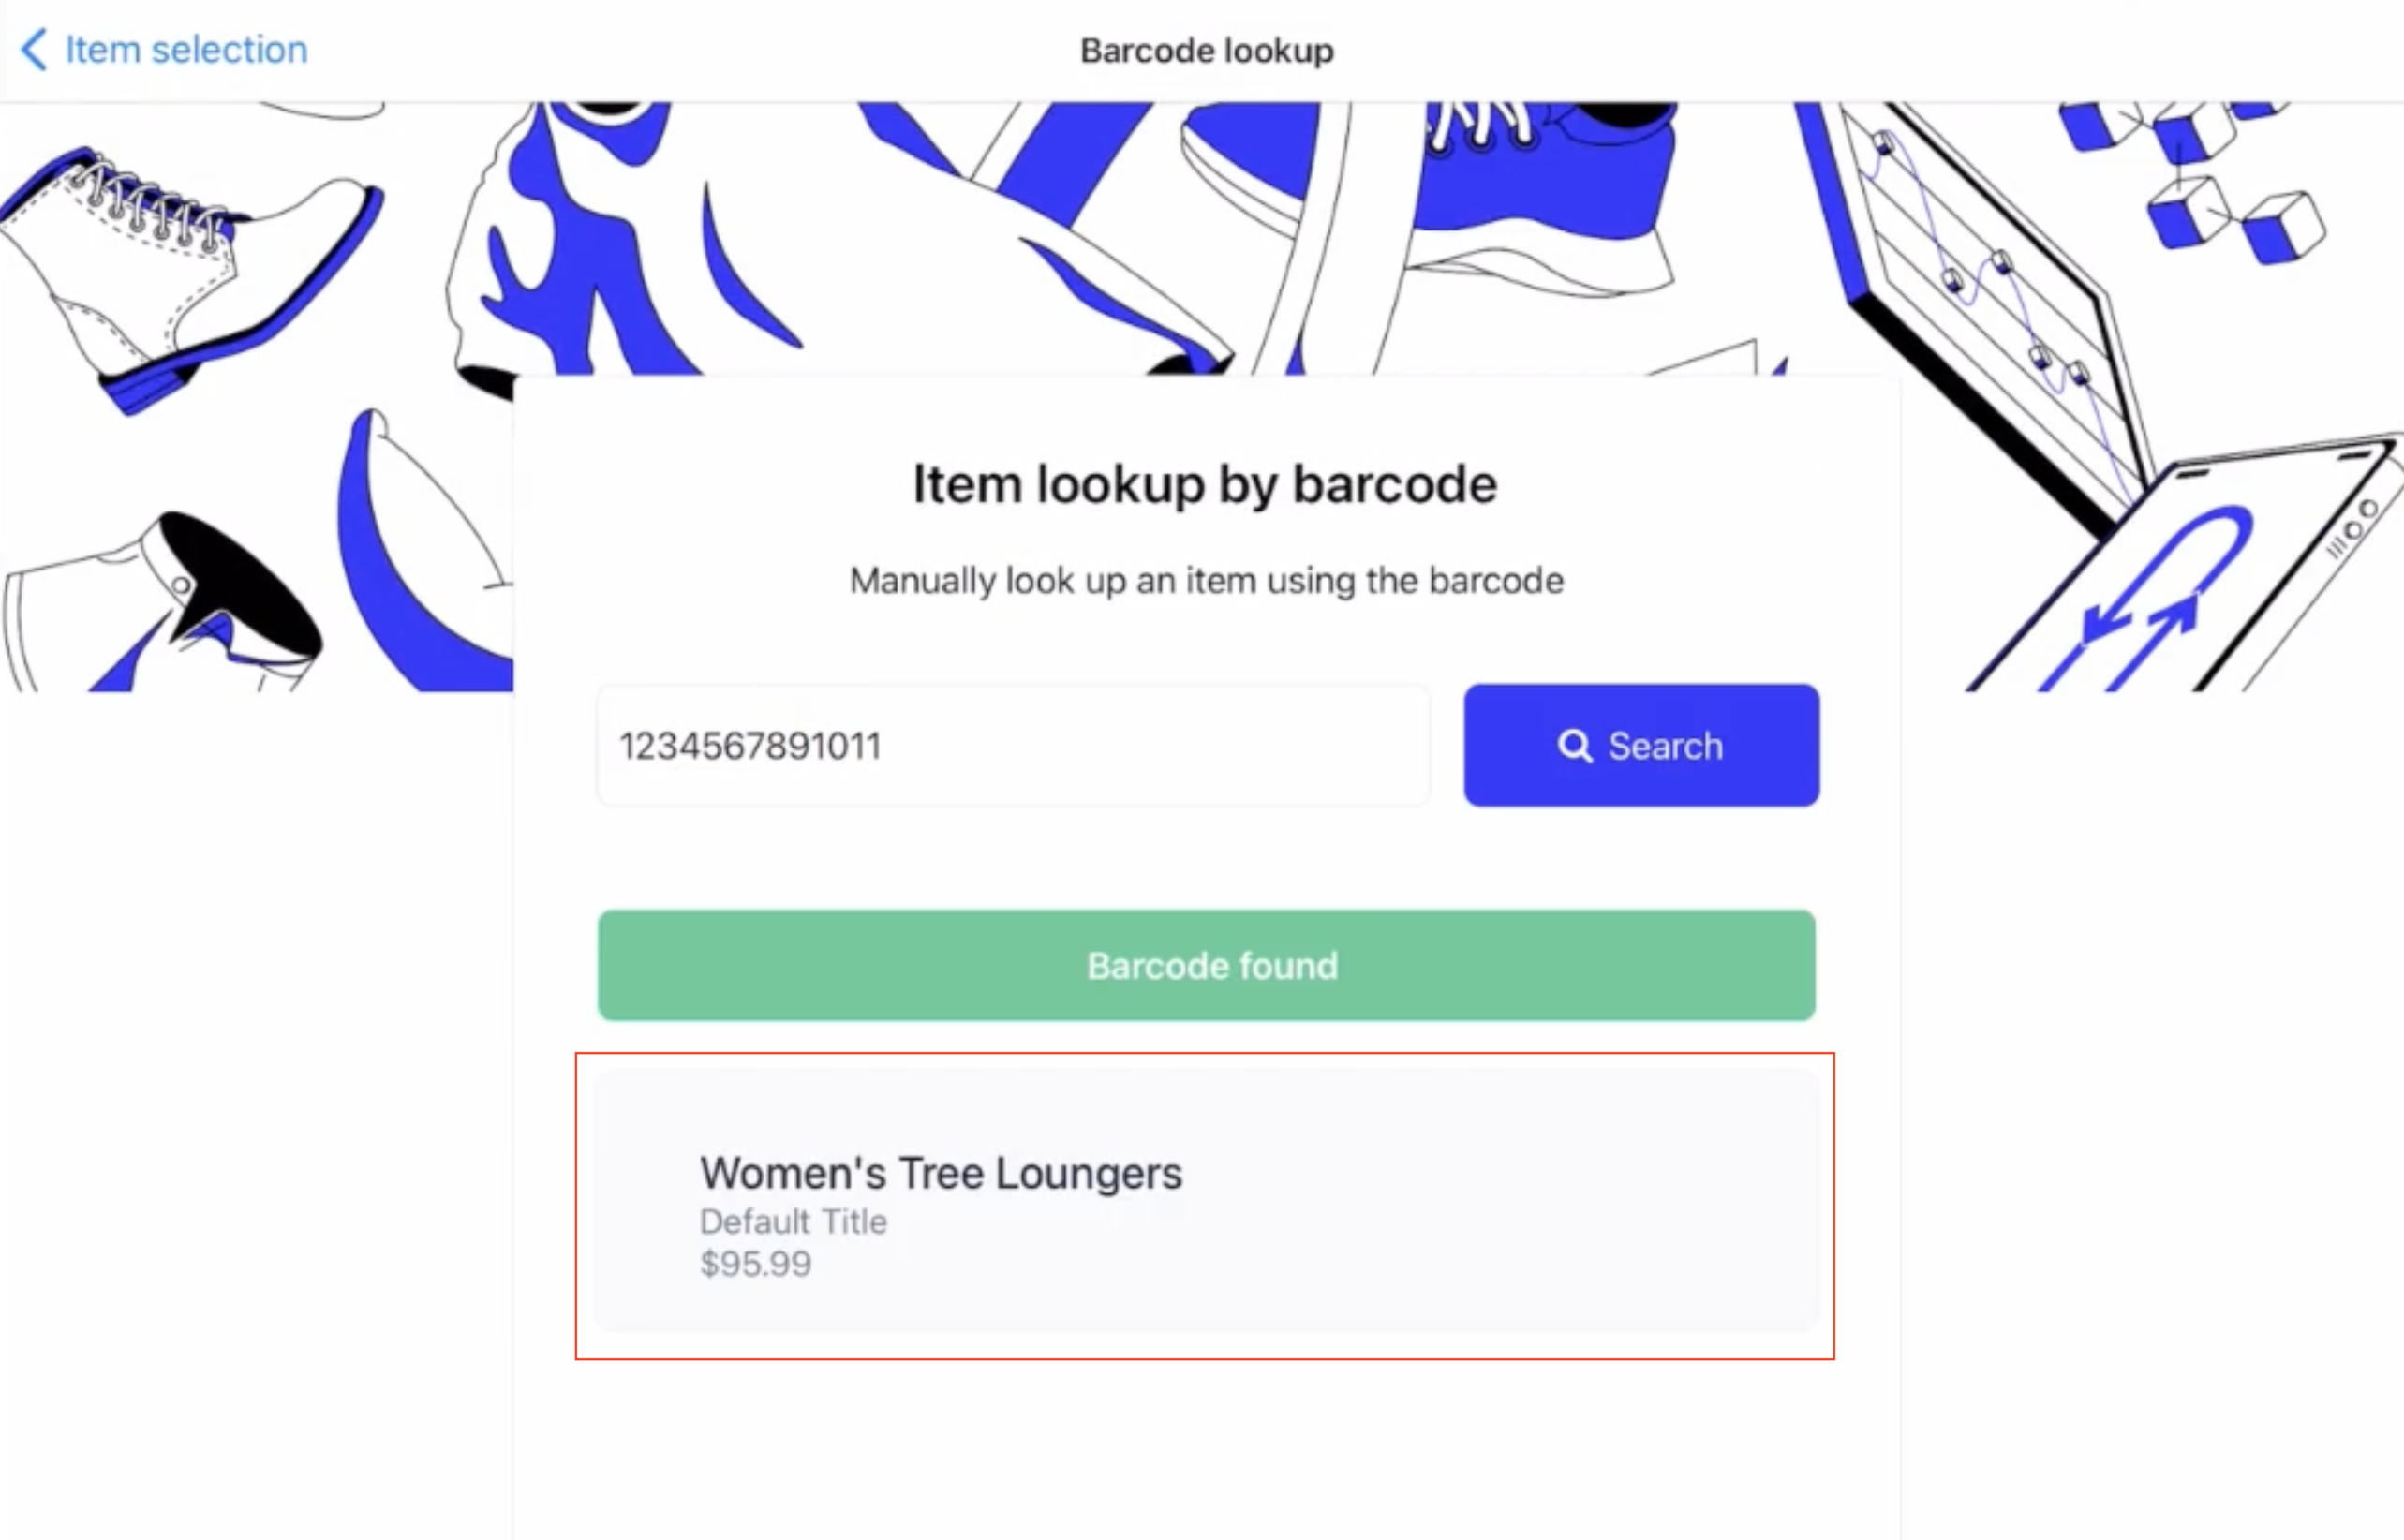
Next, look up the item by either scanning or manually entering the barcode.
Select the corresponding item below the green bar.
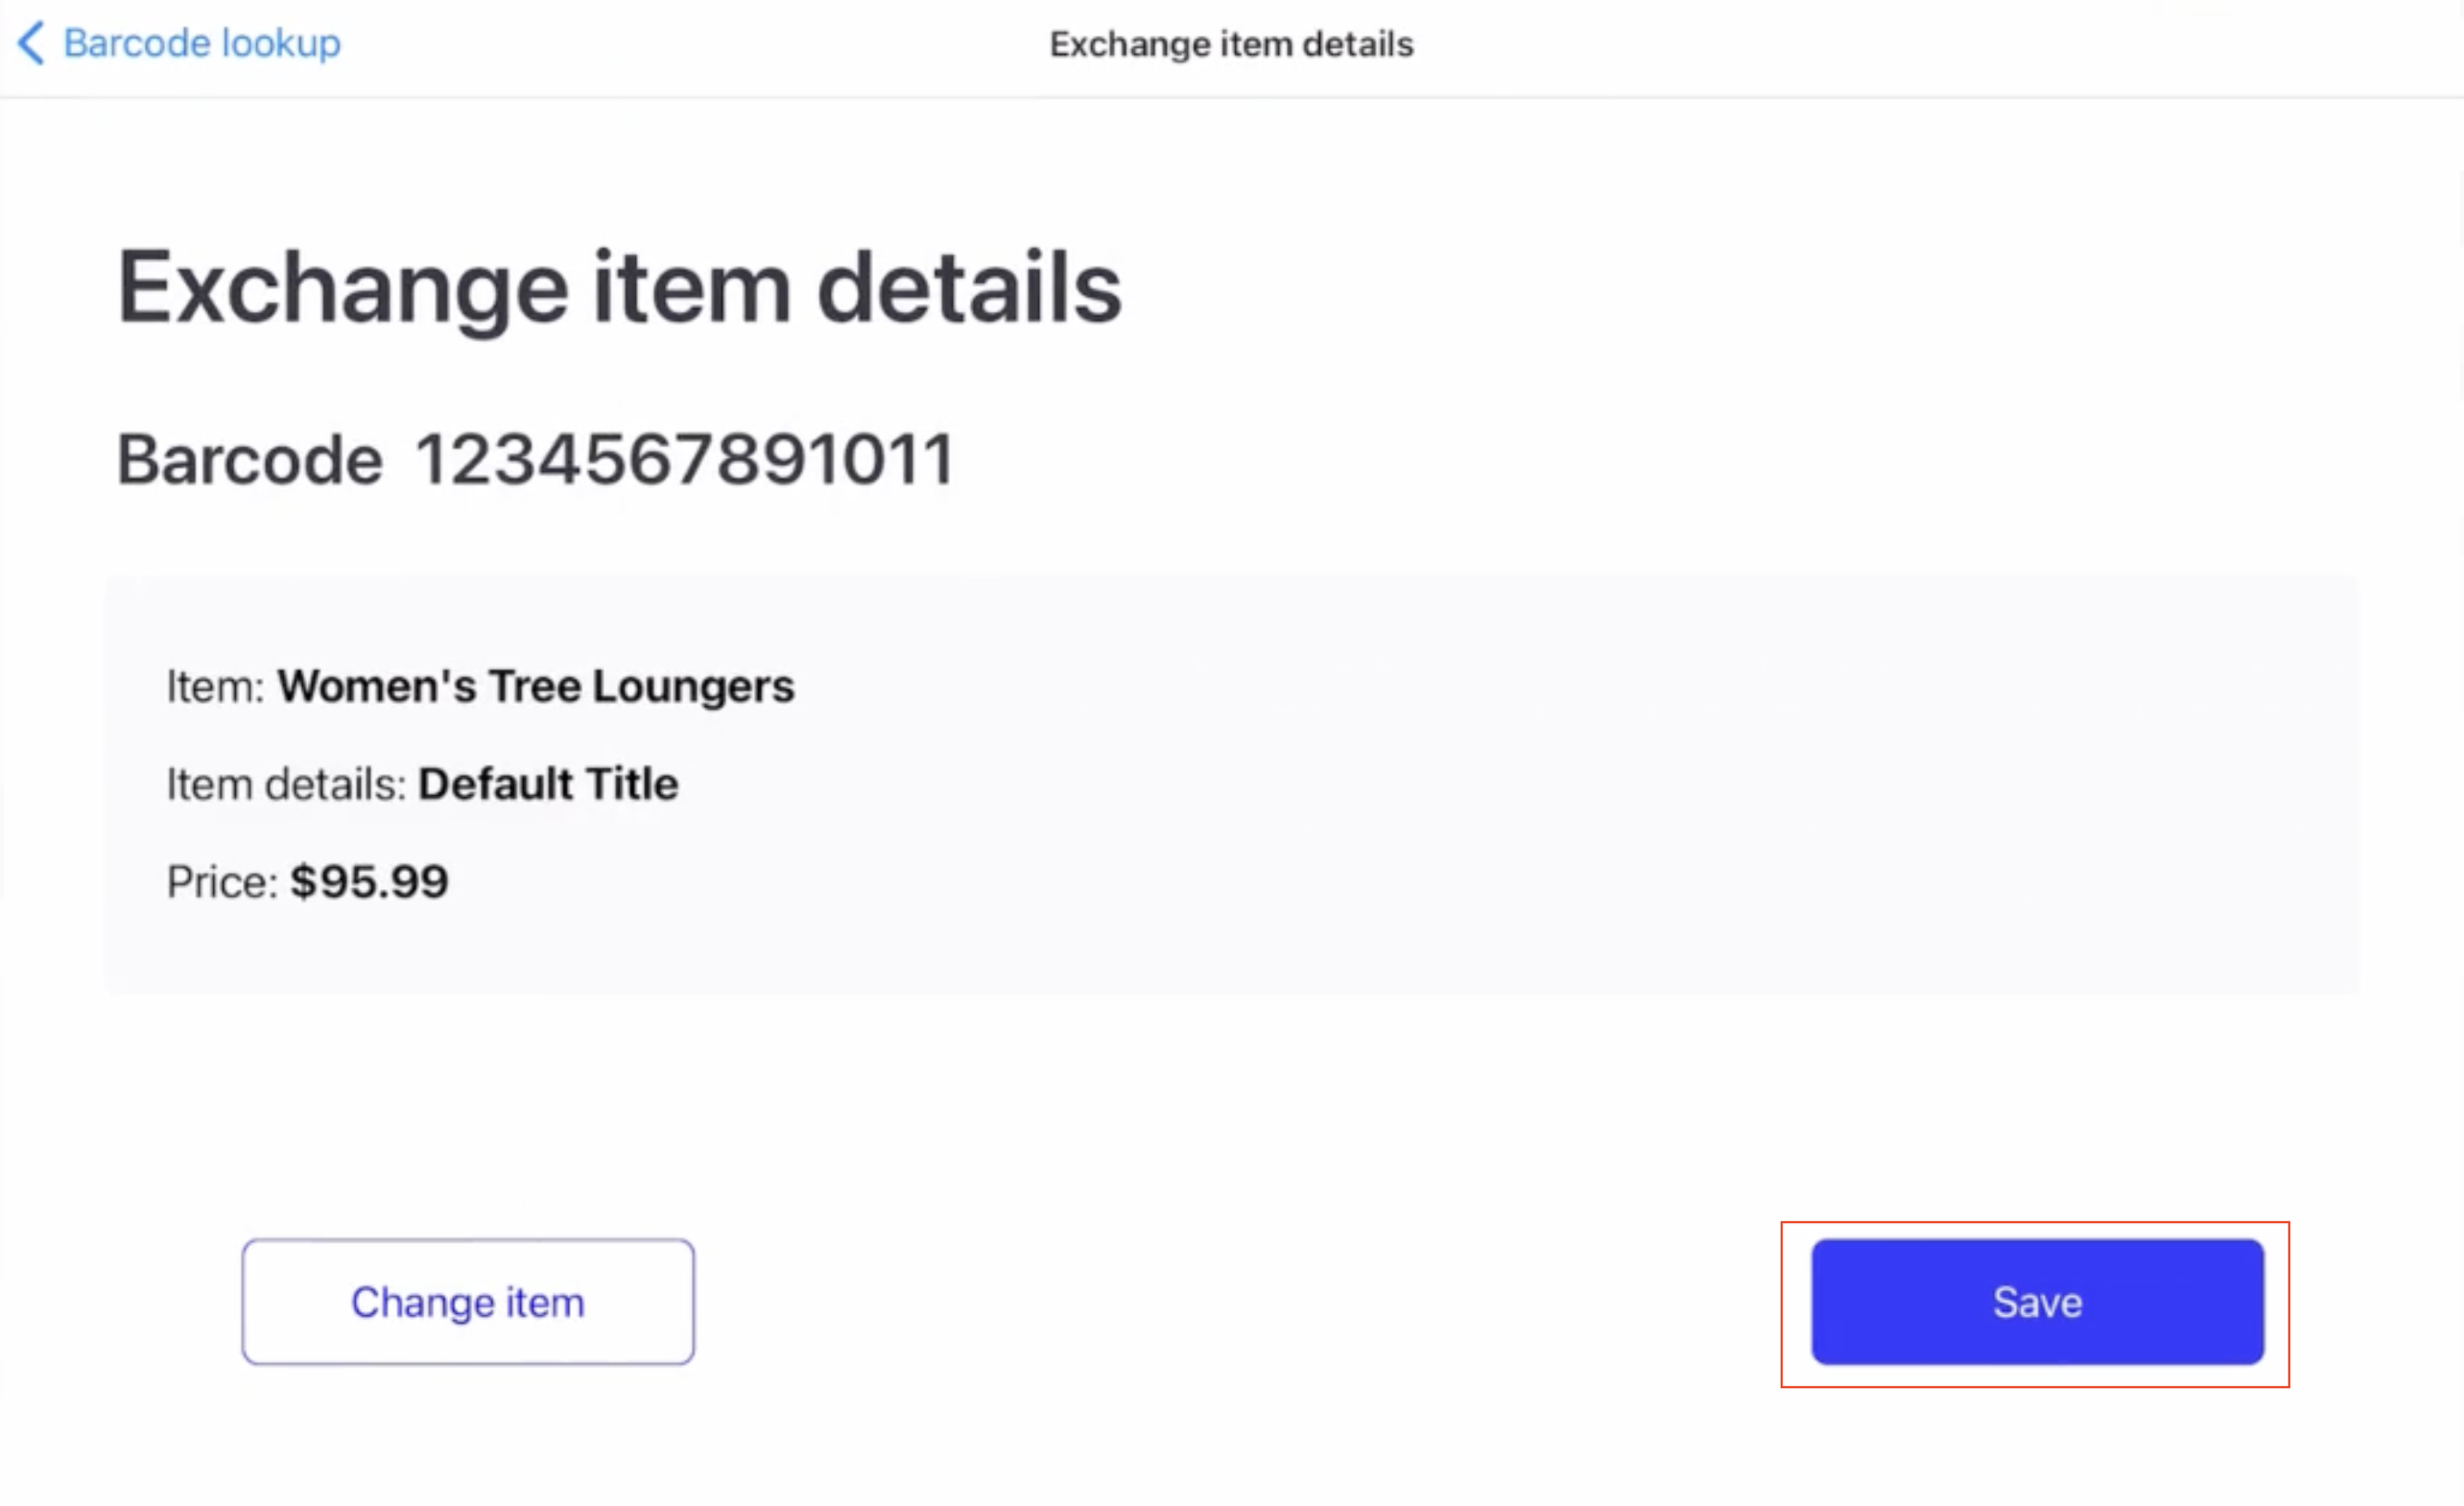
Review the item selected and click Save.
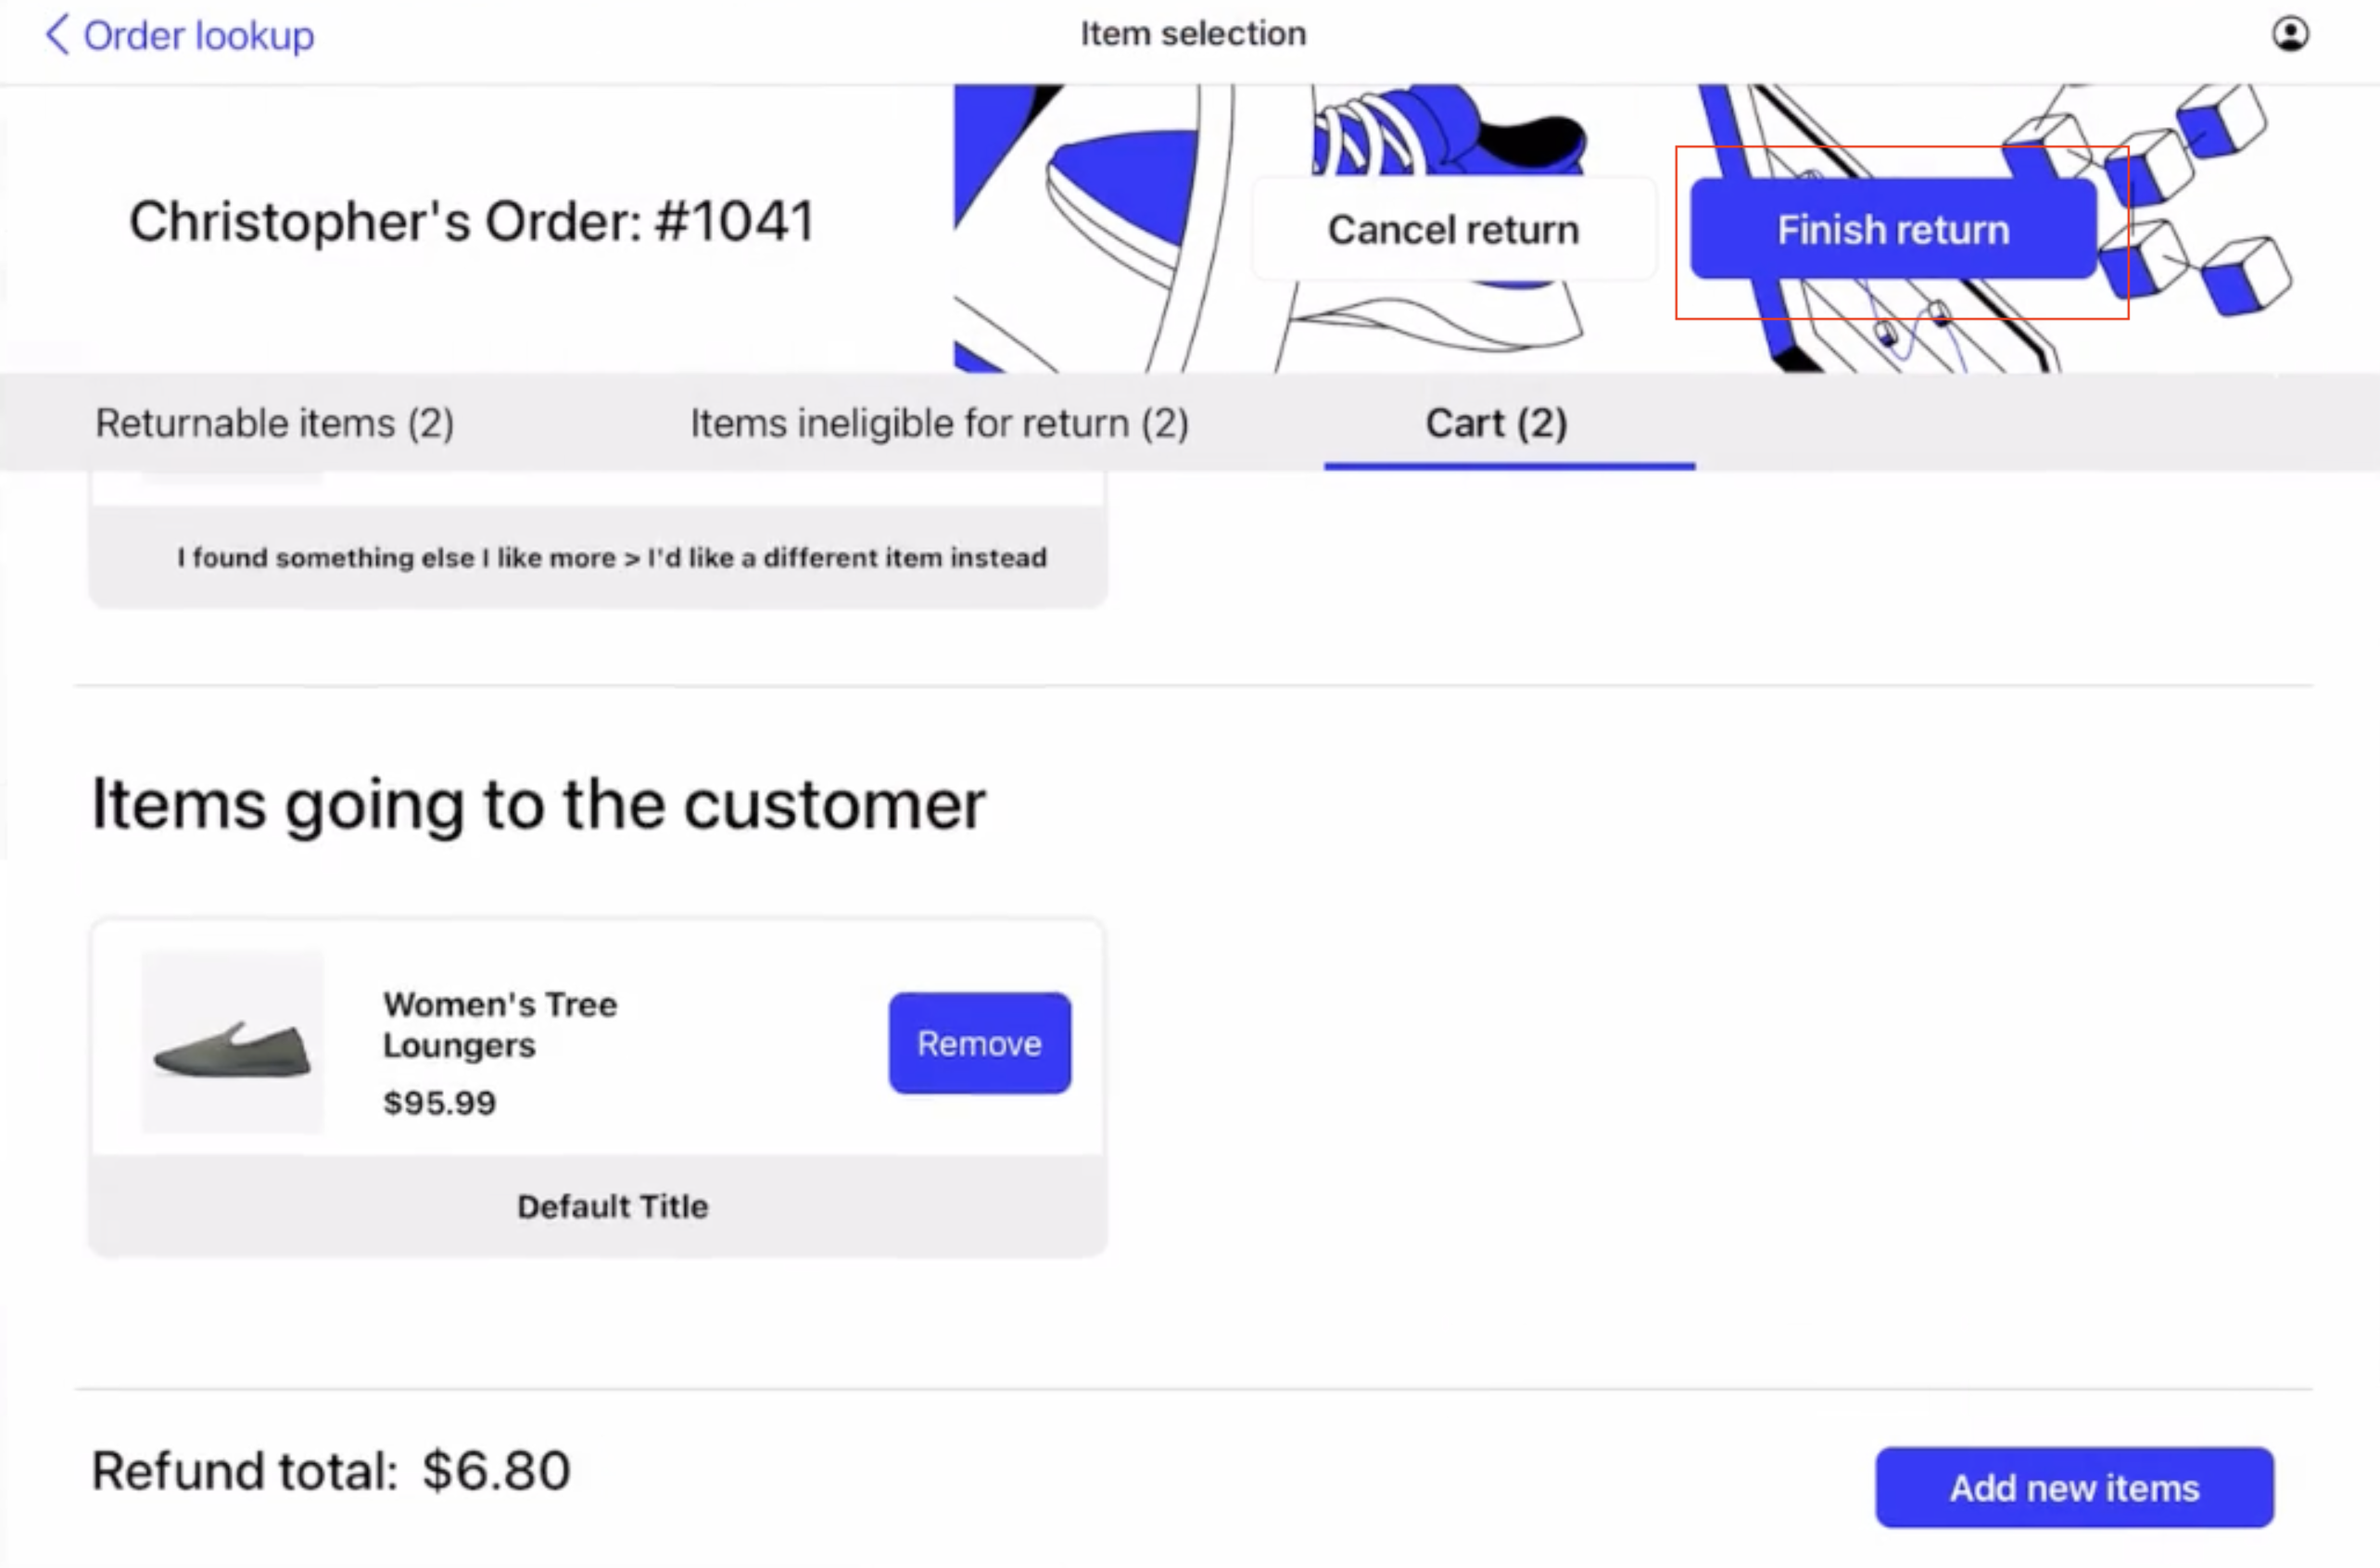
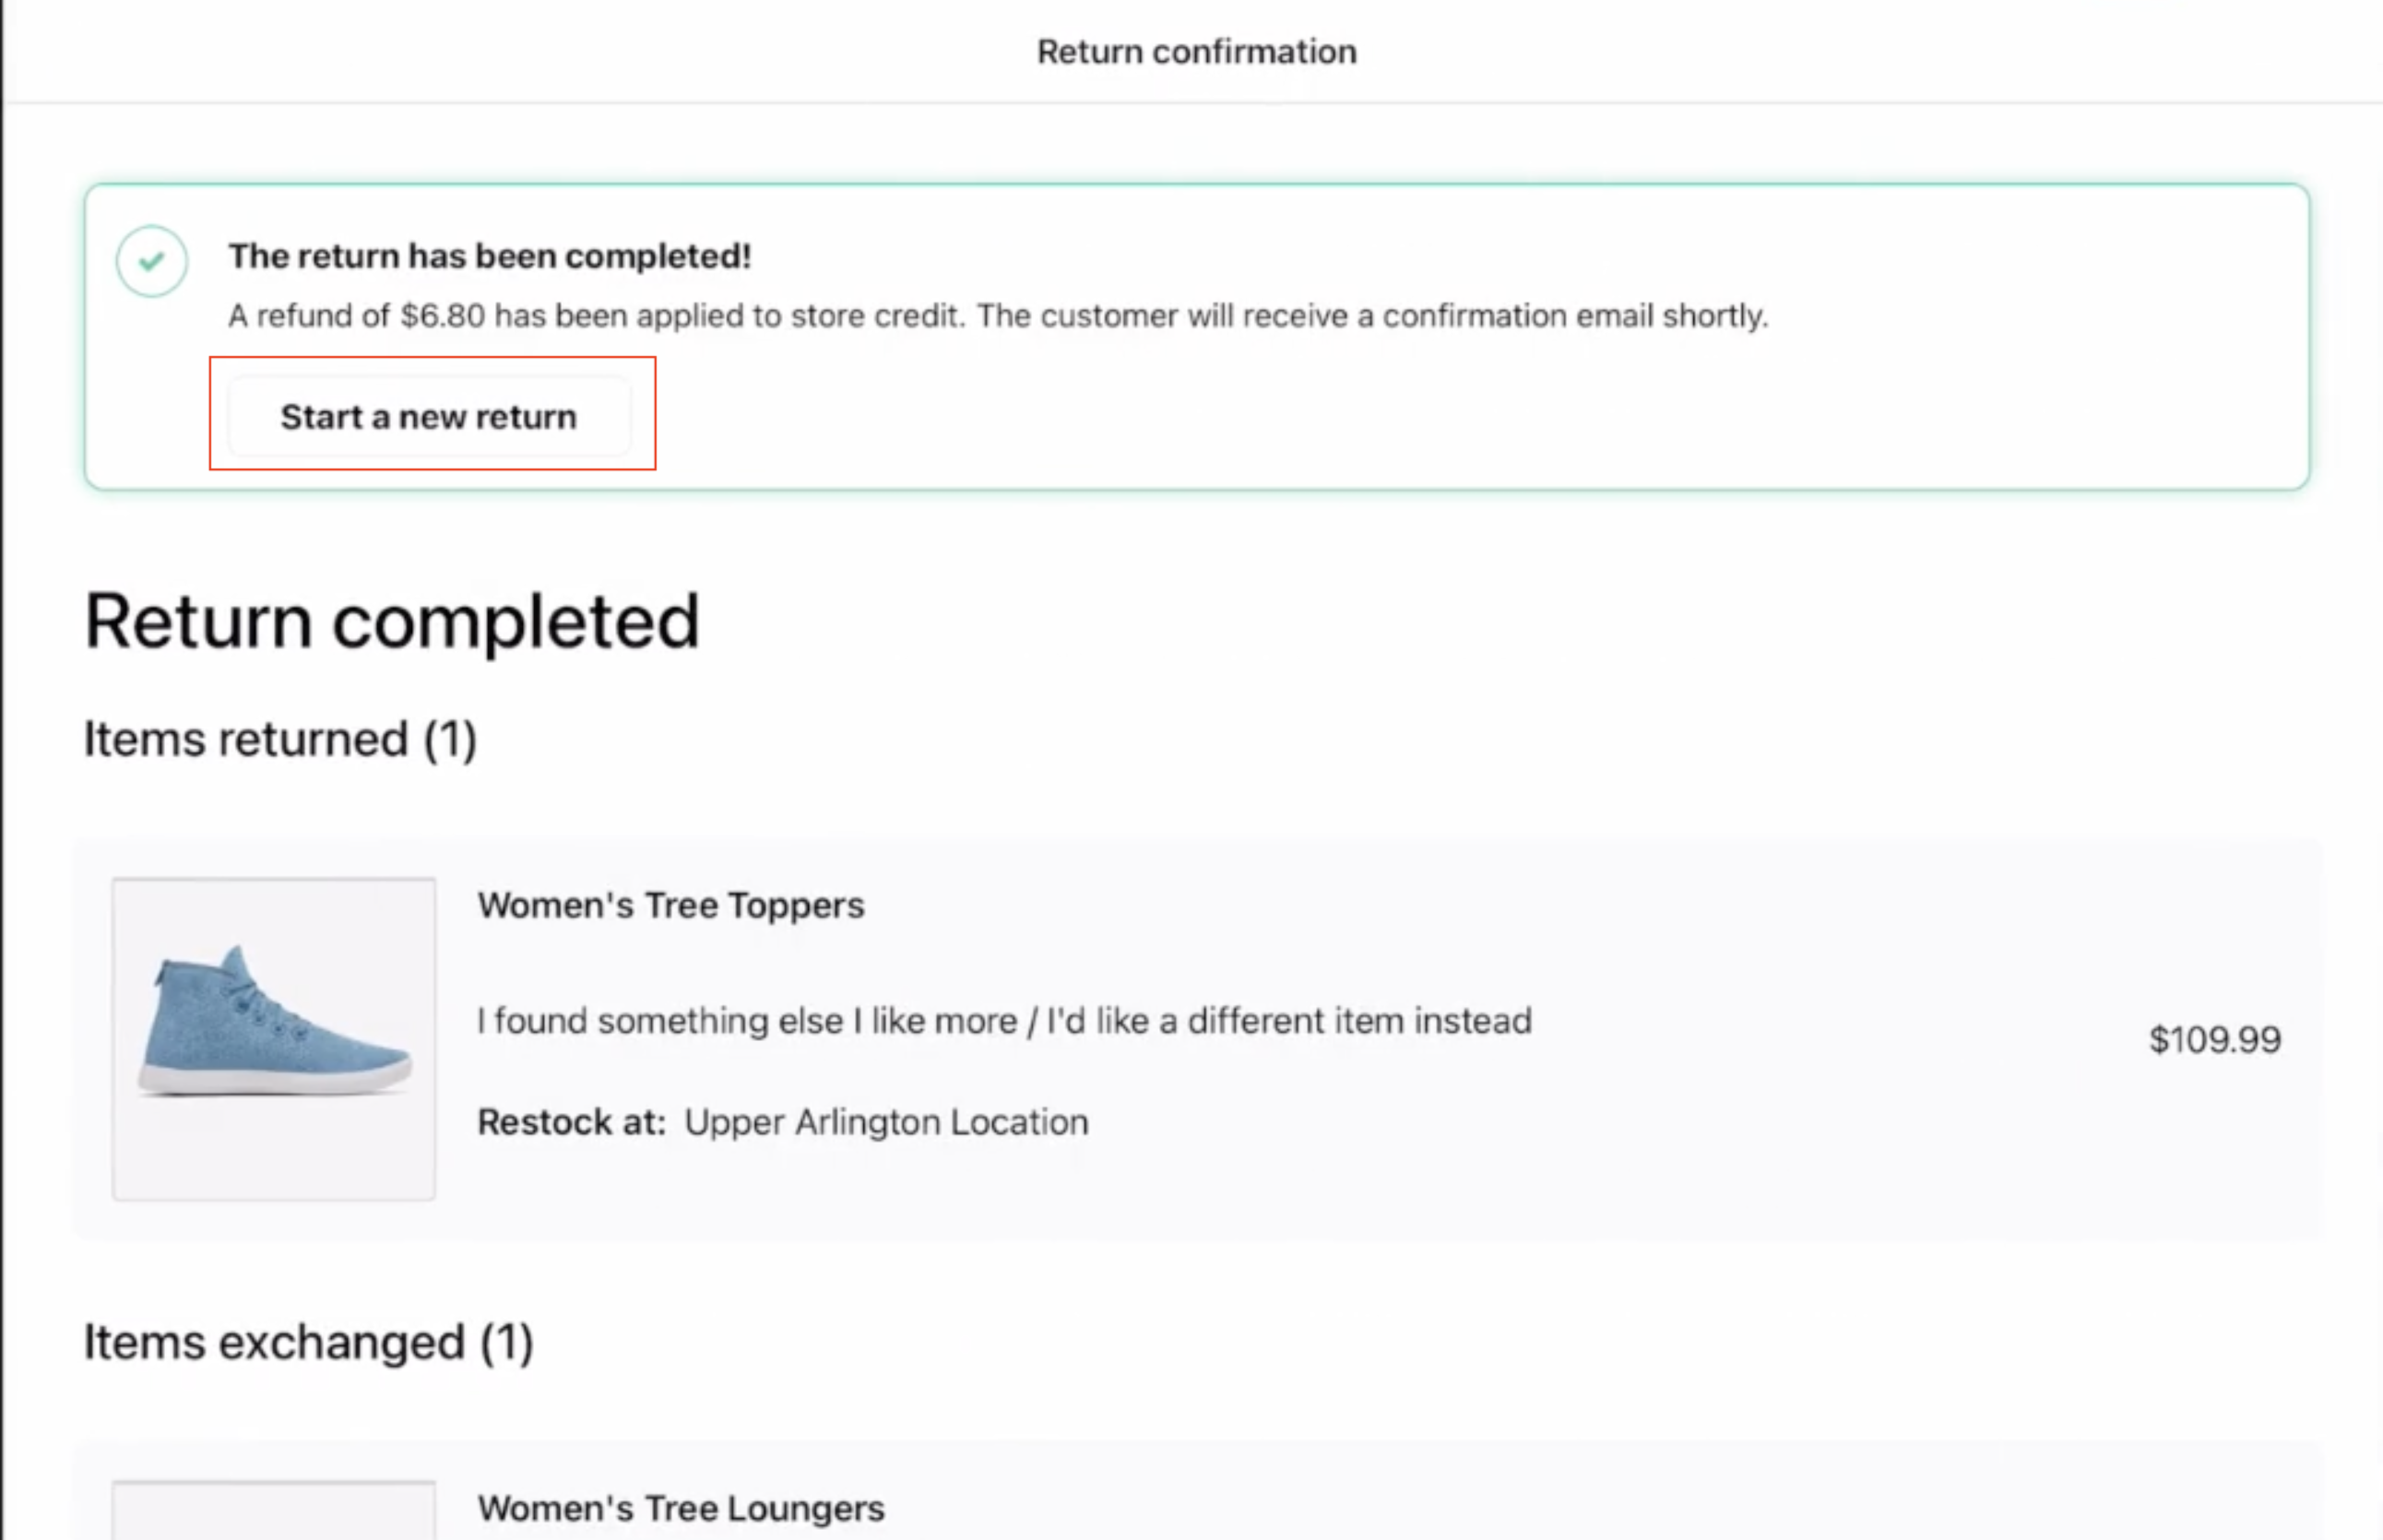
Review the exchange and when ready, click Finish return.
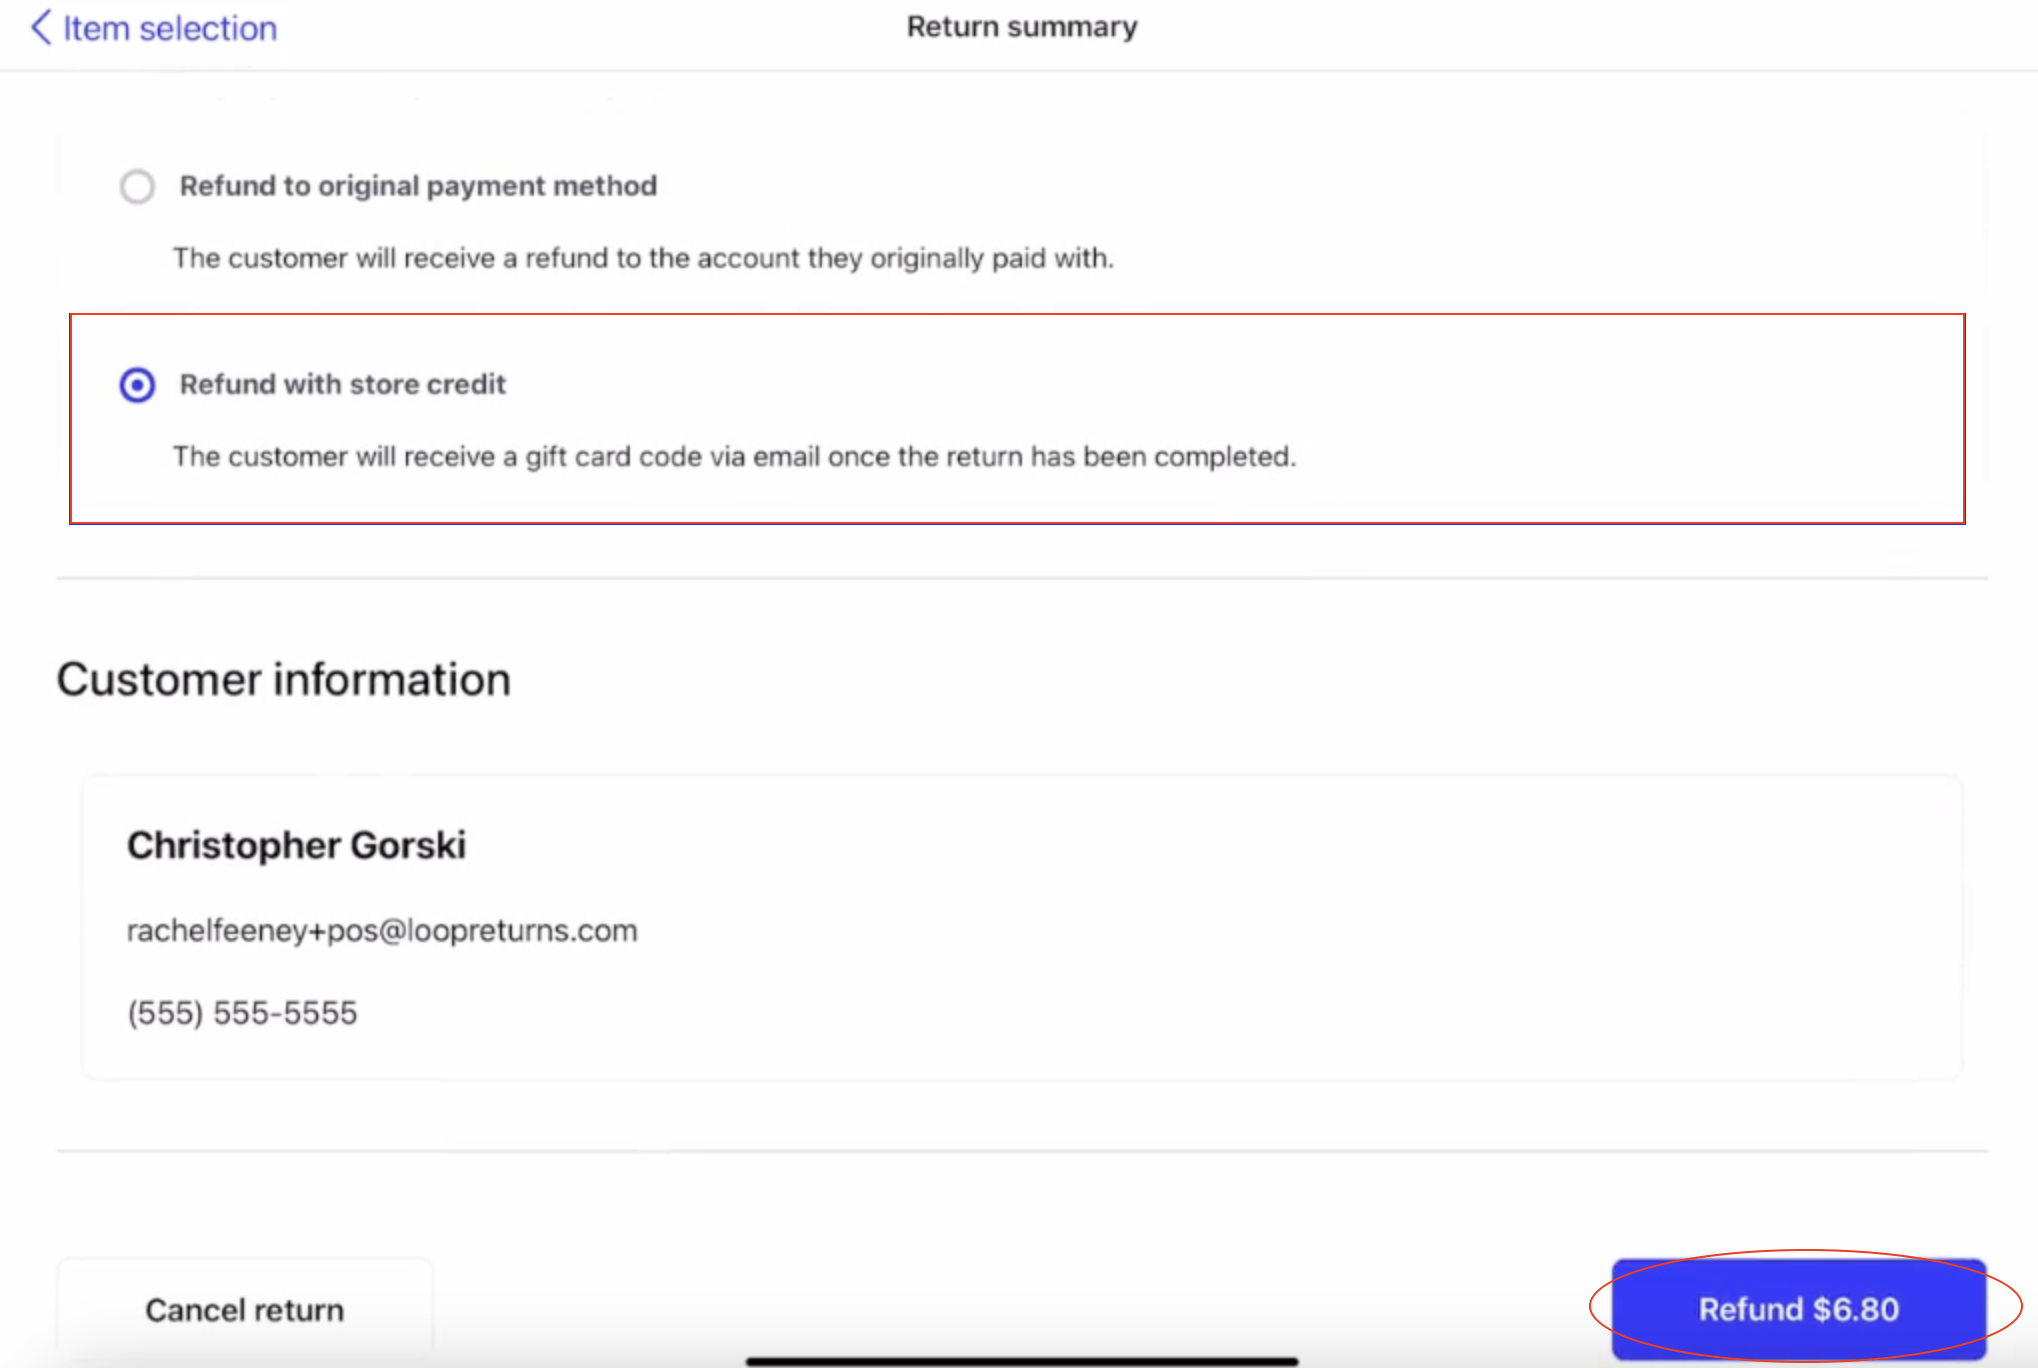
Review the return summary. You can choose to either refund to the original payment method, or refund with store credit if your store offers this option. If everything looks good, click the blue button in the bottom right of the screen and the return will be processed.
Plan information
To check to see if this feature is included in your plan, please review the Pricing page on the Loop Returns website.
If you're interested in adding this feature to your account, please contact your Merchant Success Manager to make an amendment to your account. Once that’s confirmed, we will enable Loop POS on the backend on your behalf.
FAQ
What countries can you use Loop POS in? You can currently use Loop POS in the US, CA, AU, and UK. At this time, the app supports USD, CAD, AUD, Euro, and GBP. English is currently the only language supported in English.
Why do I have to login with Admin credentials every two weeks? There’s a lot of foot traffic in your stores and we recognize your mobile devices are potentially less secure than your desktops as they can more easily be physically removed from the store. We wanted to provide two levels of security, one being the Admin login and the second being the store associate’s PIN to ensure your data is secure and the app cannot be used for returns fraud.
Why should I use Loop POS when I can already do returns through Shopify POS?
By using Loop POS:
Your retail returns data will be captured in the same system as your e-commerce returns, giving you a more comprehensive view of your shoppers' returns behavior.
You can leverage the return policies, reasons, and incentives that you have created in Loop Admin to provide your shoppers with a personalized experience.
Your accounting teams will also be able to keep track of exchanges more easily as Loop POS creates a new order rather than updating the existing one.
Can I limit POS returns to one item at a time? Yes. Some merchants have ERP limitations and have to limit returns to one item at a time. Loop can limit returns to a single item, and can set this restriction on POS returns. This can be done in conjunction with or independently of the rules for your online returns. Please contact your merchant success manager or our support team to get this turned on.
Please reach out to support@loopreturns.com with any additional questions.