
Listings
OVERVIEW
This article explains how to use Loop's Blocklist and Allowlist features to manage return exceptions and restrictions. It covers the differences between blocklisting (preventing returns) and allowlisting (allowing exceptions), and provides step-by-step instructions for creating and removing listings. The article also includes guidance on CSV bulk uploads and exports, best practices for managing listings, and how these features affect the customer experience in the shopper return portal.
Use the menu on the left to quickly navigate this article.
Blocklist versus Allowlist
Loop Listings can be utilized to allow exceptions and prevent returns in specific situations. To view Listings, navigate to the Loop admin > Returns management > Returns > Blocklist & allowlist.
Blocklisting allows you to prevent specific return requests based on the following criteria:
A customer email address.
An order number.
A specific product.
Allowlisting lets you make an exception for a specific order or customer email address. This feature allows you to override ineligibility within Loop and lets the customer make a return request through the portal normally. Examples on when your team may decide to offer exceptions are:
Final Sale products.
Exchange Only products (Allowlist will allow for refunds to the original payment method).
Orders outside of your Return Window.
Customers, orders or products that were previously added to the Blocklist.
Listings setup
Create Listings
To create a listing, go to Loop admin > Returns management > Returns > Blocklist & allowlist.
Select Create Listing and follow the prompts to create the necessary listing.
Once you have a listing created, your Listings dashboard will appear. You will be able to view the item, the date it was added and the type of listing. You will also have the option to remove listings when necessary.
Remove Listings
To remove a listing, go to Loop admin > Returns management > Returns > Blocklist & allowlist.
Select the trash can icon to the right of the listing you would like to remove.
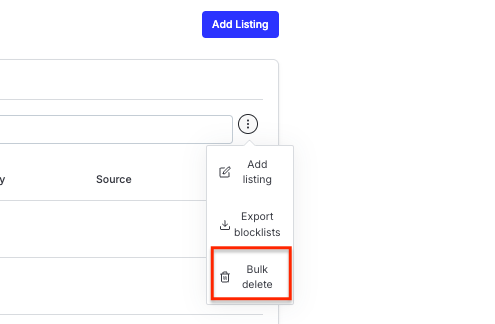
Tip: You can delete both blocklist and allowlist listings in bulk. Simply click the three dots in the right-hand corner of the listings screen and click "Bulk delete"
Types of listings
When adding listings, you can add something to the Blocklist or Allowlist by order number, email address or on the product level.
Order
Adding an order to the Blocklist will make all products in the order ineligible for return
Adding an order to the Allowlist will make all products in the order eligible for return
This overrides any existing blocklist entry, products tagged as Final Sale, or the order’s return window
Best Practice: If you’d like to ensure the customer returns the appropriate product for the outcome you approved, Loop recommends adding the order to the Allowlist, submitting the return request on the customer’s behalf, then immediately removing the allowlist entry after the request is submitted. The customer will still receive a Return Confirmation email and a shipping label for their return request.
Blocklisting an email will make all products purchased by that customer ineligible for return.
Allowlisting an email will make all products purchased by that customer eligible for return, regardless of existing blocklisting entry, products marked as Final Sale or return window.
Best Practice: Loop recommends leveraging the order functionality for allowlist entries versus email, when possible.
Product
Blocklisting a product will make that product ineligible to be returned for any order.
Blocklisting a product within an order will make that product ineligible to be returned within that order only.
Product Tag
Blocklisting a product tag will make any product with that tag ineligible to be returned for any order.
CSV upload and export
You can upload a CSV file for Blocklists and Allowlists. Blocklists can be uploaded by order number, customer email address, product or product tag while Allowlists can be uploaded by order number or customer email address.
Use the structure below for each type of listing to ensure your spreadsheet will import correctly:


Note: Words in Column A should not include capital letters. No header needed.
Allowlist or Blocklist Specific Orders
To add specific orders to an Allowlist or Blocklist:
Create a two column spreadsheet.
Enter “order” in Column A (each row).
Enter the Shopify Order Name in Column B (each row).
Blocklist by Product, All Orders
To add specific products, in all orders, to the Blocklist:
Create a two column spreadsheet.
Enter “product” in Column A (each row).
Enter one of the following associated with the products you wish to update in Column B (each row):
Shopify SKUs
Product IDs
Variant IDs
Completing these steps will blocklist that product for all past and future orders.
Blocklist by Product, Specific Orders
To add specific products, within specific orders, to the Blocklist:
Create a three column spreadsheet.
Enter “product” in Column A (each row).
Add the Product ID, SKU or Variant ID in Column B.
Add the Shopify Order Name in Column C.
Allowlist or Blocklist Customers
To add specific customers to an Allowlist or Blocklist:
Create a two column spreadsheet.
Enter “email” in Column A (each row).
Enter the customer's email address in Column B (each row).
Exporting Blocklist and Allowlist
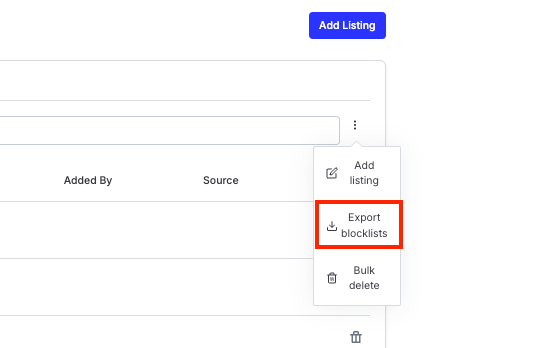
Export your listings to a csv file by clicking the three dots to the right of the search bar when viewing your list and then selecting the export option shown here:
Customer experience
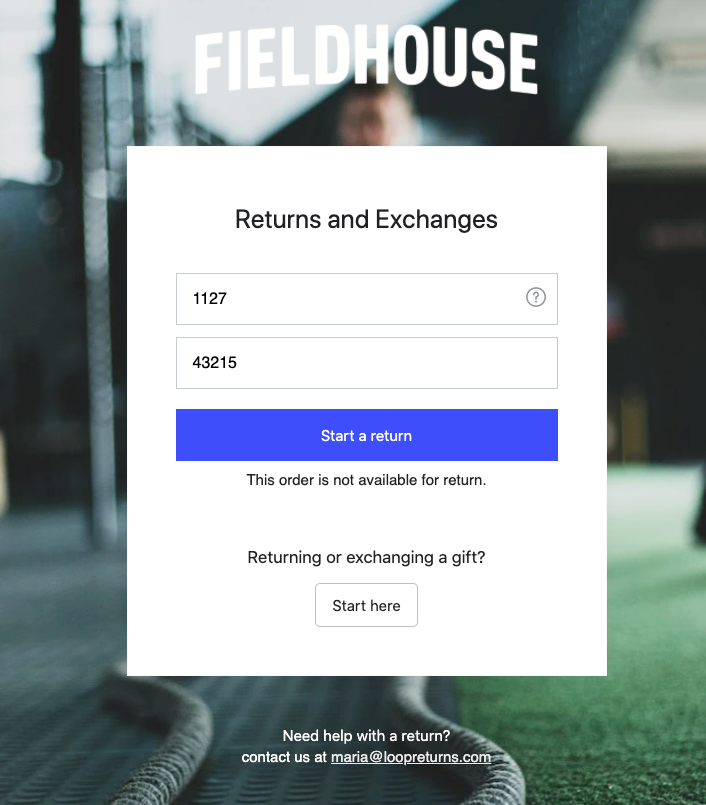
When a customer has a return that has been on the Blocklist, they will receive a message stating that their order or the product is not available for return (the message is the same for blocked emails and orders). At that point, they can contact your support team email address in the footer of the shopper return portal.
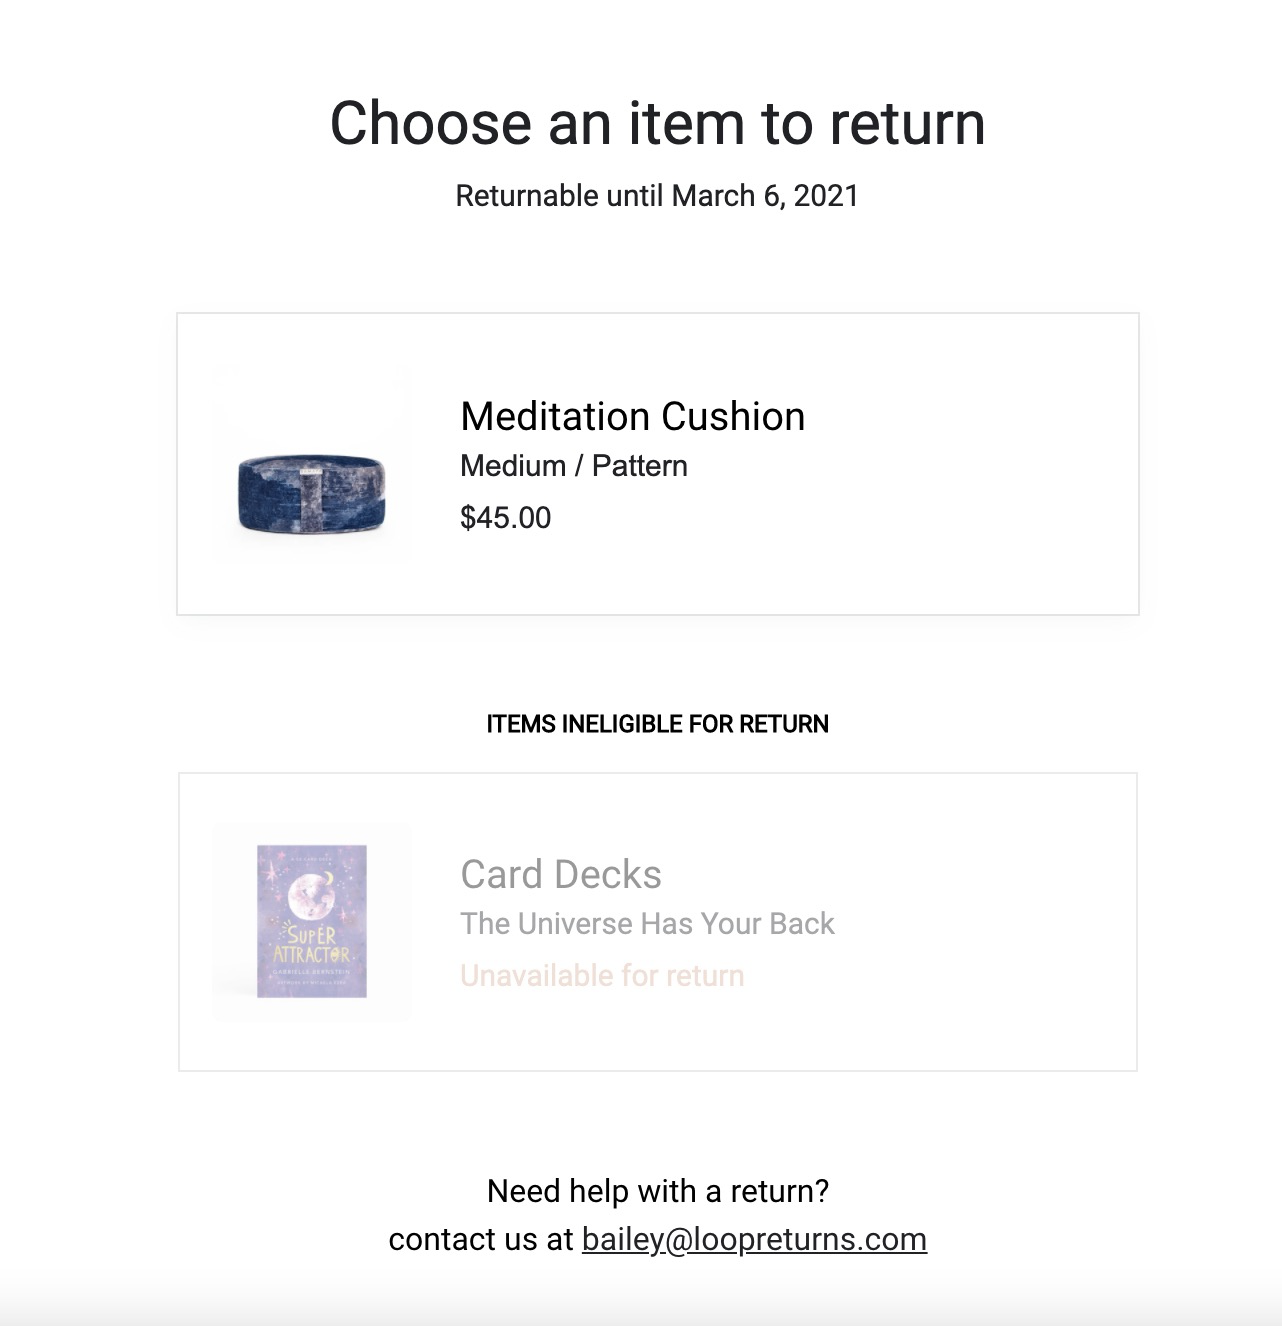
When an order or customer has been added to an Allowlist, their order(s) that was previously unavailable for return will no longer be there and they can utilize Loop as usual.
FAQ
We’ve Blocklisted a customer’s email address, but would like them to be able to return on a specific order, do we need to remove their email address from the Blocklist? No. Allowlisting the customer’s order number will trump the Blocklist record and allow the customer to return on their order.
Should I leave an Allowlist record in place forever? While your team has full control over how Allowlists are managed, Loop recommends setting up Allowlists for temporary purposes only. Many merchants will Allowlist an Order they are attempting to provide an exception for and submit the return request on behalf of their customer, immediately removing the Allowlist after the request is submitted.
How does adding an order to the Allowlist impact Workflows I have set up? Depending on the specific Workflow action, it may or may not be impacted when the order is on an Allowlist. More information on which actions are impacted can be found within our Workflows: Use Cases and Limitations article.
Please reach out to support@loopreturns.com with any additional questions.