Return Reasons Overview
OVERVIEW
The most valuable thing you can gain from a customer's return is the data surrounding why the return is being requested. Return reasons help you capture this information.
Why it matters
There is no greater source of feedback than your existing customers, especially when you ask them to share feedback in a time they are most willing to share. The customer feels heard when you let them give feedback, and you are also able to use the feedback to make informed business decisions.
Want to learn more about how Loop recommends optimizing your Return Reasons? View Loop's blog post about Improving your customer experience with return reasons.
Setting up Return Reasons
Return reasons are organized by parent and child reasons, with the ability to enable comments to help you get specific feedback on why products are being returned.
Want to learn more about how Loop recommends optimizing your Return Reasons? View Loop's blog post about Improving your customer experience with return reasons.
Step 1: Edit all return reasons
Navigate to Returns management > Shopper experience > Reasons reasons > Manage reasons library in the Loop Admin.
Add or delete return reasons to suit your brand voice and product types. We've pre-populated a few return reasons for you, but feel free to delete these and add your own.
To set up a child reason, select the drop-down, then select Create new child reason.
To enable comments, select the checkbox and select optional or required.
Note: Comments are not available on the parent-level when a child-level reason has been added.Select Save.
Step 2: Add return reasons to the reason group
Select Default Group.
View Return reasons.
Add or delete from your library or add new reasons on the fly for this group.
Note: Return reasons in the default group will be applied to all products, unless otherwise setup for return reasons by product type.Select Save.
Setting up Return Reasons by product type
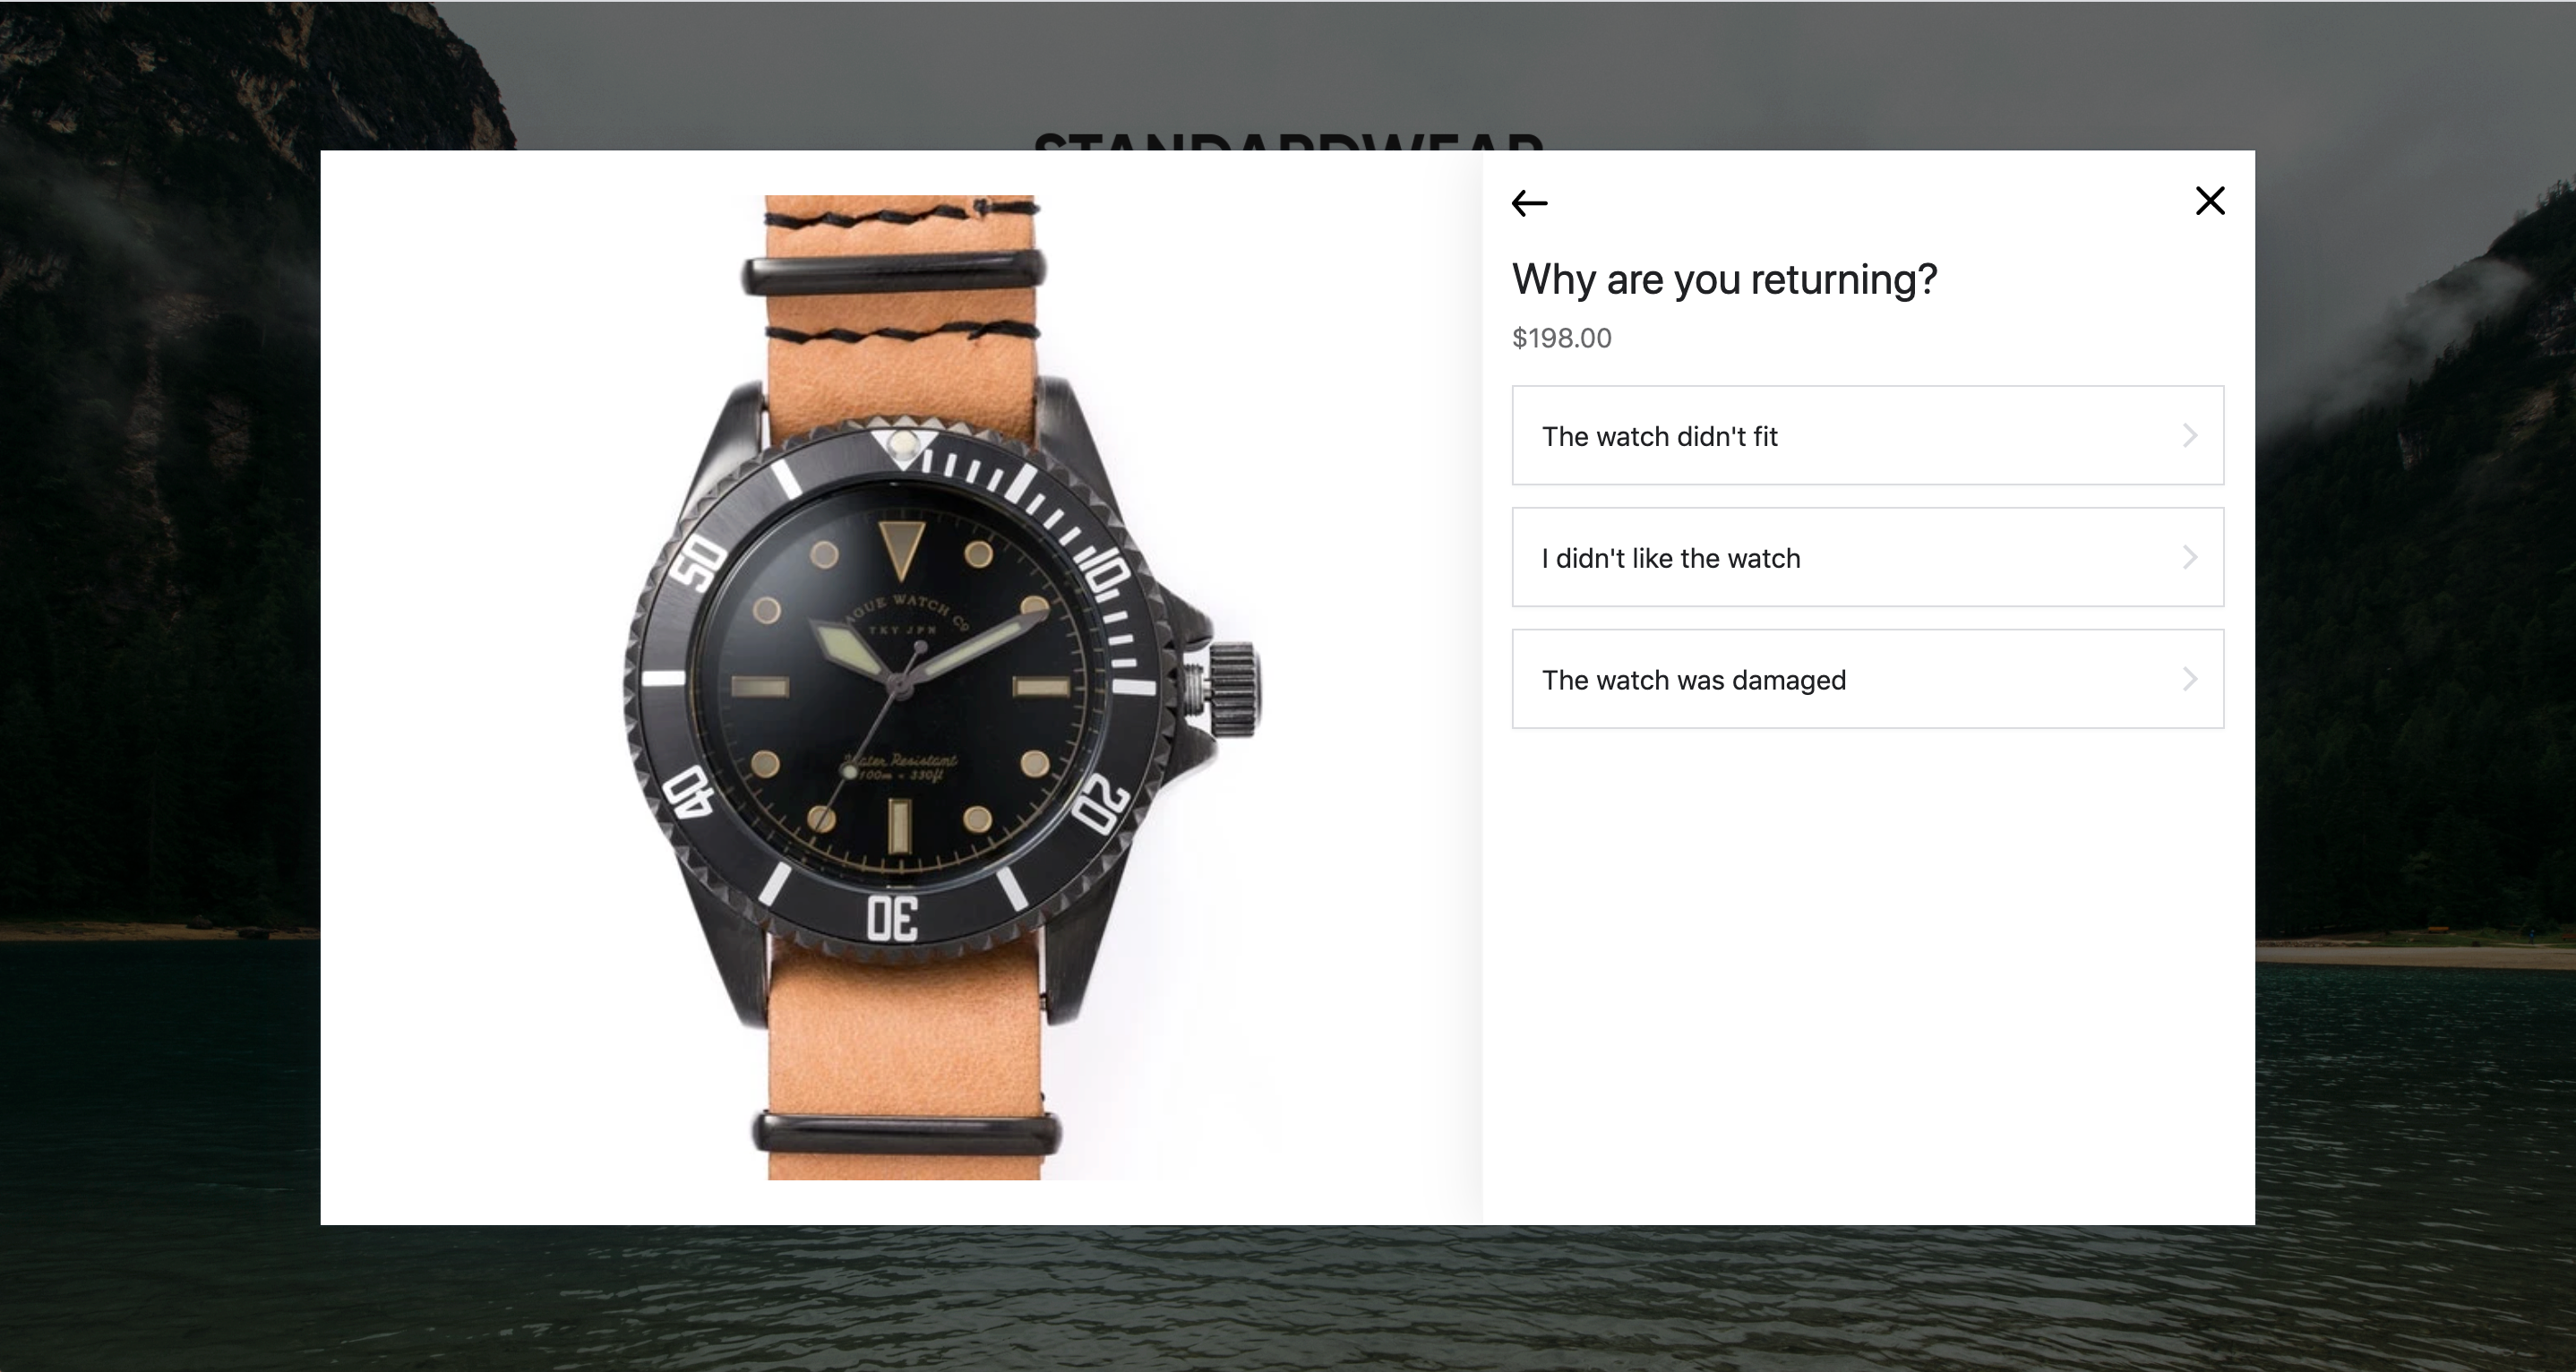
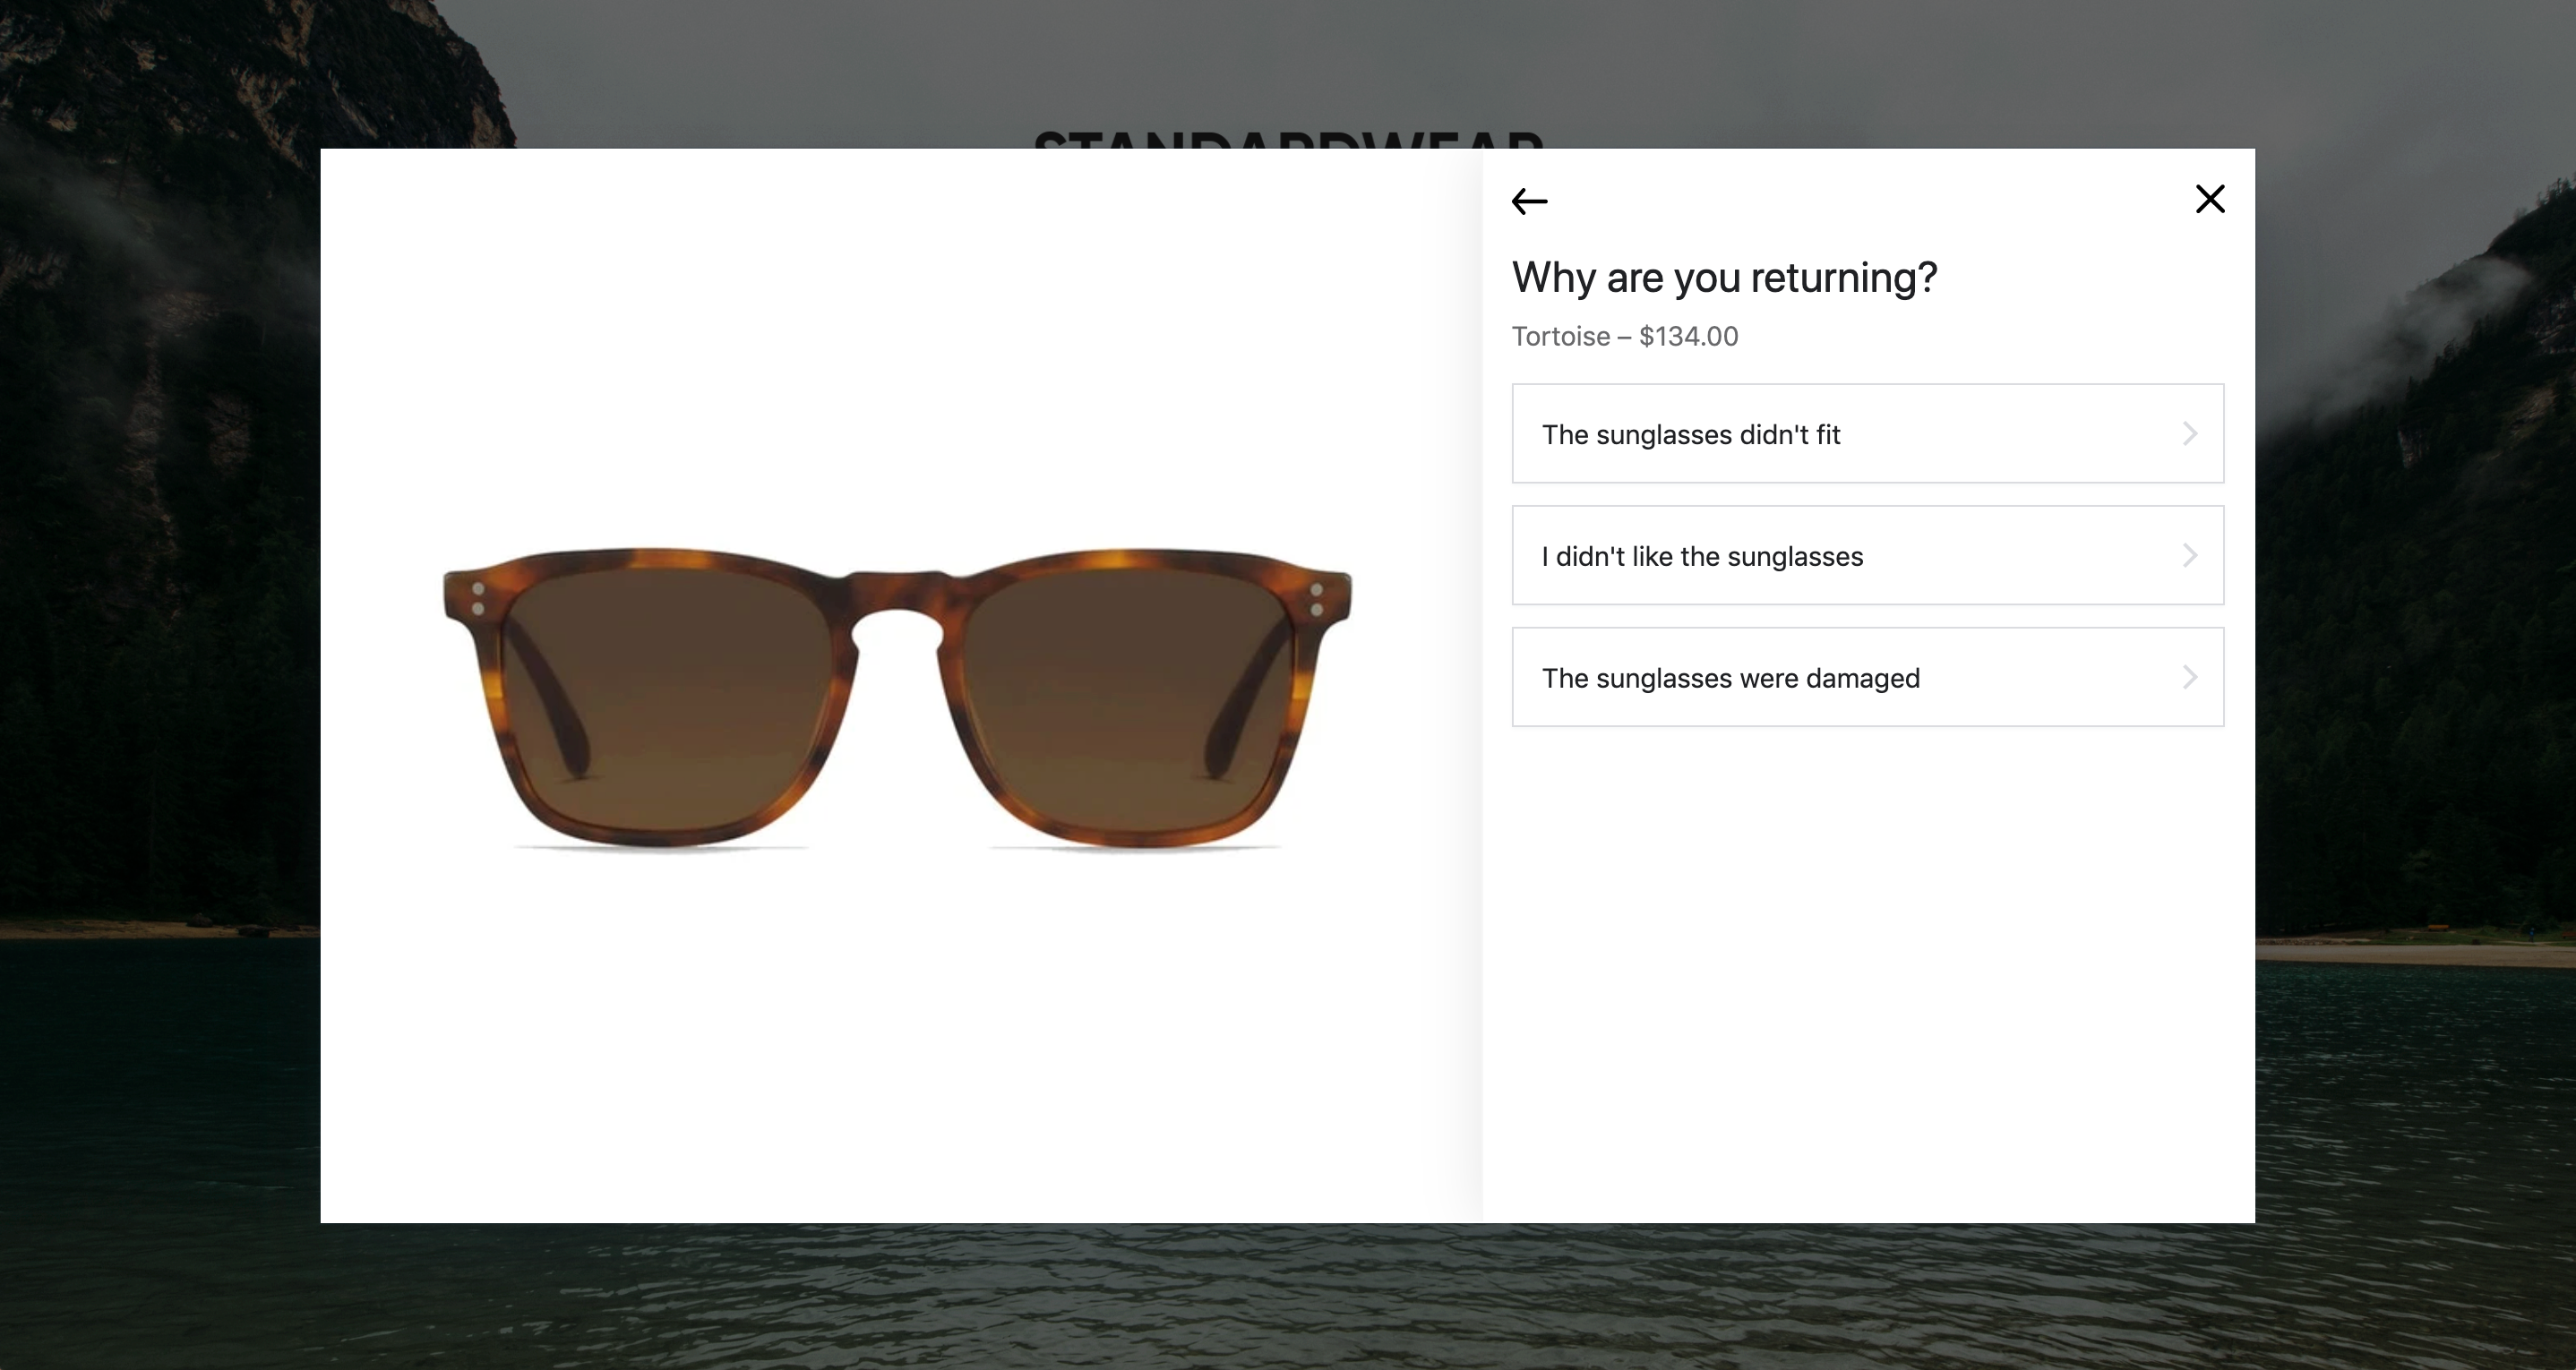
When this feature is set up, customers will receive different return reasons for each of their product types. The reason groups you set up will be based on product types you've defined in Shopify. The example below shows watches vs. sunglasses.
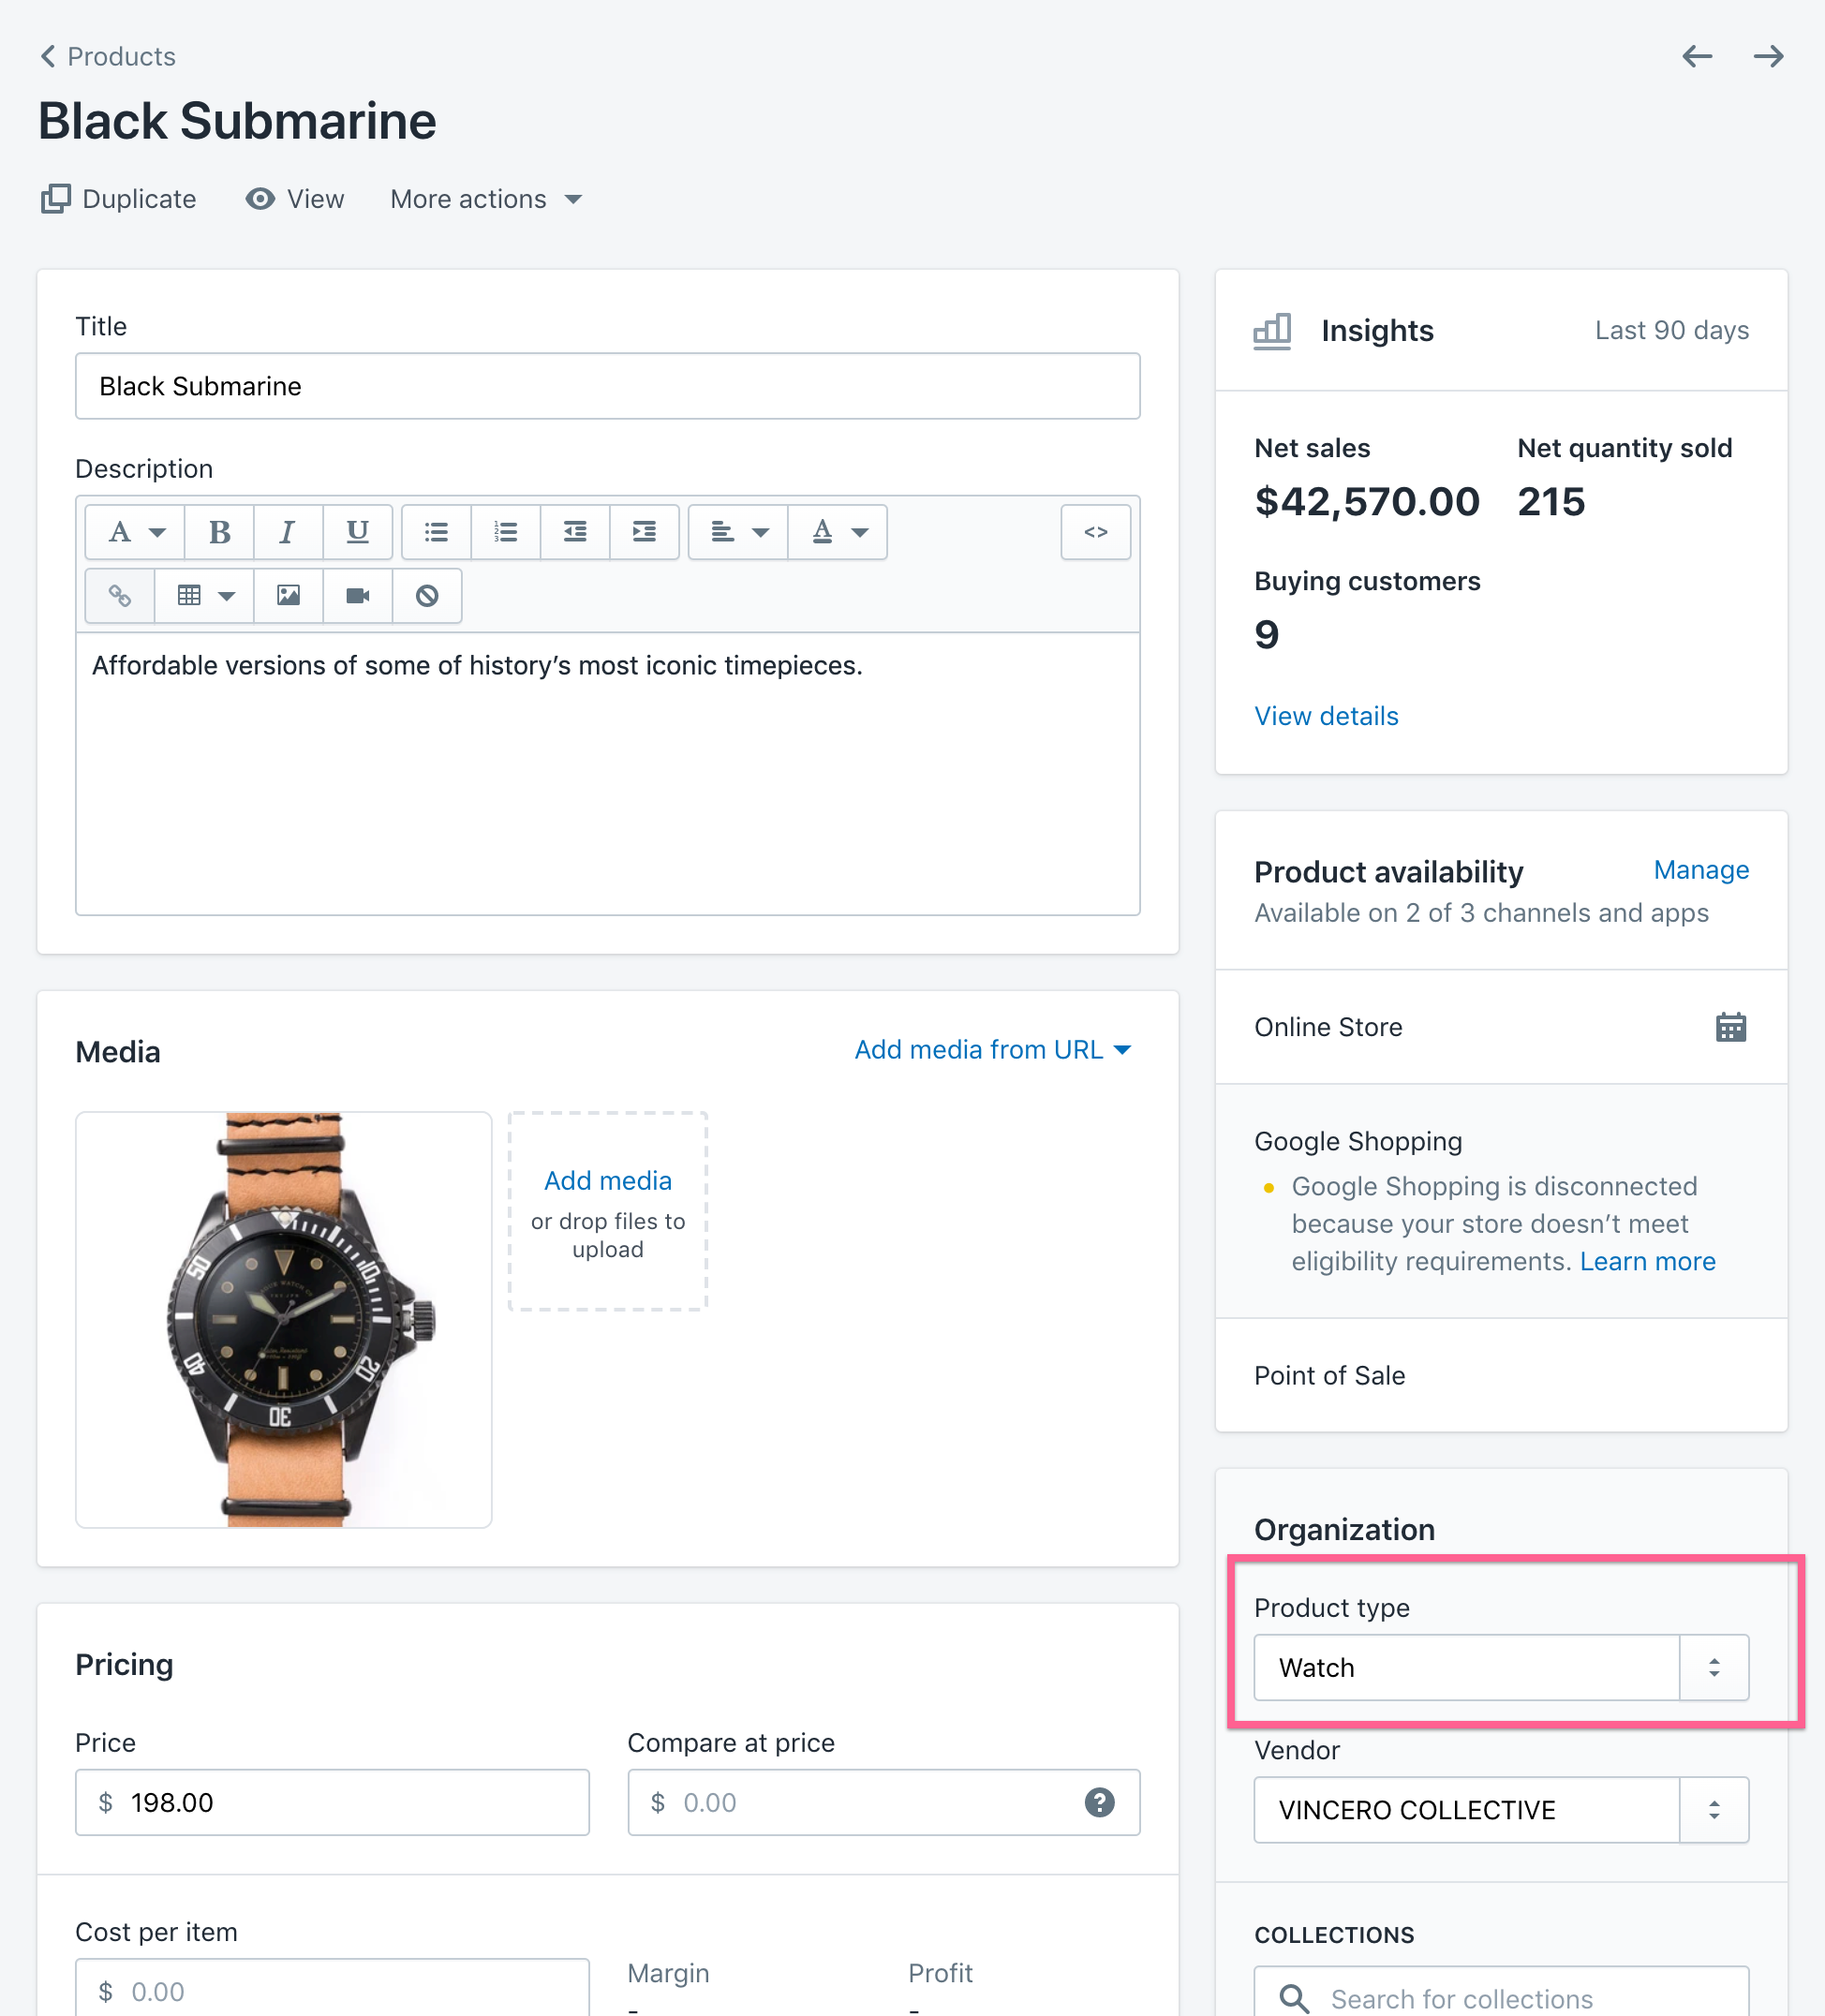
Step 1: Add product types to your products within Shopify
Navigate to your Shopify Admin.
Select Products.
Select any product.
Under Organization, you'll see Product Type. You can add products to an existing Product Type or create a new one.
Once product types have been set in Shopify, the rest of the process takes place in the Loop Admin.
Note: If you are already using product types in Shopify, feel free to skip this step. If you are not, confirm with your Shopify site administrator that doing so will not impact any other integrations your store has set up.
Step 2: Edit all return reasons
Navigate to Returns management > Shopper experience > Return reasons in the Loop admin.
Select Manage reasons library in the upper left-hand corner of the screen.
Add, delete, or re-organize all return reasons to suit your brand voice and product types. We've pre-populated a few return reasons for you, but feel free to delete these and add your own.
To set up a child reason, select the drop-down, then select Add return reason.
To enable comments, select the checkbox and select optional or required.
Note: Comments are not available on the parent-level when a child-level reason has been added.Select Save.
Step 3: Create reason groups
Select Create new group.
Add Title and the Product Types you want to receive these reasons.
Select Manage reasons for this group.
Select existing return reasons from your reasons library or easily add new reasons on the fly by selecting Create new parent reason.
To set up a child reason, select the drop-down next to the newly added reason and then select Create New Child Reason.
Reasons will appear in the order in which they were added. You can choose to randomize the order by checking the box in the Edit reason group window.
Select Save.
Shopify linked reasons
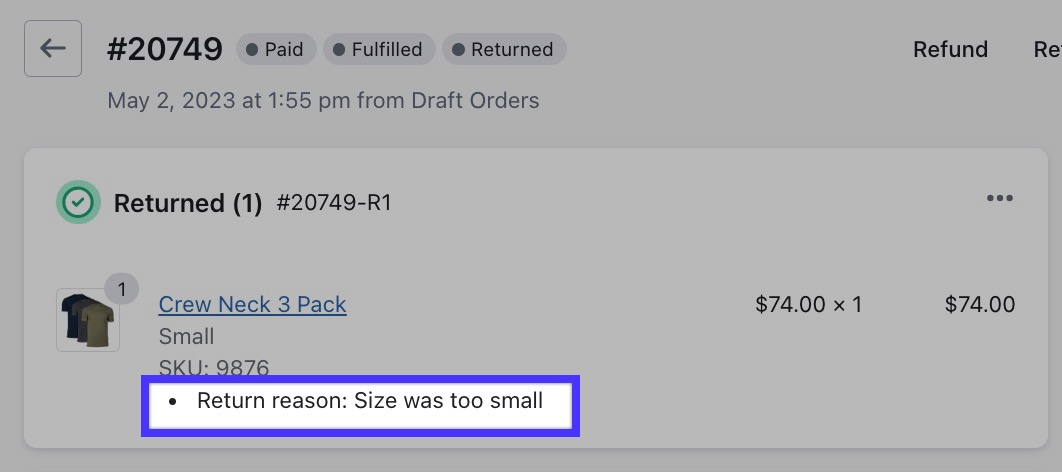
By linking return reasons between Loop and Shopify, Loop return reasons will pull through to the returned item in Shopify. If a return reason is not linked, the return reason will read as OTHER on the return in Shopify.
To link return reasons, please do the following:
In the Loop admin, go to Returns management > Shopper experience > Return reasons.
At the top, click Manage reasons library.
Click edit on the parent OR child reason you'd like to link.
Select an option on the Shopify Linked Reason dropdown.
Click Save.
Note: The Shopify Linked Reasons are defaults set by Shopify. At this time, return reasons cannot be customized in Shopify.
To learn more about the Loop and Shopify integration, please review the Shopify Returns API article.
Viewing Return Reason data
There are two different places to view return reasons: 1) Within individual returns or 2) through a return reason report.
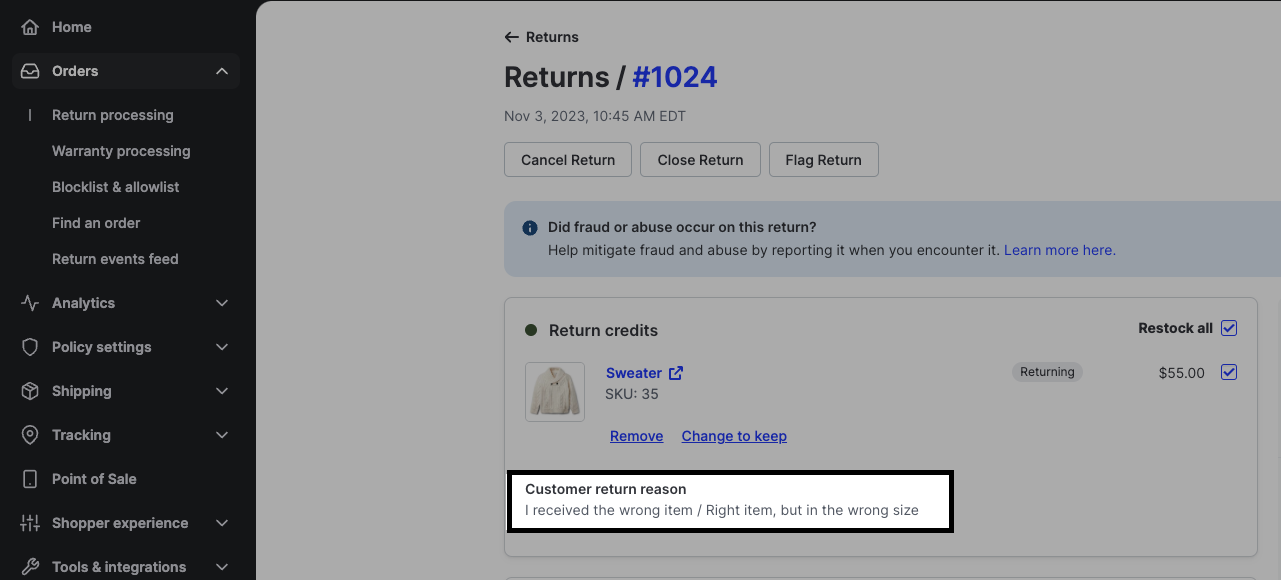
In the return detail view, responses will display beneath each line item. Parent/child reasons and open type field responses are separated by a forward slash.
To generate a return reason report:
Navigate to Returns management > Analytics > Reports in the Loop Admin.
View Return Reasons and select from:
Return reasons by product.
Return reasons by SKU.
Return reasons by line items.
Fill in criteria of your choice.
If you'd like to download the report, select Export.
Note: Open field responses are included in the Return Reasons by line items report in the “comment” column. Comments are not included in the other reports because they are not grouped by product ID or SKU.
FAQ
Why can't I edit existing reasons? Since we have return data being captured with return reasons, you can only disable or delete a return reason.
Where can I enable comments for my customers? Comments can be enabled as the last step of the reasons flow. This means they can only be turned on for the child-level reason if it exists, by selecting the checkbox and choosing optional or required.
Can I delete return reasons? Yes, but we only recommend deleting return reasons if they are not being utilized, as this will delete prior records. A better practice would be to just disable the reason from all groups.
Is there a limit to the number of return reasons I can add? Nope! Add as many as you'd like!
What about Custom vs Standard Product Types?
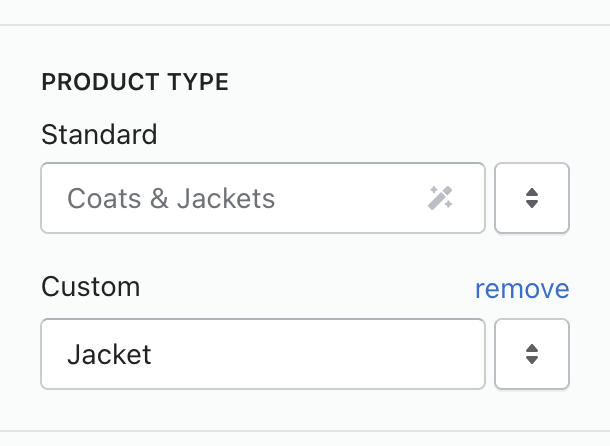
Shopify now has both Standard and Custom Product Types that merchants can use. For merchants using a Standard Product Type only, that Product Type will come through in Loop. For merchants using a Custom Product Type, that will overwrite the Standard Product Type, and the custom one will show up in Loop.
Please reach out to support@loopreturns.com with any additional questions.

