Checkout+: Cart Setup
Checkout+ is a consumer-paid returns model that allows you to combat rising return costs. By adding Checkout+ to your checkout experience, you can give customers the option to pay a small fee during checkout to get a free return later and/or protect their package from loss, damage, or theft. This allows merchants to significantly cut operating costs without relying on providers that aren’t consistent with your brand.
This article can be used for first-time implementation or when reconnecting Checkout+ to your theme. We recommend working with your developer to implement this.
Shopper experience
How it works
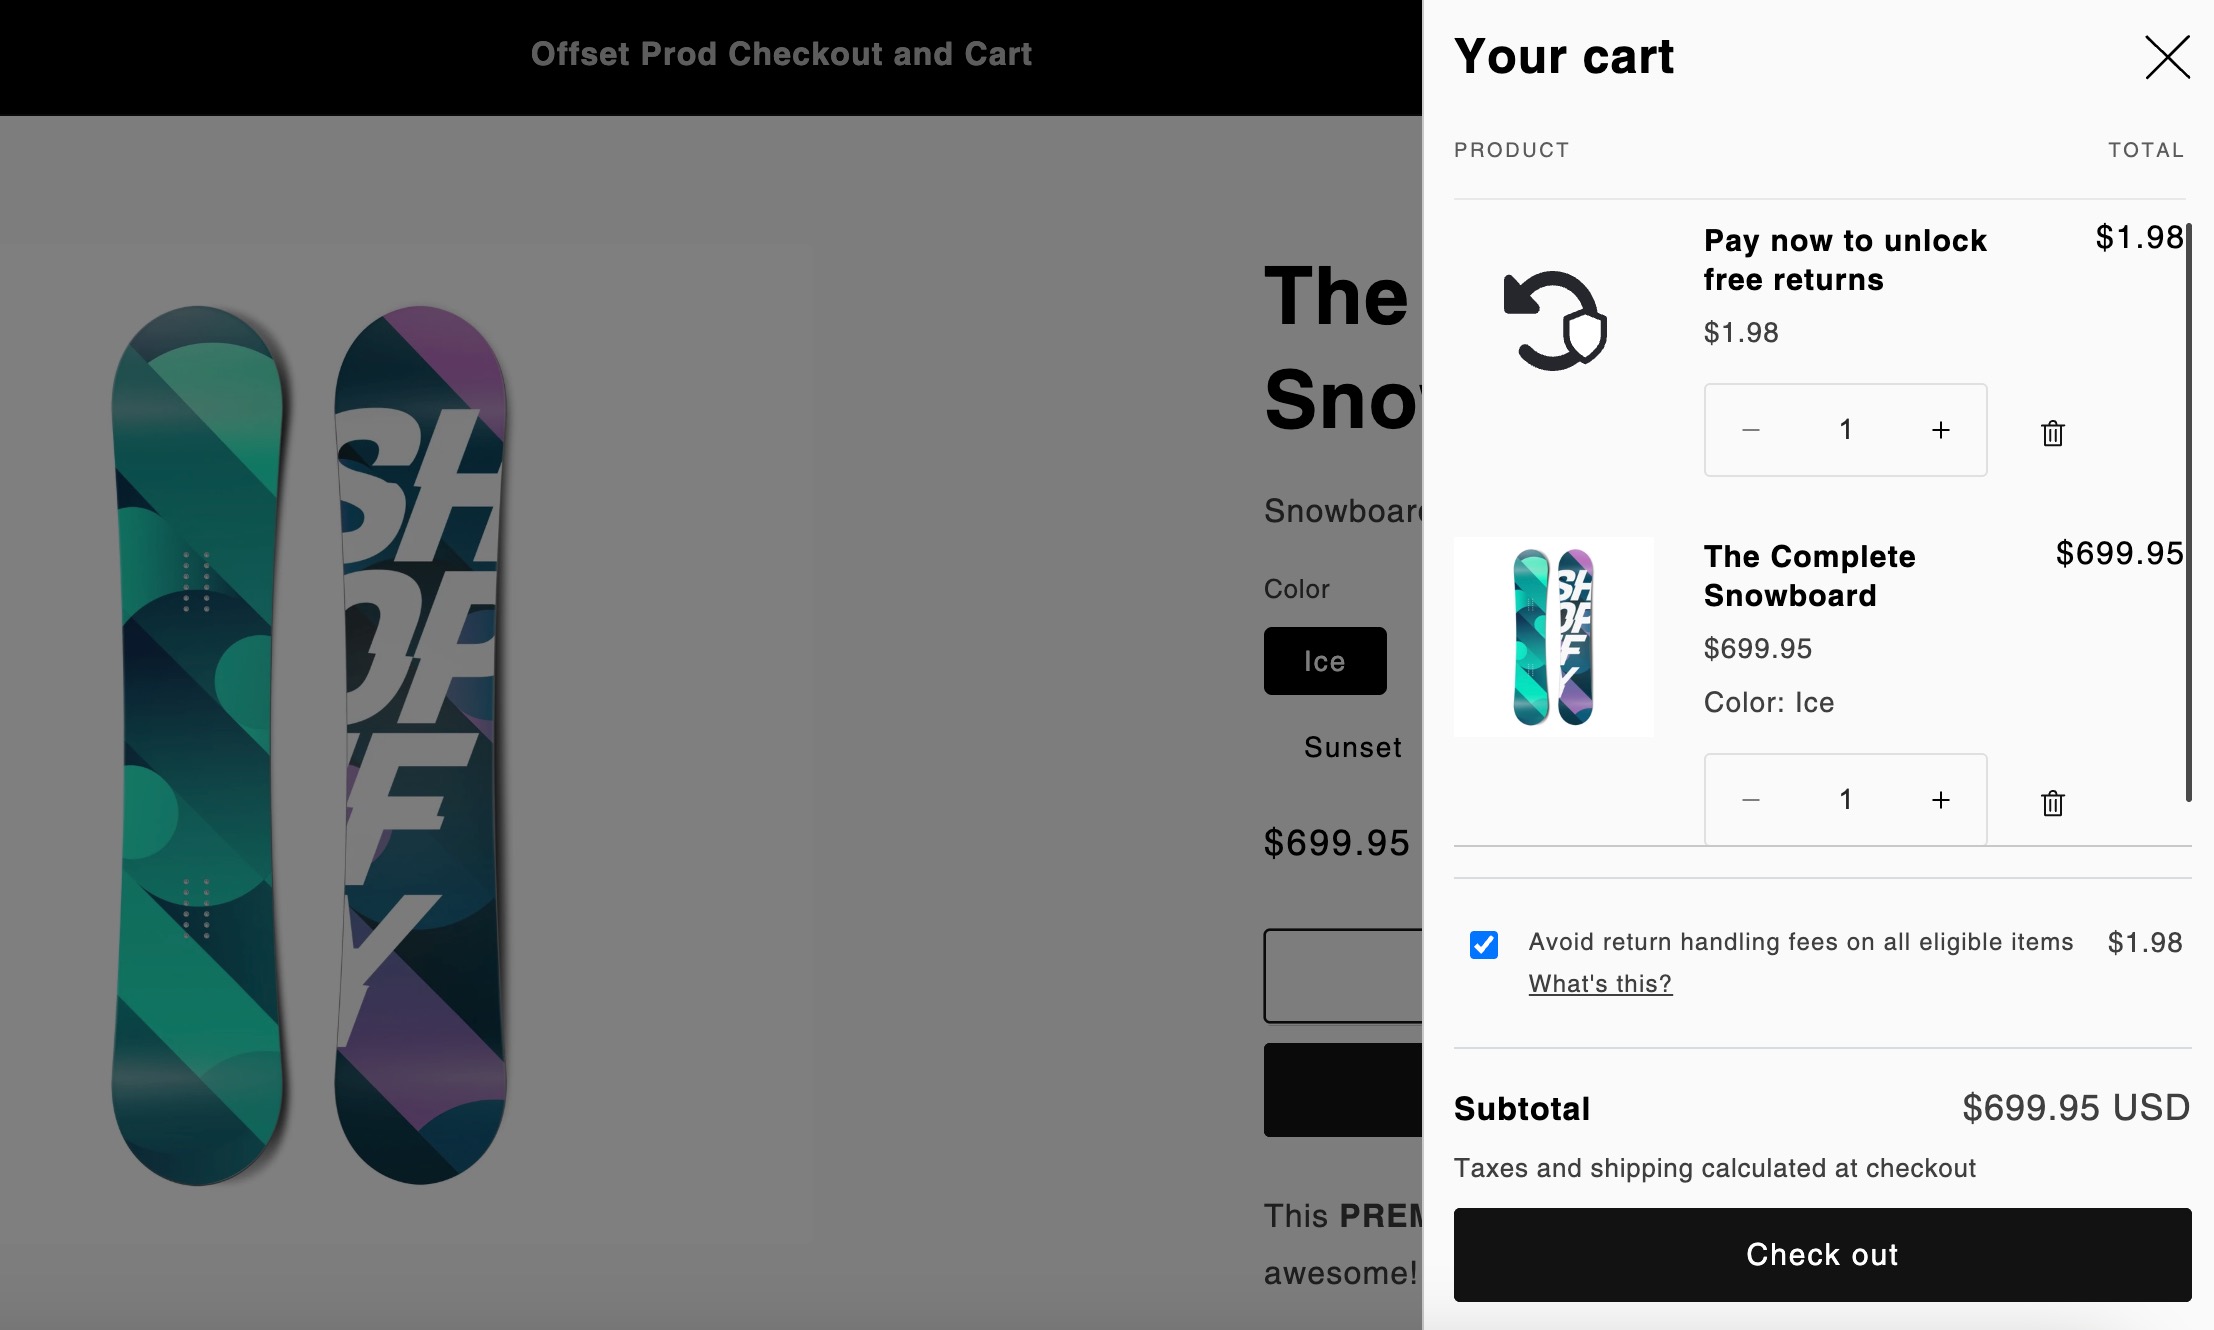
During the initial purchase, customers will have the opportunity to purchase Checkout+ with their order for a small fee. This fee will be added to their order as if it’s any other product or fee from the store.
Once the customer receives their order, if they're not satisfied they can initiate a return or exchange. If the package is lost, stolen, or damaged and the customer purchased Package Protection, they can file a claim. For details, see Package Protection.
During the return:
If the customer paid for Checkout+, they will enter their order information into the Loop customer portal and see a message indicating to them they are covered for free returns. This means that all handling fees will be free, regardless of return outcome.
If the customer did not pay for Checkout+, they will enter their order information into the Loop customer portal, but will be subject to a handling fee.
Pre-Setup Considerations
Tip: Before beginning Checkout+ setup, merchants should have configured General Settings, Return Policies, customizations, and integrations. Setting up Checkout+ should happen just before you launch with Loop, so everything else should be ready to go.
Merchants on Checkout+ Free do not need to configure shipping services, labels, or handling fees.
Setup
Important: Once you complete setup, please make sure any time you change your theme going forward that the Checkout+ product is still connected. If the Checkout+ product is removed from your theme, the returns portal will be disabled.
Review product configuration
The Loop team should have created the product on your behalf already, but there are a few things merchants should review and configure:
Product Status should be Active.
It can be inactive until you go live with Checkout+ if you want to prevent it from appearing on your site. That said, once you begin setup the product should Active.
Sales channels should include Online Store.
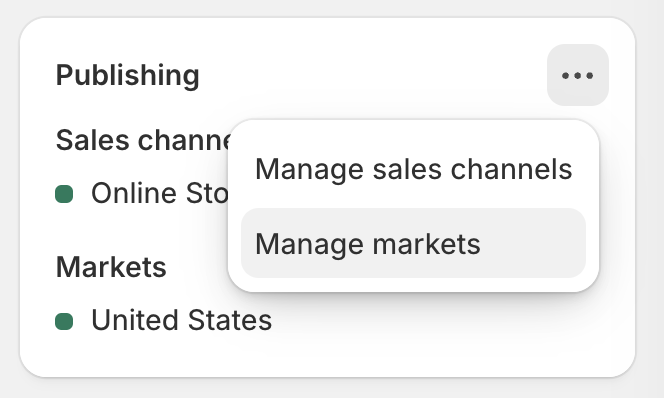
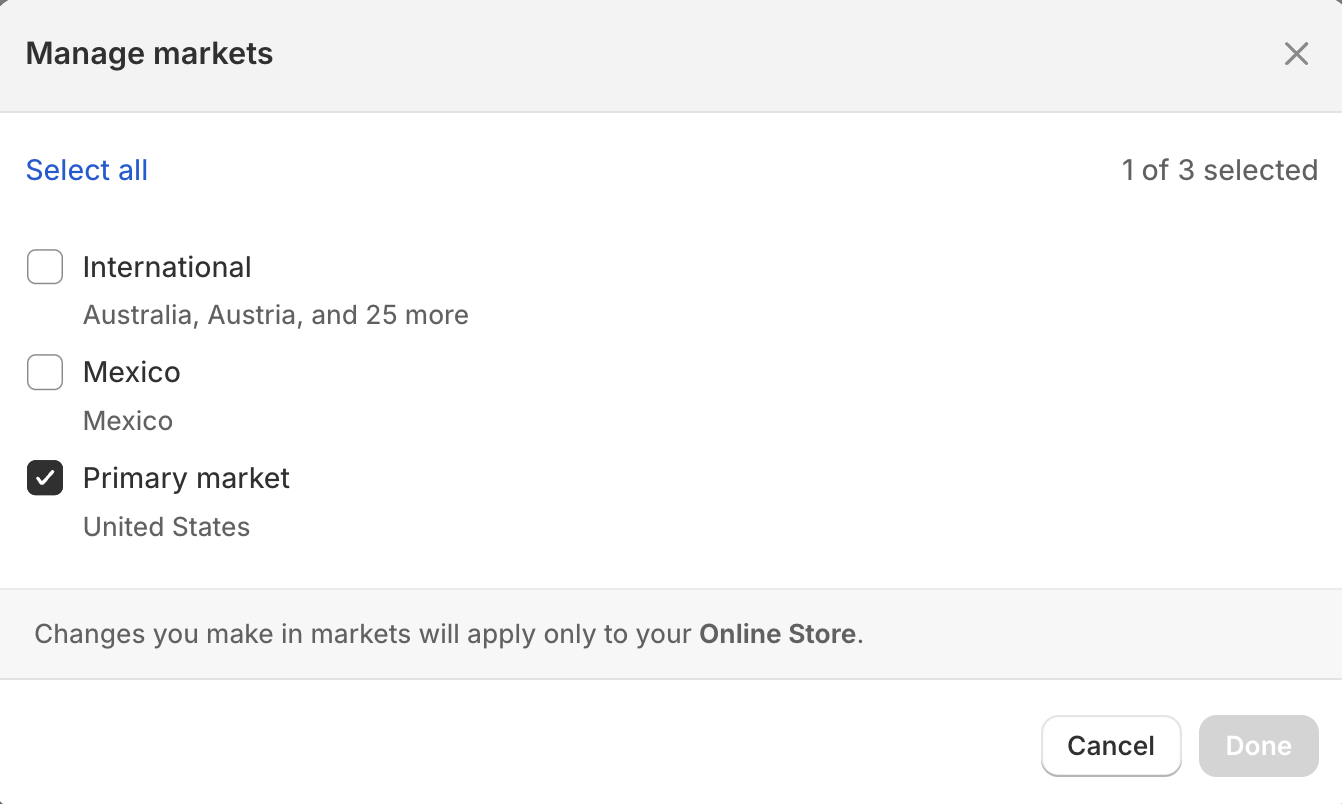
Markets: Make sure markets are configured for where you want Checkout+ to be sold.
Free: Checkout+ has to be on your US policy. It's optional to have Checkout+ on any other markets you support.
Flex: Checkout+ can be added to any market you support.
Media should contain an image.
Price: This is pre-set for the Checkout+ Free merchant according to the Loop contract and this should not be edited. For Checkout+ Flex merchants, the fee can be customized according to your needs.
Charging tax on the product is up to the discretion of the merchant. Merchants should consult with their legal counsel to determine whether or not to charge tax on the Checkout+ product.
Inventory > Track quantity should be unchecked.
Shipping > "This is a physical product" should be unchecked.
Create Checkout+ Theme
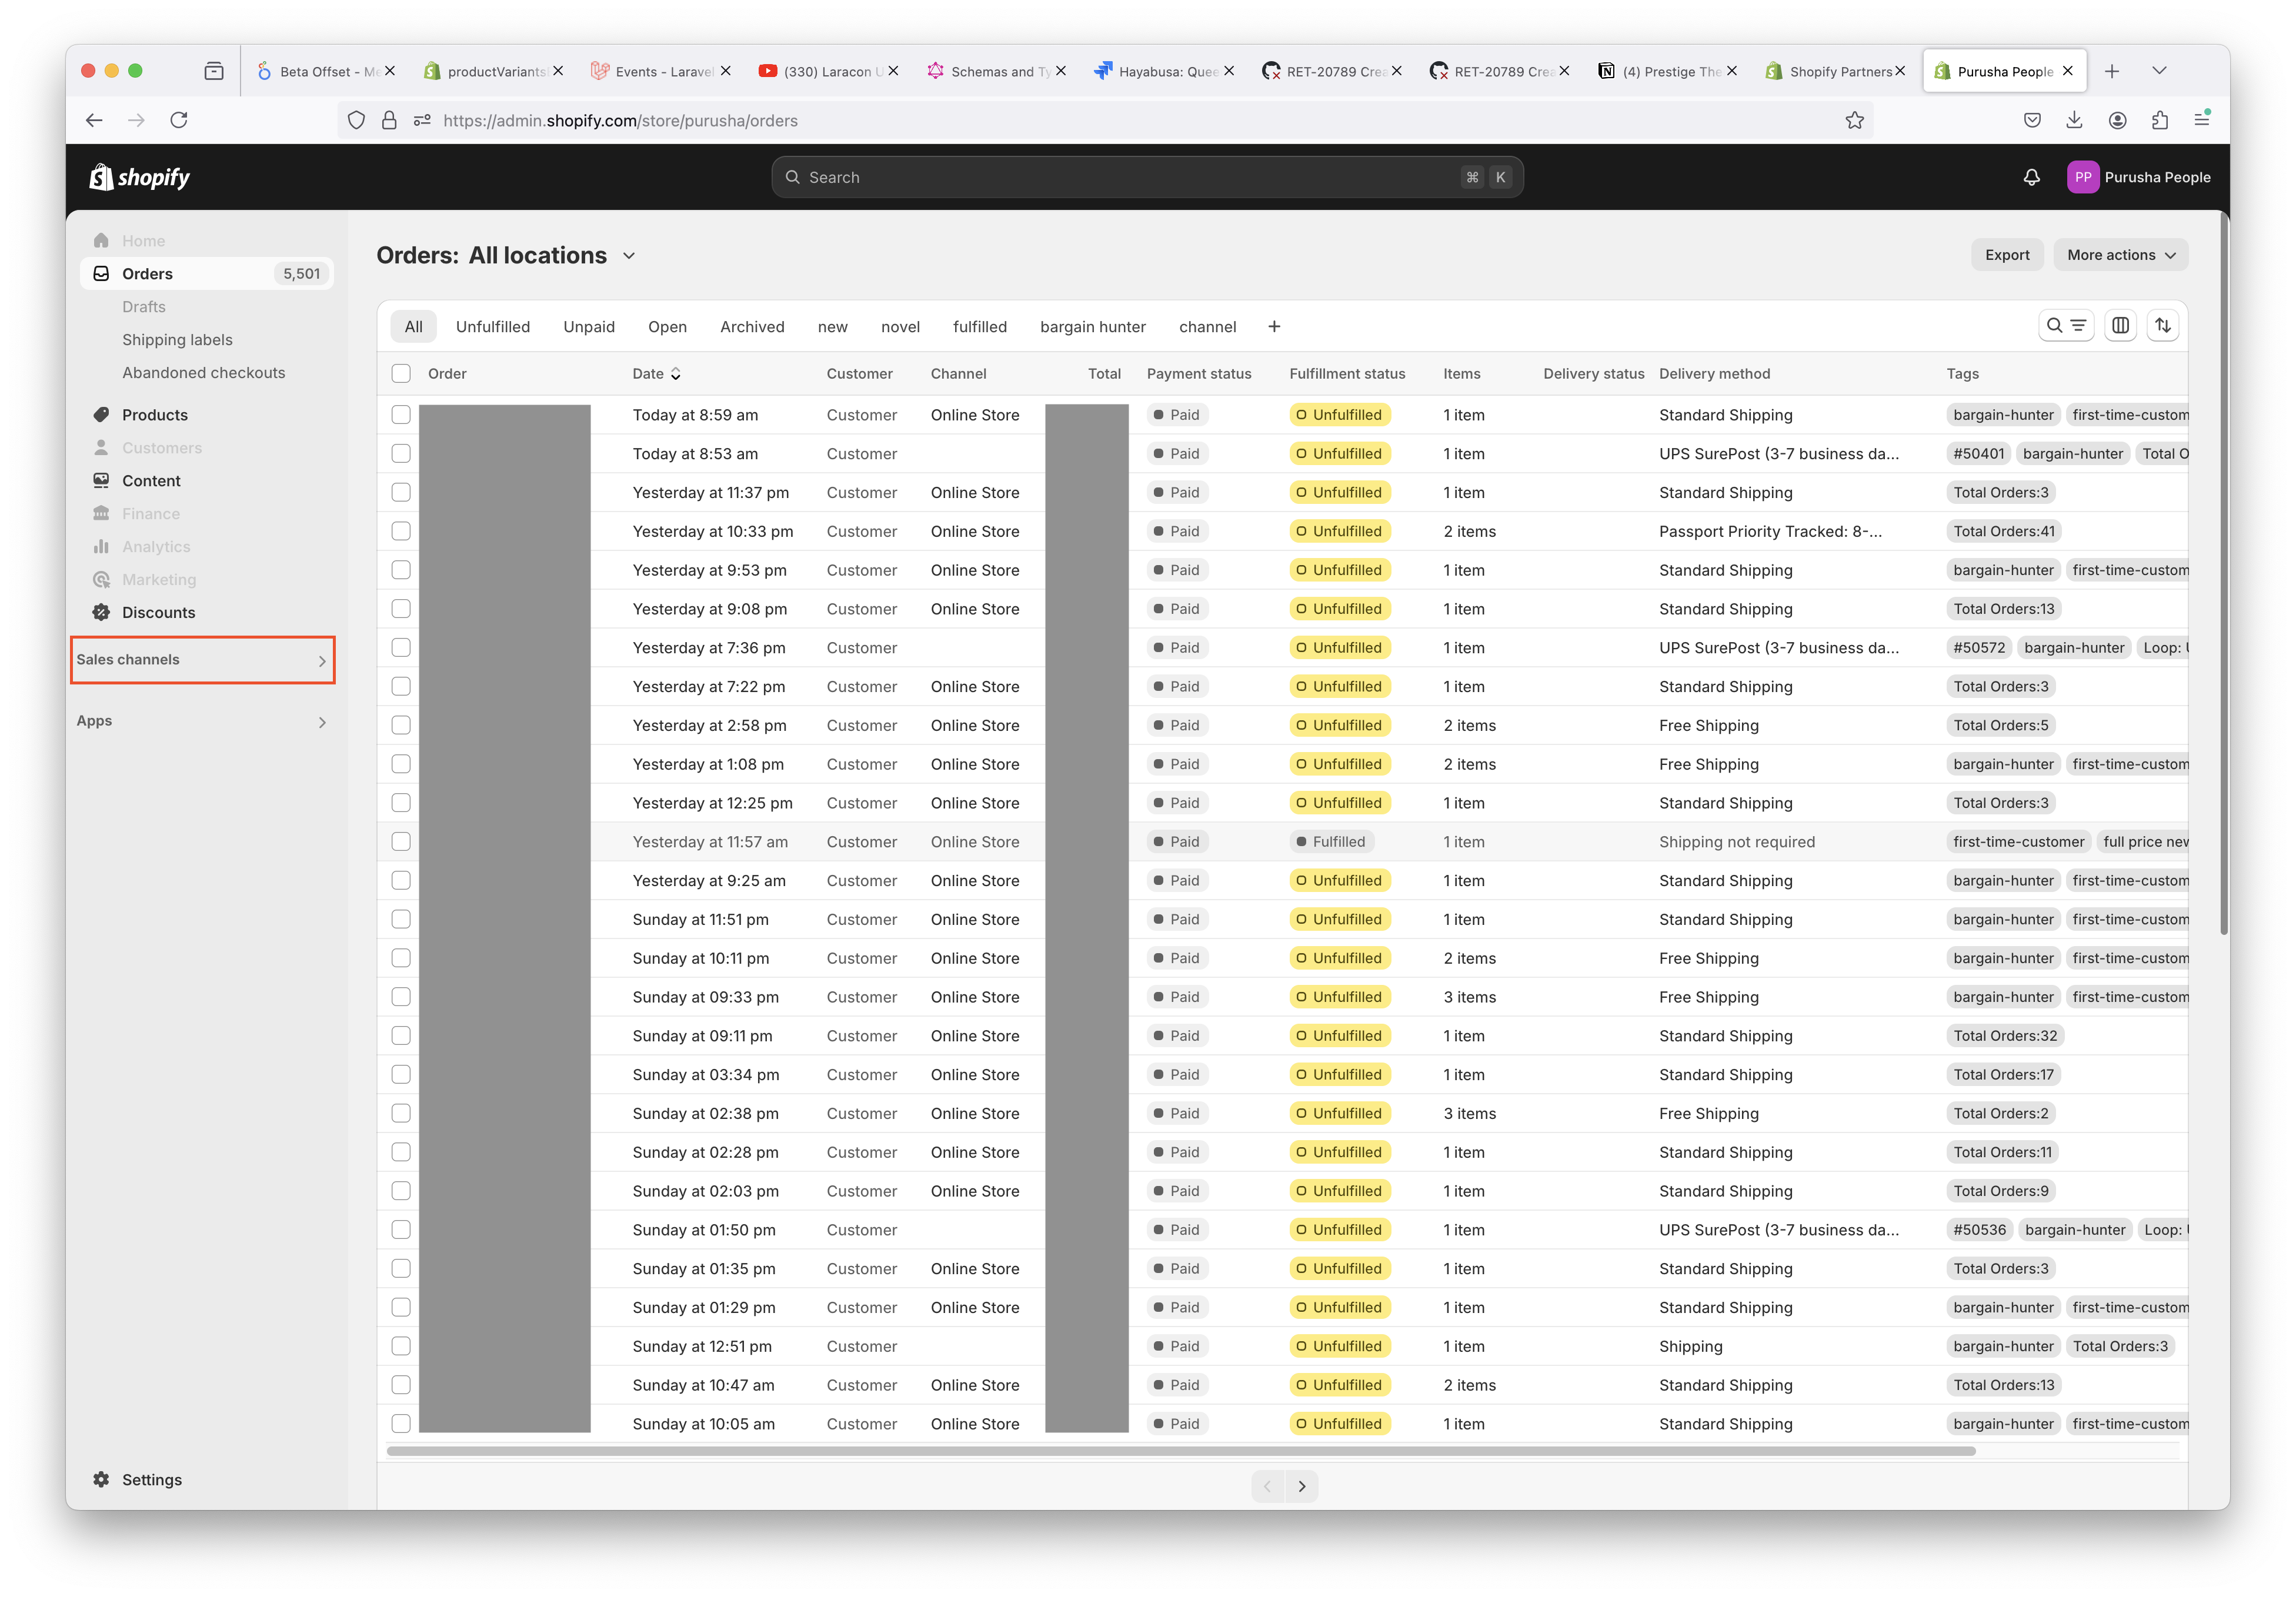
In Shopify, go to “Sales channels” tab in the navigation section.
Select Online Store in the popup modal
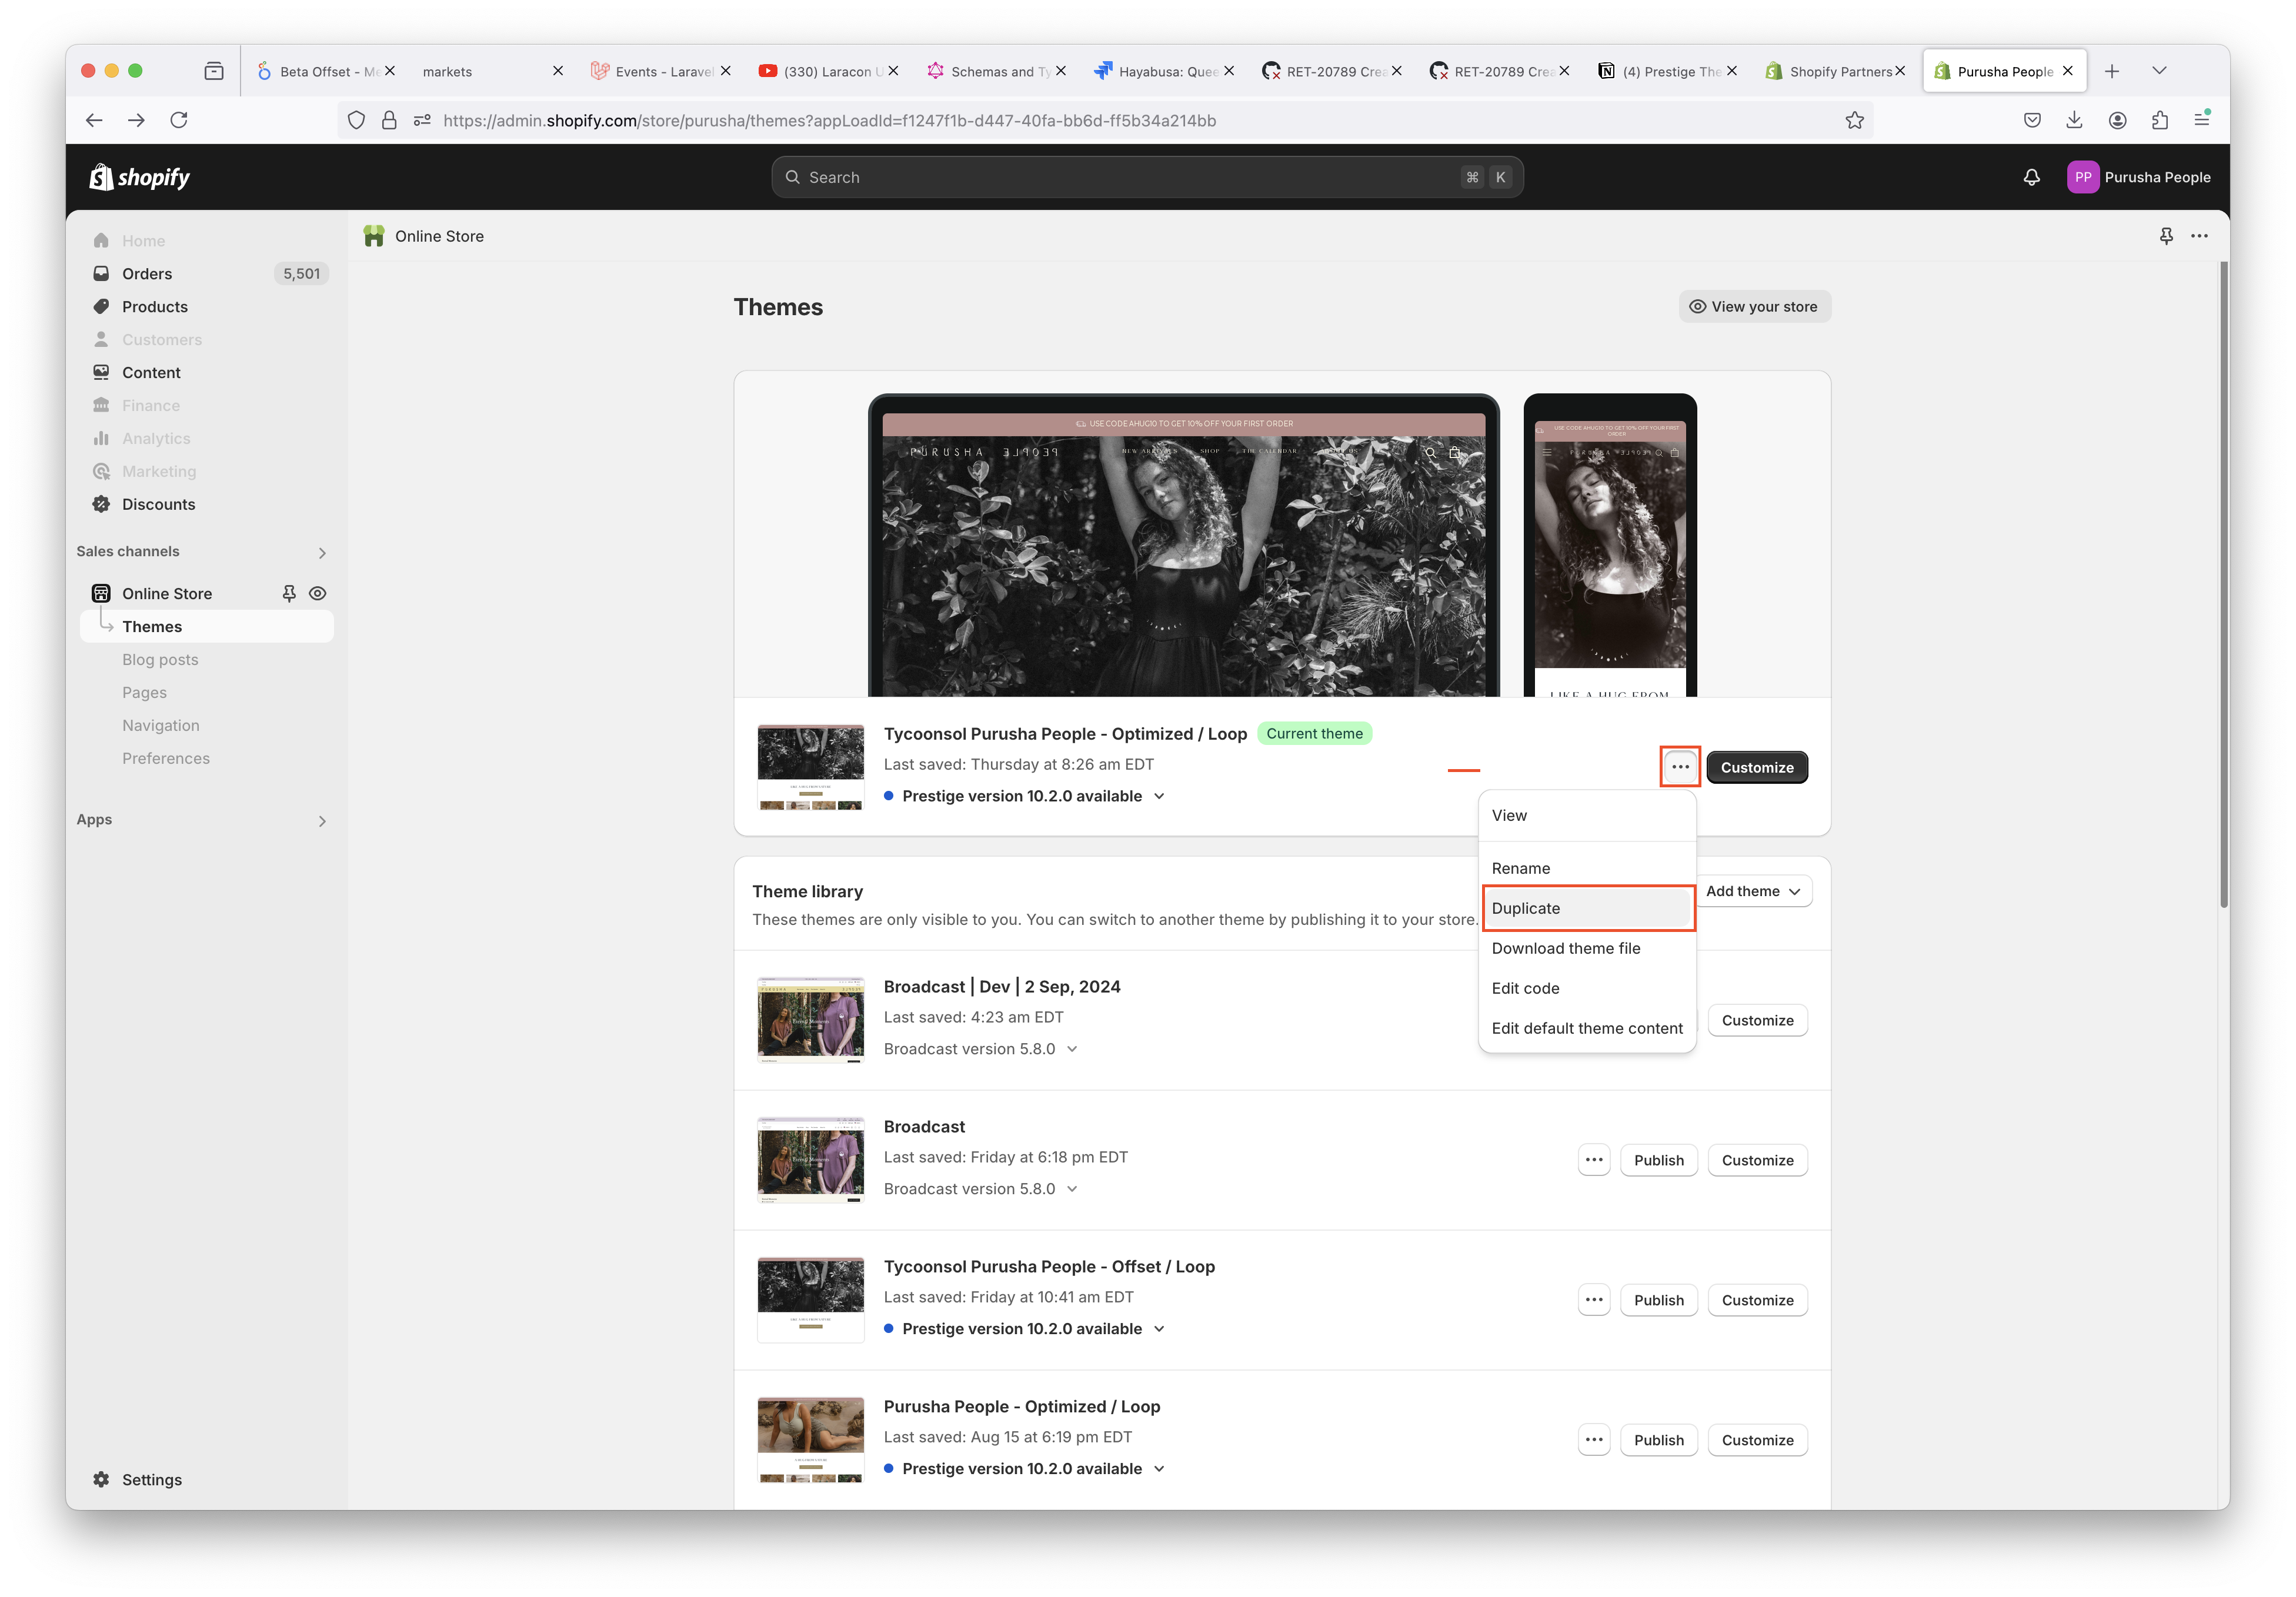
Duplicate the current theme
The duplicated theme where you you will setup Checkout+
In the future, after testing and ensuring Checkout+ is working correctly, you can publish this theme to be your live theme with Checkout+.
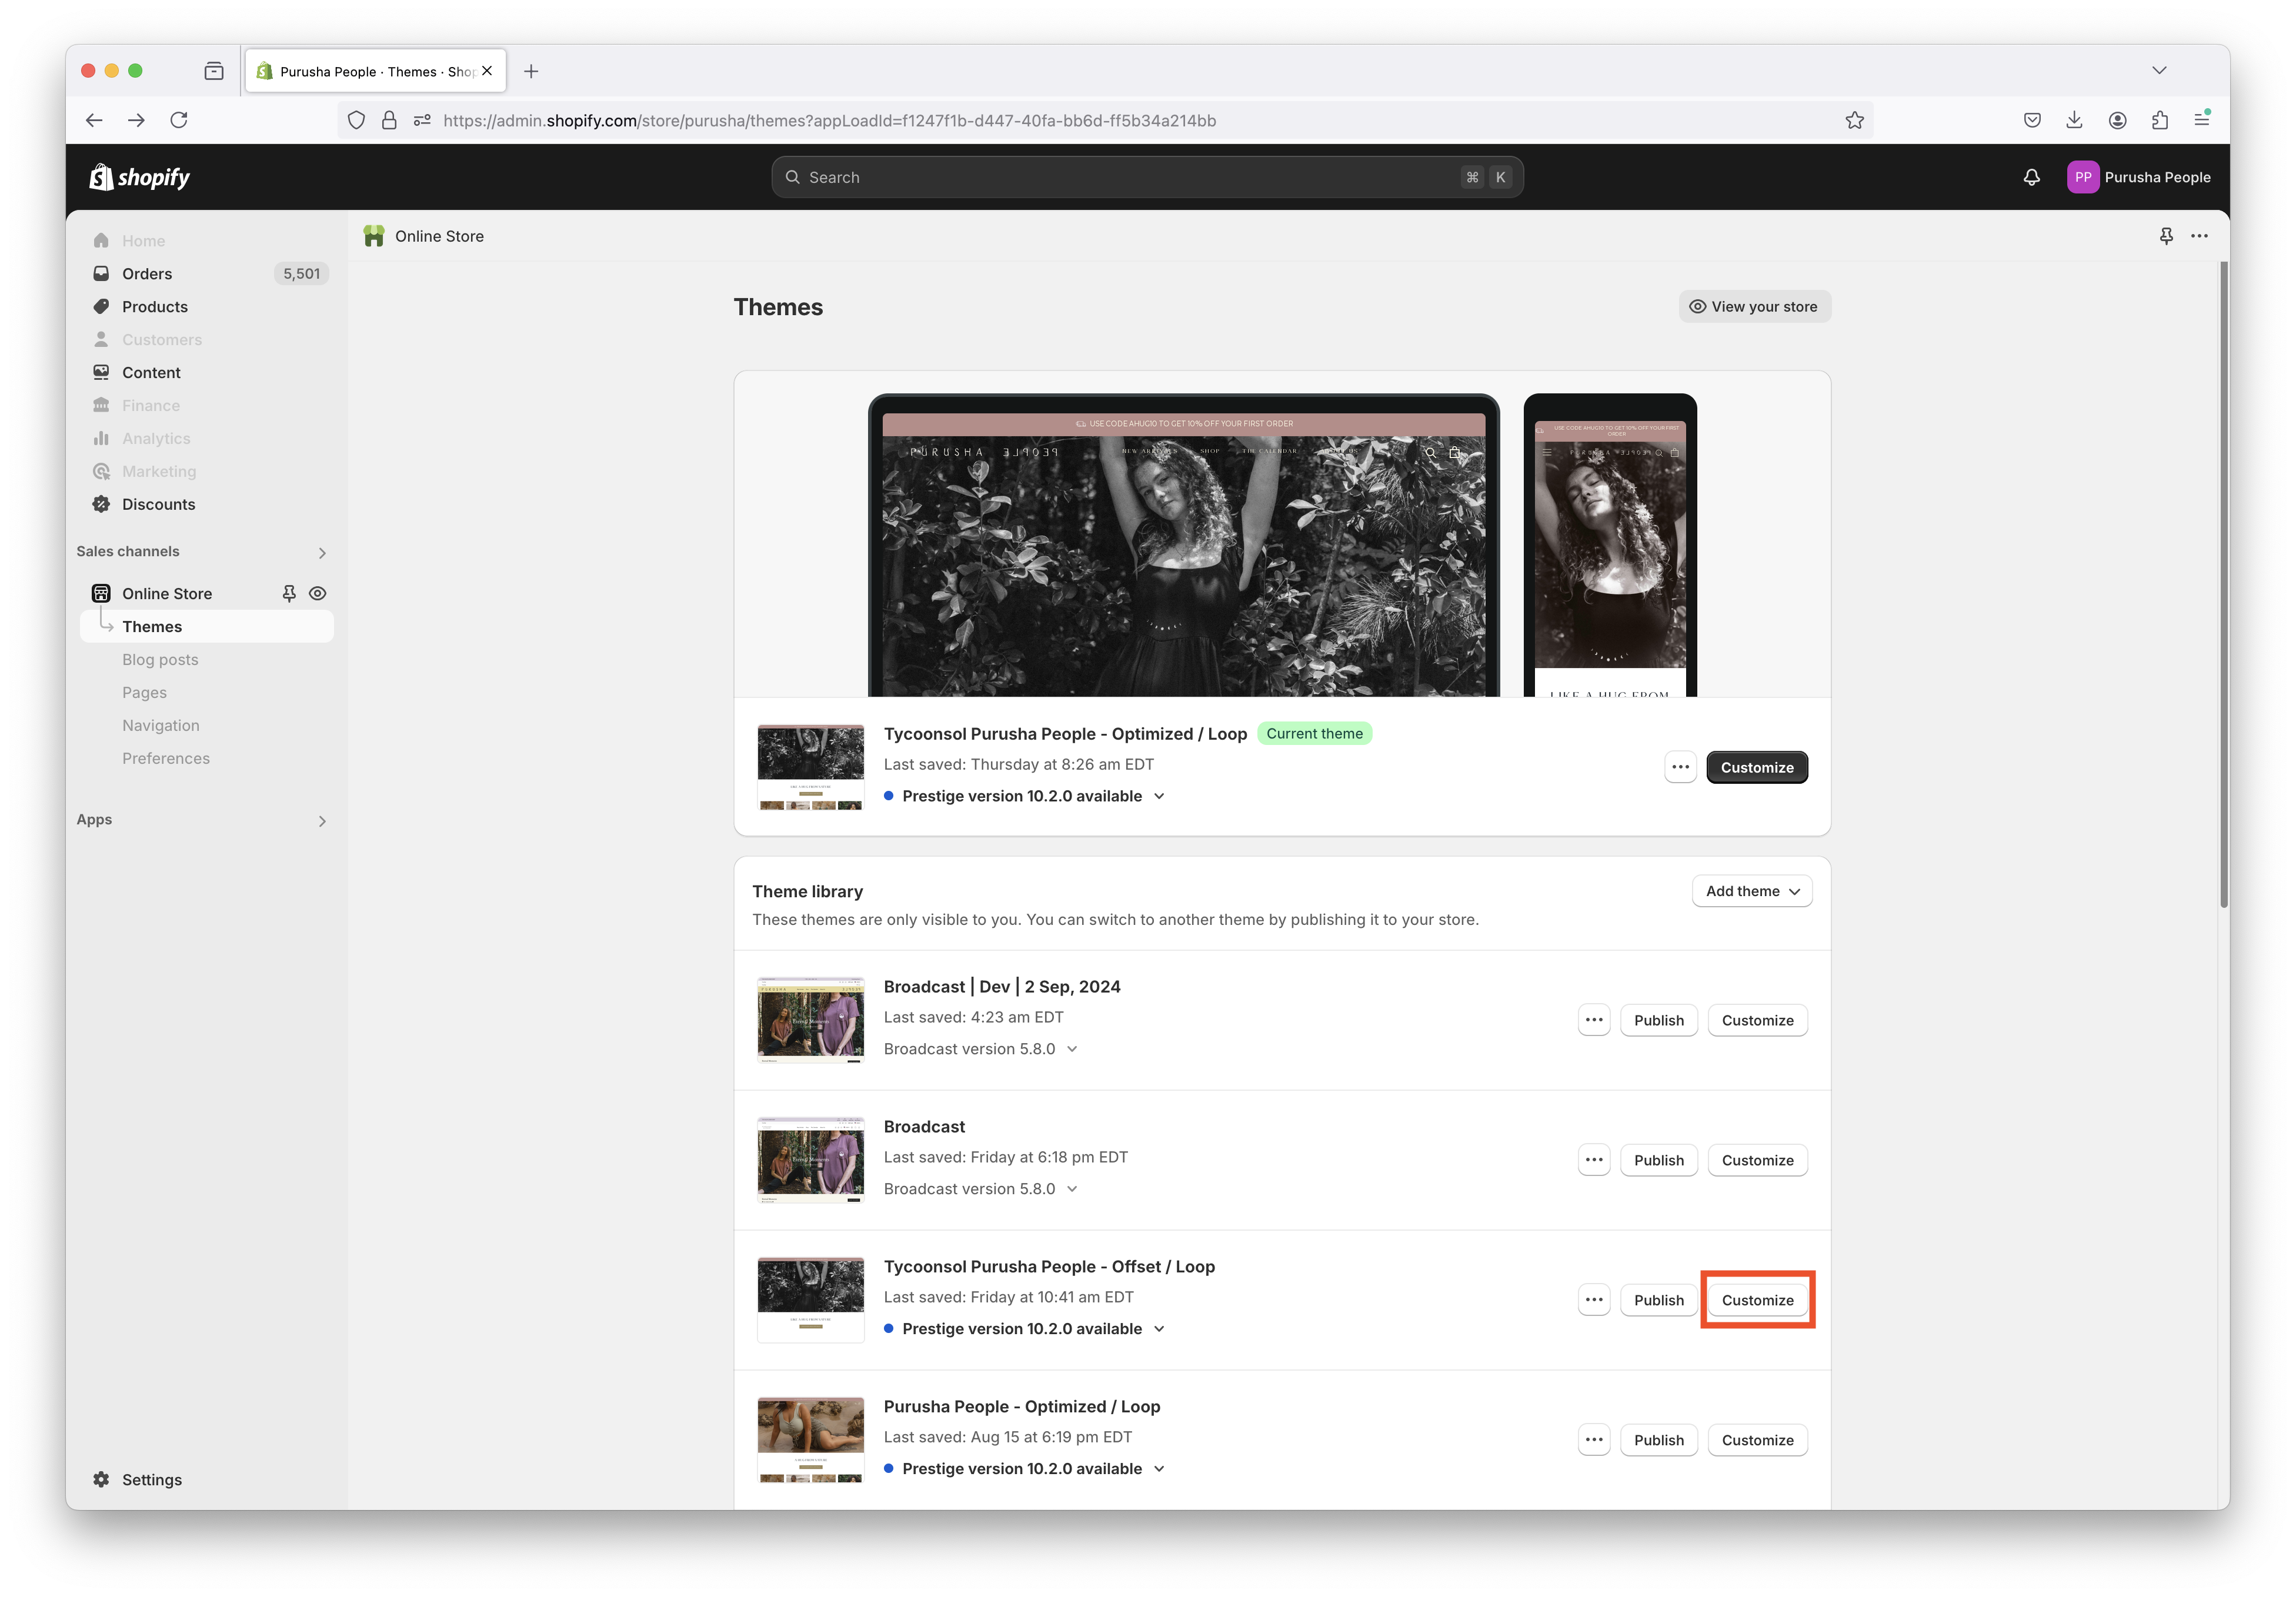
Click Customize
Update App Embed Settings
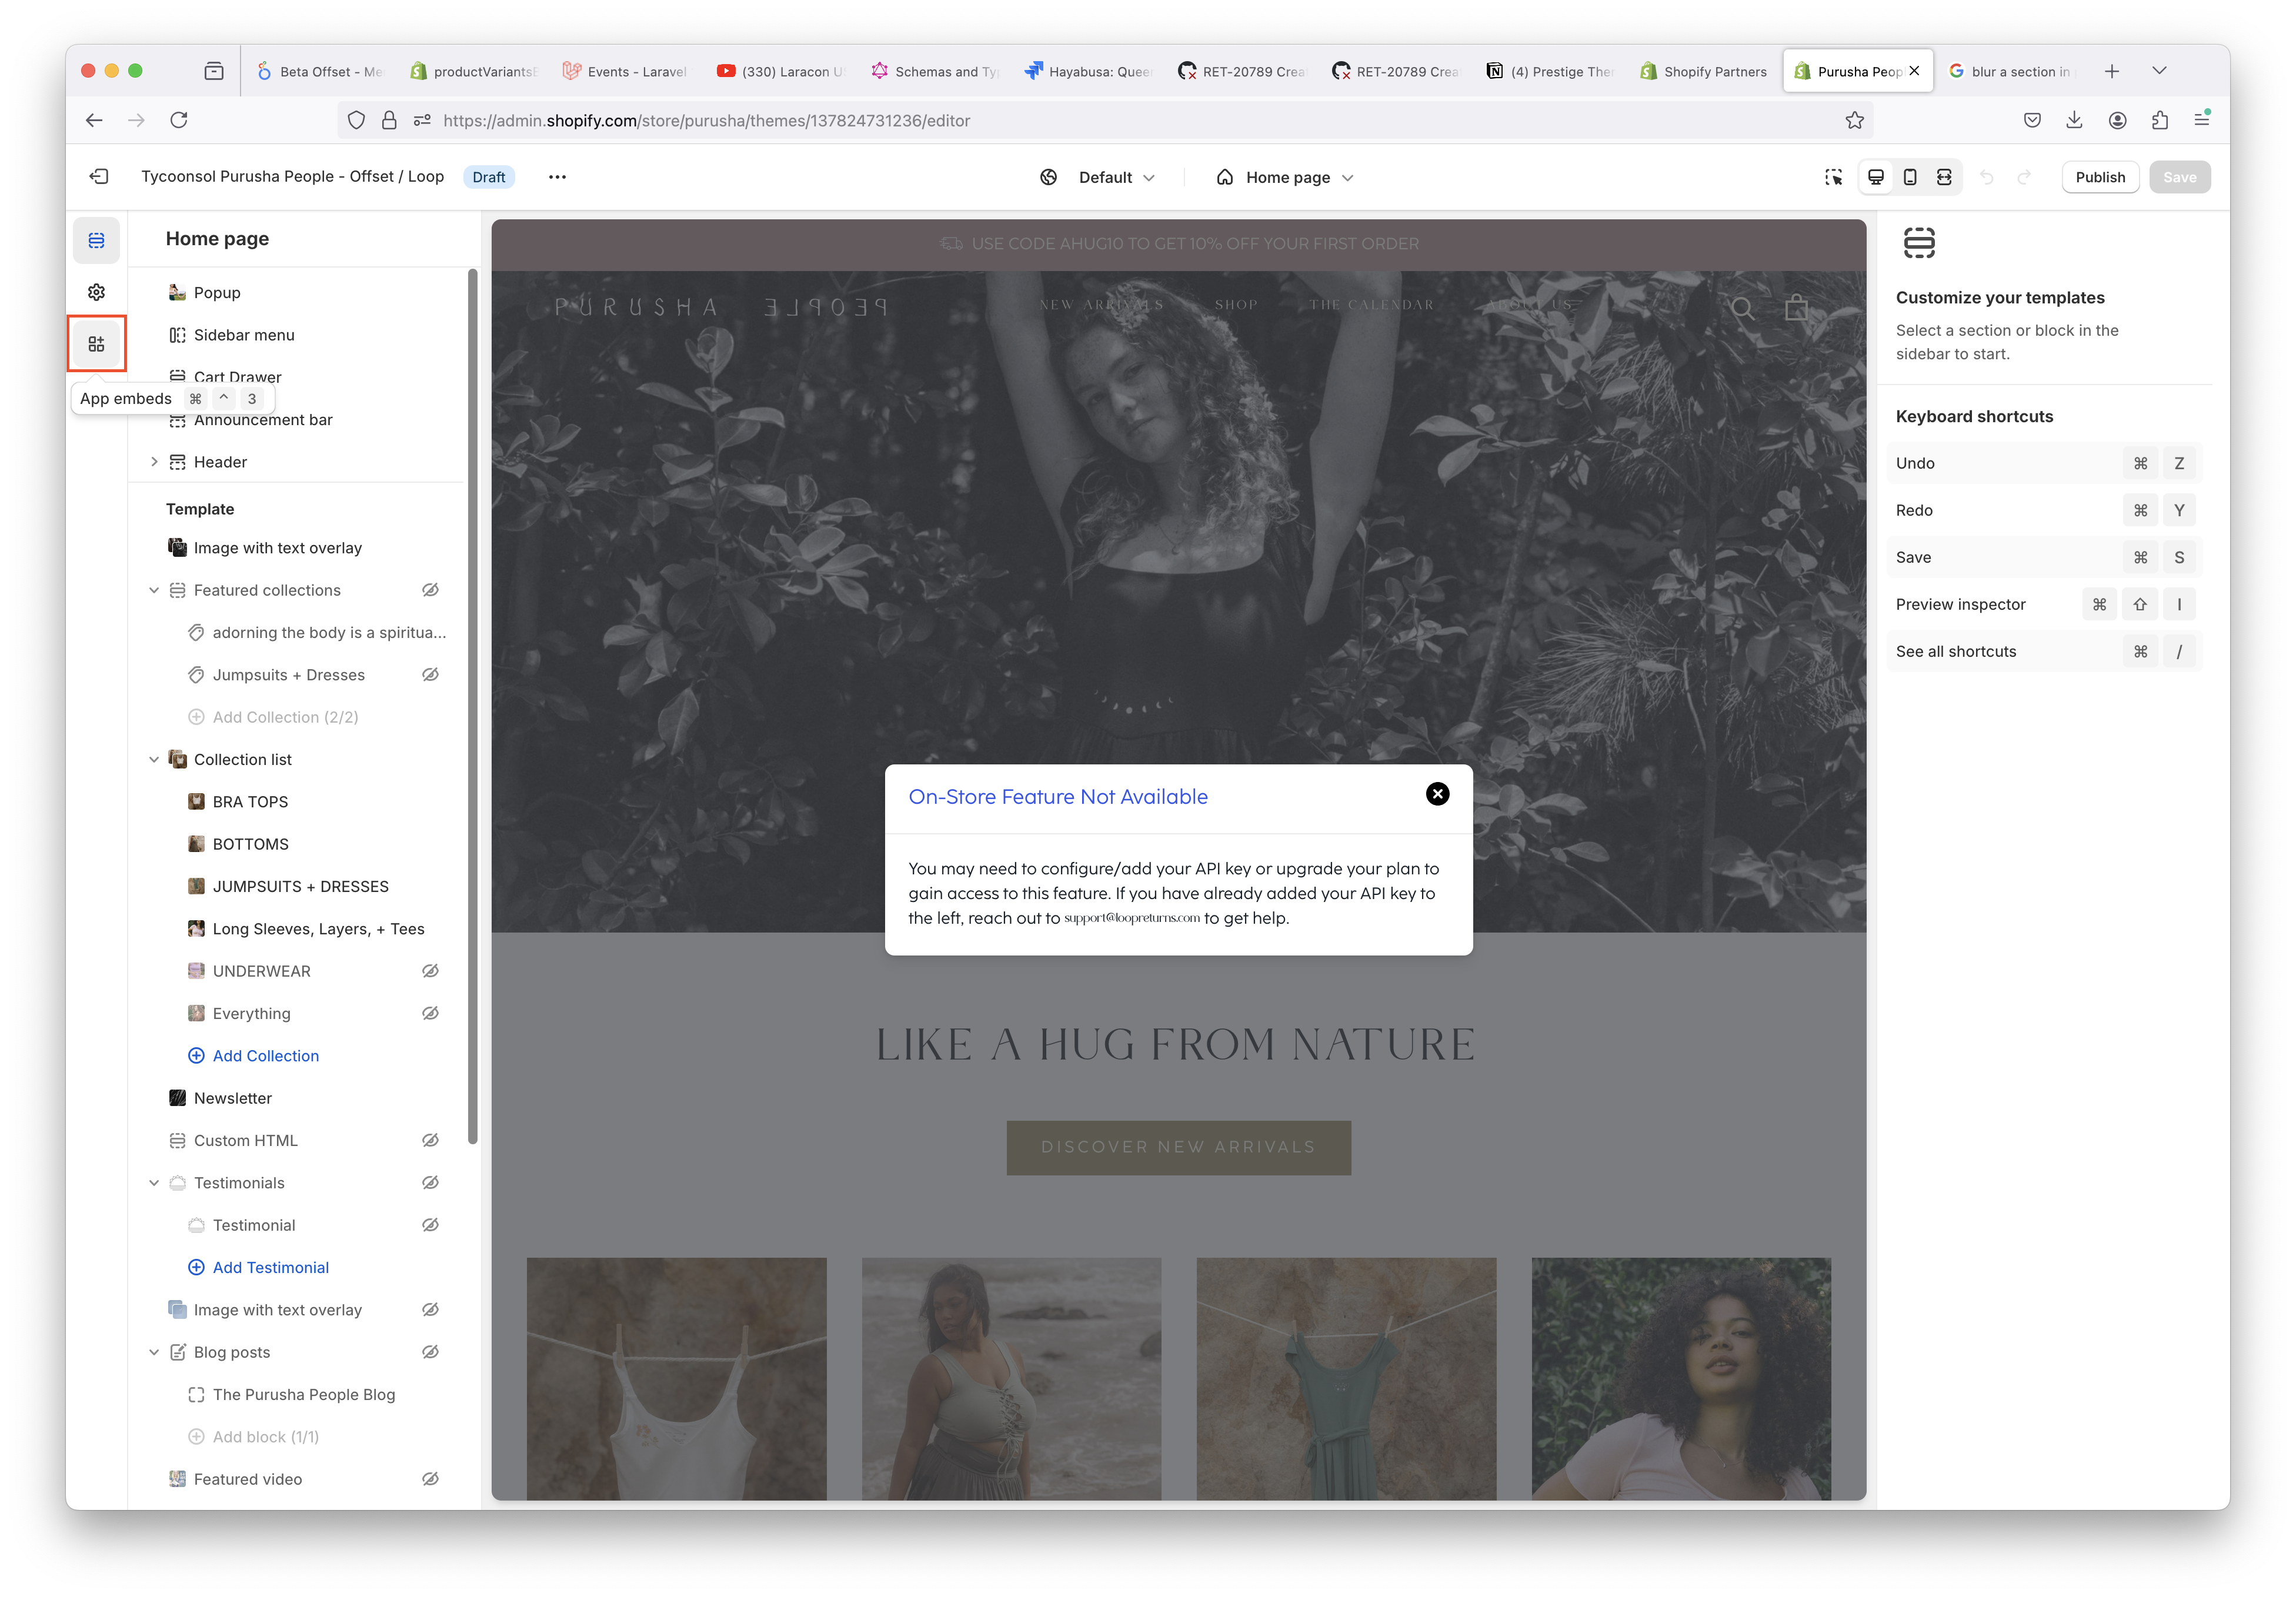
Within the theme template editor, select the App Embeds button in the side navigation on the left.
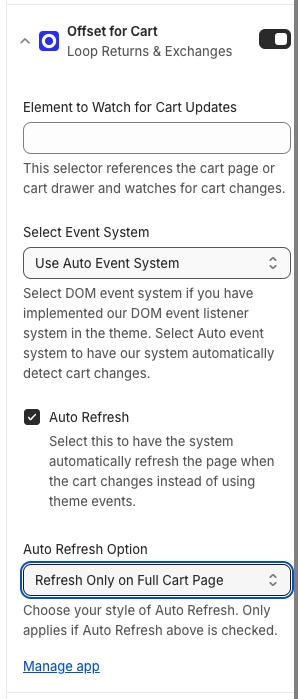
There will be a list of apps displayed on the left sidebar. Scroll and select Checkout+ for Cart.
Click on the switch to enable the embed. If the settings aren’t displayed, click the drop-down arrow to expand and show the settings.
Set the following:
For Element to Watch for Cart Updates: Leave blank
Under Select Event System, select “Use Auto Event System”
Auto Refresh: Toggle on
Click Save in the top right corner once you are done.
Customize the Theme to include the Checkout+ Offer UI element
Note: We recommend having a developer perform the implementation.
The Checkout+ Extension will automatically search for two divs (
id="offset-cart-ui-offer"andid="offset-cart-drawer-ui-offer") on every page of your site. If either of these two divs is detected, the Checkout+ Extension will display the offer UI automatically.You will need to alter your theme’s liquid template files and place these divs in the appropriate places within the liquid template files according to where you’d like to display the offer UI.
Tip: The code files to modify are often called main-cart.liquid for the main cart page, and cart-drawer.liquid for the Cart Drawer, but this can vary depending on the theme.
For more details on how to edit your theme’s liquid template files refer to Shopify’s documentation.
To display the Checkout+ offer UI in a main cart page, you can use the following
div:<div id="offset-cart-ui-offer"></div>To display the Checkout+ offer UI inside of a cart drawer, you can use the following
div:
<div id="offset-cart-drawer-ui-offer"></div>
⚠️ For your Developer: You can apply any necessary padding, margins, or additional CSS to these containing divs to support your theme design.
Auto-fulfilling the Checkout+ Product in Shopify
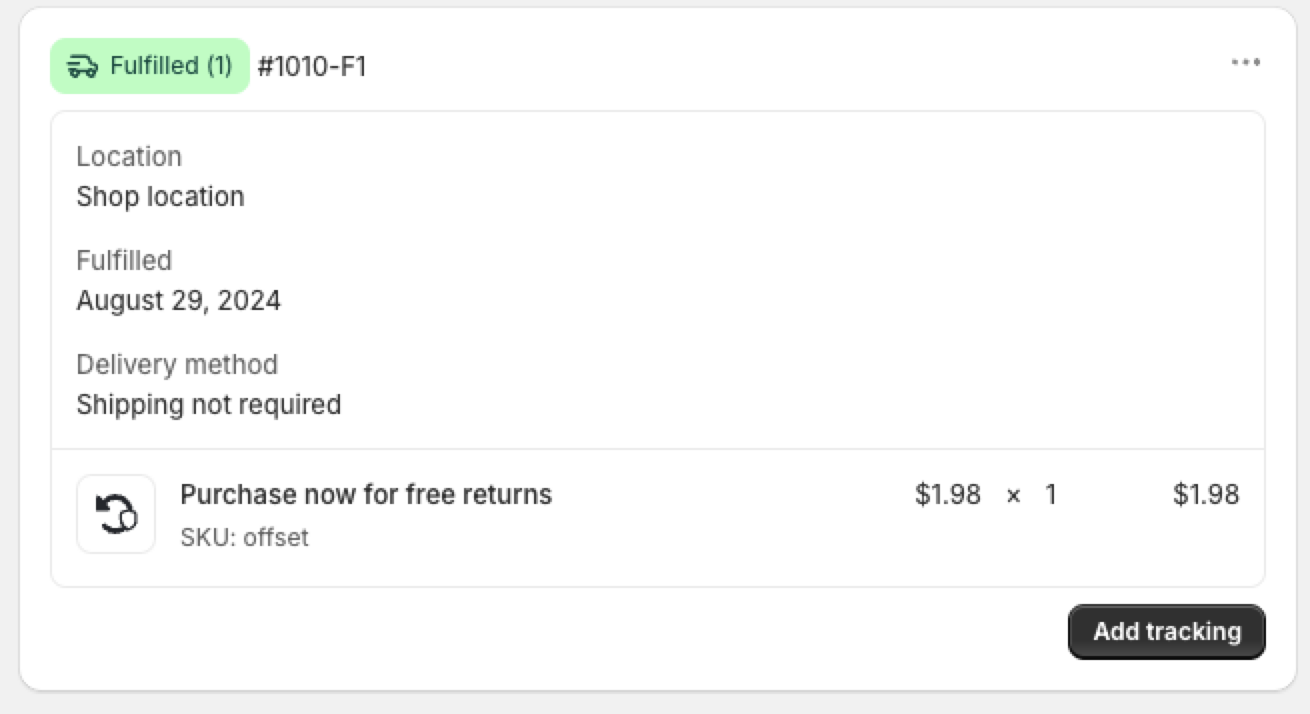
The Checkout+ product will remain unfulfilled by default unless manually fulfilled or an automation is setup. This process walks through how to setup automation for this.
Important: This should be communicated that your warehouse should fulfill this product if you choose to not auto fulfill it. The Checkout+ product has to be marked fulfilled in order to function properly.
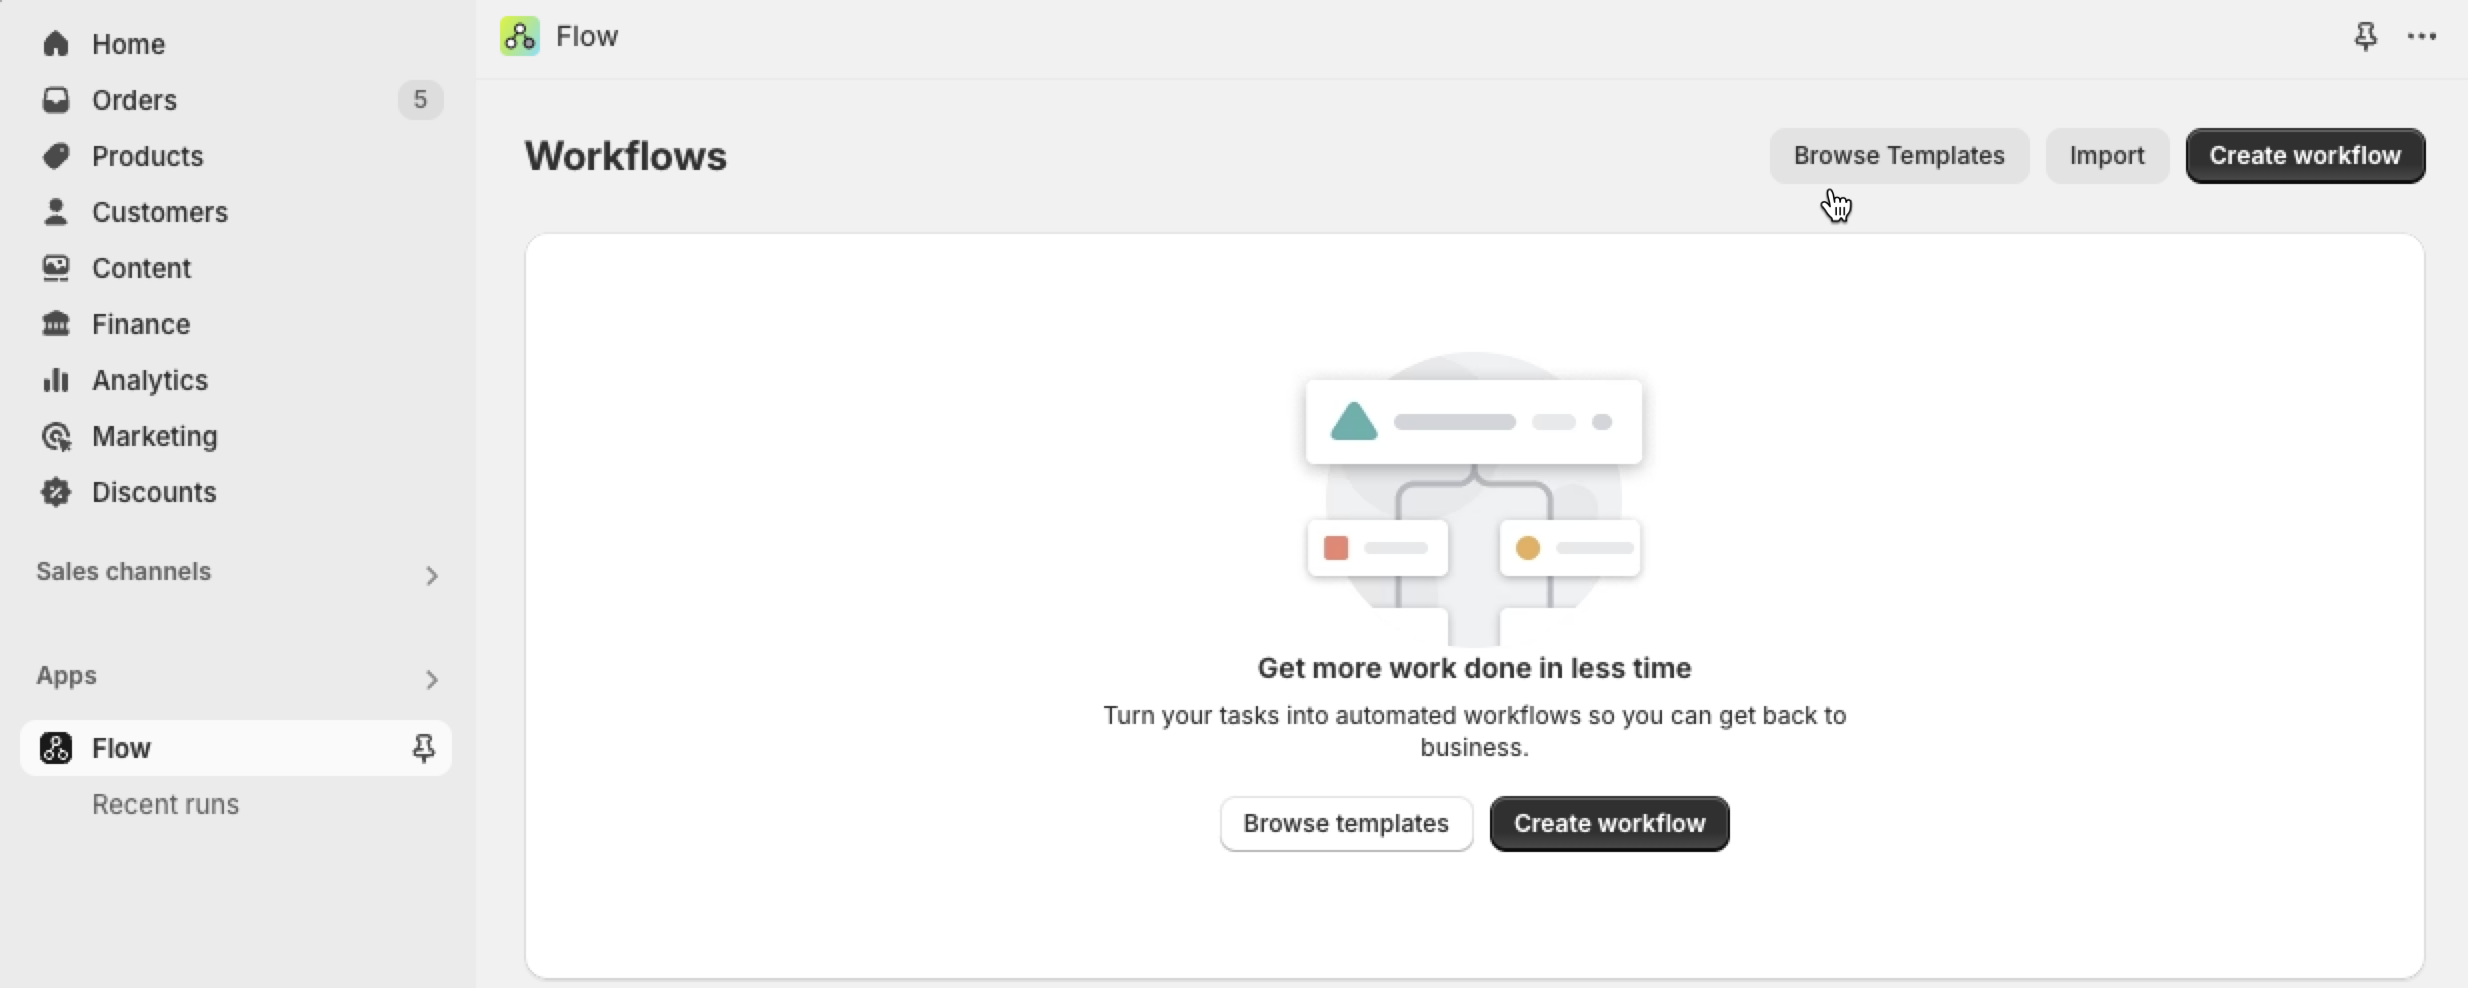
Install the Shopify Flow app in your Shopify store.
Open the Flow app.
Click the Browse Templates button.
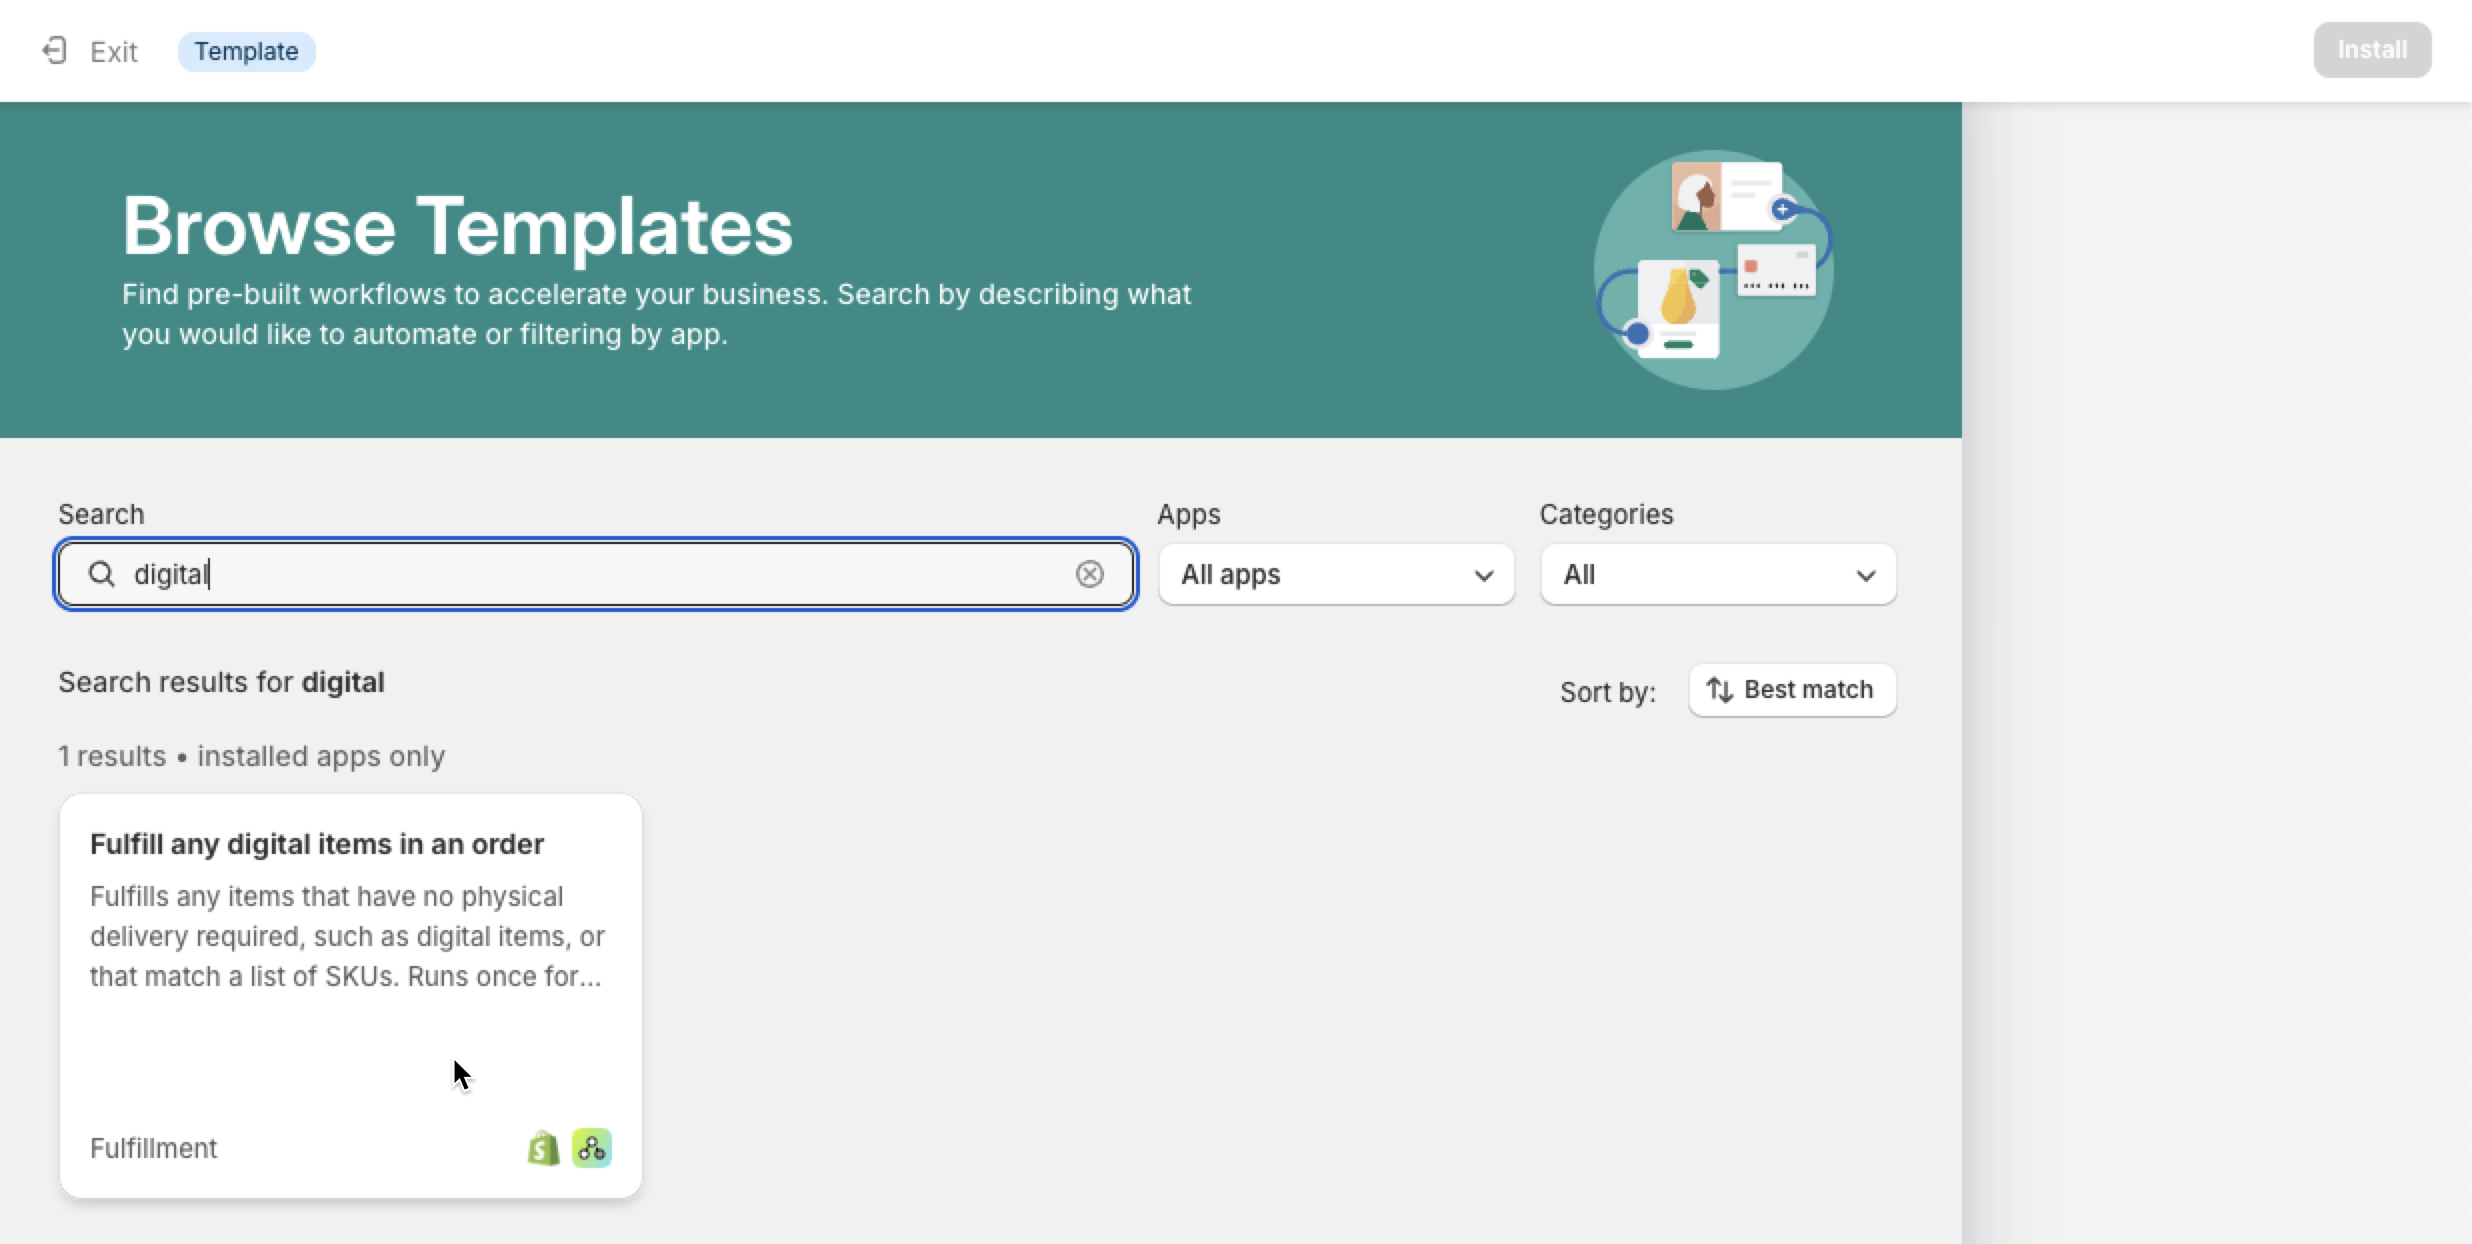
Search for “digital” to find the Fulfill any digital items in an order template, and click on it.
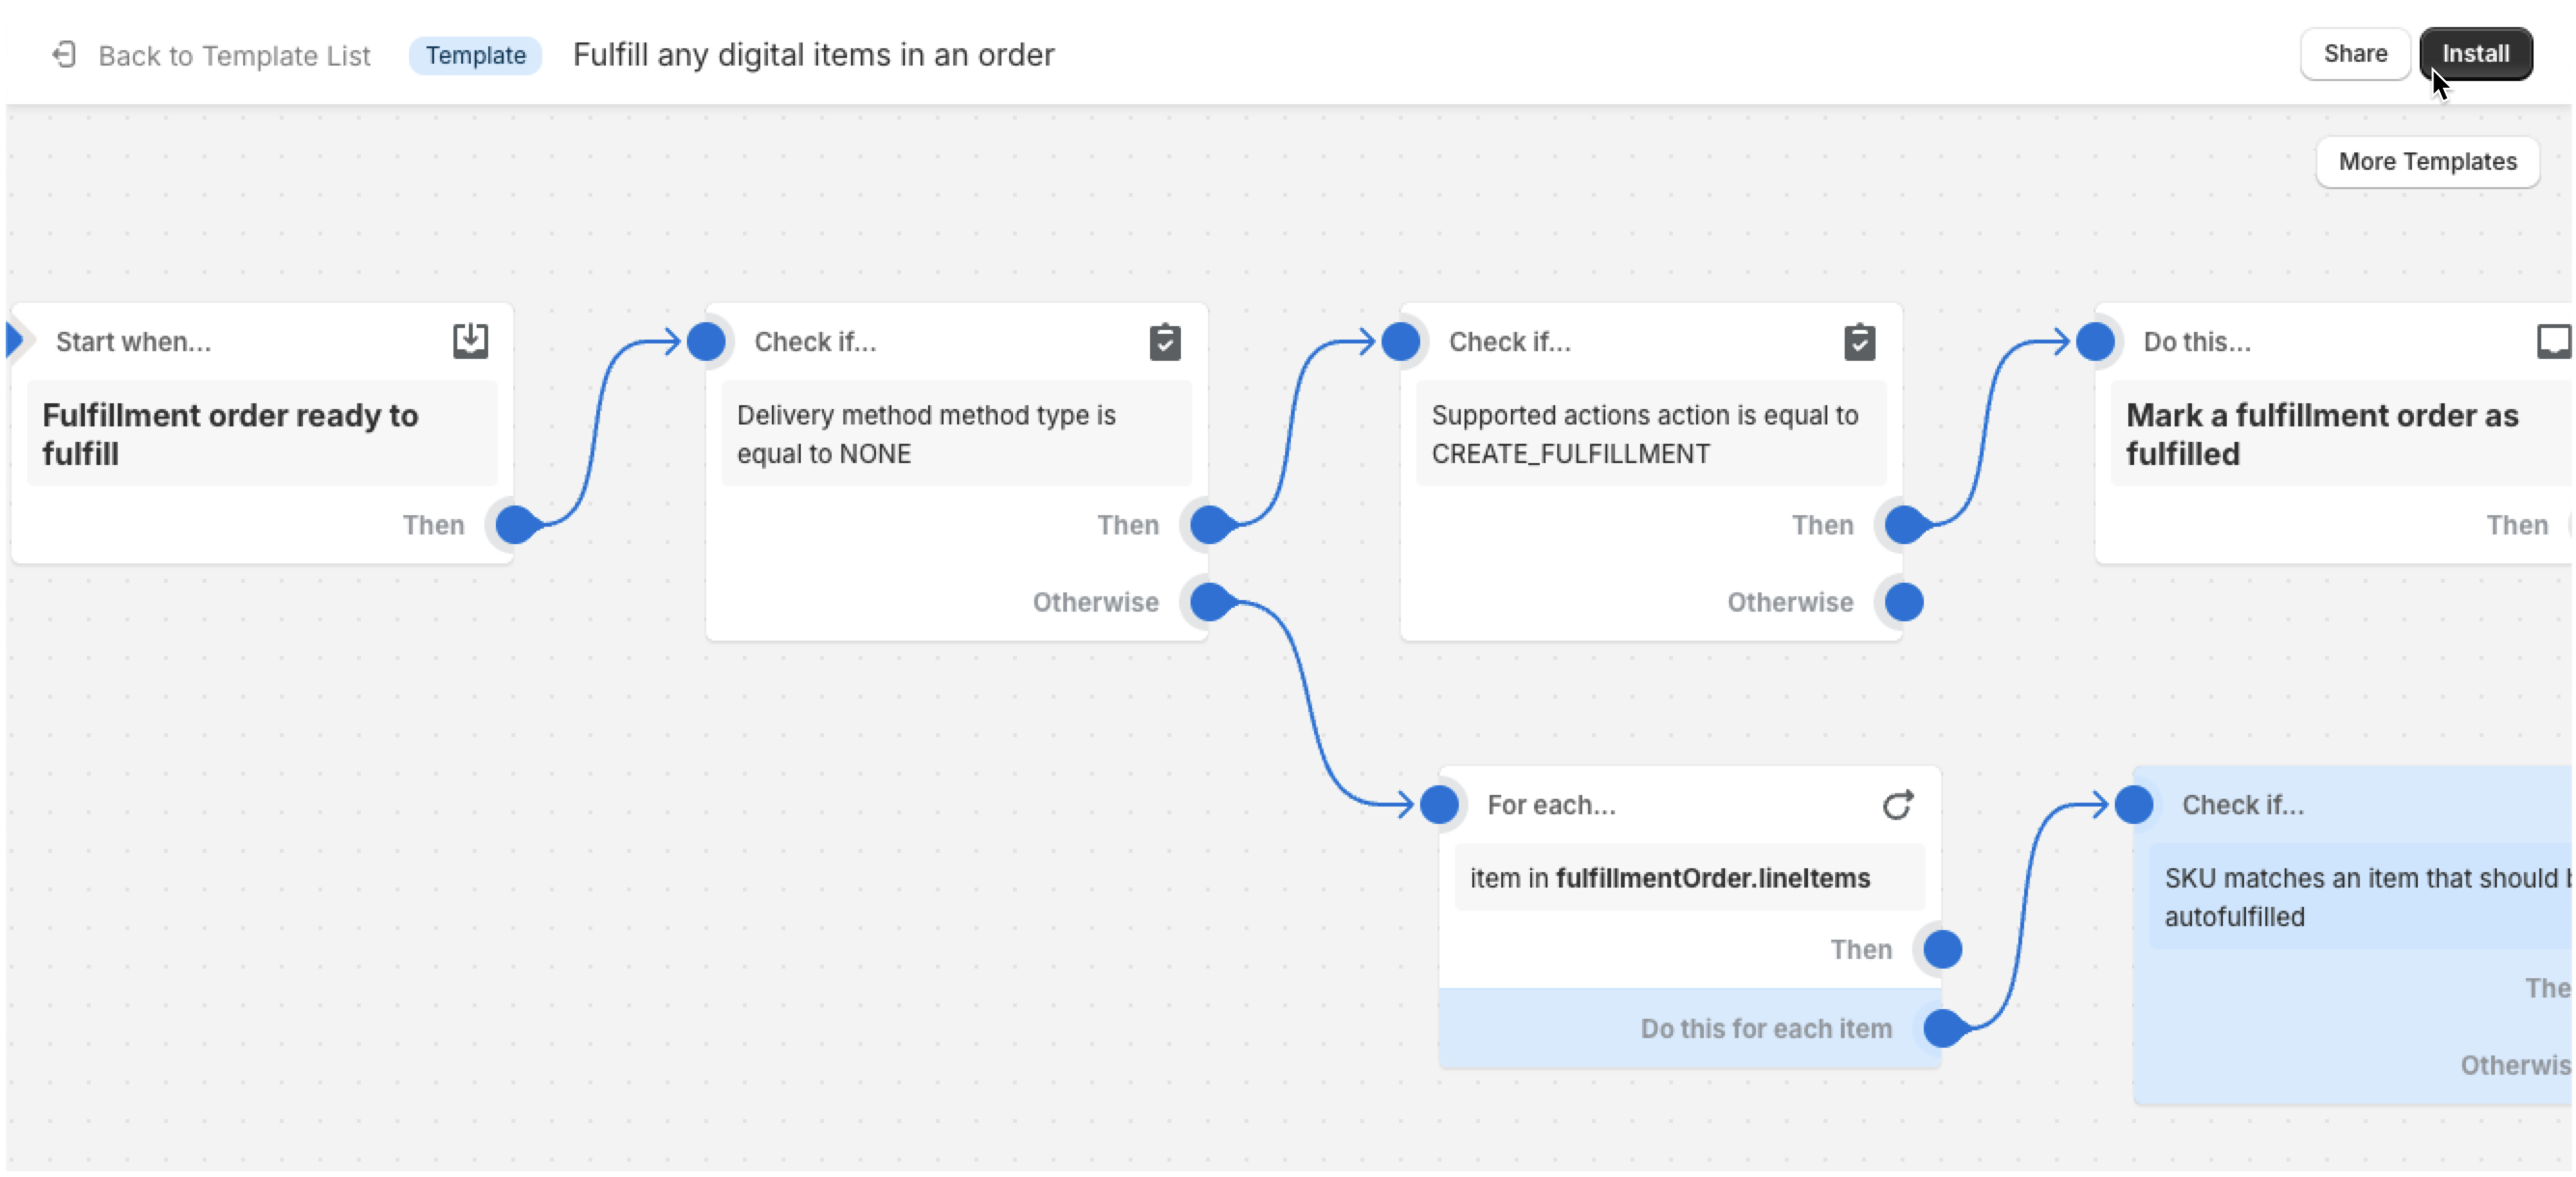
Click the Install button in top-right corner.
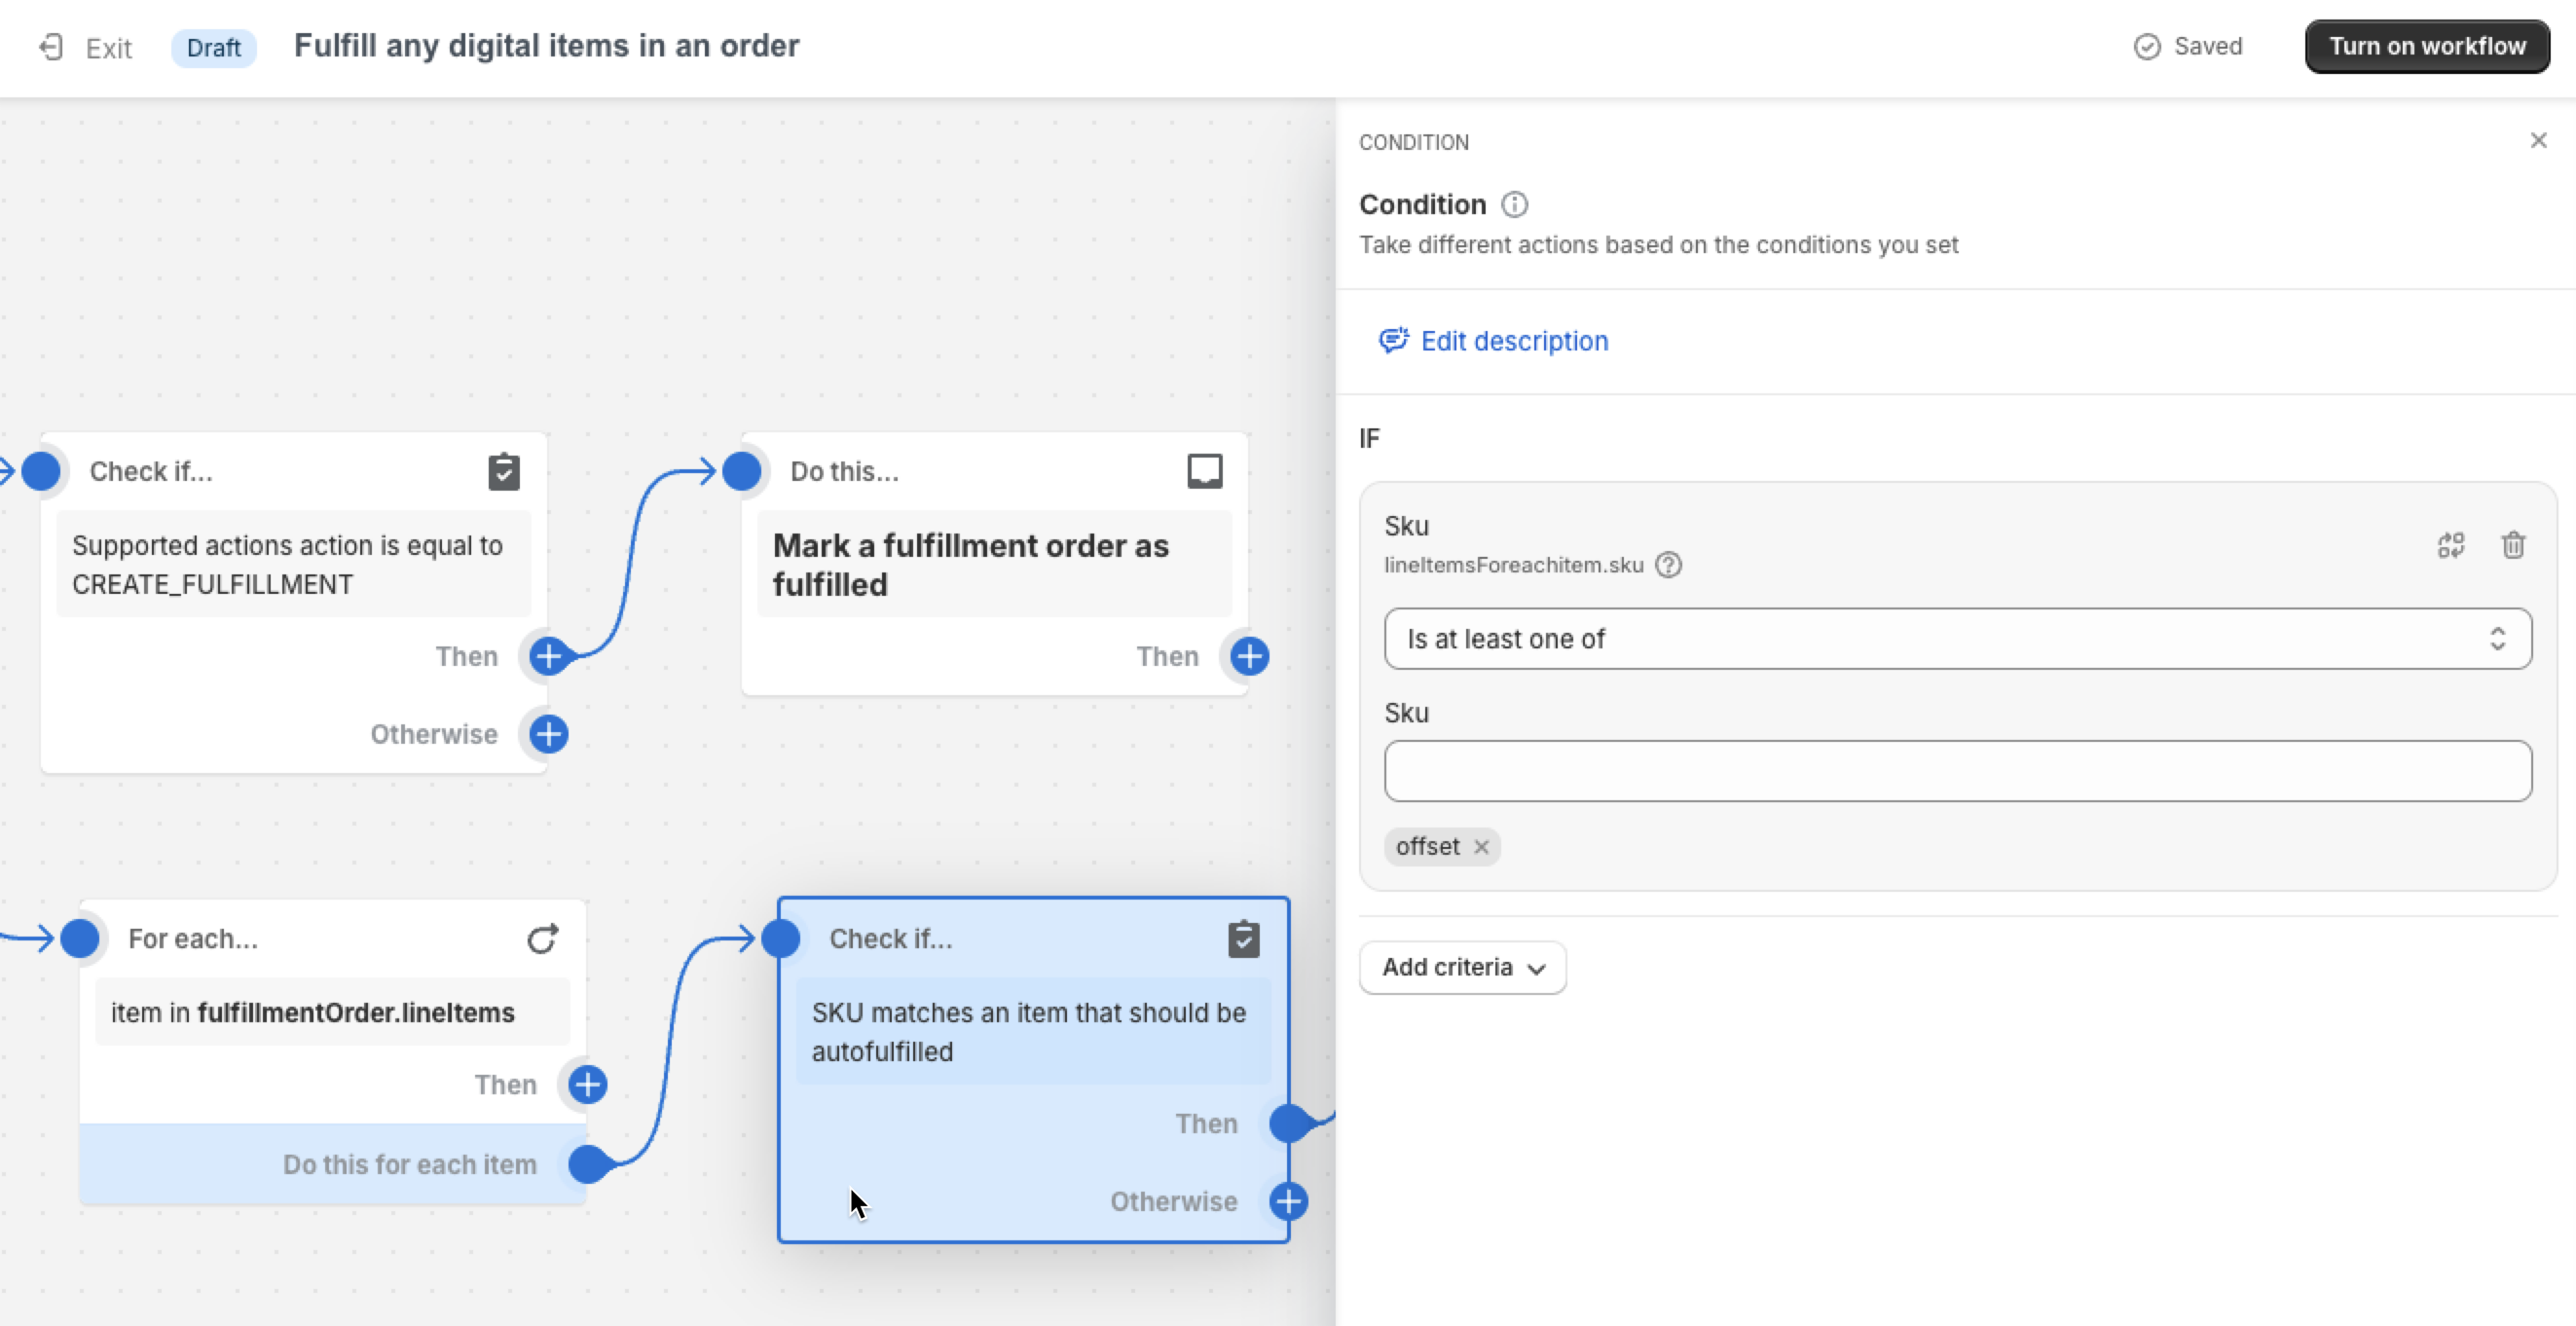
In the Check if… SKU matches an item that should be auto-fulfilled block, add the SKU of your Checkout+ product.
Click the Turn on the workflow button.
Create a test order with the Checkout+ product and checkout. Then open the order details in Shopify and confirm that the Checkout+ product has been fulfilled.
Test
Follow these instructions and test to ensure that Checkout+ is working correctly.
Once you’re ready to go live, publish the theme where you have implemented Checkout+.
Important: Please notify your onboarding specialist when you have published Checkout+ to your theme!

