
Shopper Edit Return: Configure Confirmation Notification
OVERVIEW
This article explains how to add a "Manage Your Return" section to the Return Confirmation email. This is an optional configuration step for merchants who have enabled Shopper Edit Return. It provides two setup options—adding explanatory text only or including a dedicated button—with complete HTML code snippets and step-by-step instructions for inserting the code into the email template, ensuring customers have a clear call-to-action to edit or cancel their returns.
Note: This step is optional. Shoppers can already manage their returns through the existing "View your return" button in your confirmation email. Adding this snippet simply provides an additional, more explicit call-to-action.
Use the menu on the left to quickly navigate this article.
How it works
When you add this email snippet, customers will see a clear call-to-action in their return confirmation email that takes them directly to their Return Status Page, where they can edit their shipping address or cancel their return before it ships.
This configuration adds messaging to your return confirmation email that explicitly tells customers they can edit or cancel their return. You can choose between two approaches:
Option 1: Add explanatory text only - Adds clear messaging about the editing capability without adding a second button
Option 2: Add a dedicated button - Creates a new "Manage your return" button with supporting text, appearing before your existing "View your return" button
Both options link customers to the same Return Status Page where they can make changes. The choice depends on your preference for email design and how prominently you want to feature this capability.
Setup
In Loop Admin, navigate to: Settings → Notifications → Return Confirmation
Choose your approach
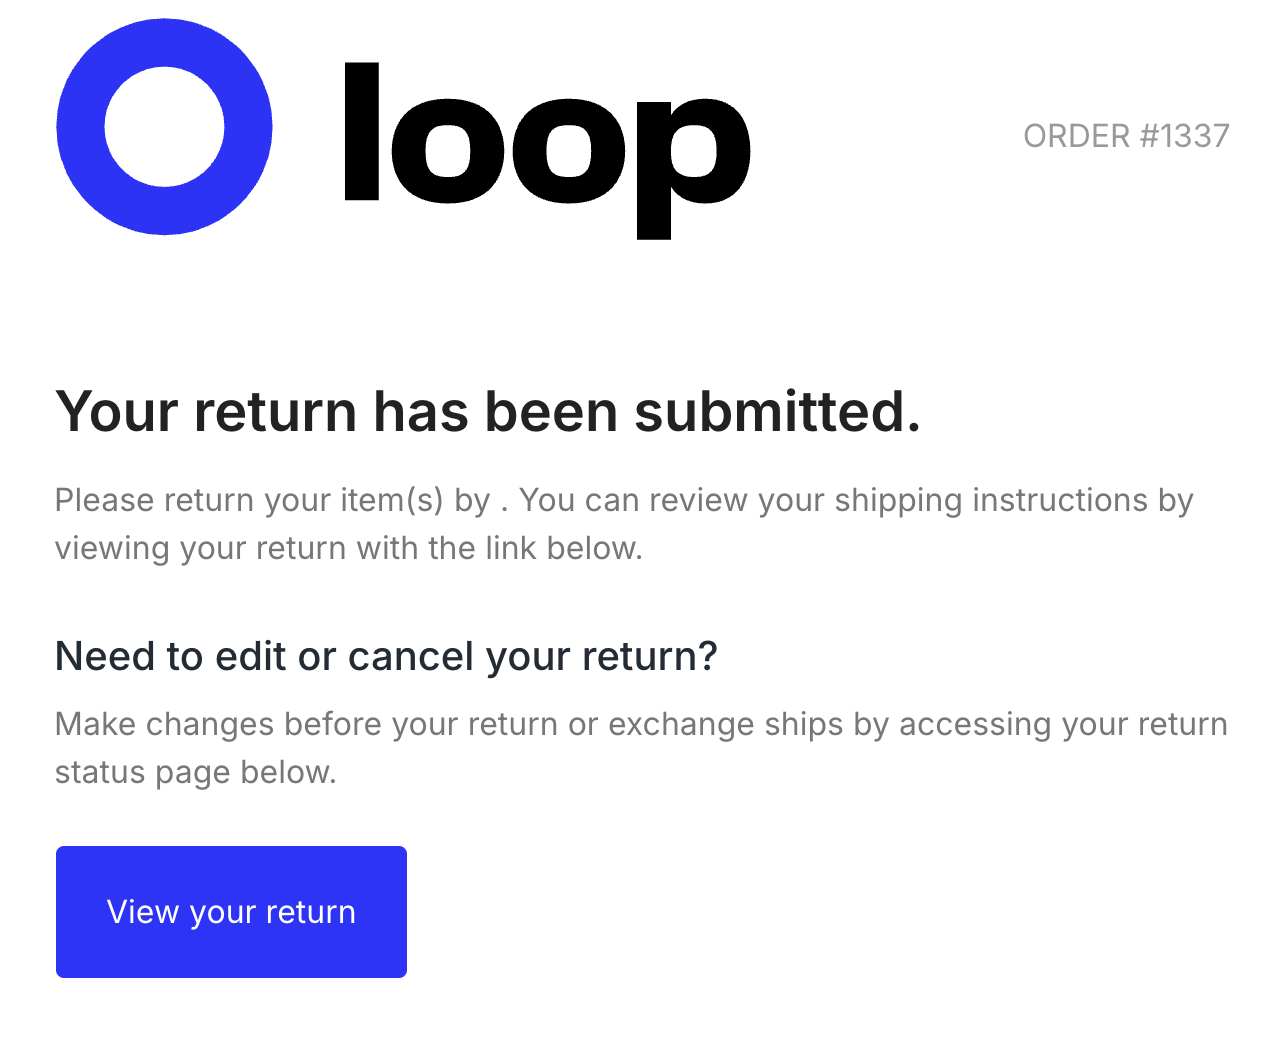
Option 1: Add text only (no additional button)
This option adds a heading and explanatory text that directs customers to use your existing "View your return" button to make changes. This keeps your email simpler with just one button while still clearly communicating the editing capability.
In the email template, search for this text:
<!-- //End Thank you text -->
This tag ends the previous section. You'll be adding new code directly between this section and the next one that starts with <!-- Button link -->.
Copy the entire code block below and paste it directly between the <!-- //End Thank you text --> tag and the <!-- Button link --> tag below it.
<!-- Edit/Manage Return Section - Text Only -->
<tr>
	<td width="100%" valign="top" style="padding-top: 30px;">
		<h5 style="font-size: 20px; font-weight: 500; color: #212b36; margin: 0; display: block;">Need to edit or cancel your return?</h5>
		<p style="margin: 0; margin-top: 10px; display: block;">Make changes before your return or exchange ships by accessing your return status page below.</p>
	</td>
</tr>
<!-- End Edit/Manage Return Section -->
Tip: Make sure you copy the entire code block, including the HTML comment tags (<!-- Edit/Manage Return Section --> at the start and <!-- End Edit/Manage Return Section --> at the end).
This approach adds clear messaging above your existing "View your return" button without adding a second button to the email.
Your email preview should look similar to this:
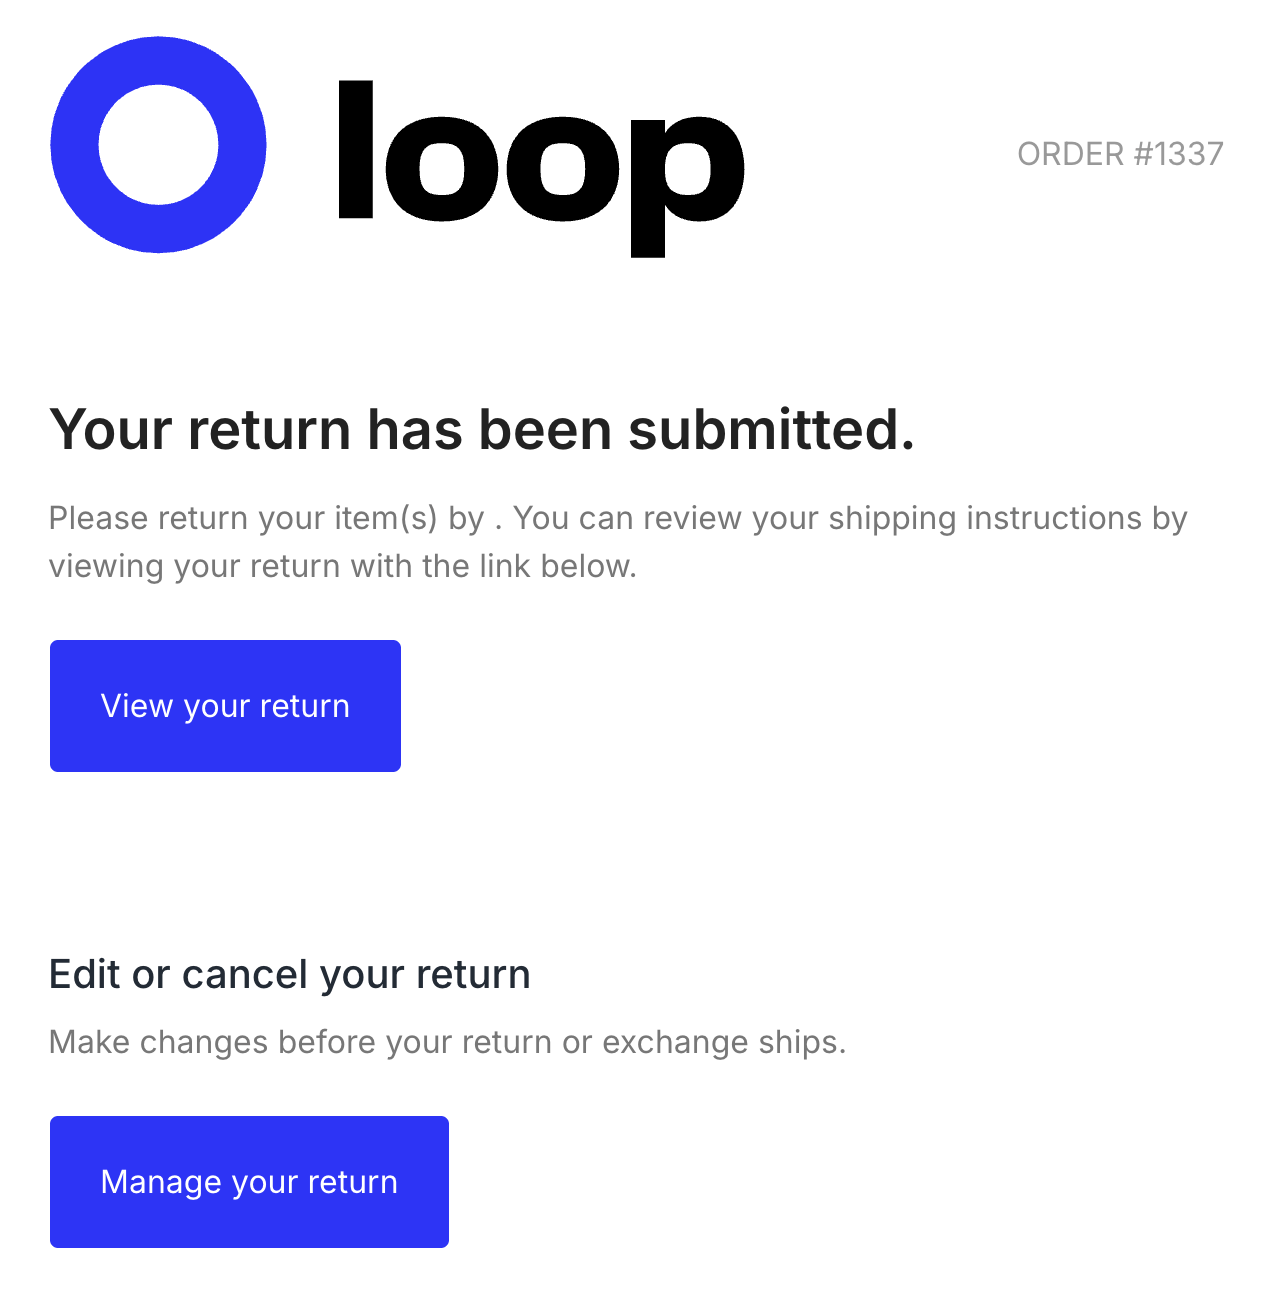
Option 2: Add a "Manage Your Return" button
This option adds a new section with a heading, explanatory text, and a dedicated button. Customers will see two buttons in their email:
Manage your return (the new button) - Clearly communicates that customers can make changes
View your return (your existing button) - Remains in place for customers who want to view their return details
The button automatically:
Links each customer to their specific return
Matches your brand's primary color
Works on desktop and mobile devices
In the email template, search for this text:
<!-- //End Button link -->
This tag ends the previous section. You'll be adding new code directly between this section and the next one that starts with <!-- divider line -->.
Copy the entire code block below and paste it directly between <!-- //End Button link --> which closes the previous section, and <!-- divider line --> which starts the following section.
<!-- Edit/Manage Return Section -->
<tr>
	<td width="100%" valign="top" style="padding-top: 24px;">
		<h5 style="font-size: 20px; font-weight: 500; color: #212b36; margin: 0; display: block;">Edit or cancel your return</h5>
		<p style="margin: 0; margin-top: 10px; display: block;">Make changes before your return or exchange ships.</p>
	</td>
</tr>
<!-- Manage Return Button -->
<tr>
	<td width="100%" valign="top" style="padding-top: 24px; padding-bottom: 40px;">
		<table style="width:100%;border-spacing:0;border-collapse:collapse">
			<tbody>
				<tr>
					<td>
						<table style="border-spacing:0;border-collapse:collapse;float:left;margin-right:24px">
							<tbody>
								<tr>
									<td style="border-radius:4px" align="center" bgcolor="{{primary}}"><a href="{{status_page_url}}" title="Manage your return" style="font-size:16px;text-decoration:none;display:block;color:#fff;padding:20px 24px" target="_blank">Manage your return</a></td>
								</tr>
							</tbody>
						</table>
					</td>
				</tr>
			</tbody>
		</table>
	</td>
</tr>
<!-- End Edit/Manage Return Section -->
Tip: Make sure you copy the entire code block, including the HTML comment tags (<!-- Edit/Manage Return Section --> at the start and <!-- End Edit/Manage Return Section --> at the end).
Your email preview should look similar to this:
Save and test your changes
After adding either snippet:
Save your changes in Loop Admin
Use the preview or test function to send yourself a test email
Check that:
The new section appears between the intro text and the "View your return" button
If you added a button, it displays in your brand color
All buttons link correctly when clicked
The email looks good on mobile devices
FAQ
The button isn't showing my brand color. What should I check? Make sure you didn't accidentally remove the {{primary}} variable from the code. This variable automatically applies your brand's primary color to the button.
The button doesn't link anywhere when I click it. What's wrong? Check that the {{status_page_url}} variable is still in the code. This variable generates the unique link for each customer's return. Don't replace it with an actual URL.
The spacing looks off after I added the code. What happened? Make sure you copied the entire code block, including the HTML comment tags at the beginning (<!-- Edit/Manage Return Section -->) and end (<!-- End Edit/Manage Return Section -->). These tags help maintain proper spacing.
Can I customize the button text or heading? Yes, you can change any of the text here to match your brand voice. Just don't modify anything inside double curly braces like {{primary}} or {{status_page_url}} - these are variables that Loop uses to personalize the email.
Will this work with all email clients? Yes, this code uses standard HTML email formatting that works across major email clients including Gmail, Outlook, Apple Mail, and mobile email apps.
Please reach out to support@loopreturns.com with any additional questions.