
Building a Test Order in Shopify
OVERVIEW
This article explains how to create test orders in Shopify for testing Loop's core functionality before launch. The article provides detailed steps for creating a test order in Shopify, including best practices for discounting, customer assignment, and preventing accidental fulfillment to minimize the impact on reporting.
Use the menu on the left to quickly navigate this article.
Note: This article focuses solely on building a test order in Shopify. Loop's instance-testing article contains more guidance on how to test.
Why it Matters
The testing step of onboarding is crucial to ensure Loop is functioning as expected prior to launching. You will need one or two orders to test the below core elements of Loop:
Generating return labels through EasyPost
Gift card automation that allows Loop to issue store credit through Shopify
Loop's Stripe functionality (required if using Shop Now, Instant Exchange, or are charging handling fees on exchange)
Create a Test Order
Go to the Orders tab in Shopify and click Create Order.

Add any available and in stock products from your store, preferably one with variants (sizes, colors, styles, etc.). Testing an order with variants will give you a closer look at the customer experience when using Loop.
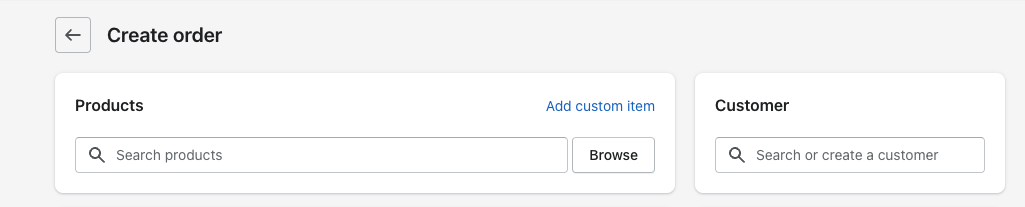
Set yourself as the customer. This will ensure that you'll have visibility into the notifications a customer can expect from your Shopify store, as well as from Loop.
To minimize the impact on your reporting, you can enter in a discounted amount using the "Add discount" button. This will report as a large discount in Shopify, but will have the least impact on your overall revenue numbers. Please see the below note for best practice on the recommended discount amounts.
Important: If you have handling fees enabled in your return policy settings make sure your discounted test order is not less than the handling fee amount. If the handling fee is higher than the value of the return, it will require payment to submit the return request. Additionally, we do not recommend discounting the order 100%, as that order will carry no value in Loop.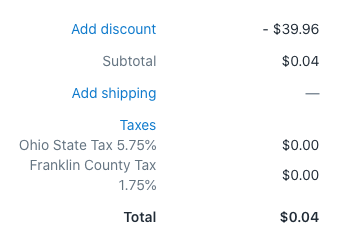
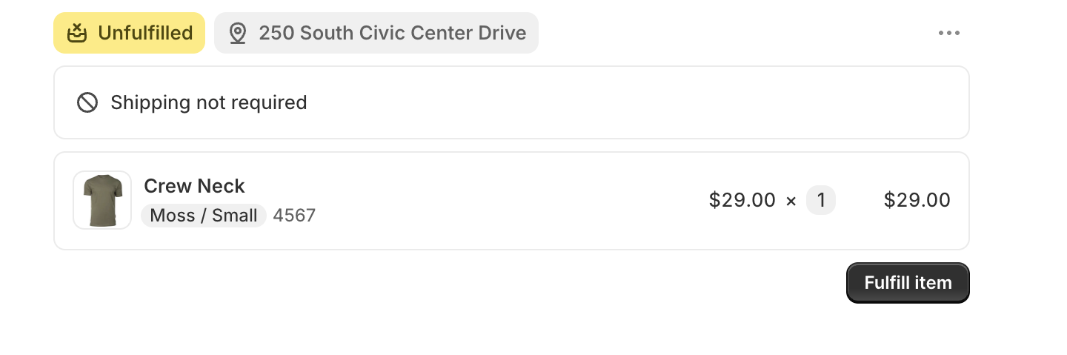
Take the necessary steps to ensure your warehouse or fulfillment team is aware to not fulfill this order, whether that is to let them know directly or include a "Do Not Fulfill" alert within the notes section of the order.
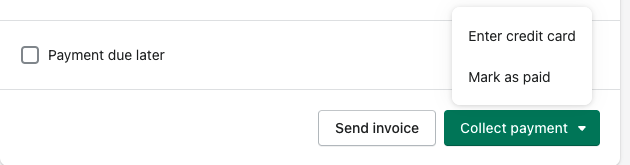
Click the green Collect payment button and mark the order as paid.
Click the Fulfill item button. This will take you to a new page where you need to select the "Fulfill item" button again.
Important: the test order must have a customer tied to it, be marked as paid, and marked as fulfilled in order to be submitted for a test return in your Loop portal.
This order is now ready to use for testing. You can begin testing by reviewing the steps listed within the How to Test Your Loop Instance article.
FAQ
Do I have to test prior to launching Loop on my website? It is strongly encouraged you test your Loop instance prior to launching not only to ensure the entire process is functioning correctly, but also so you can experience the returns process from the viewpoint of the customer.
Please reach out to support@loopreturns.com with any additional questions.