
Shop Now: On-Store Troubleshooting (Manual)
This article pertains to merchants with the original version of On-Store that requires manual code entry to activate. If troubleshooting for the embedded, more automated version, review the embedded troubleshooting article.
For those with the original On-Store setup who want to switch to the embedded On-Store setup, please review Loop's switching instructions below.
OVERVIEW
This Shop Now: On-Store troubleshooting guide will help merchants triage common issues that occur when a) setting up On-Store for the first time or b) monitoring active On-Store during a release. "SDK" refers to the software development kit for this version of On-Store.
Tip: Loop highly recommends having a developer or engineer present for these customizations.
Important: If partnering with certain third-party apps such as SpurIT Pre-Order or Preorder Manager, merchants must create a new checkout button. Otherwise, their current checkout button(s) will direct shoppers to the Shopify checkout instead of Loop's On-Store checkout. Check out Loop's section about third parties.
Shoppers directed to wrong checkout flow
During the On-Store flow, the checkout button(s) should take shoppers to the Loop On-Store checkout instead of the typical Shopify checkout. However, there are three common scenarios that can still lead shoppers to their typical Shopify checkout. Review the scenarios below to troubleshoot any issues.
Note: These descriptions and instructions pertain to the Google Chrome browser. However, the steps should be similar in any browser.
Play the video below, or review the written instructions underneath it, to double-check the attach value(s) and code placement.
1. Check the attach value
The most common issue is that the “attach” value in the store’s On-Store snippet does not match the ID or Class of the store’s checkout button. To inspect this:
Go to Shopify admin > Sales channels > Online Store.
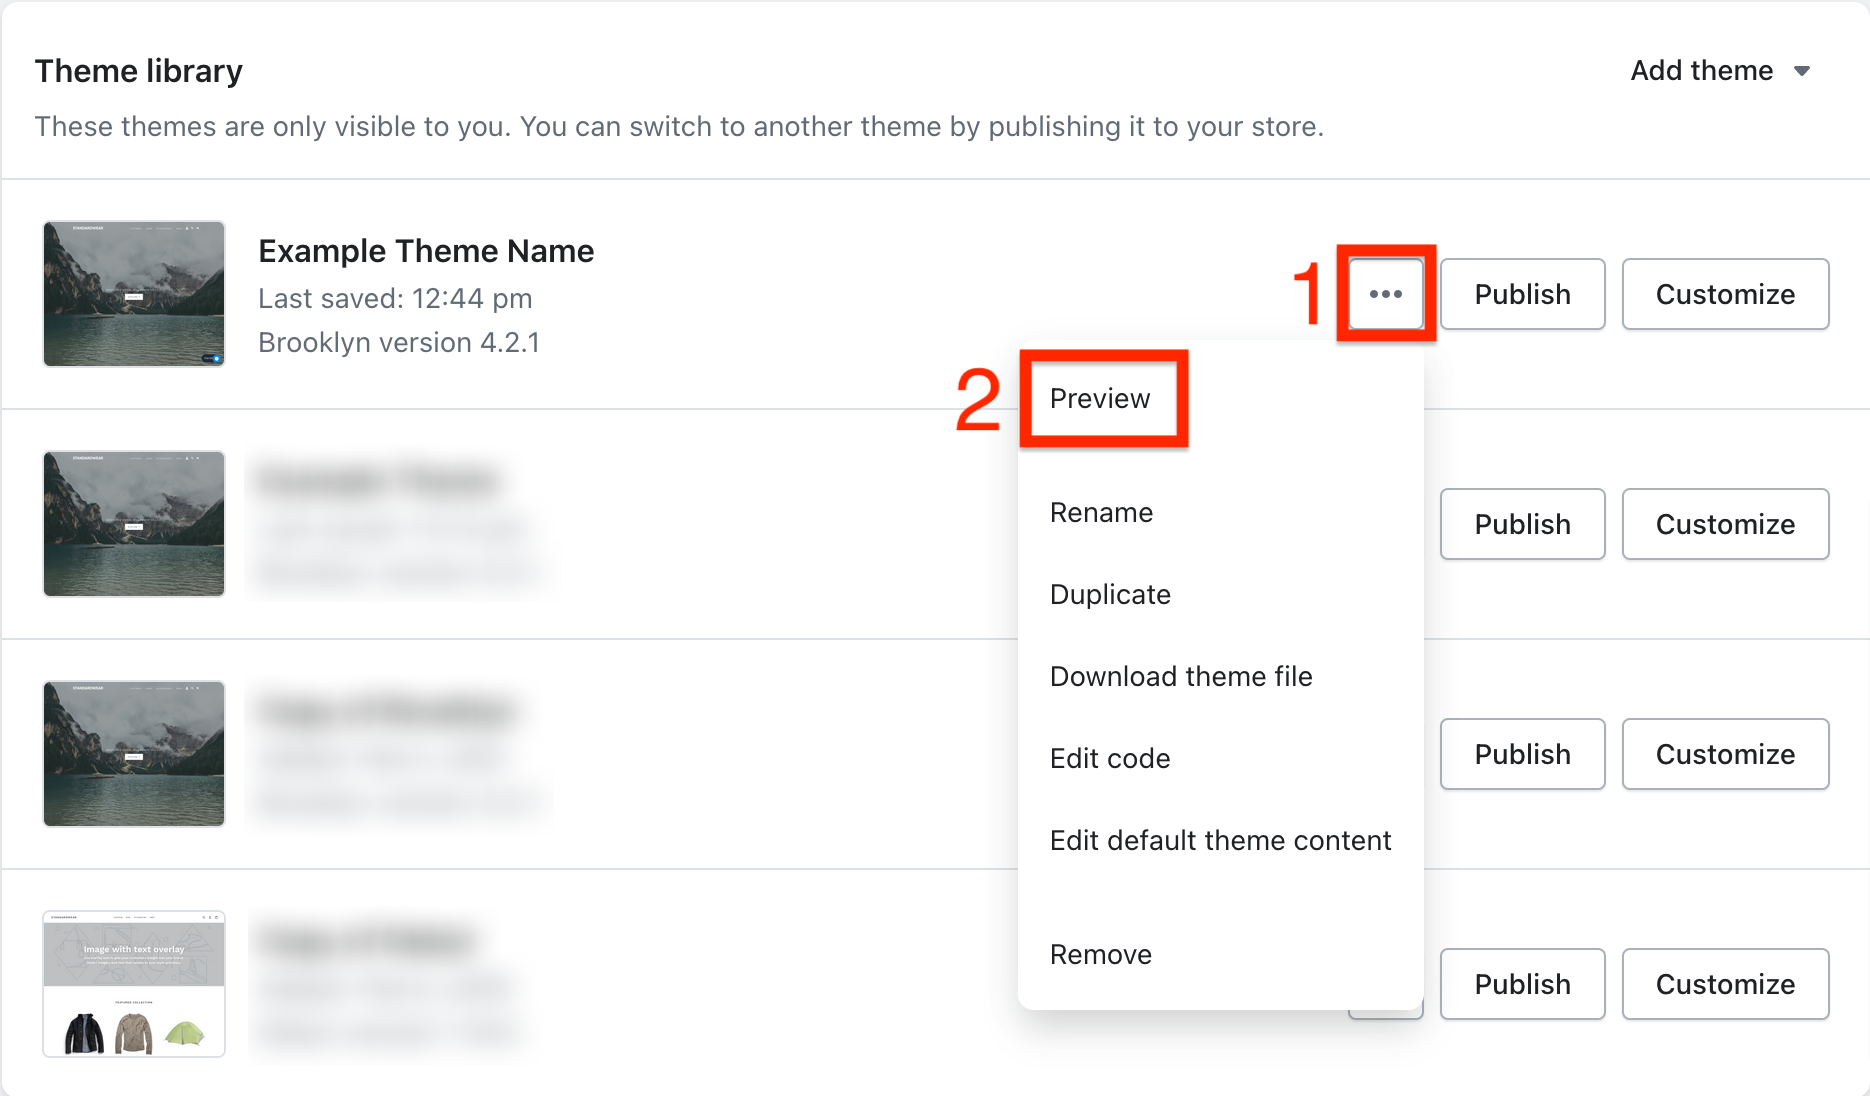
Find the unpublished theme under the "Theme library" section. Click the ellipsis button > Preview.
In the store preview, go to where the checkout button lives. (For some themes, this is a Cart page. If using a mini or fly-out cart, this can be any page.)

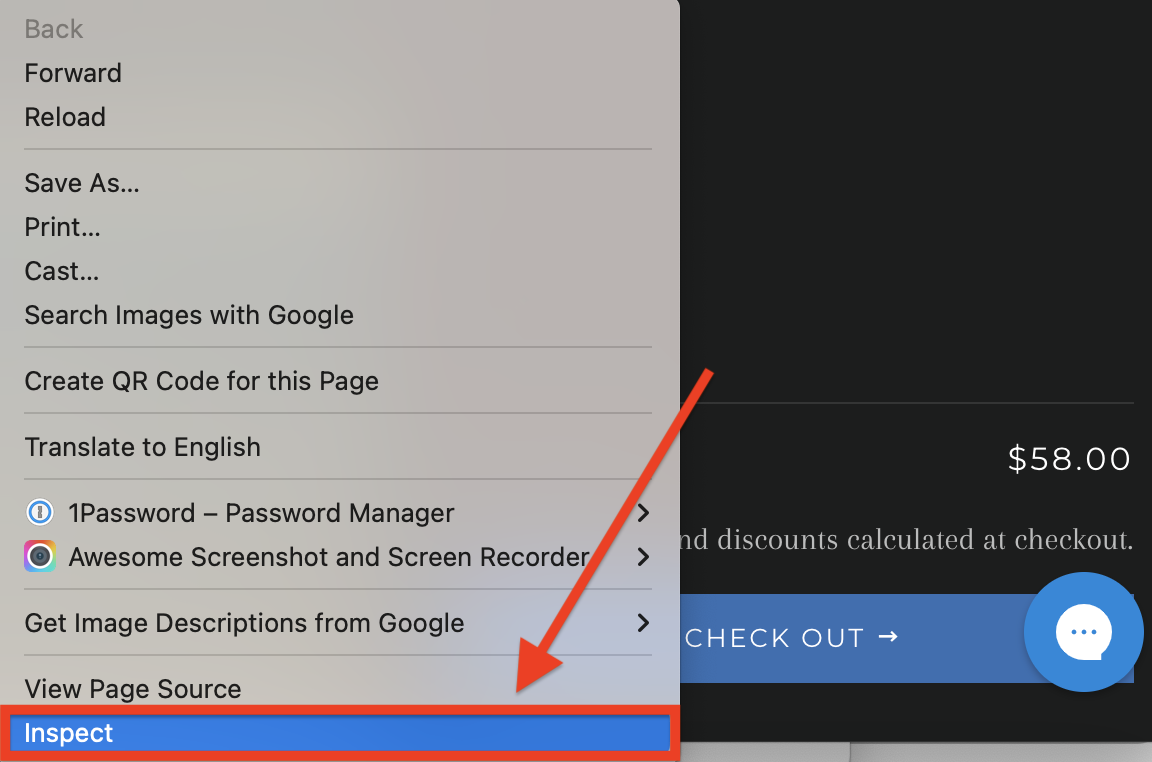
Right-click the checkout button and click Inspect.
Check that the checkout button's ID or Class highlighted in the Inspector Tool exactly matches the attach value in the store’s code.

Important: Along with using the appropriate attach value, be sure to place the correct character before it. A hash (#) must always proceed an ID, and a period (.) must always proceed a Class.
Below is an example of an attach value matching the checkout button ID:

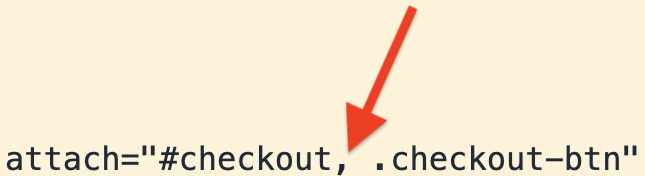
Tip: If the store has multiple checkout buttons that do not share the same Class or ID, put multiple values in the attach field by separating them with a comma (,). For example, if one button has an ID of “ #checkout ” and another has a Class of “ .checkout-btn ”, it should look like:
2. Check the code placement
The On-Store checkout code must appear before the closing body tag (“ </body> ”) in the store’s Shopify theme. Any other placement may cause functional issues such as the checkout button directing shoppers improperly.
To double-check the On-Store code location:
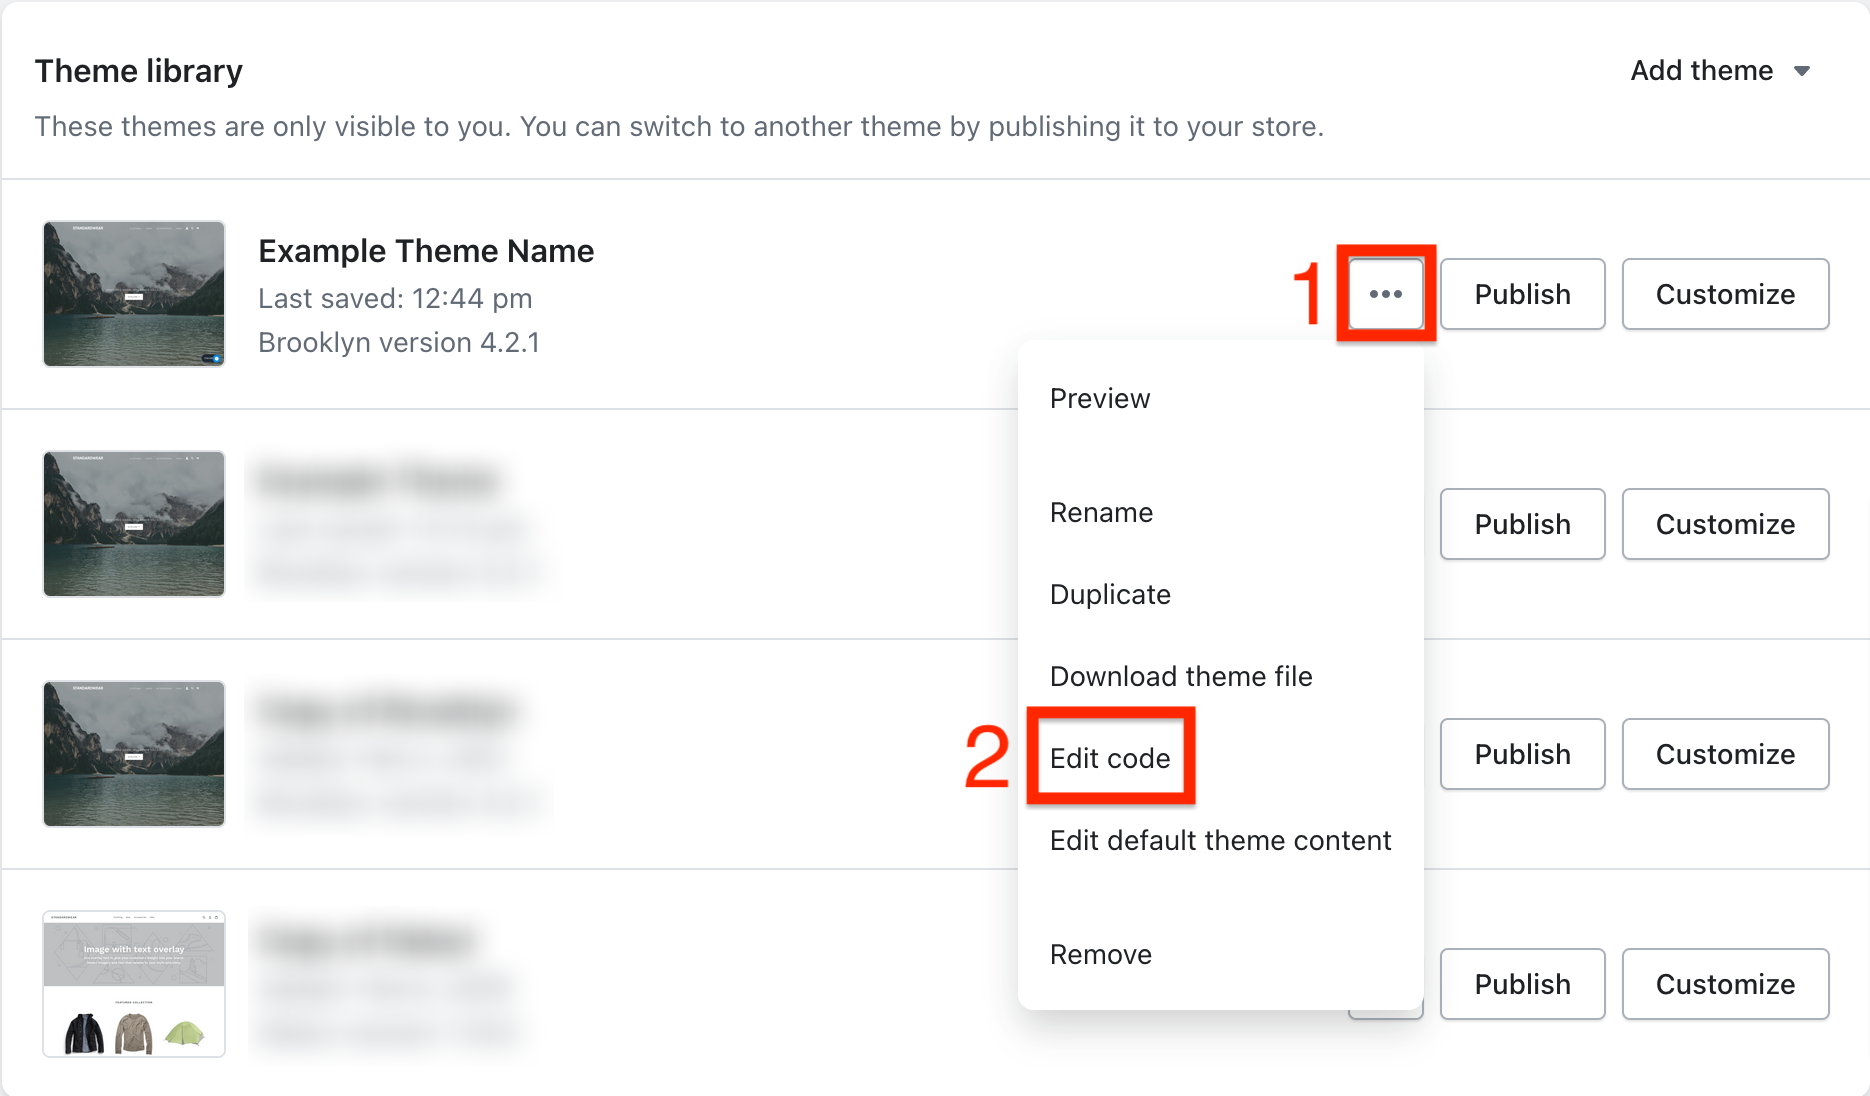
On the theme in Shopify, click the ellipsis button > Edit Code.
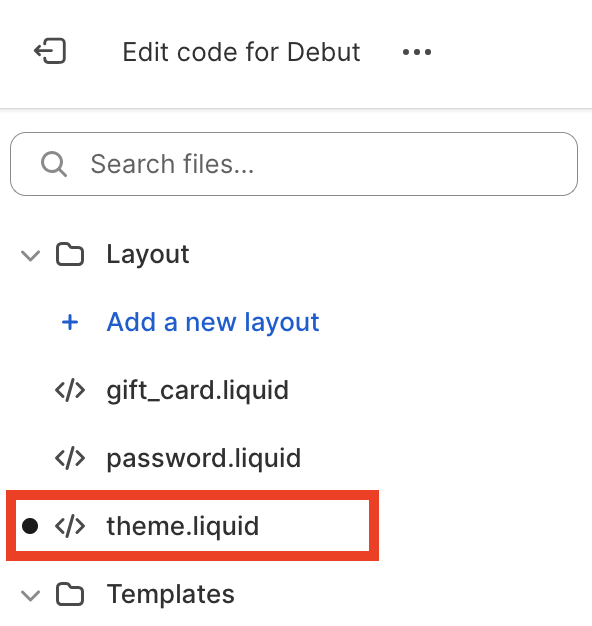
Under the Layout folder on the left, click the file called “theme.liquid”.
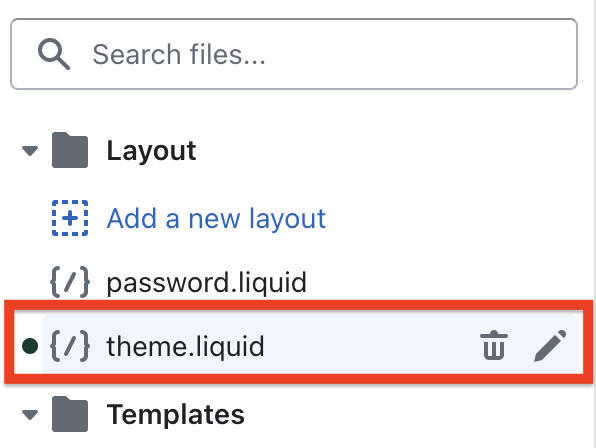
Scroll to the bottom of the code or use the finder tool to locate the closing body tag. The On-Store checkout code should be directly above it.
3. Check partnered apps and third parties
Some of a merchant's partnered apps or third parties might "listen" on the back end (non-maliciously) for shoppers to click the Shopify checkout button. Once the shopper clicks "Checkout," the app brings the shopper to them (or Shopify) instead of Loop, overriding the On-Store flow.
Some apps that have known issues include:
SpurIT Pre-Order
Preorder Manager
Additional apps may conflict with the On-Store experience if they require access to the checkout button(s) (shop developers can likely identify those apps). If the team does not have developers, or more help is needed with conflicting apps or third parties, please contact your Onboarding Manager or support@loopreturns.com.
Hiding irrelevant elements
Loop recommends hiding references to the following elements during the On-Store Experience:
Third-party checkout methods (for example: PayPal). On-Store exchanges must be completed through Loop checkout.
Alternative payment methods (for example: AfterPay, Klarna). Stripe must capture On-Store upsell value through Loop's checkout.
Product customizations recorded as line item properties. Loop cannot record line item properties and apply them to exchange orders at this time.
Merchants can add “.loop-returns-activated” in the code to hide elements by way of CSS. Hide a specific element by way of the element’s ID, or a whole group of elements by way of the elements’ Class. Below are examples of hidden IDs and Classes (ID and Class are bold for emphasis).
Element ID:
// hide AfterPay
.loop-returns-activated #afterpay {
 display: none !important;
}
Element Class:
// hide alternative payment types (use whichever class matches the container for your alternative payment types)
.loop-returns-activated .alternative-payment-methods {
 display: none !important;
}
For more information, please refer to this setup article.
Tip: Developers can use a "yes or no" flag, " LoopOnstore.isActive() ", to turn On (show) or Off (hide) features or elements that merchants don't want running while Loop On-Store is active.
They can add this flag to any JavaScript code running in their Shopify theme (Shopify > Sales Channels > Online Store > ellipsis button for the desired theme > Edit Code > theme.liquid).
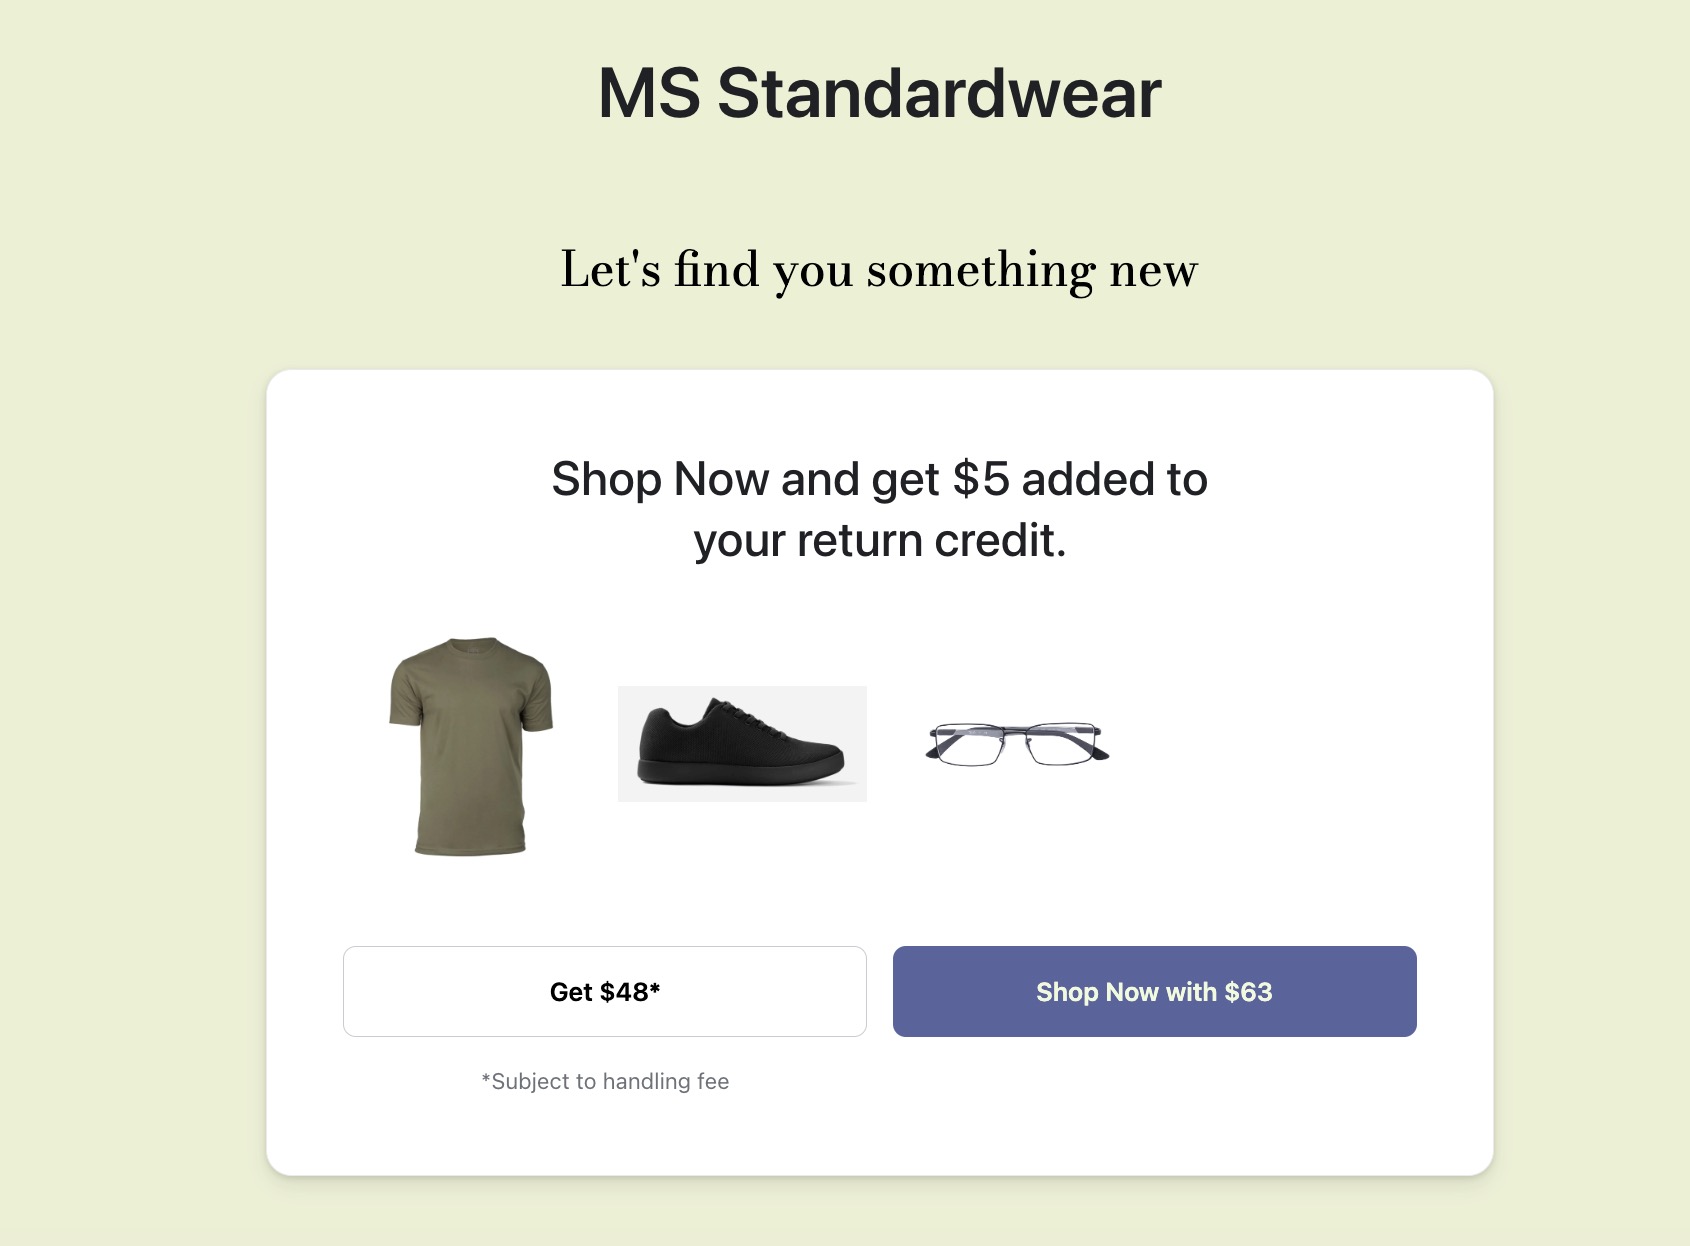
Credit banner covers checkout button
If the credit banner is covering the checkout button, Loop recommends two potential solutions.
Option 1: Raise the cart
To raise the cart higher on the web page, merchants can change the max height of the cart in the code:
Review the instructions above to find the “theme.liquid” file in Shopify admin.
Find the On-Store snippet for the cart and alter the height. This will look something like this:
.cart { width: 396px; max-height: 95%; min-height: 95%; bottom: 0; }Click Save in the upper right corner of the theme editor window to keep all changes.

Note: The Class ".cart" above is just an example. Each merchant's cart Class may be different.
Option 2: Shorten the On-Store banner
To shorten the On-Store banner:
Add the “.loop-onstore” Class (the Class for the On-Store banner) to the code in the “theme.liquid” file. It will go right after the ".loop-returns-activated" Class, between the style tags.
Edit the Class so that the banner does not go all the way across the screen. For example:
.loop-onstore { width: 67%; }Click Save in the upper right corner of the theme editor window.
On-Store redirects shoppers back to credit page
If the On-Store checkout button redirects back to the Shop Now credit page instead of the summary page:
Typically, this happens because the API key needs updating. Play the video below, or review the written instructions underneath it, to troubleshoot this issue.
To update the API key:
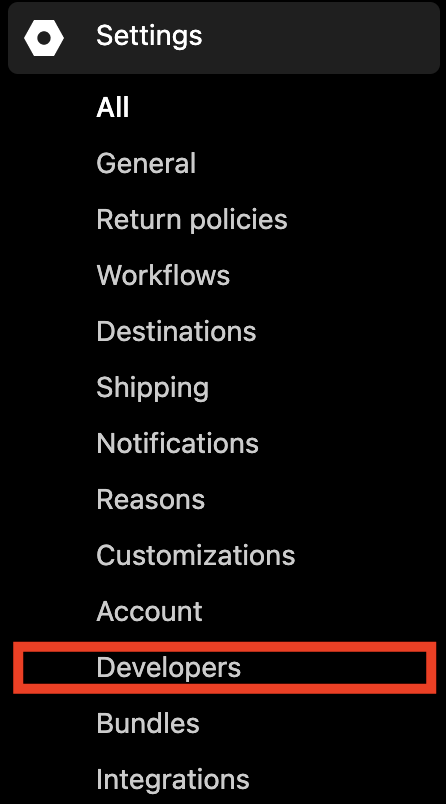
Go to Loop admin > Settings > Developers.
Scroll down to the “API keys” section.
Ensure that the “Scopes” column shows the chosen API key as “Cart” only. (Including more scopes could expose returns data. Create a Cart-only API key if there isn't one yet.)
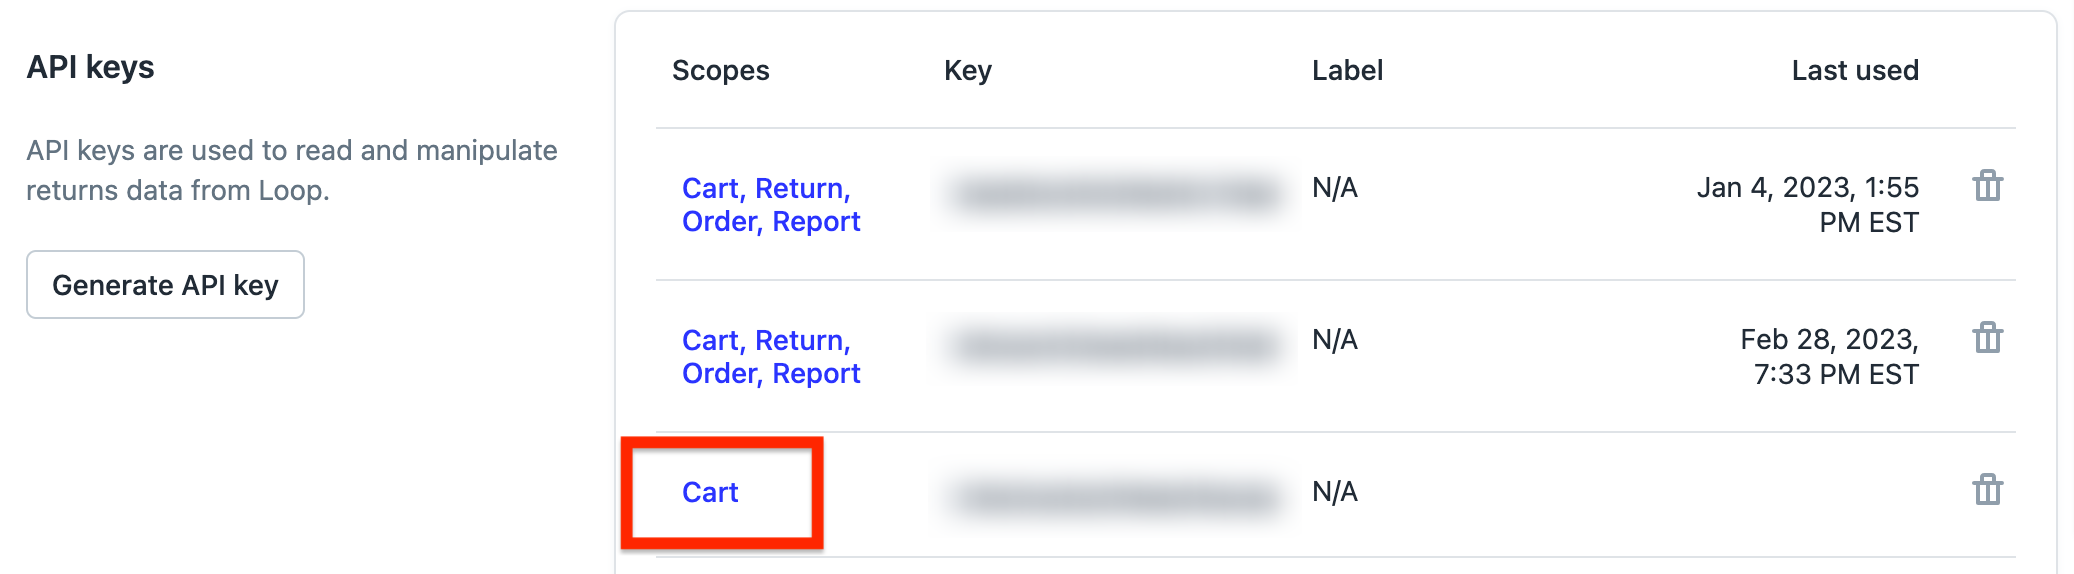
API key with Cart-only scope.
Copy the API key from the “Key” column.
Go to the Shopify theme’s “theme.liquid” file.
Find the “LoopOnstore.init” call or snippet.
<script src="https://cdn.jsdelivr.net/npm/@loophq/onstore-sdk@latest/dist/loop-onstore-sdk.min.js"></script>
<script>
   LoopOnstore.init({
   key: "example api key",
   attach: "example attach value",
   });
</script>
Paste the API key between the quotes next to the key field (where "example api key" is above).
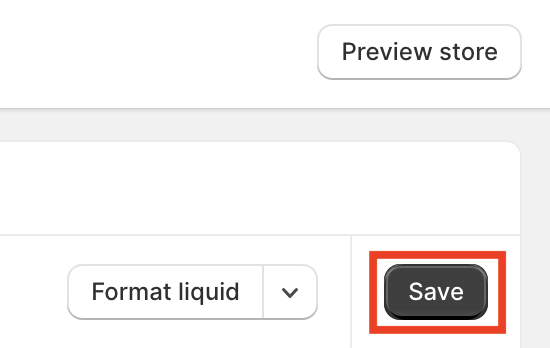
Click Save in the upper right corner to make all changes stick.

Tip: If the steps above don't help, please also check that the key is correct for the portal in use. For example, if the store has portals for both the United States and Australia, and the focus is currently on the Australian portal, ensure that the key being used is for the Australian portal.
Switching to embedded On-Store
To experience a smoother and more automated On-Store setup, merchants must a) set up the embedded version and b) remove the code for the current setup.
Important:
Only merchants using Shopify 2.0 (a Shopify update adding more feature and tooling options, as well as architecture upgrades) have access to embedded On-Store. Merchants that do not use Shopify 2.0 can still set up and use Loop's original On-Store feature.
Loop recommends activating embedded On-Store before deleting the original code. Doing this reduces the risk of functionality gaps while switching On-Store versions. To turn on embedded On-Store, follow these setup steps before continuing below.
After setting up embedded On-Store, follow these steps to disable the current setup:
Go to Shopify > Sales Channels > Online Store.
Click on the ellipsis button for the correct theme, then click Edit Code.
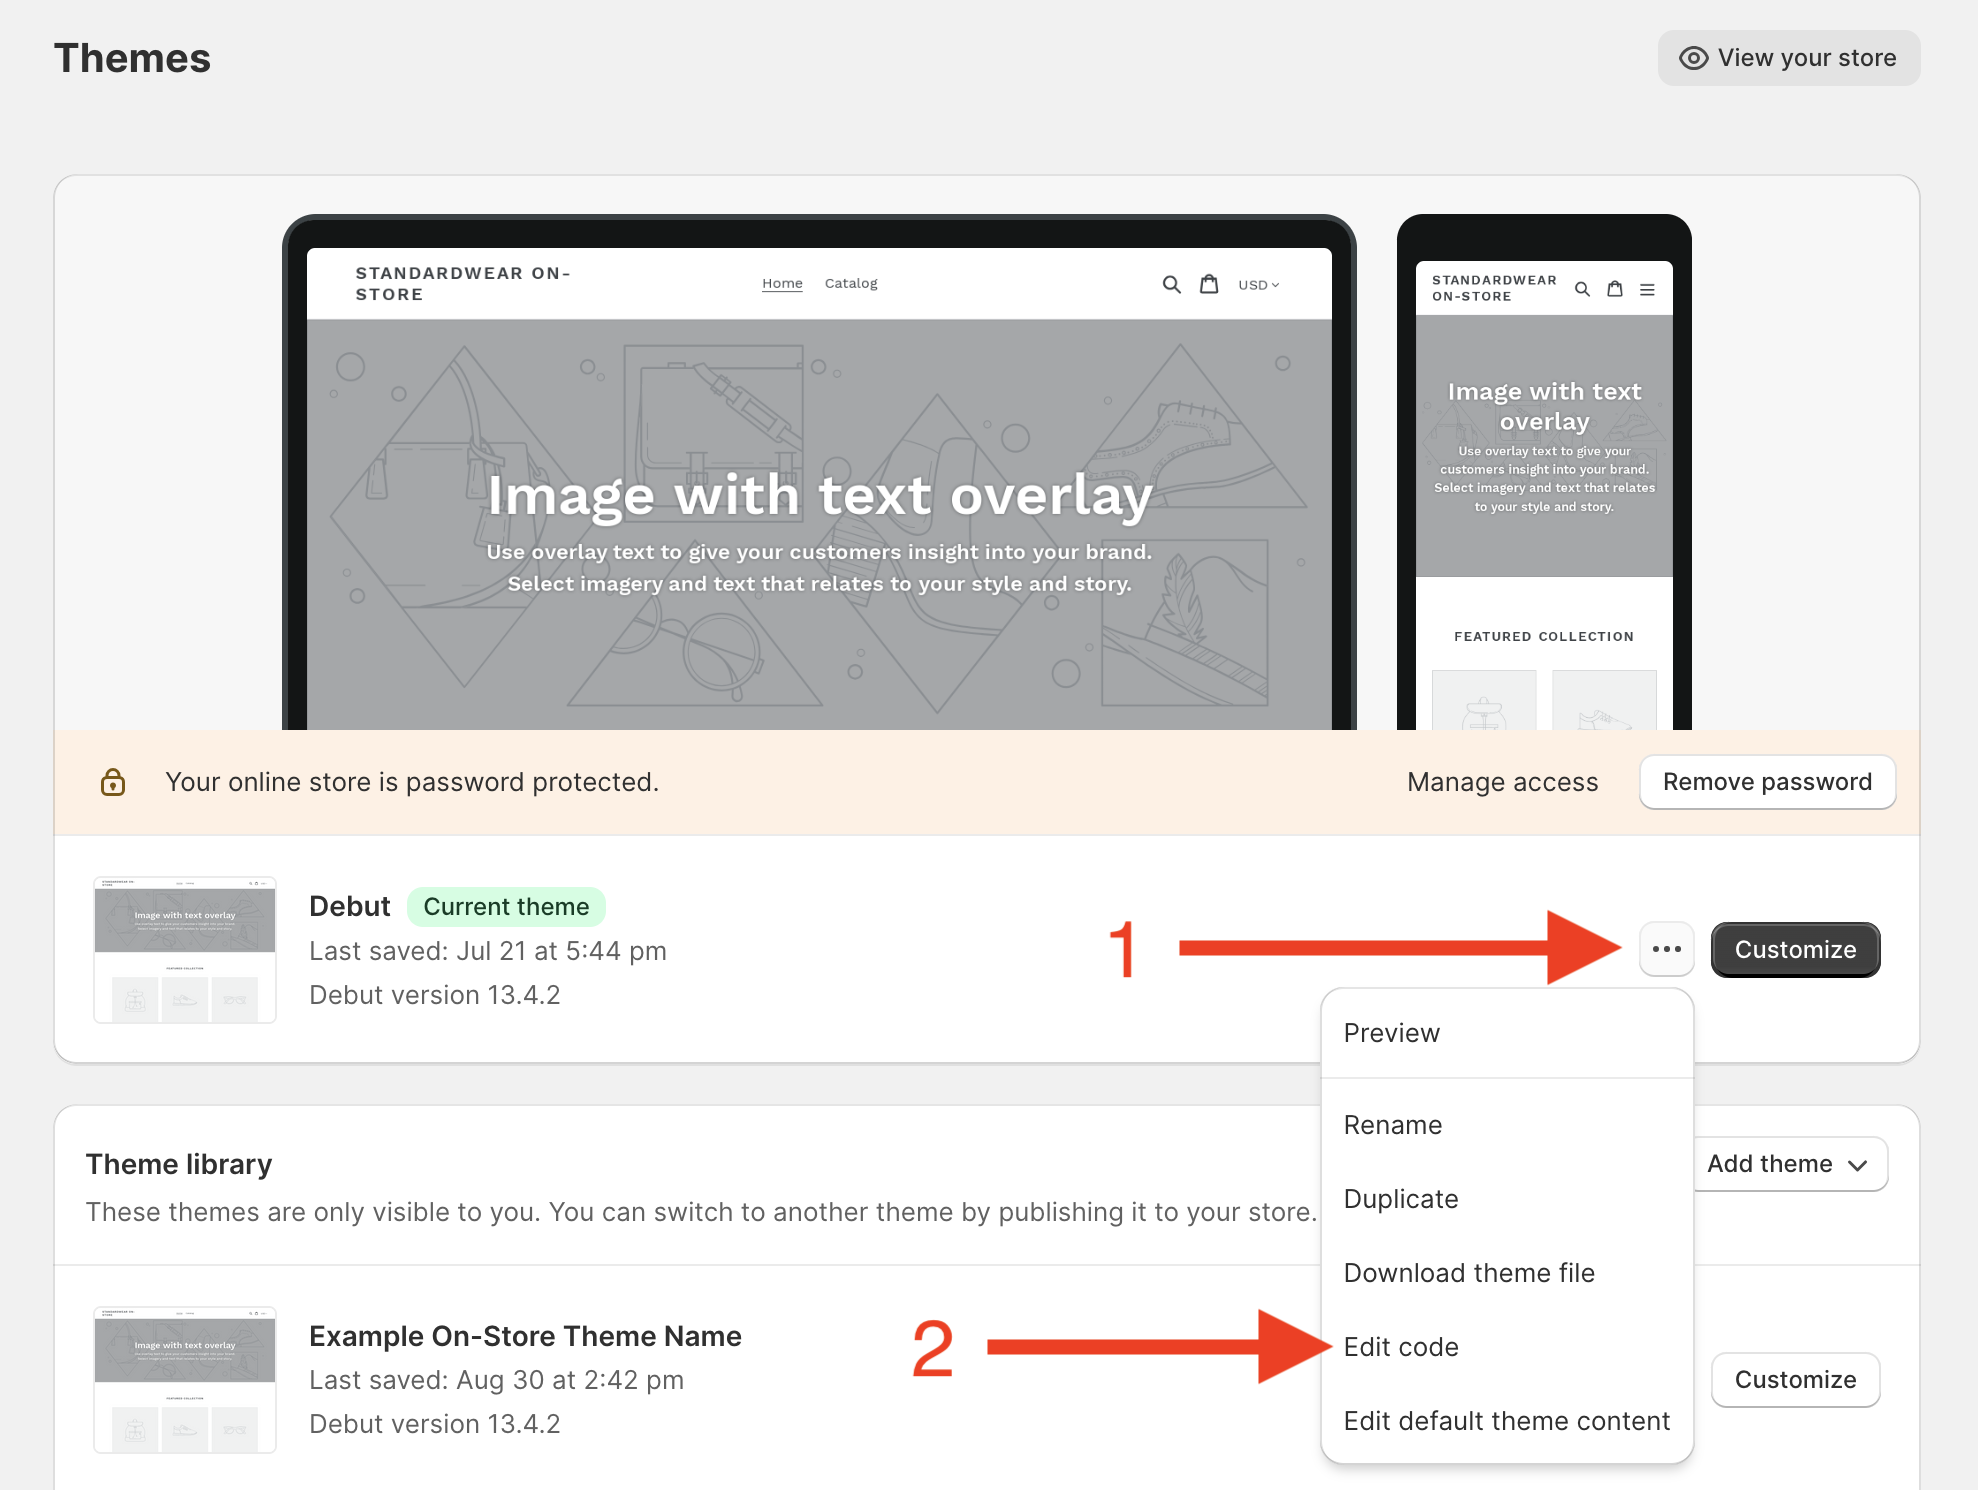
Shopify theme page with ellipsis button and Edit Code option for current theme.
Find and click on the theme.liquid file.
By scrolling or by using the finder tool (Control F for Windows, Command F for Mac), find in the code the JSDelivr link (the link could also be Unpkg) and the "LoopOnstore.init" call, as shown below.
<script src="https://cdn.jsdelivr.net/npm/@loophq/onstore-sdk@latest/dist/loop-onstore-sdk.min.js"></script>
<script>
   LoopOnstore.init({
   key: "example api key",
   attach: "example attach value",
   });
</script>
Delete both of these code snippets, including the beginning and ending script tags (
<script>,</script>) for both the link and the init call.After deleting the above scripts, remove any other customizations in the theme.liquid file. The newly-added, embedded On-Store version should override any leftover customizations if forgotten.
Click Save in the upper right corner.
FAQ
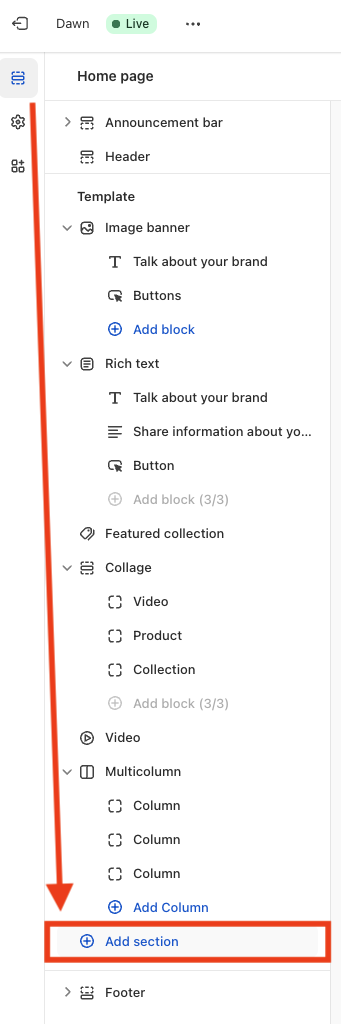
Why can't I see or use the embedded On-Store version? Embedded On-Store is only available to merchants on Shopify 2.0, a Shopify update adding more feature and tooling options, as well as architecture upgrades. You may be on 2.0 already if you see an "add section" theme within the Shopify theme customizer.
If not using this version of Shopify, you can either a) look into migrating your themes and apps to 2.0 or b) use Loop's original On-Store feature.
For further help while setting up Shop Now: On-Store, please reach out to your Onboarding Manager or support@loopreturns.com