
Shop Now: On-Store Setup (Manual)
OVERVIEW
This article explains how to configure Shop Now On-Store, which encourages customers to exchange items by shopping directly from the merchant's product catalogue.
Use the menu on the left to quickly navigate this article.
This guide is for merchants using the original version of On-Store, which requires adding a code snippet to your Shopify theme. If you use specific theme details that include use of a Shadow Root/DOM for your checkout button, this is the best setup for you.
If you're new to On-Store or want a simpler embedded setup, see Shop Now: On-Store Setup (Embedded). To switch from manual to embedded, see Switching to embedded On-Store. For headless Shopify stores, see Shop Now: On-Store Headless Setup.
Setup
Loop’s Shop Now: On-Store feature encourages customers to exchange items by shopping directly from the merchant's product catalog—helping retain revenue through in-store purchases.
What you'll need:
Access to the merchant's Shopify admin
A duplicate of the merchant's current theme
An API key scoped to Cart
Checkout button selectors (IDs or Classes)
An internet browser (Chrome is used in the tutorial below)
1. Create a development theme
In the Shopify admin, navigate to Online Store.
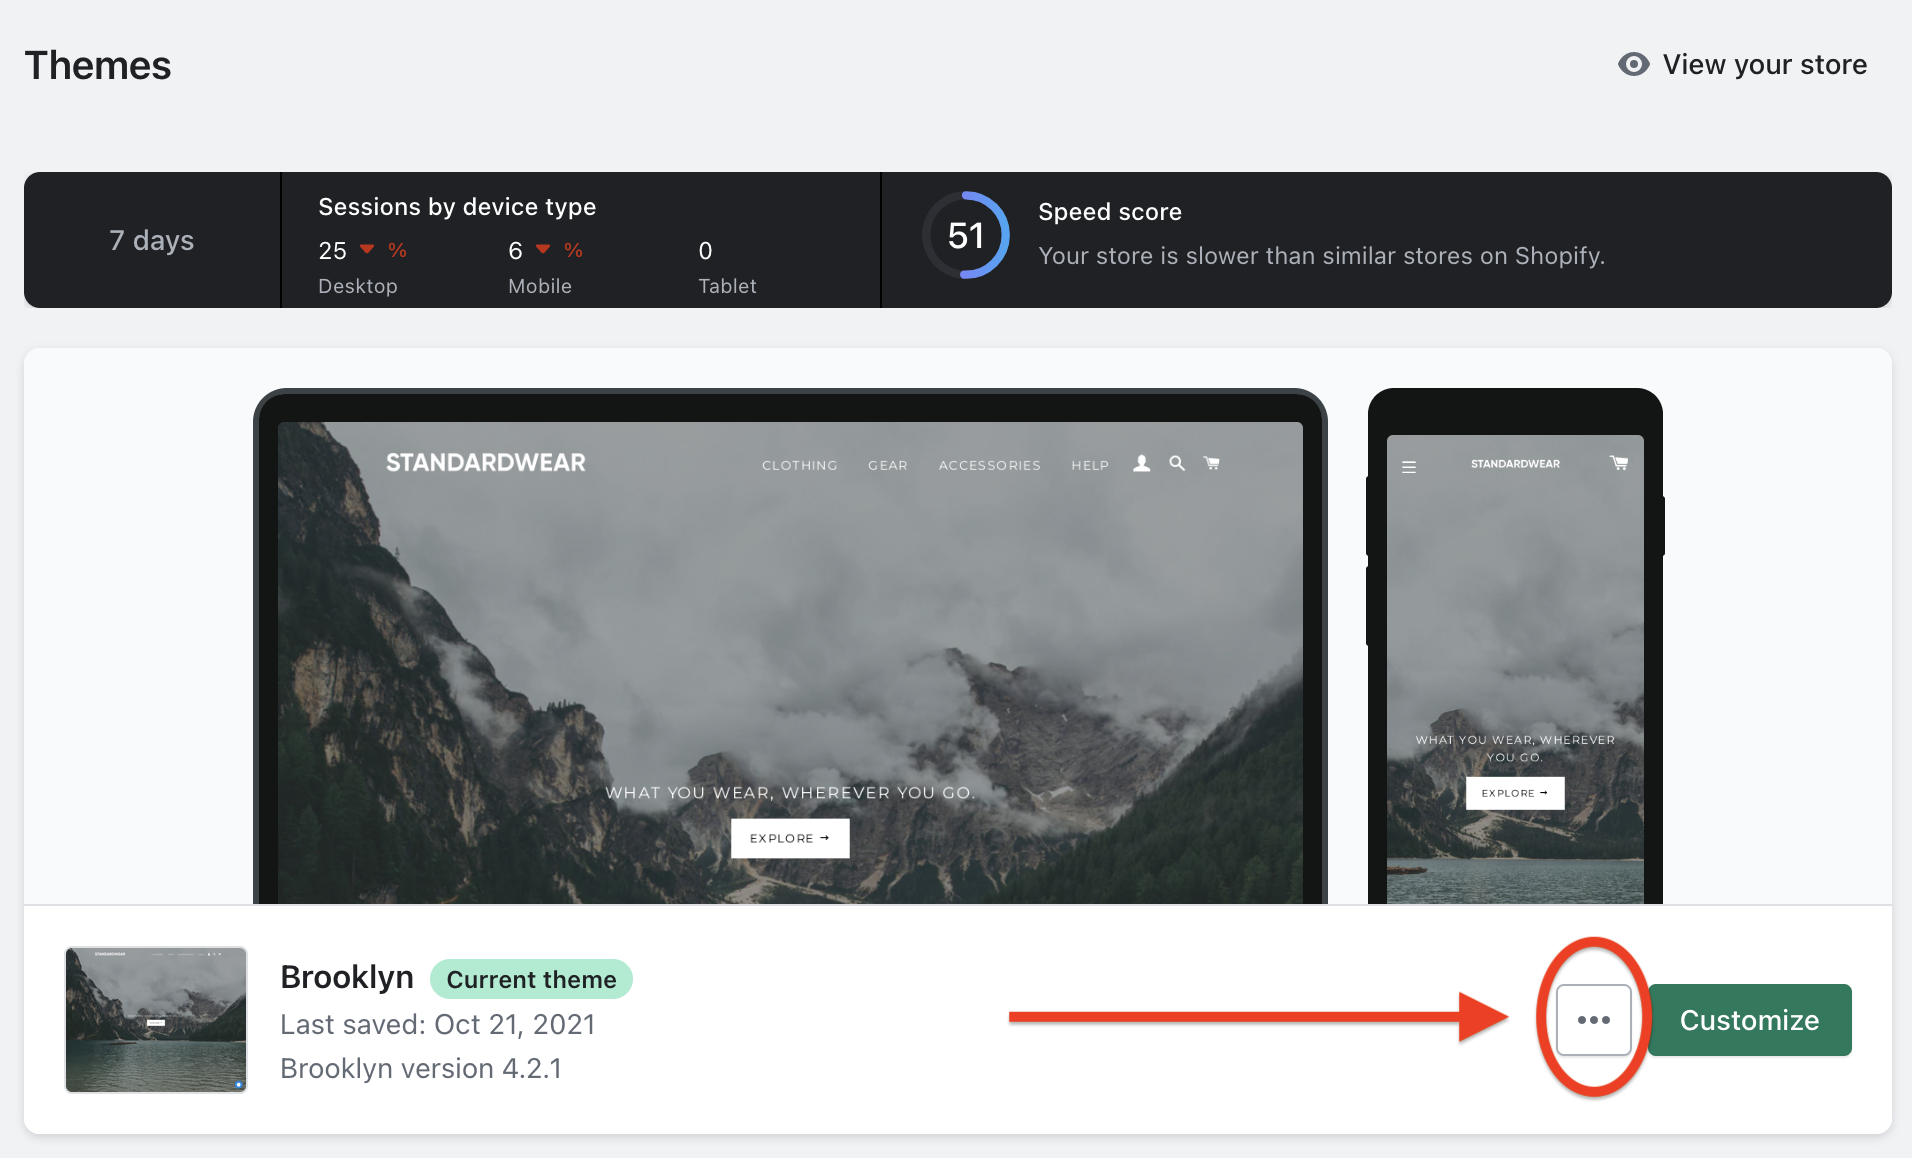
Under “Current theme,” click the ellipsis (…) > Duplicate.
Rename the duplicate to something descriptive (for example "YourTheme - Loop On-Store").
Tip: Don't publish the new theme yet. Save backups regularly before editing.
2. Add the On-Store script snippet
Loop has written the snippet already —just copy and paste it into your theme code.
Insert the snippet
Click ellipsis (⋯) > Edit Code on the new theme.
Open Layout > theme.liquid.
Find the </body> tag (Ctrl+F or scroll to bottom).
Paste the following snippet above </body>:
<script src="https://cdn.jsdelivr.net/npm/@loophq/onstore-sdk@latest/dist/loop-onstore-sdk.min.js"></script>
<script>
   LoopOnstore.init({
     key: "example api key",
     attach: "example attach value",
   });
</script>
Click Save in the top right corner.
3: Fill in the snippet values
Add the API key
In the Loop admin, navigate to Returns management > Tools & integrations > Developer tools.
Under API Keys, copy a key that is scoped to Cart only or generate an API key that is scoped to Cart only.
In the snippet pasted above, replace "example api key" with the actual API key (be sure to keep the quotes).
Click Save.
Add the checkout button identifier
Open the merchant's Shopify storefront in a new tab.
Right-click the checkout button, then click Inspect.
Locate the button's ID or Class (for example, id="checkout" or class="checkout-btn").
Copy the value in quotes.
Use # before IDs (#checkout)
Use . before Classes (.checkout-btn)
In the snippet, replace "example attach value" with the copied identifier. For multiple buttons (such as a side cart and cart page), separate values with commas:
attach: "#checkout, .checkout-btn"
Click Save.
Tip: If no clear selector is visible, try checking Snippets > cart-template.liquid, or reach out to support.
Note: If using a Shadow root or Shadow DOM for the checkout selector, you will need to pass this through in a specific way. See Step 5: Optional setup to learn more.
4: Test the setup
Loop strongly recommends testing with help from a developer.
Test the script load
Click Save and return to the Shopify Themes page.
Click the ellipsis (⋯) > Preview to preview the new theme.
Right-click > Inspect > go to the Console tab.
Type and run:
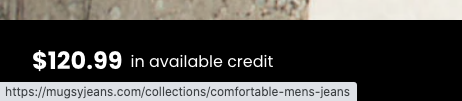
LoopOnstore.testMode()A “credit banner” should appear.
If the banner doesn't appear, double check the script placement or contact support@loopreturns.com.
Test the Checkout Button(s)
In the Preview tab, add a product to the cart.
Inspect the page, then navigate to the Network tab.
Check Preserve log.
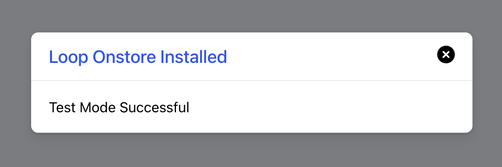
Click each checkout button on the merchant's site. A “Test Mode Successful” pop-up should appear.
Developers can check for:
A call to /api/v1/cart/
Valid response and payload (including token and variant IDs)
If the pop-up didn't show up, review the identifier setup above or contact support@loopreturns.com.
5: Optional setup
Shop Now can now be previewed on the merchant's storefront. However, if the merchant's shop includes customizations such as line item properties or multiple carts, Loop offers optional configuration guidance. For details, see Shop Now: On-Store Optional Setup (Manual).
Please consult a developer or contact support@loopreturns.com before publishing.
6: Publish the On-Store theme
In the Shopify admin, navigate to Online Store.
Click Publish next to the tested On-Store theme.
Run the following command in the browser's console to confirm the feature is active:
LoopOnstore.isActive()
7: Enable On-Store in the Loop admin
In the Loop admin, navigate to Returns management > Policy settings.
Select a return policy, then click Edit.
In the Shop Now section, enable On-store.
Click Save.
8: Notify Loop
Contact the merchant's Onboarding Manager or email support@loopreturns.com to let Loop know that On-Store is enabled.
FAQ
What Loop plan is required? Check the Pricing page or email support@loopreturns.com.
Can I edit my theme after setup? Yes! Just save backups and re-test after any changes.
My checkout button stopped working after edits. Review the instructions in Step 1 and Step 2 to ensure that everything is set up properly. If the checkout button still doesn't work, contact Loop support.
Where’s my API key? API keys can be found in the Loop admin by navigating to Tools & integrations > Developer tools.
How does Loop choose which products to display?
In-App: Based on Product Type in top-level menu.
On-Store: Must select “Import Collections” in the Loop admin and add a menu item.
Does On-Store support custom product fields? Yes—Loop pulls line item properties into the new exchange order. See Shop Now: On-Store Optional Setup (Manual) for configuration details.
For further questions, please contact your Merchant Onboarding Manager or support@loopreturns.com.